


 Last time, we looked at deploying NSX as a plug-in to vCenter server. See NSX vCenter Plug-in Deployment.
We then used the deployment wizard to configure NSX in a security only configuration. See NSX vCenter Plug-in Deployment - Security Only Configuration.
Finally we looked at the caveats to deploying NSX security only via the deployment wizard. See NSX vCenter Plug-in Deployment - Security Only Configuration: Caveats to catch up if needed.
This time we will run through the other NSX deployment wizard: Virtual Networking.
To recap; historically NSX-T or NSX as it is now known as was installed as a separate entity and managed away from vCenter and the vSphere client.
Since the releases of vSphere 7.0 Update 3 and NSX 3.2.0, NSX can now optionally be installed and managed in the vSphere client via a vCenter plug-in in much the same way as the previous VMware network virtualisation product, NSX-v used to be.
Overview
What is an NSX Virtual Networking Configuration?
Not only that, how does it differ from an NSX security only configuration, as covered previously?
Let’s ask!
Chris: How does a NSX virtual networking install differ from an NSX security only install?
ChatGPT: An NSX virtual networking installation is a full installation of the NSX platform that provides both network virtualization and security features, while a security-only installation provides only security features.
In a full NSX virtual networking installation, all the components necessary to create and manage virtual networks, including virtual switches, routers, and load balancers, are installed and configured. Additionally, security features such as firewalls, intrusion detection and prevention, and security groups are integrated with the virtual networking components to provide end-to-end security for virtualized applications and workloads.
In a security-only installation, only the security-related components of NSX are installed and configured, such as firewalls, intrusion detection and prevention, and security groups. This type of installation is typically used in cases where a customer already has an existing virtual networking infrastructure and only needs to add security to it.
In summary, the main difference between a full NSX virtual networking installation and a security-only installation is the scope and the components installed, with the former providing both network virtualization and security capabilities, while the latter provides only security capabilities.
Correct! Wait. Hmmmmmm…

Anyway…
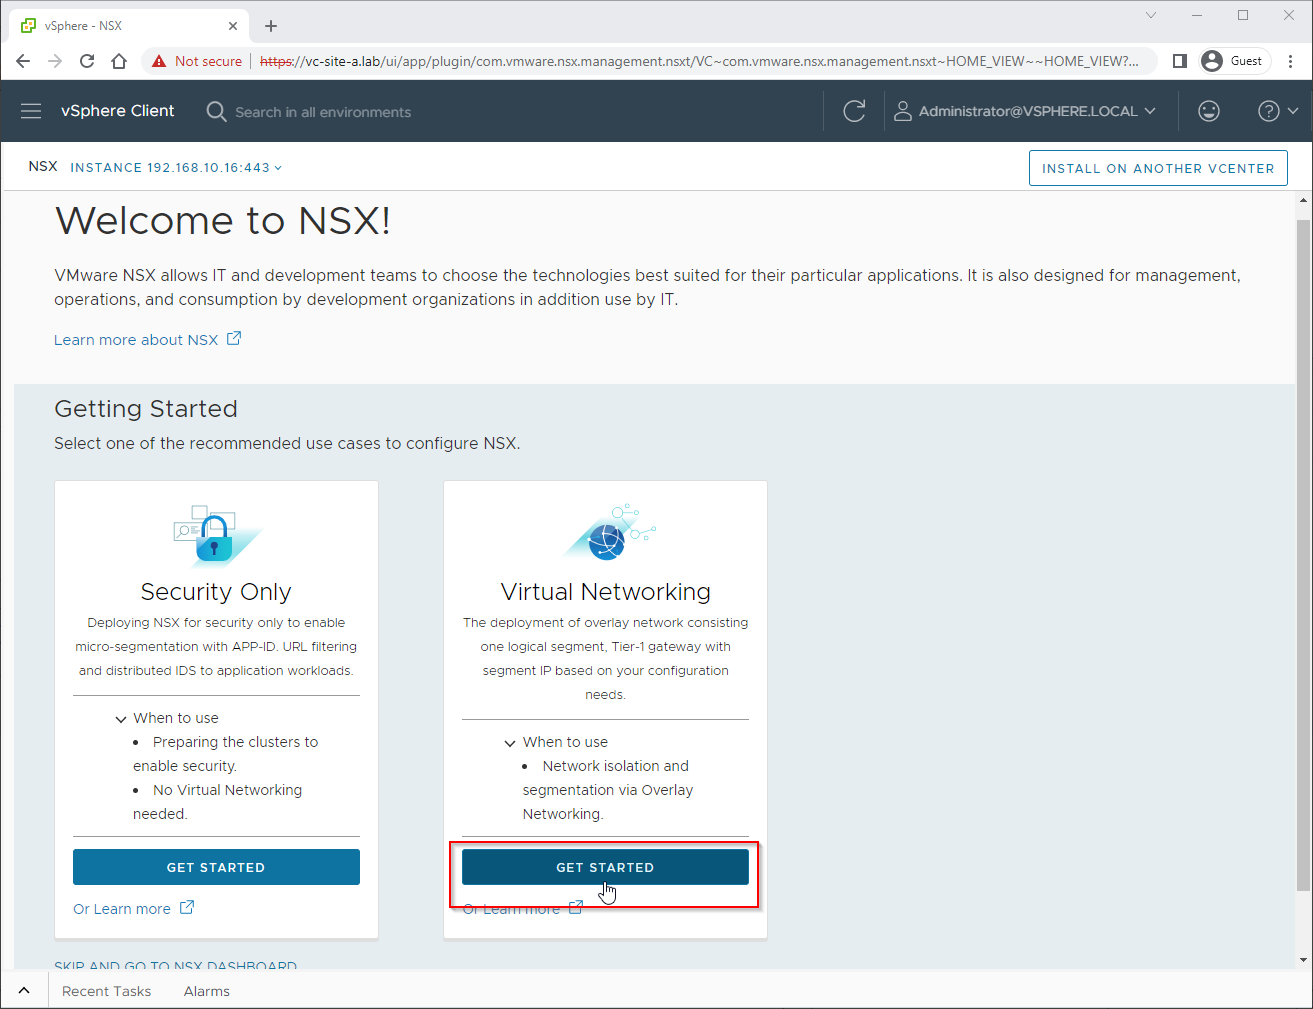
Lets look at the NSX’s virtual networking option.
Configuring an NSX Virtual Networking Deployment via the vCenter Plug-in
Let’s begin the configuration. As mentioned, this builds upon the installation we completed previously.
Note: We will be using the wizard to (re)build our NSX Site A as detailed here. All IP addressing and VLAN selection will be taken from this post.
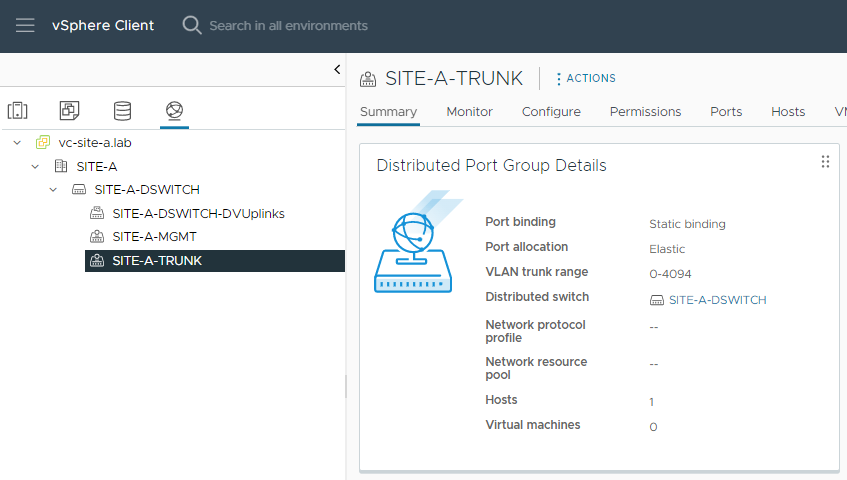
There is one change we need to make before NSX deployment. We need to create a VLAN Trunk that we will use later on during deployment:
Getting Started
From the vSphere Client menu, select NSX. From the wizard, select the Virtual Networking Get Started option:
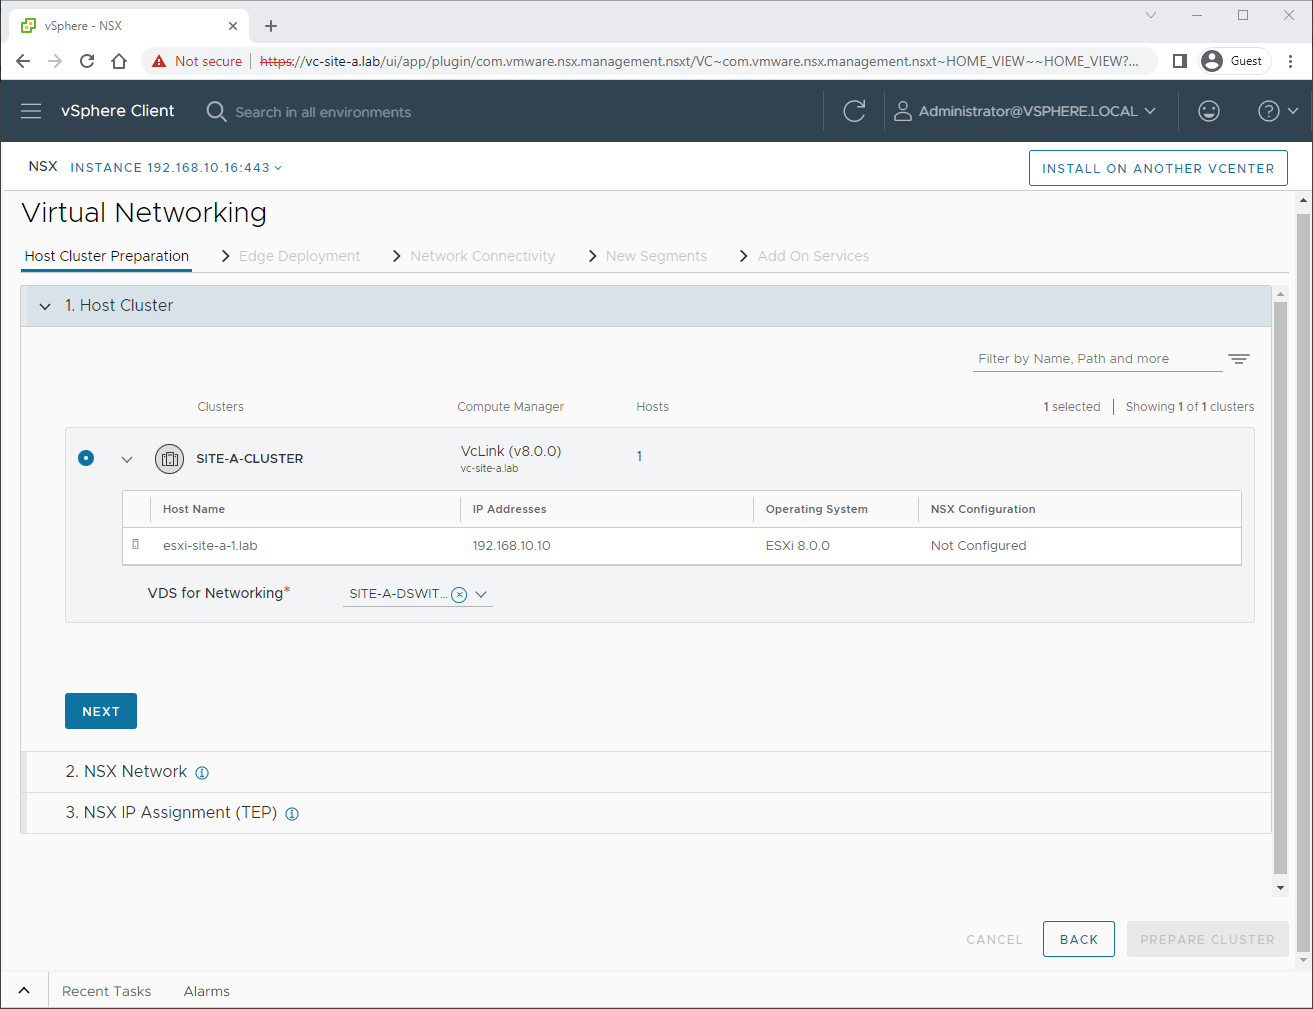
Host Cluster Preparation
After selecting the cluster to prepare and the VDS for networking, click Next:
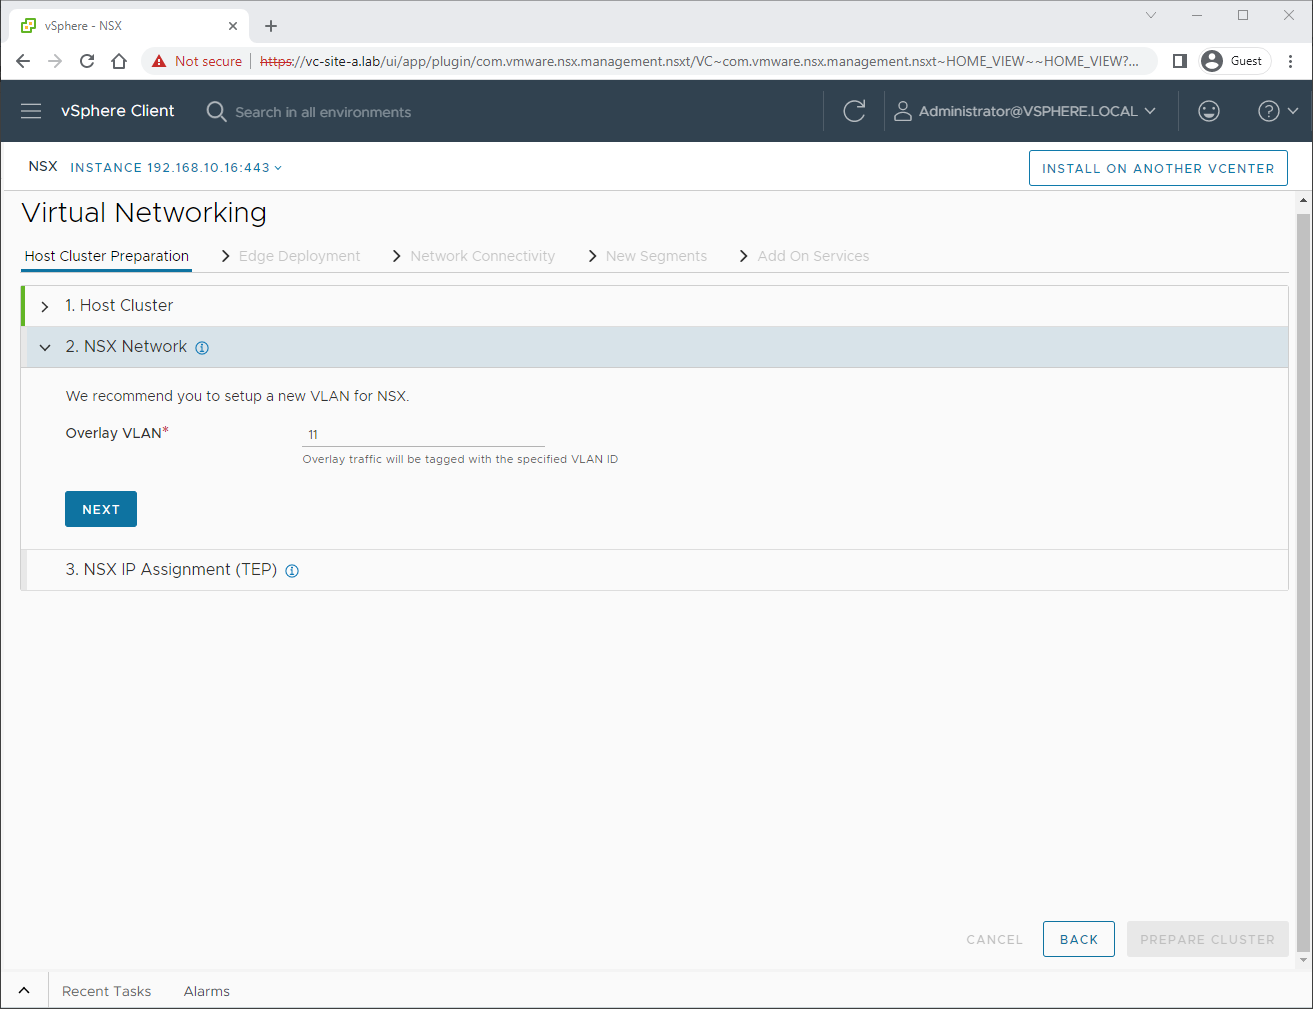
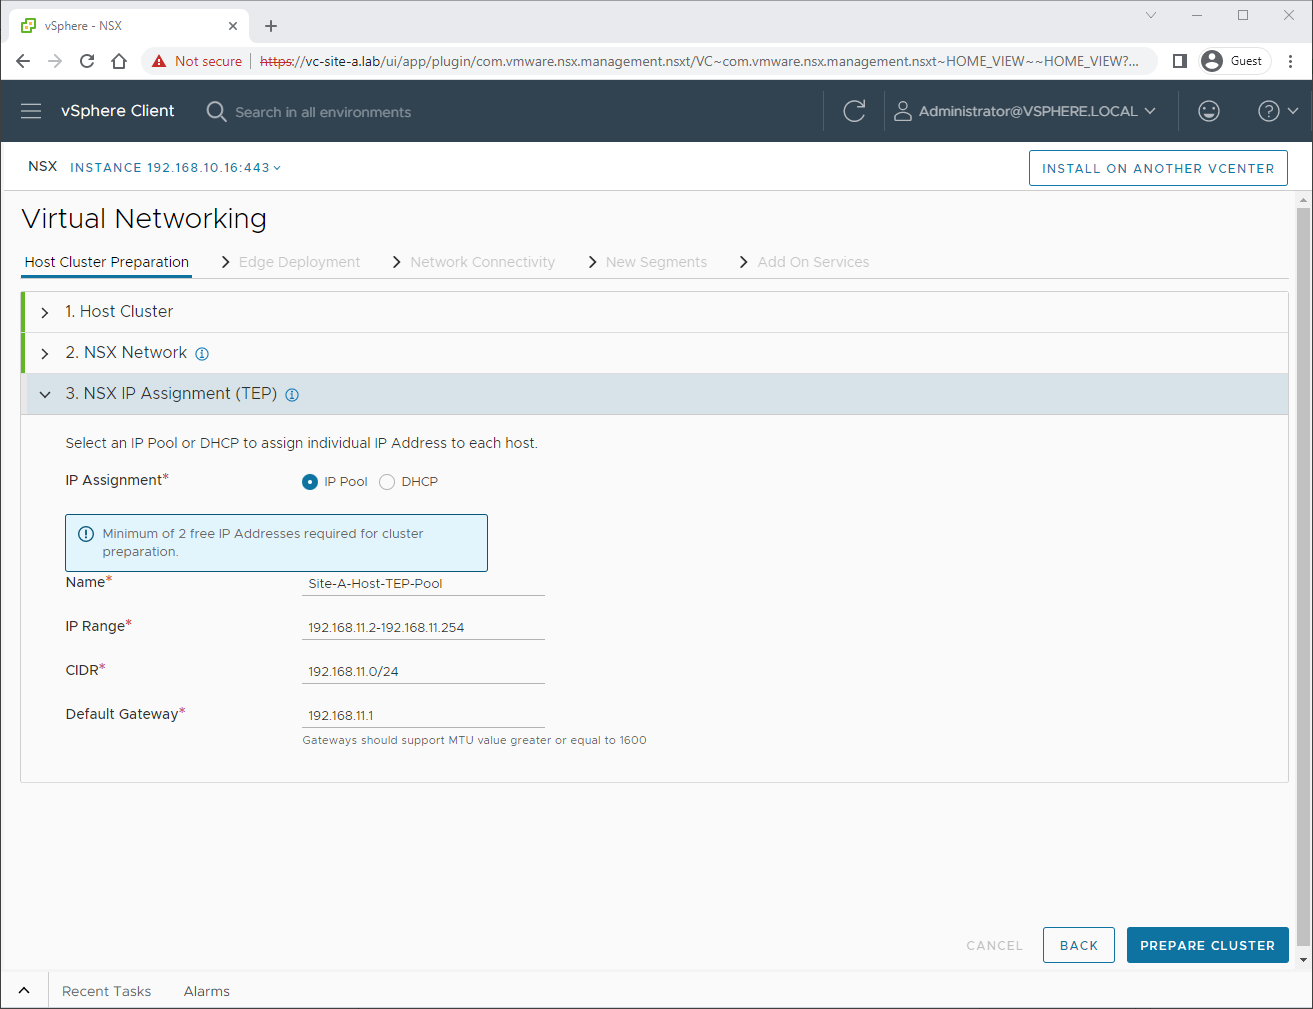
Next we select our VLAN for our overlay network. This VLAN will is also known as our Transport VLAN and it will be the VLAN used by our host tunnel end points (TEPs). We will be using VLAN 11. Click Next:
Next let’s complete our Host TEP IP addressing. I’m not using DHCP, so I shall create an IP Pool, after which I shall select Prepare Cluster:
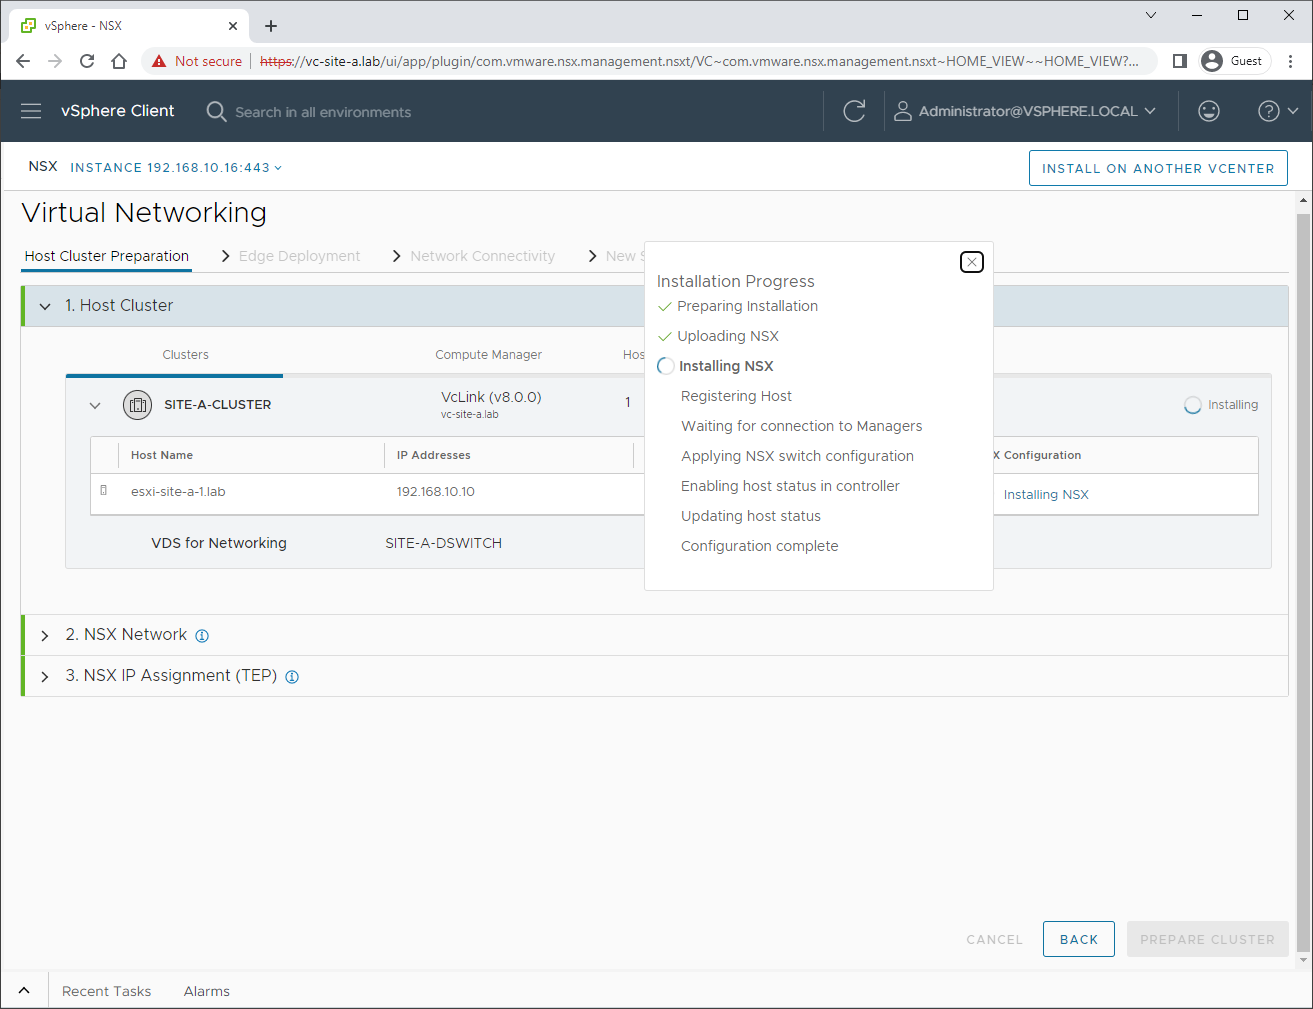
Allow time for the cluster to prepare. You can click the step under NSX Configuration to monitor the preparation:
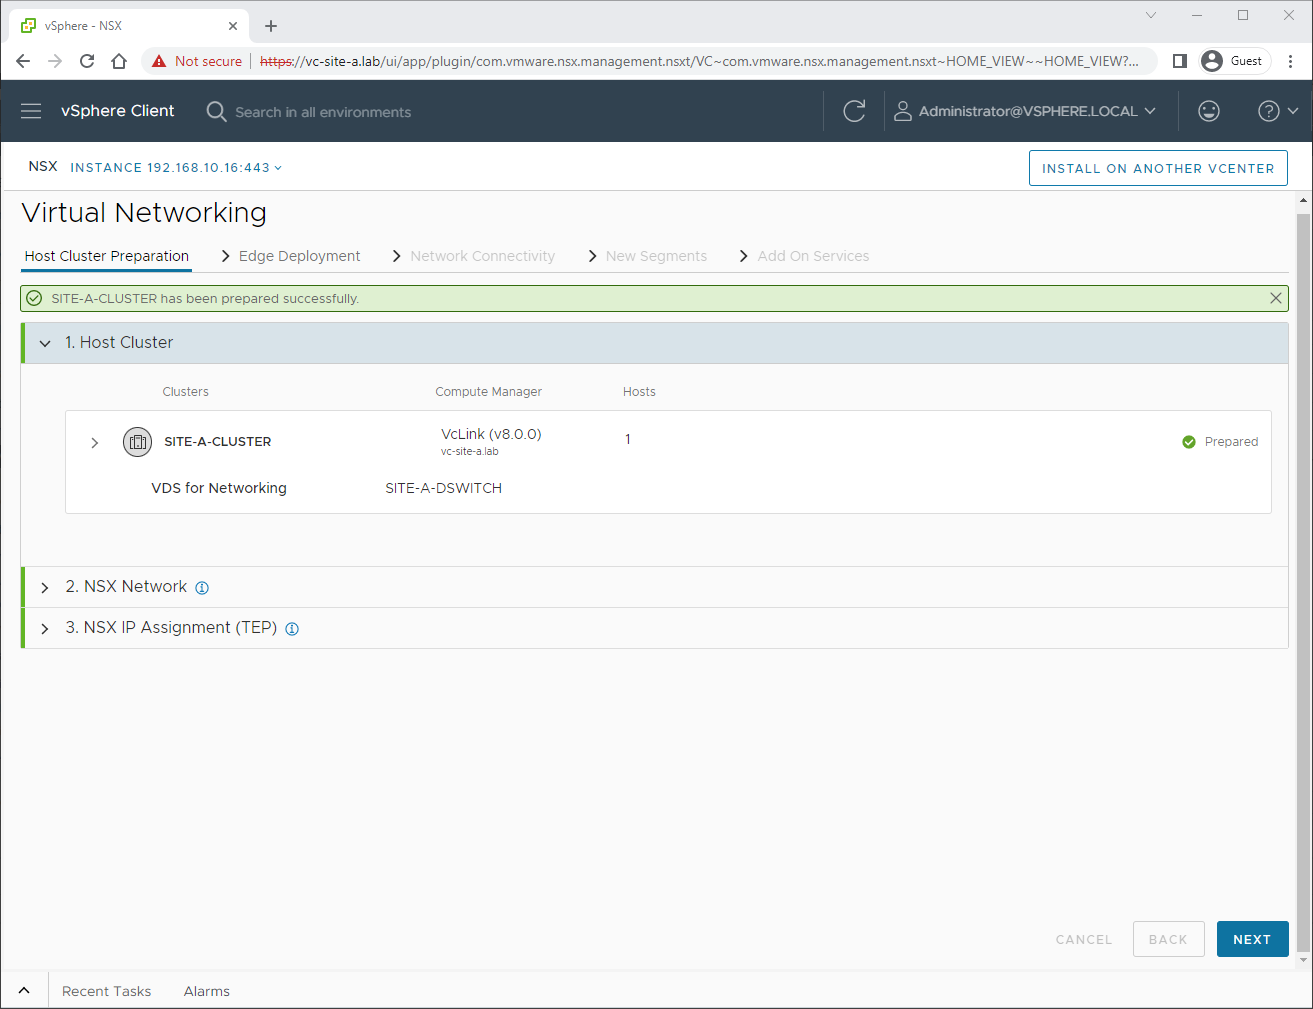
Job done, cluster prepared. Click Next to continue:
Edge Deployment
Next, lets configure our Edges. Here is where we run into our first issue:
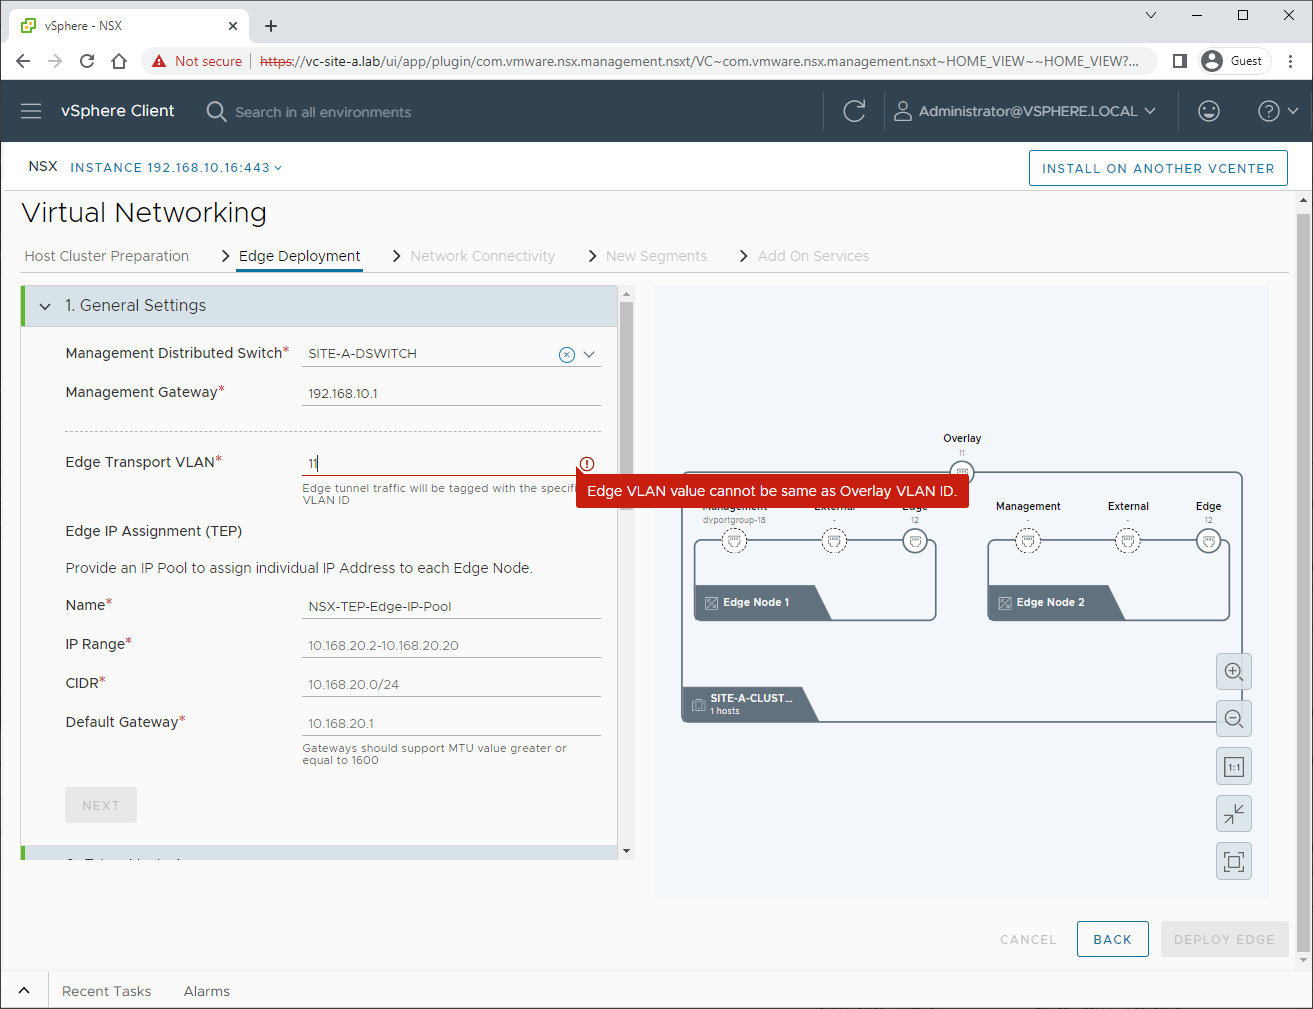
Edge VLAN value cannot be the same as Overlay VLAN ID.
Really? VMware Knowledge Base 83743 says different.
Looking back over our manual build, we did create a Create a Trunk VLAN Segment for our edge TEPs prior to deploying the edges. However, so far following the wizard we have had no such opportunity.
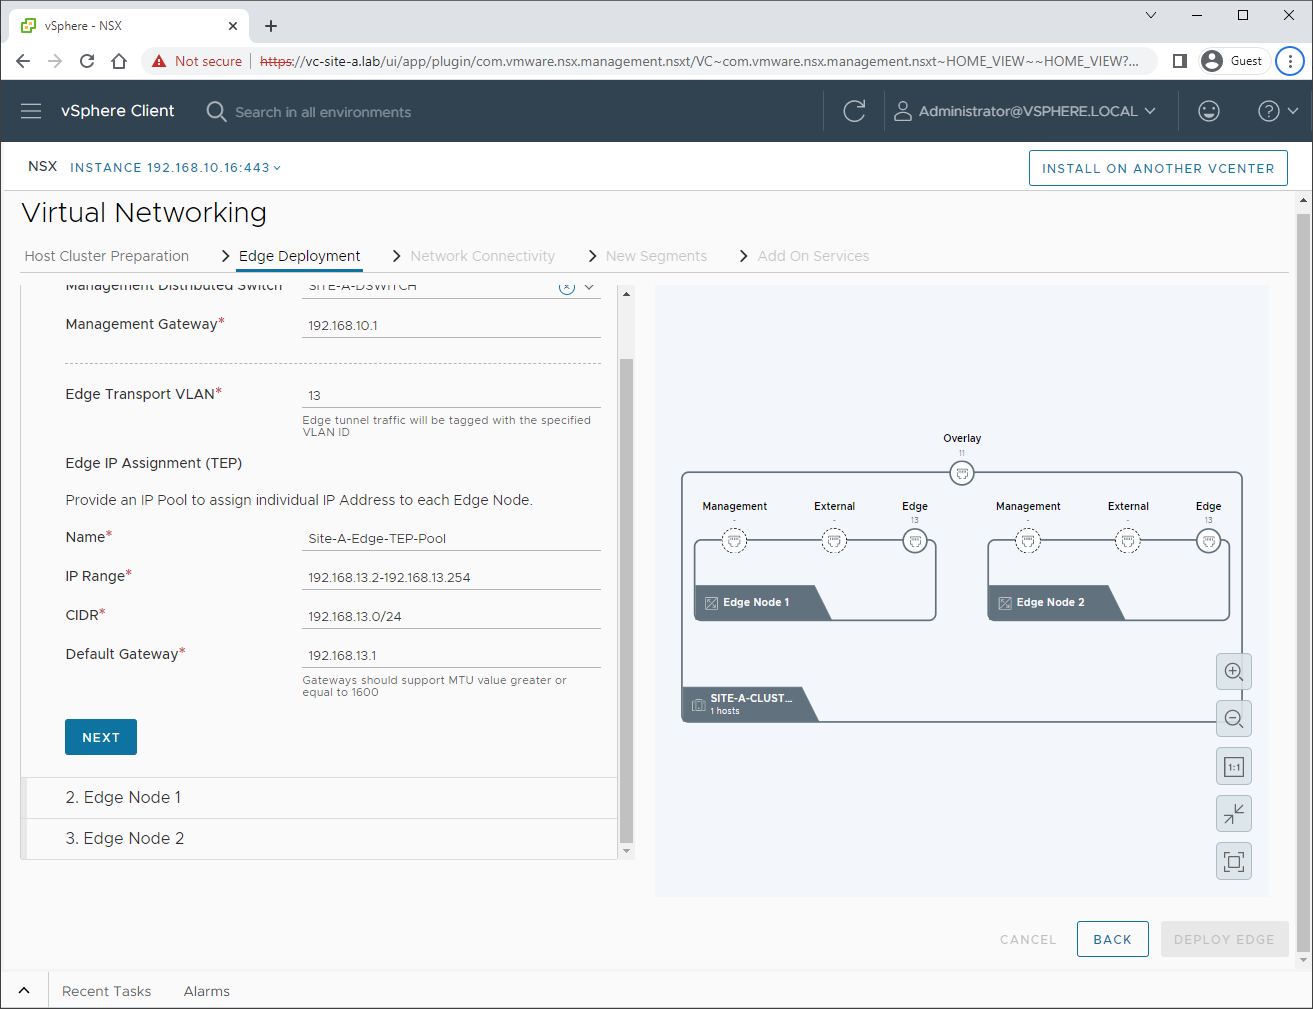
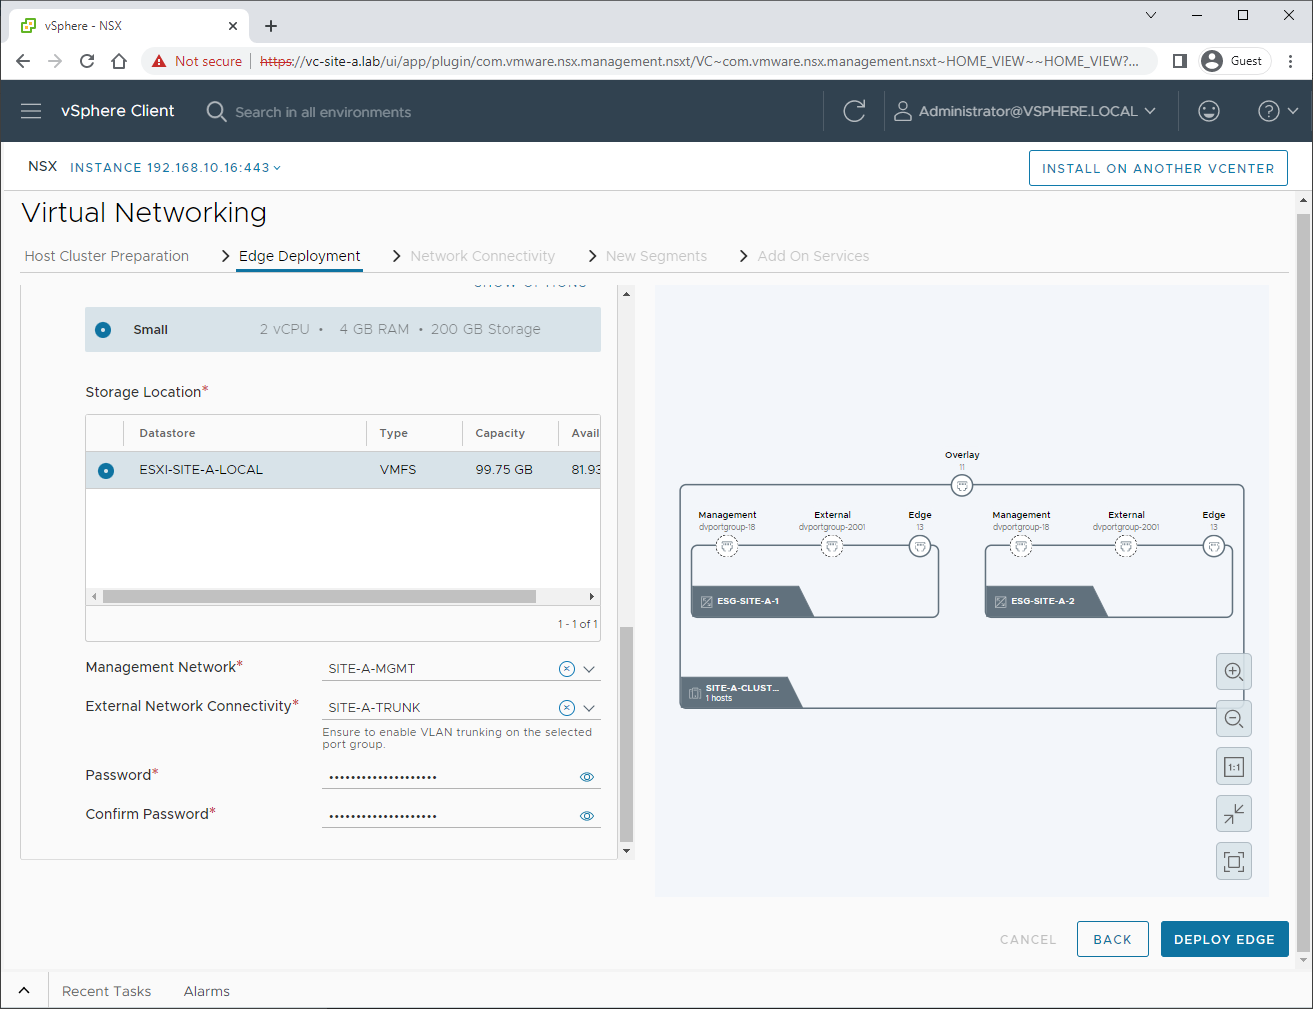
OK, we’ll use VLAN 13 instead. We will also create our Edge TEP Pool:
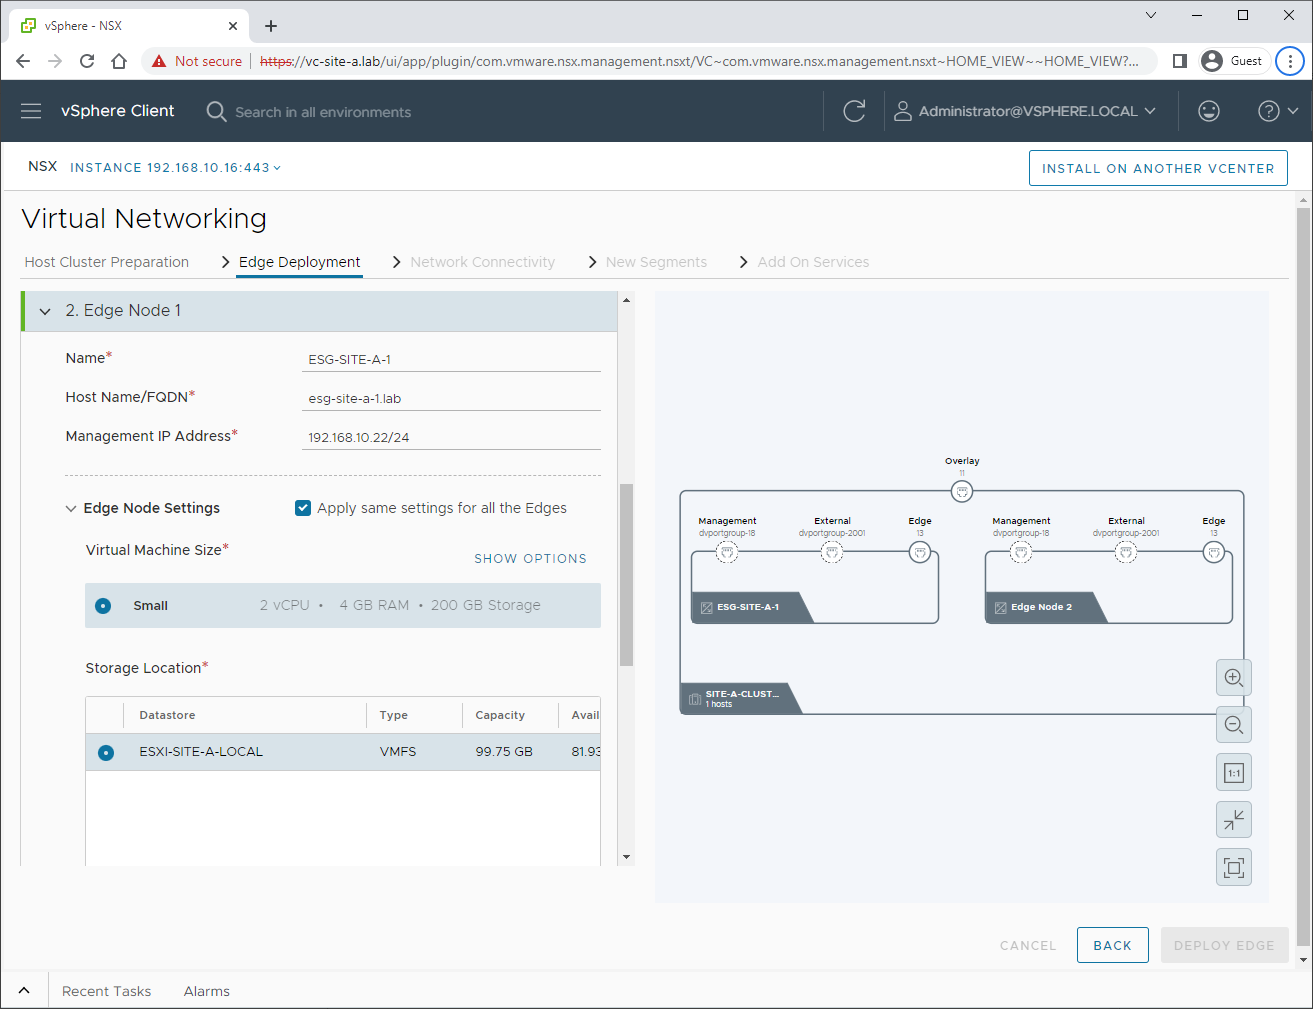
Next, we will name, size and set the storage location for our edge:
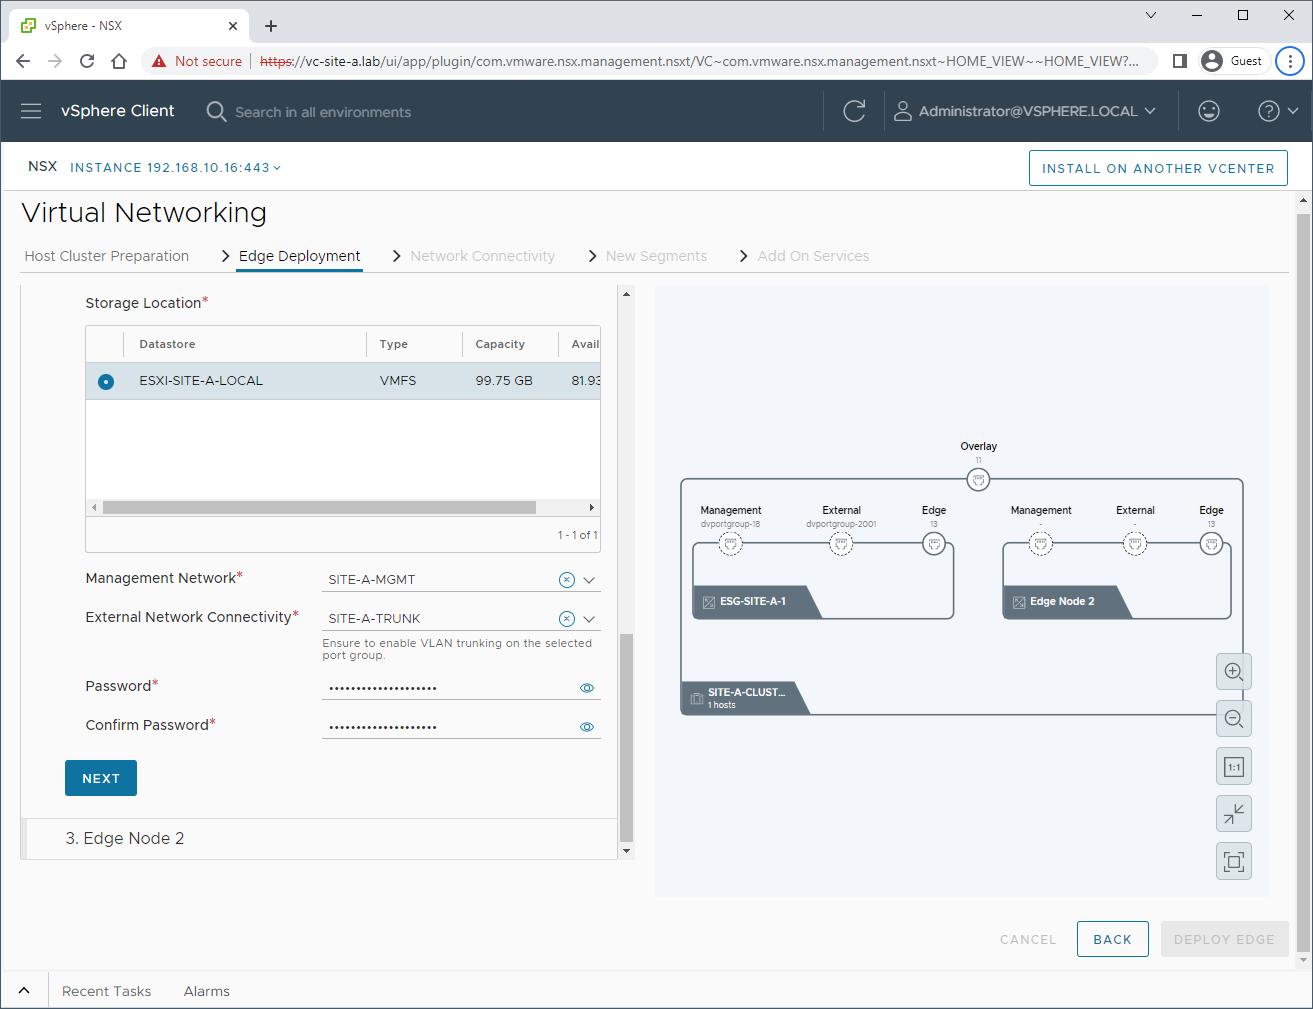
Next we will configure our edge networking. This is where the trunk we created earlier comes in:
Lets configure edge 2:
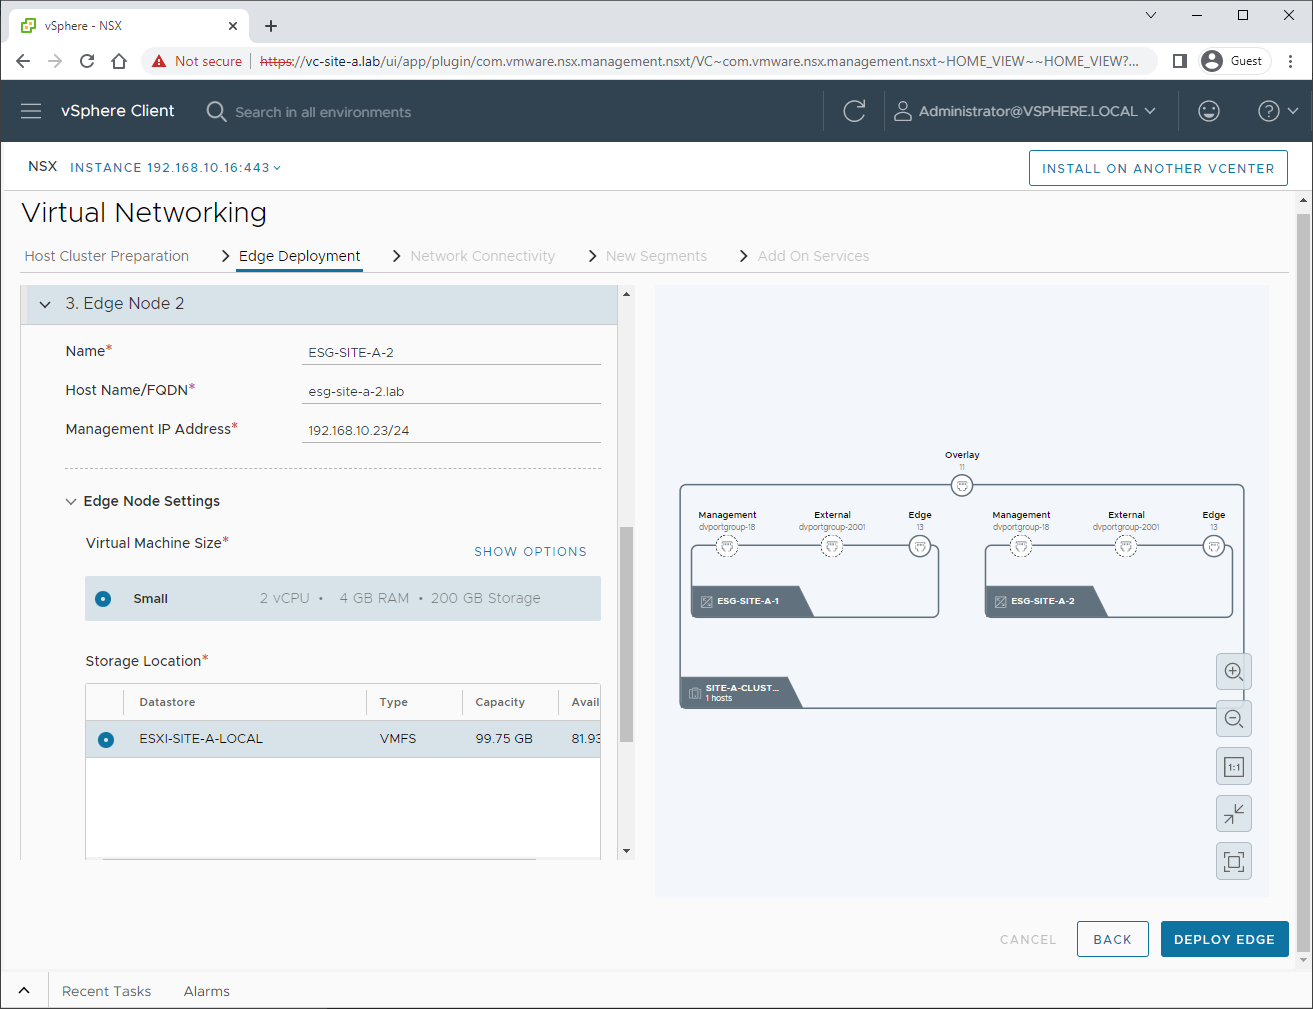
And edge 2’s networking:
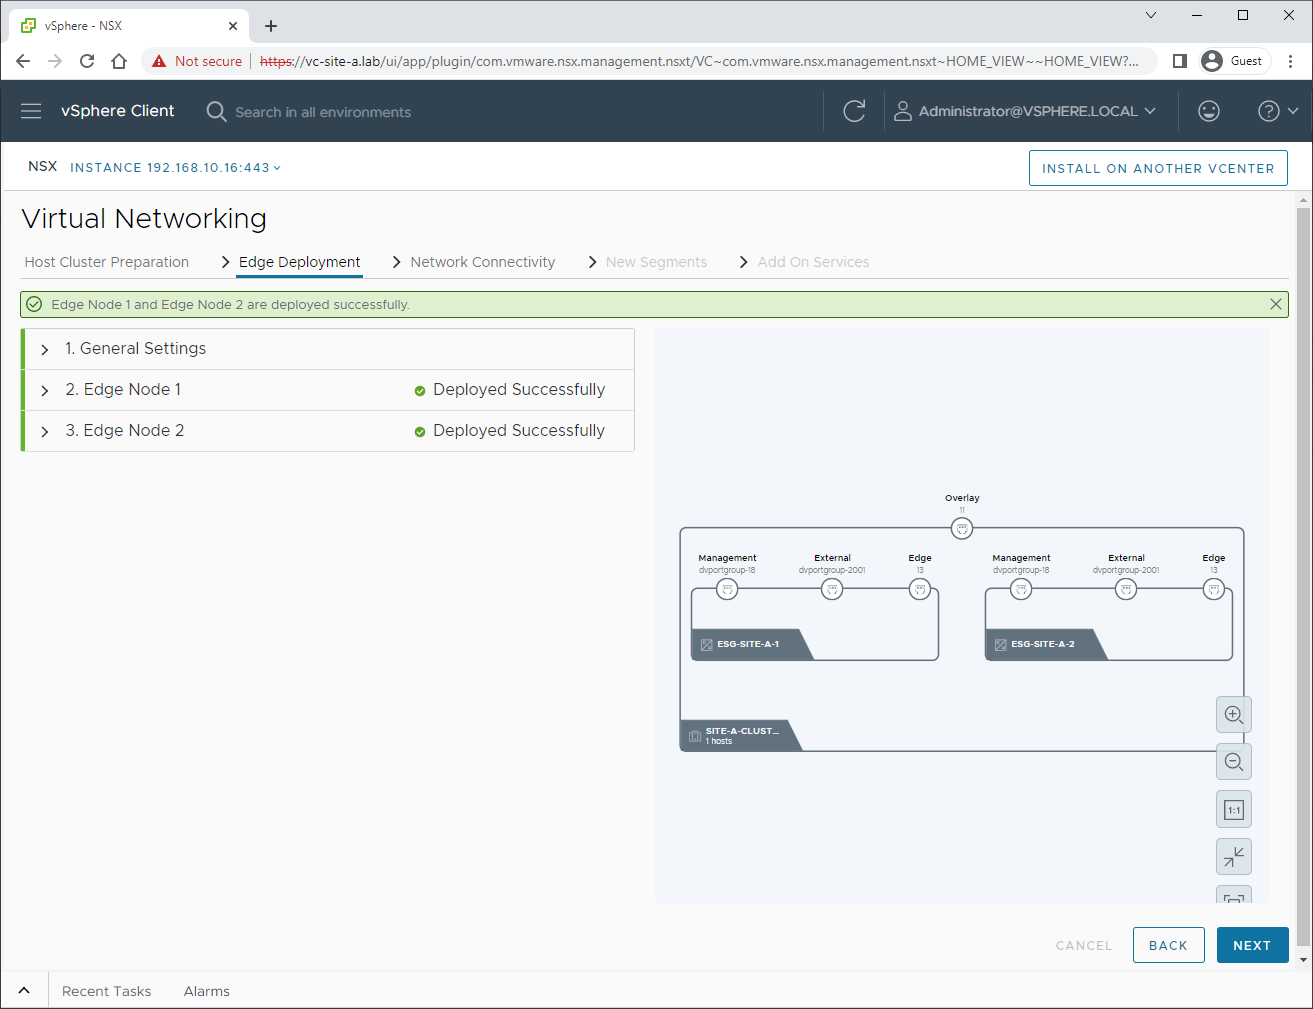
Hit Deploy Edge to continue. After allowing time to complete, we have two edges deployed:
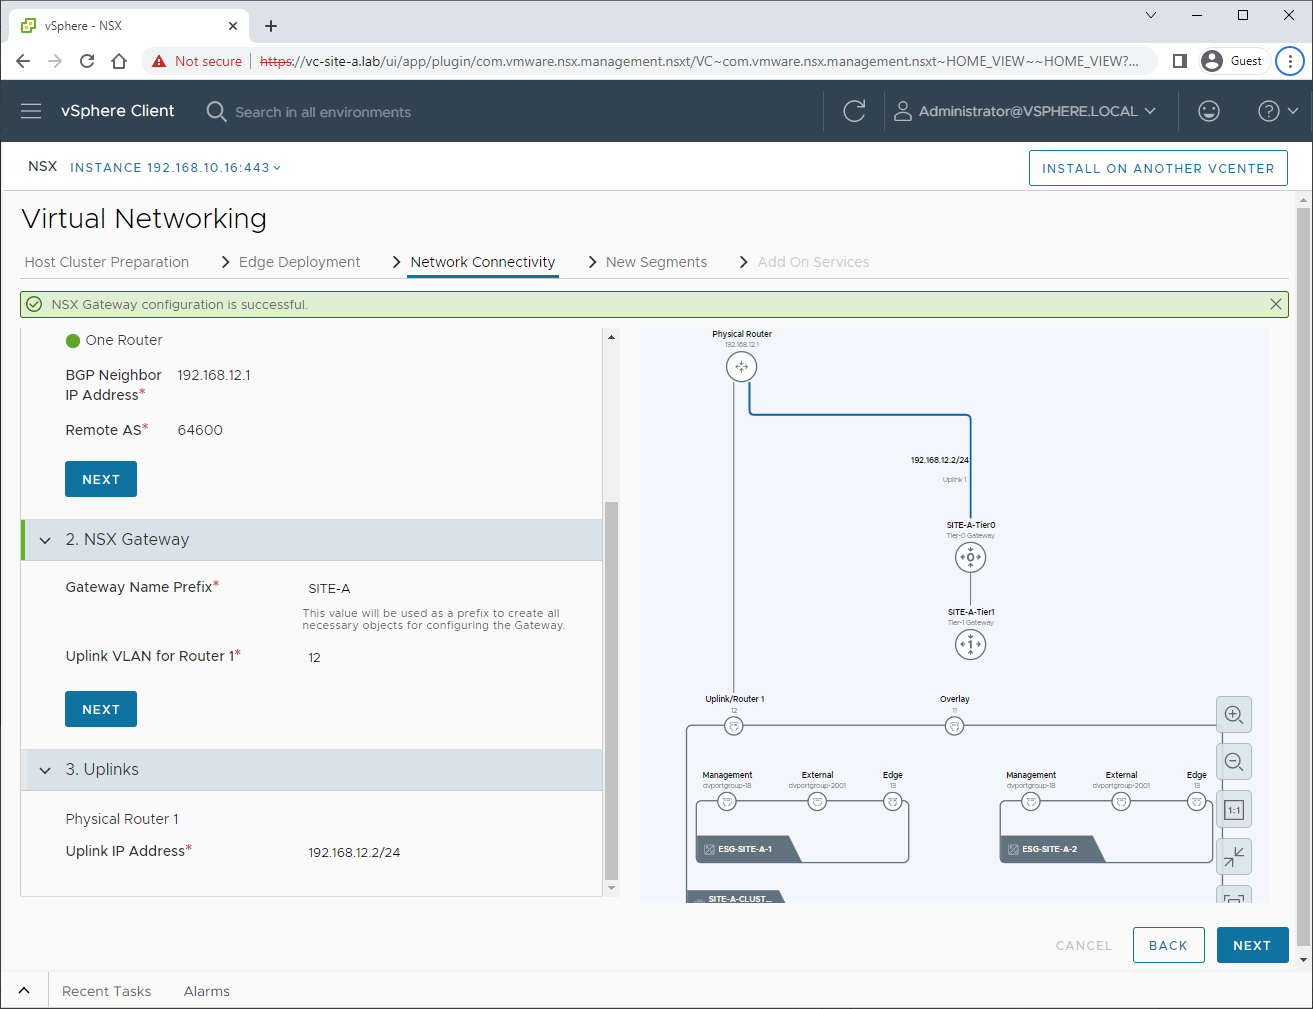
Network Connectivity
OK, lets set up some BGP peering. I’m using an OPNsense router to peer with. See my post OPNsense BGP and BFD Configuration for OPNsense configuration details.
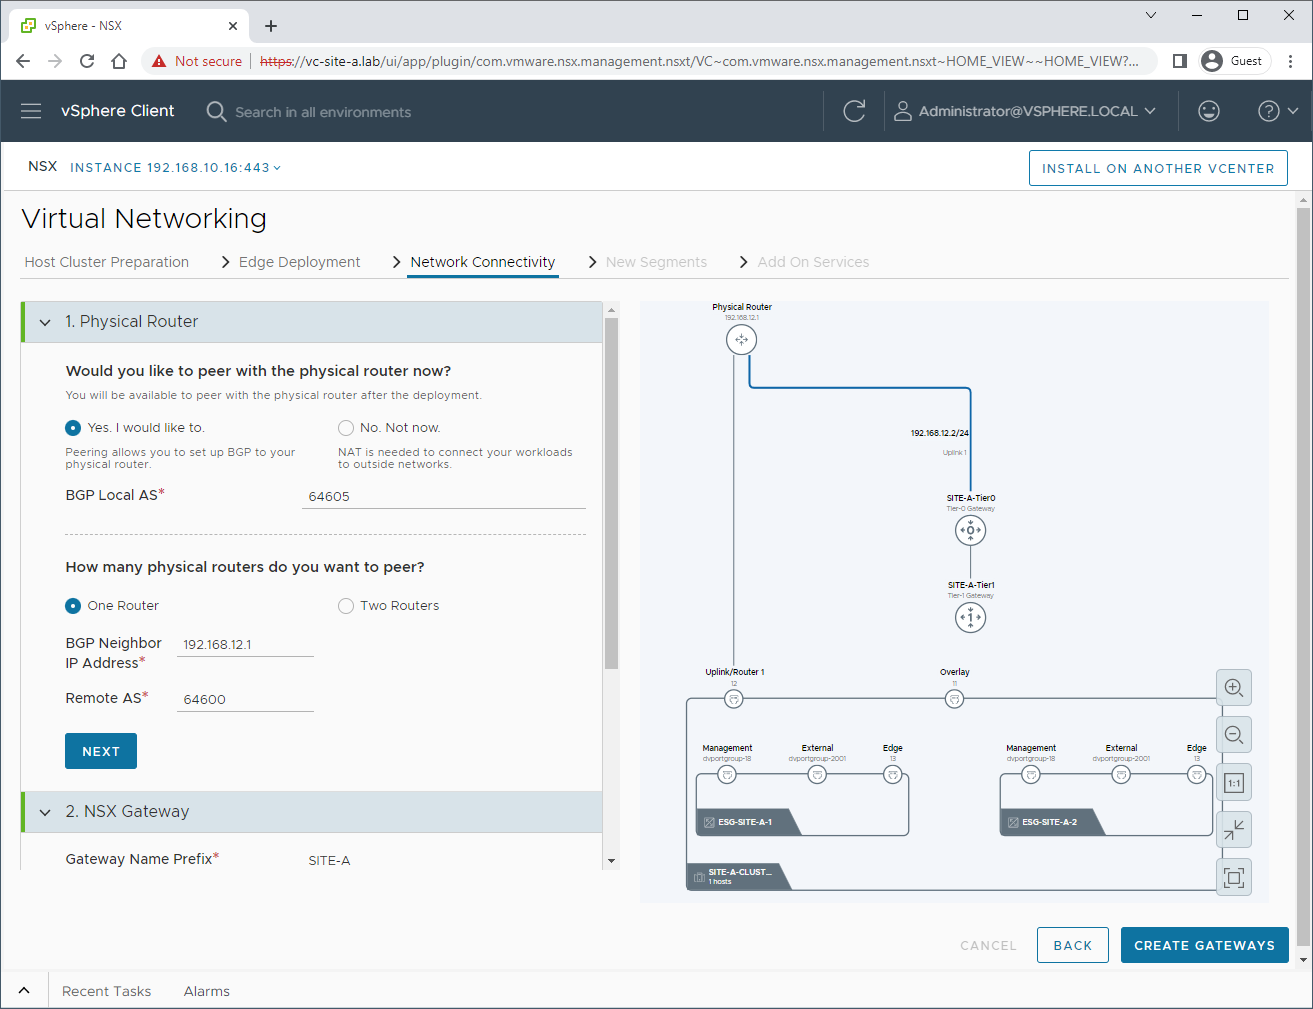
and:
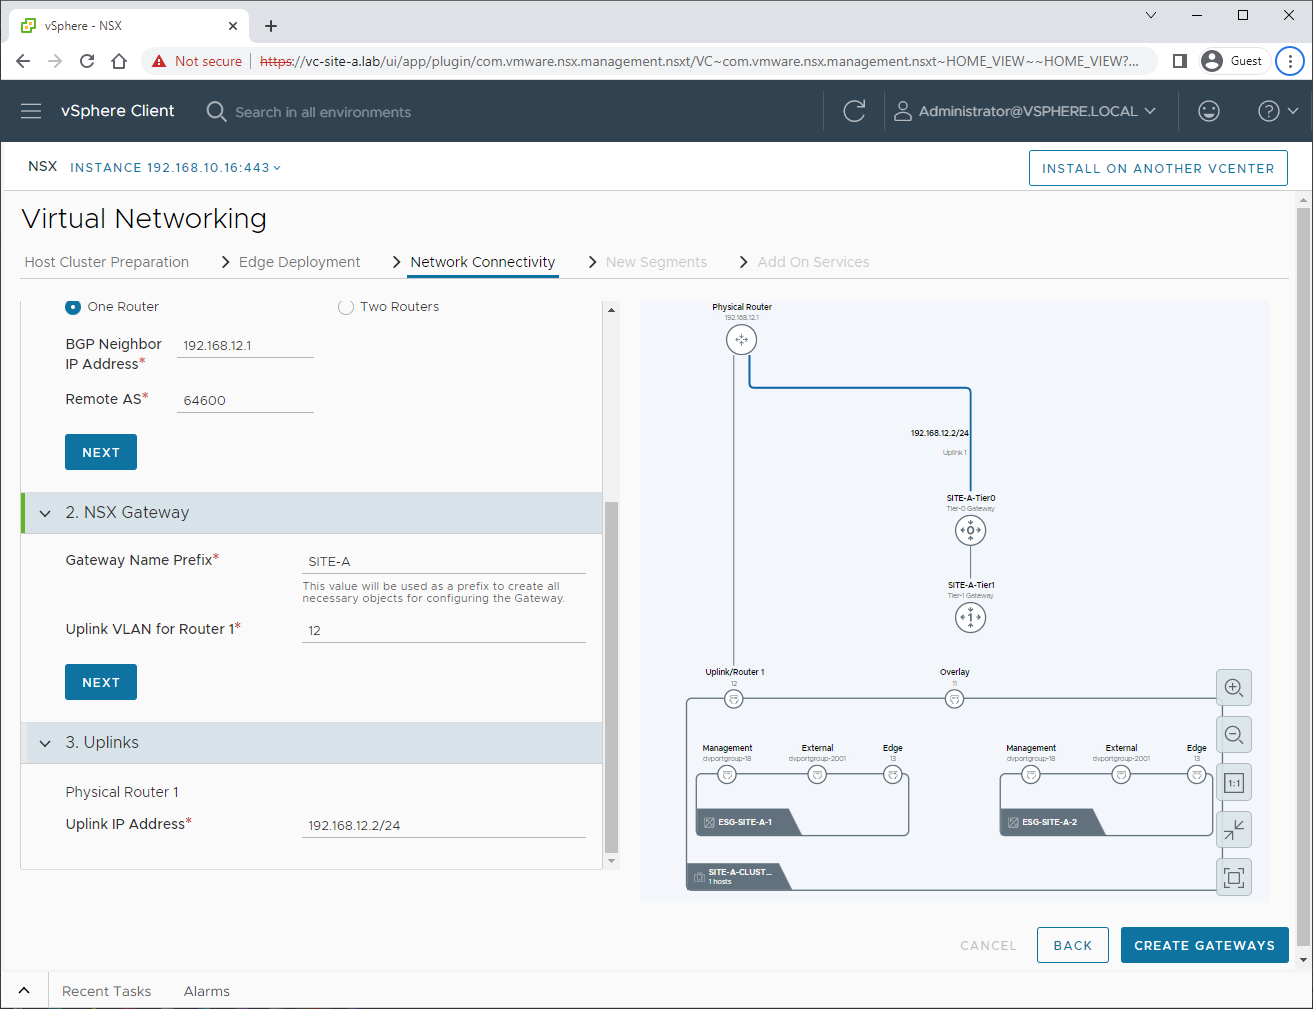
After clicking Create Gateways, we get confirmation that our Tier-0 gateway has been created:
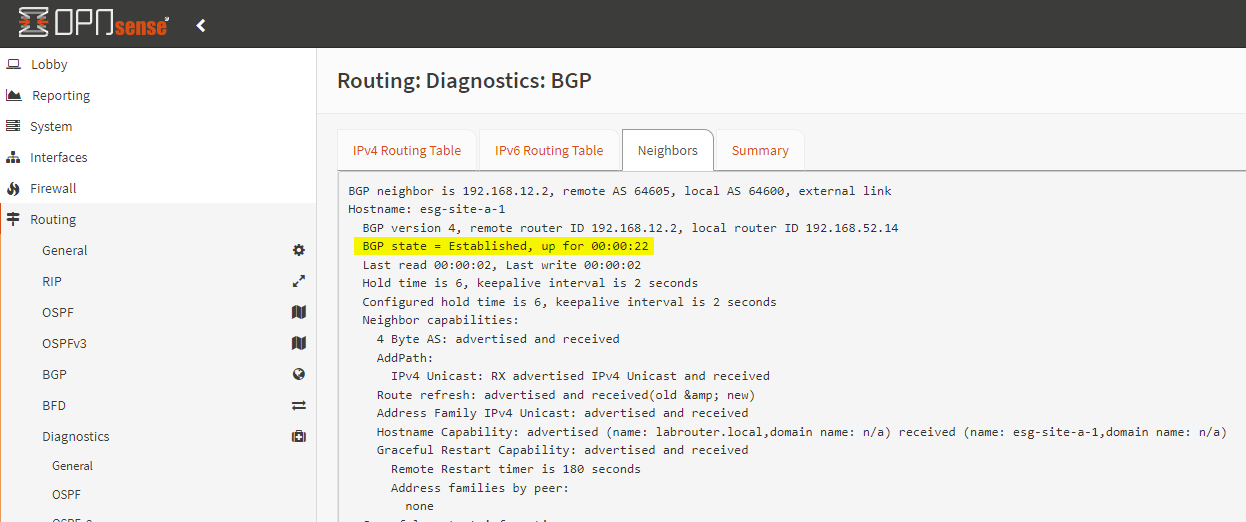
Checking OPNsense, I can see that that our NSX Tier-0 has successfully established a BGP session:
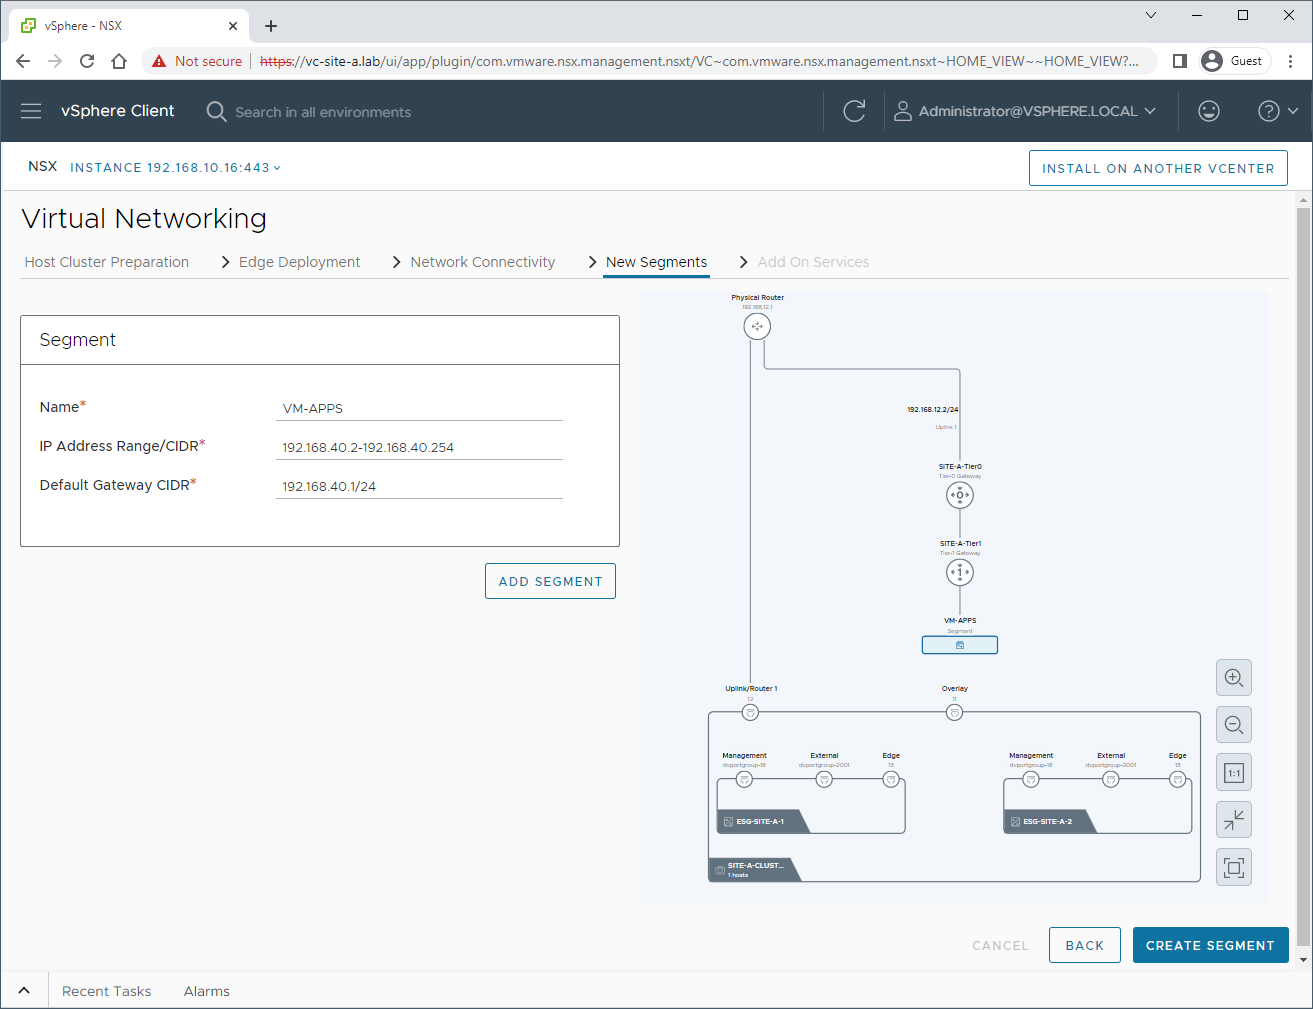
New Segments
Back to the NSX deployment, lets create a segment to connect our VMs to. I’ll create a segment called VM-APPS and give it the IP address CIDR of 192.168.40.0/24:
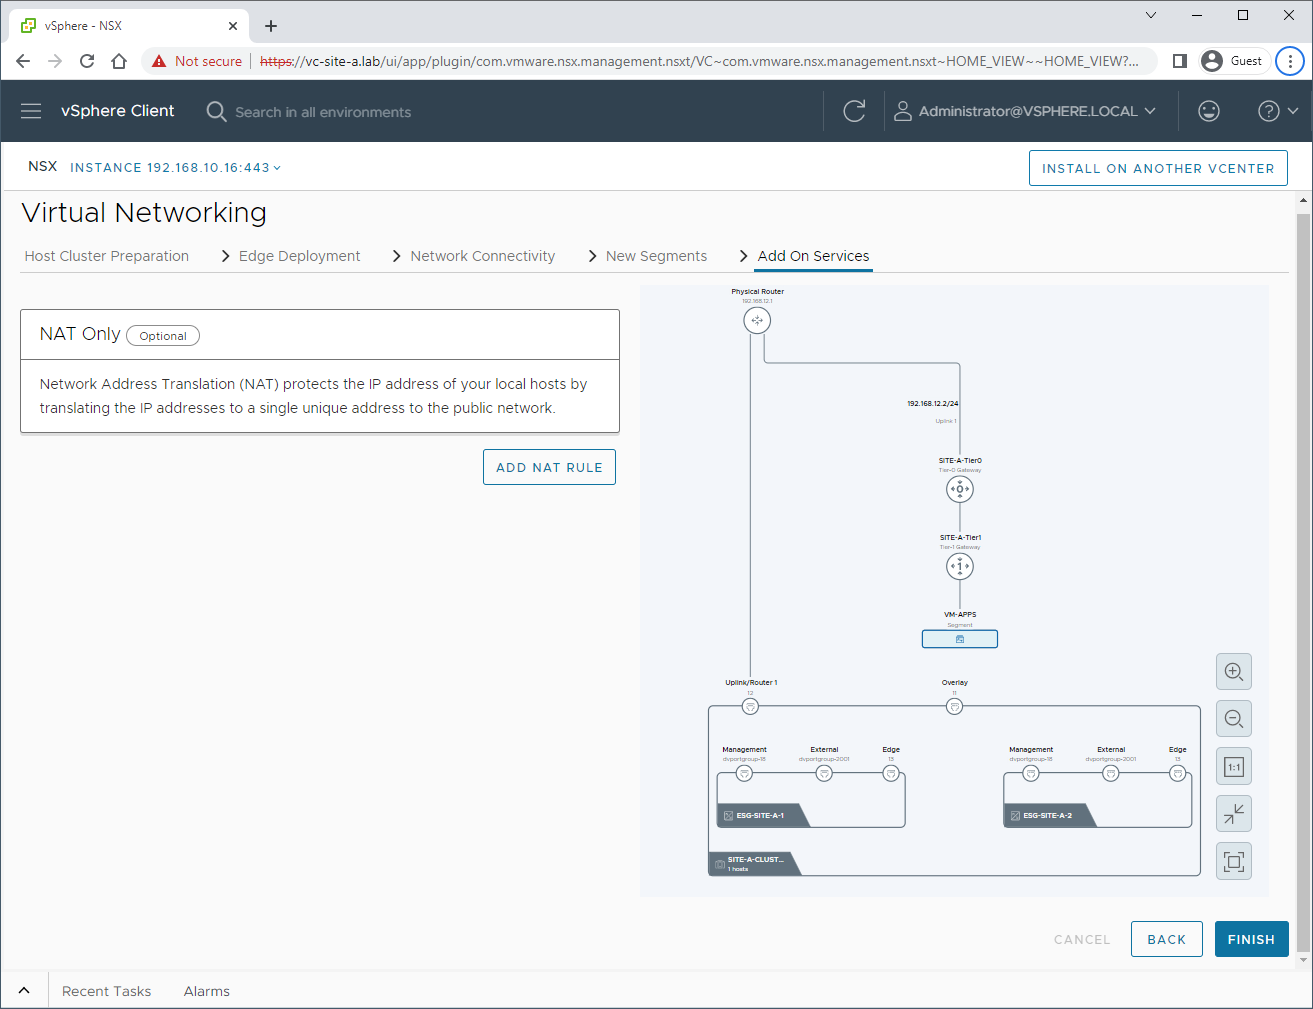
Add On Services
I’m not going to create any NAT services just now:
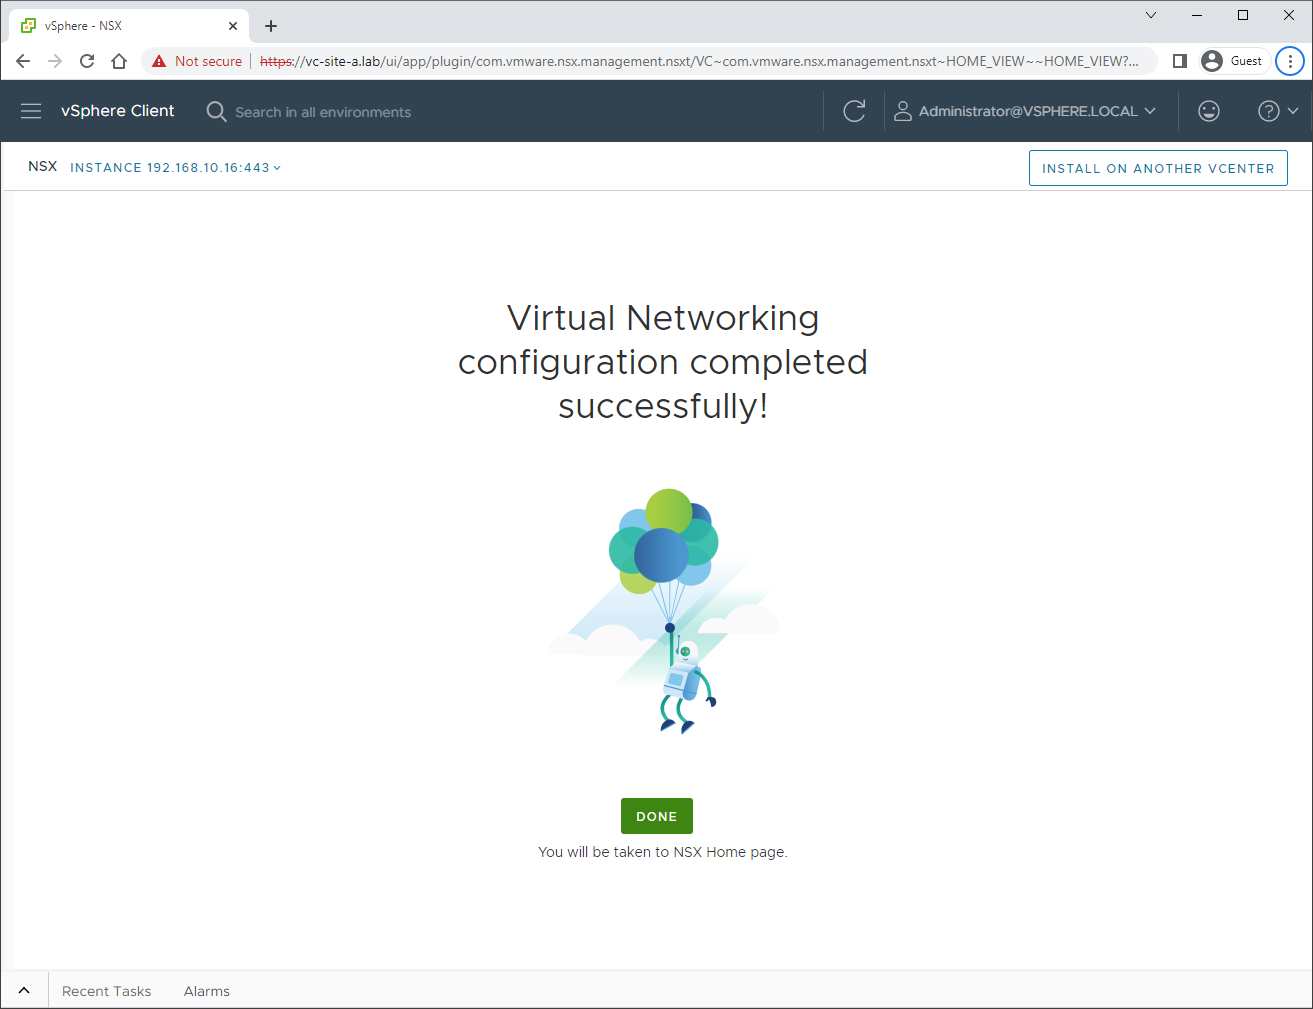
Virtual Networking Configuration Completed
Click finish and BOOM!
By way of belt and braces, let’s check the OPNsense routing table to see if BGP is propagating a route to get to our VM-APPS (192.168.40.0/24) network. Yep looks good:
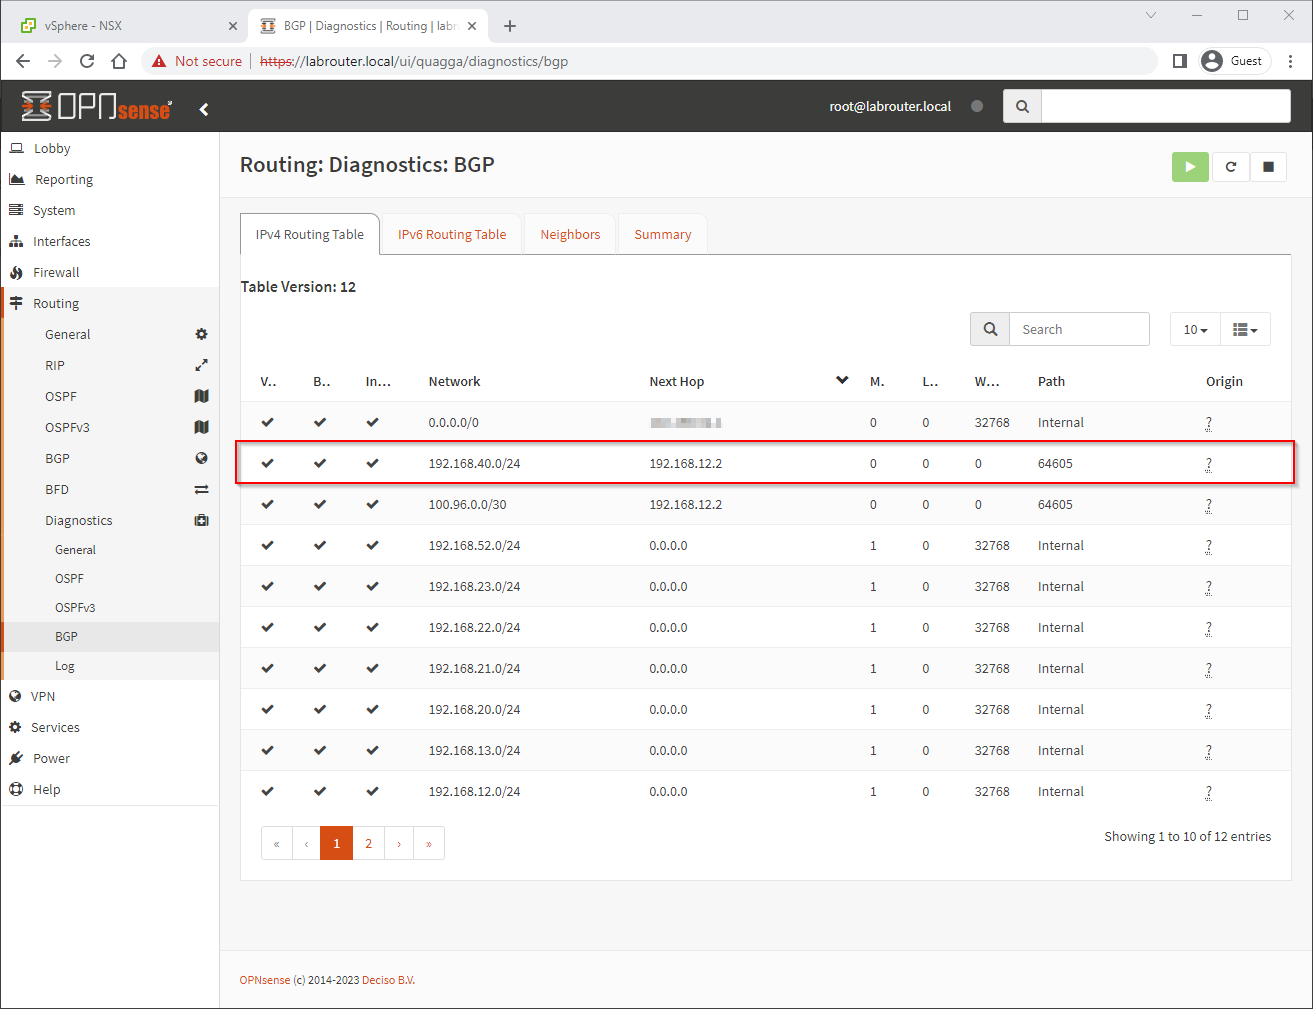
The next hop 192.168.12.2 is the IP we gave to our Tier-0 router earlier.
Tracing to VM-APPS from my Windows laptop:
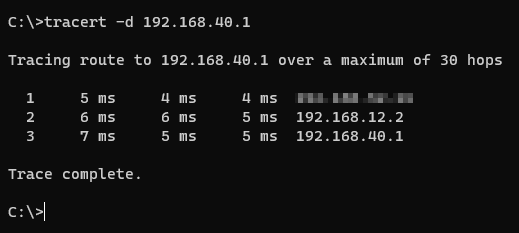
Nice!
Conclusion and Wrap Up
So let’s take a step back and take a look at the infrastructure the wizard has built for us using the network topology view from the NSX manager interface:

Working down the topology top to bottom, we have the uplink to the OPNsense lab router from the Tier-0 gateway via the edge nodes. This is achieved over the SITE-A-vlan-segment1 VLAN which is shown to the right of the topology map. Site-A-Tier0 is providing the one service; gateway firewall.
Below Site-A-Tier0 we have the “auto-plumbed” 100.64.0.0 network connecting Site-A-Tier0 gateway to Site-A-Tier1 gateway. Services on the Site-A-Tier1 gateway are gateway firewall and DHCP for the VM-APPS segment.
Finally, connected VM-APPS segment we have 2 VMs APP1 and APP2.
All in, all good, all tested and working.
Next time we’ll dig into the caveats of using this deployment model.
-Chris