


 In this post we will look at installing NSX as a plug-in to vCenter server, as promised a while ago.
Historically, NSX-T or just NSX as it is now known as was installed as a separate entity and managed away from vCenter and the vSphere client.
Since the releases of vSphere 7.0 Update 3 and NSX 3.2.0, NSX can now be installed and managed in the vSphere client via a vCenter plug-in in much the same way as the previous VMware network virtualisation product, NSX-v used to be.
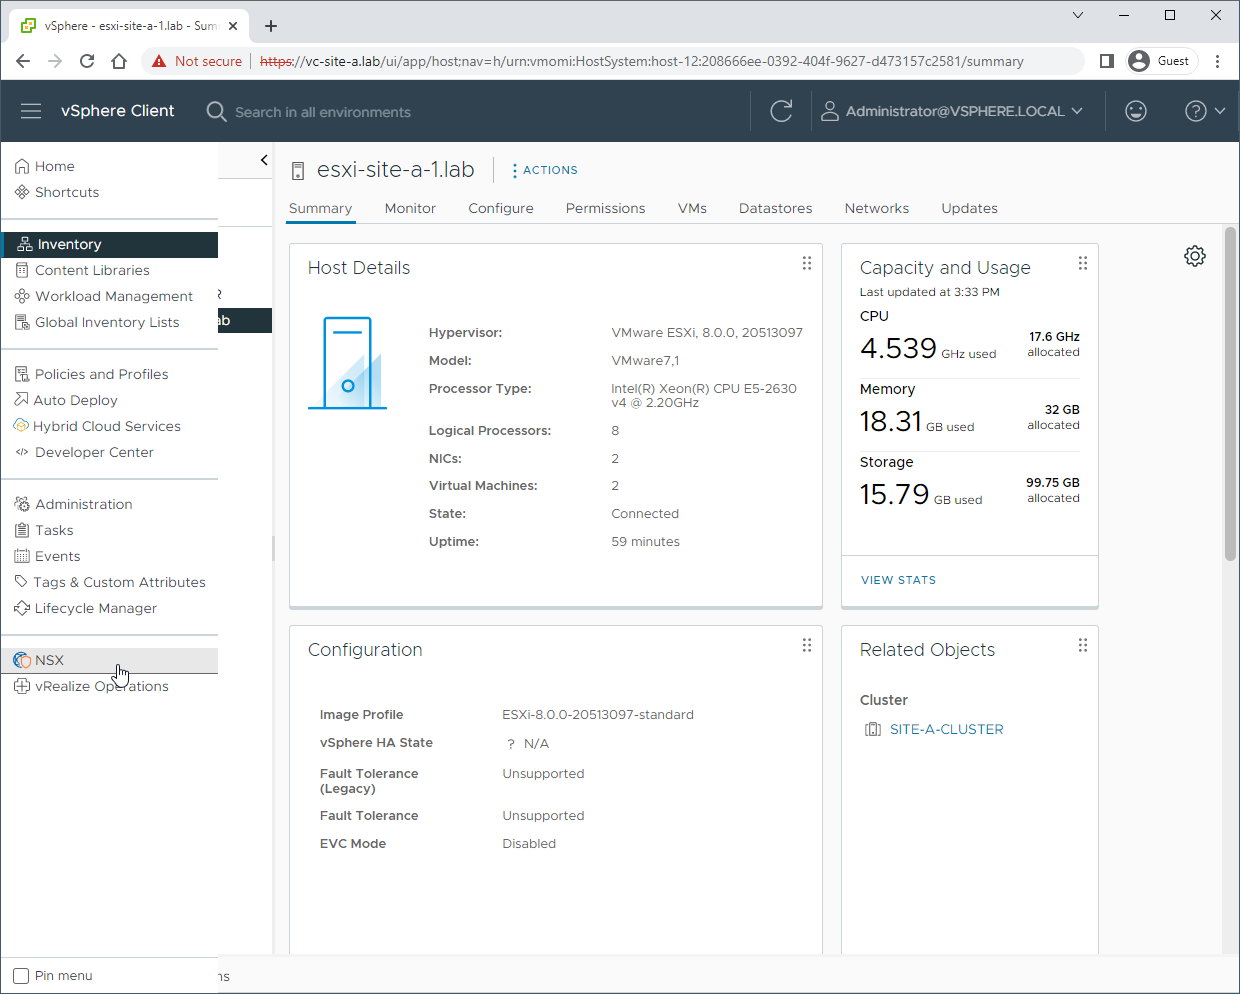
First off, let’s take a look around our environment prior to NSX deployment.
Overview
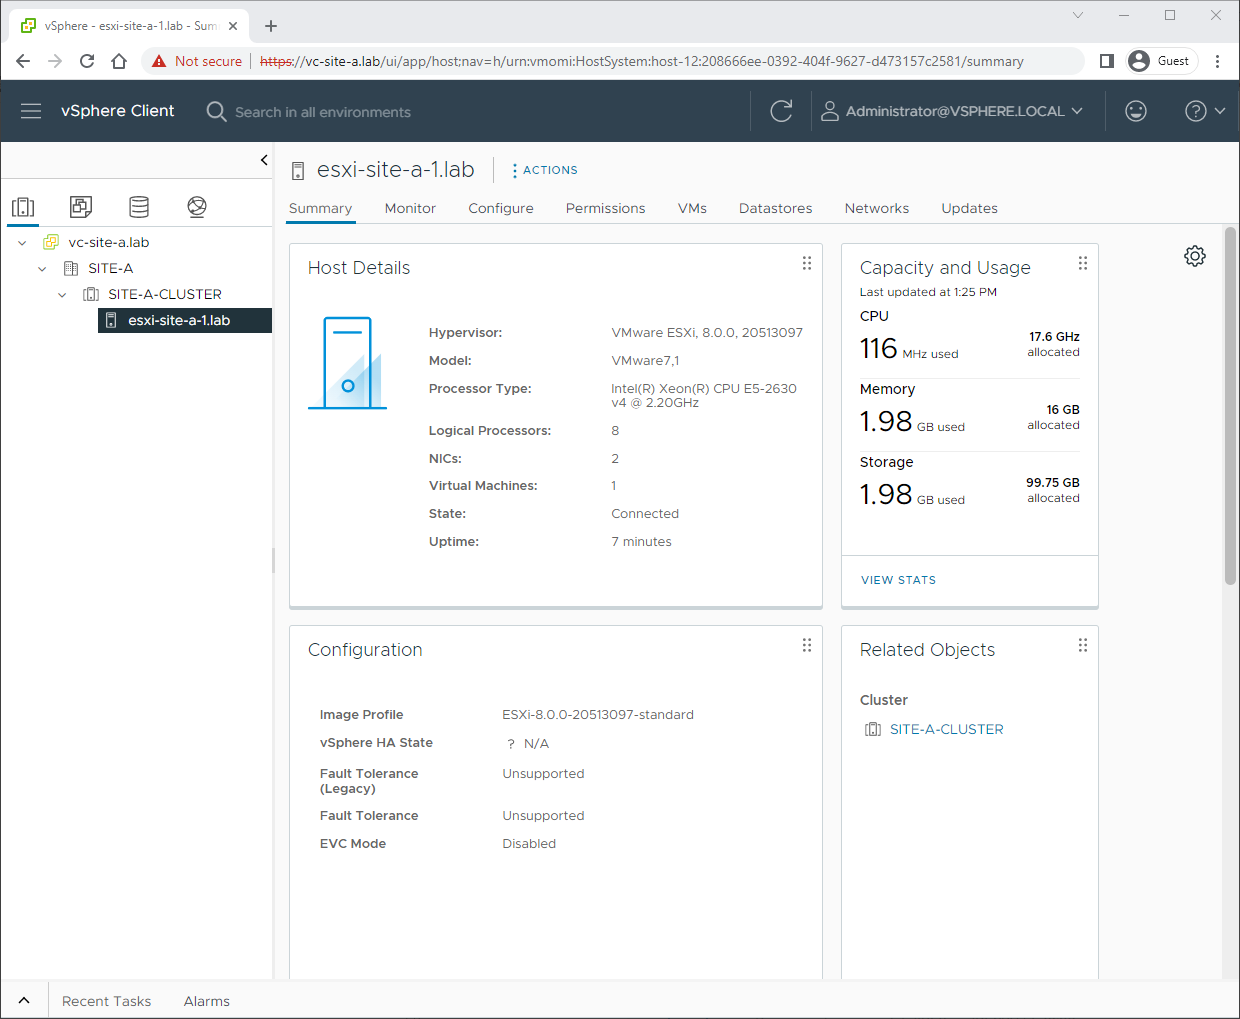
vSphere Environment
vSphere 8.0 environment consisting of one ESXi 8.0 and one vCenter 8.0 server:
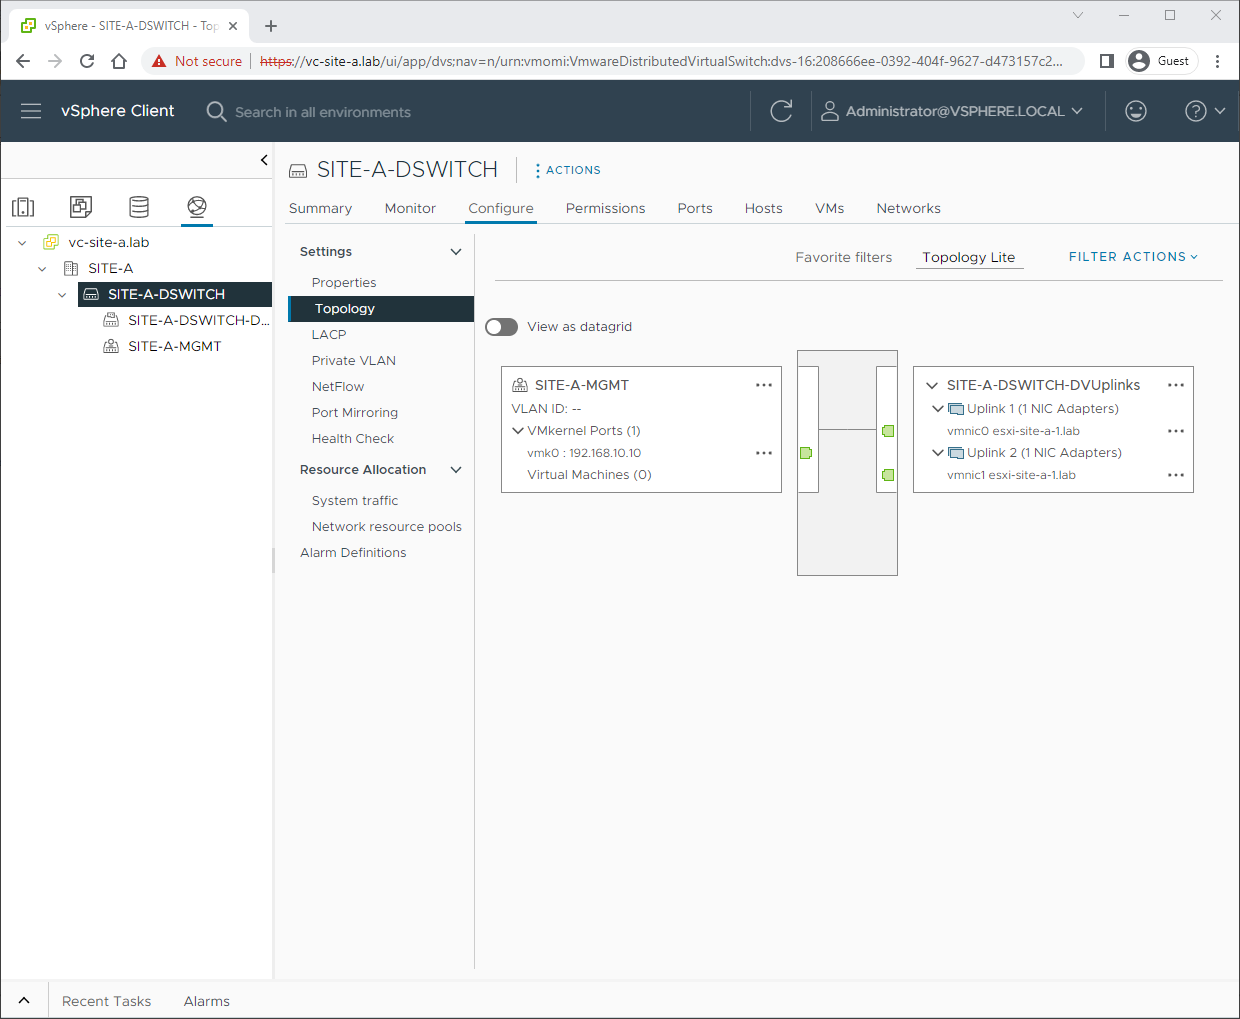
A single version 8.0 vSphere Distributed Switch (VDS) handling all connectivity via two uplink NICs:
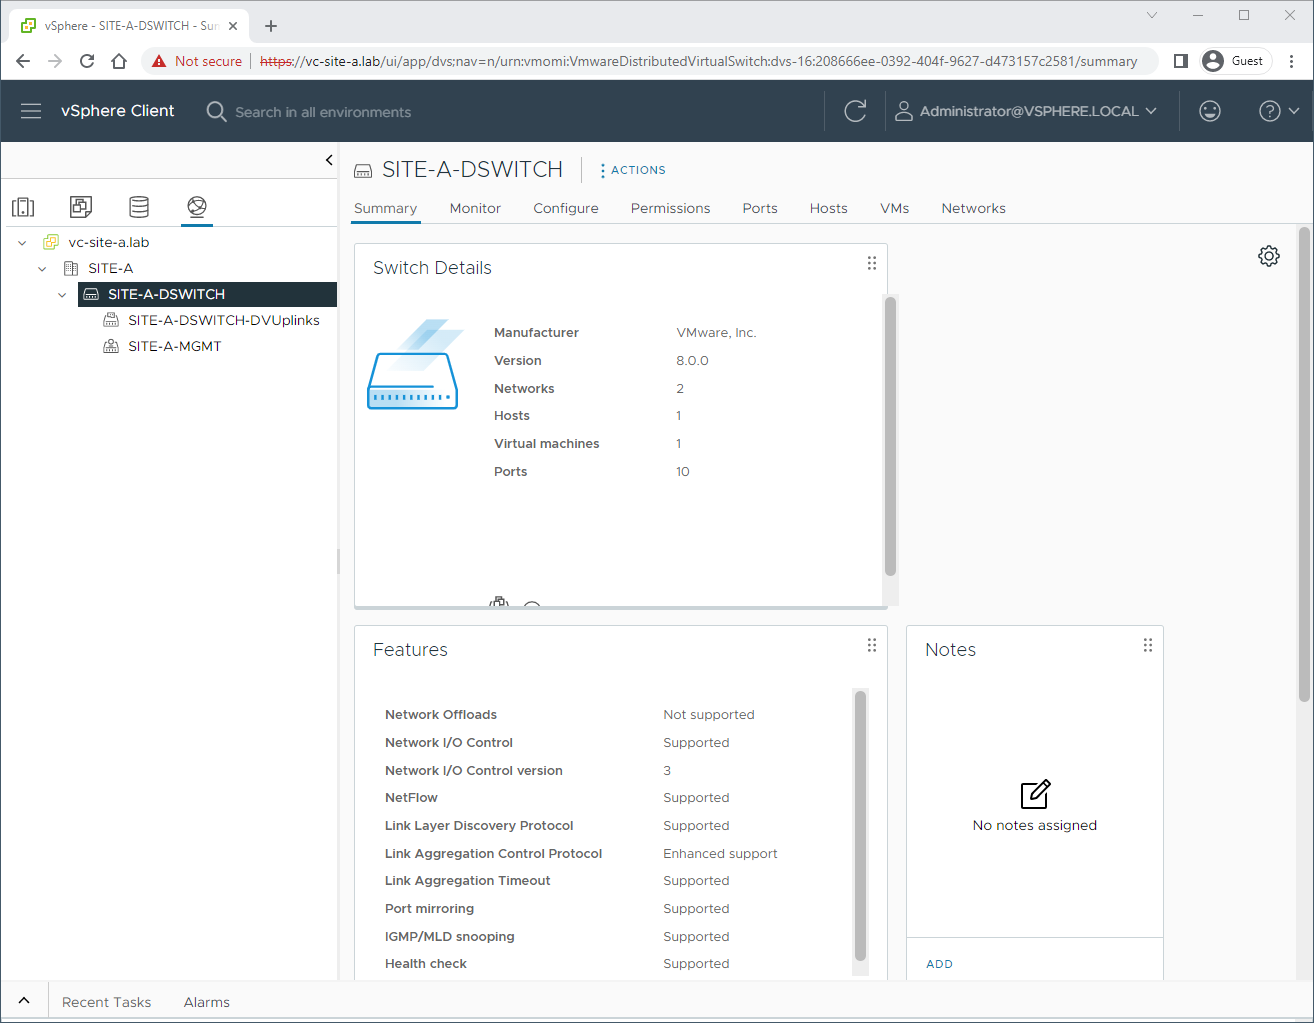
VDS topology:
NSX Deployment
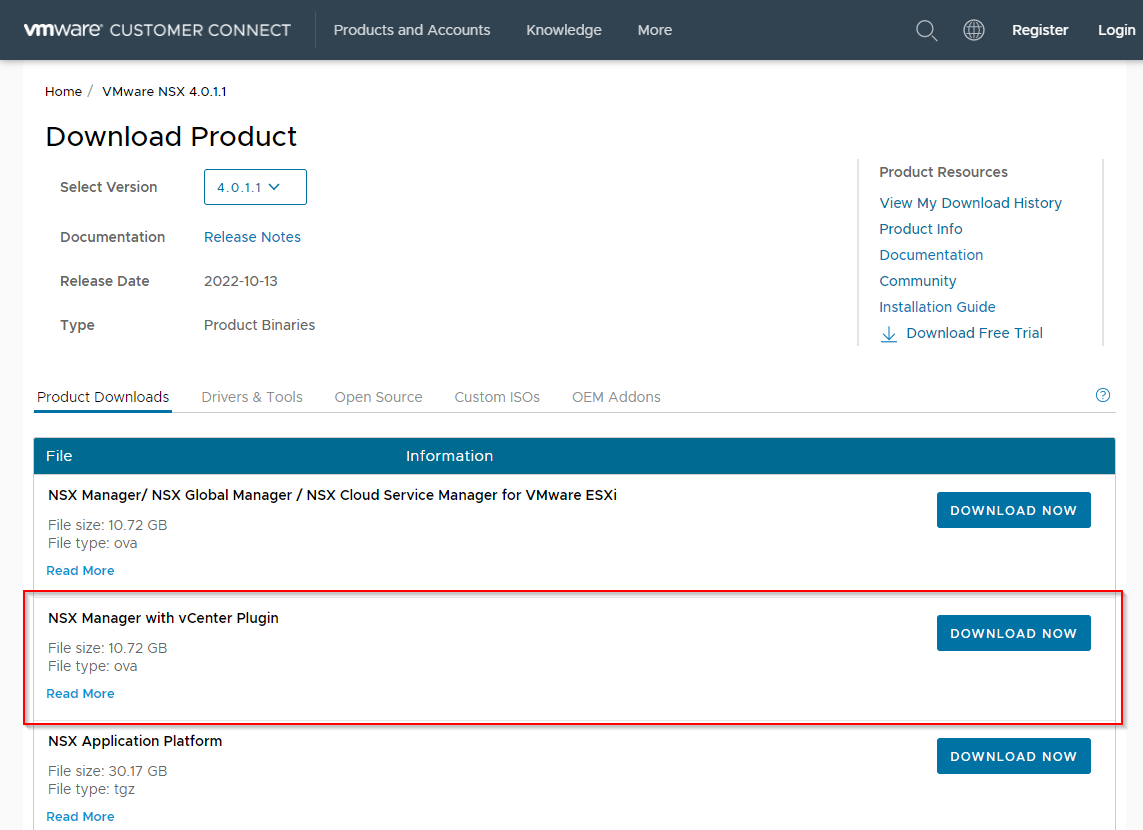
OK, let’s download the correct NSX installer from the VMware software portal. In this article I’ll be deploying NSX v4.0.1.1 into my vSphere 8.0 environment:
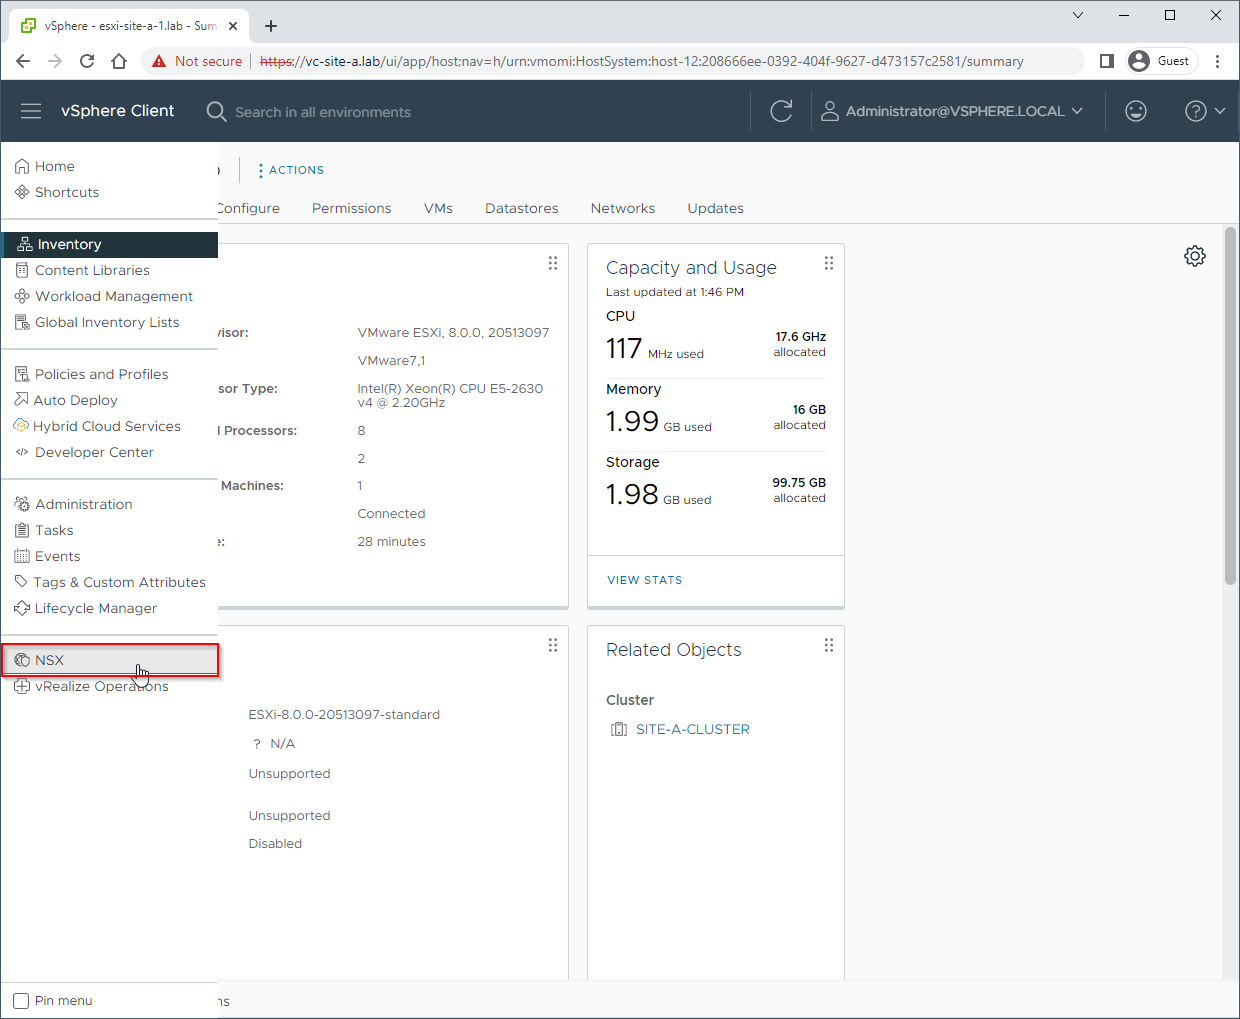
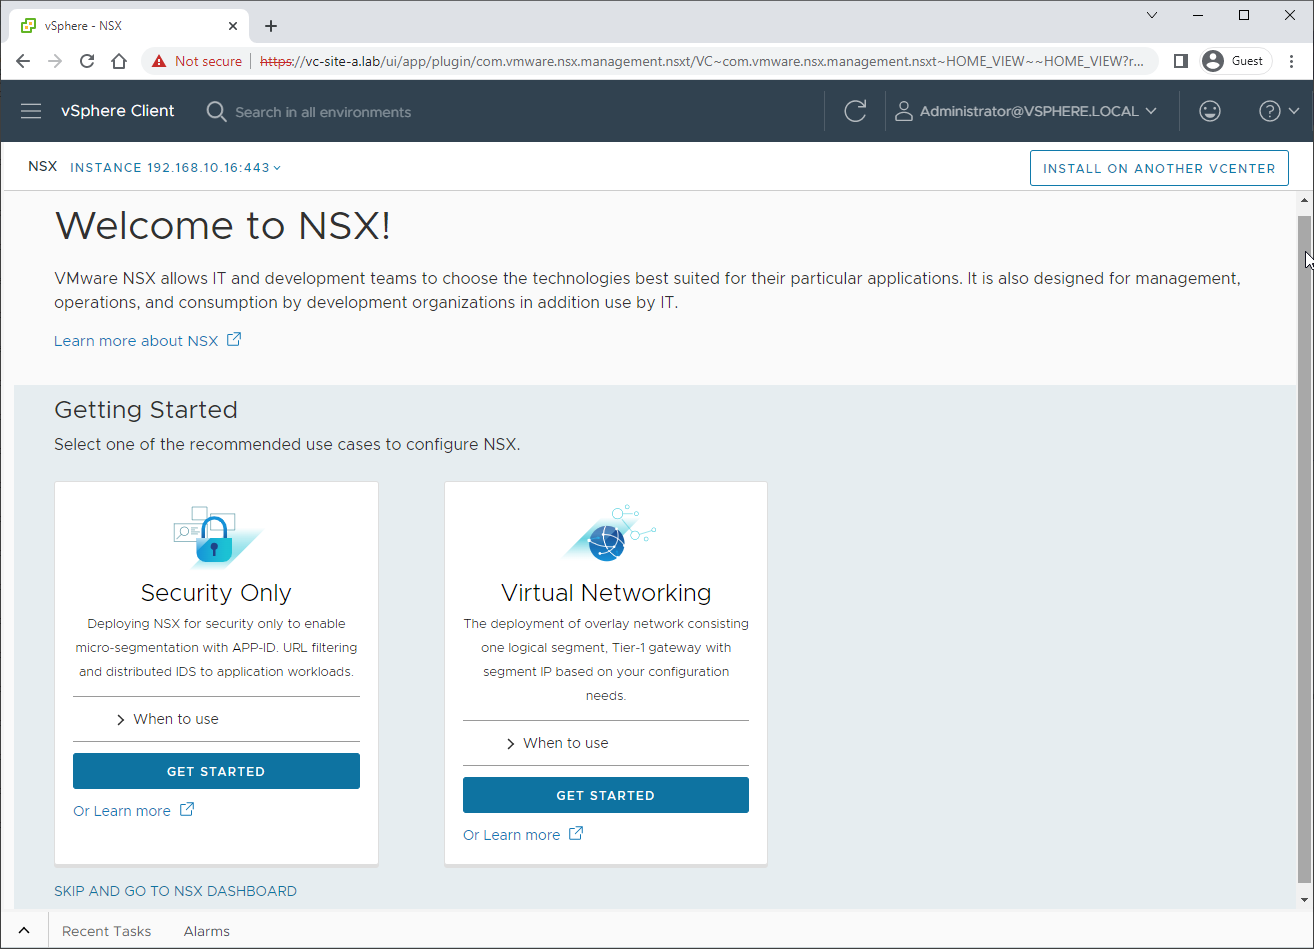
Next, from the vSphere Client menu, select the NSX option:
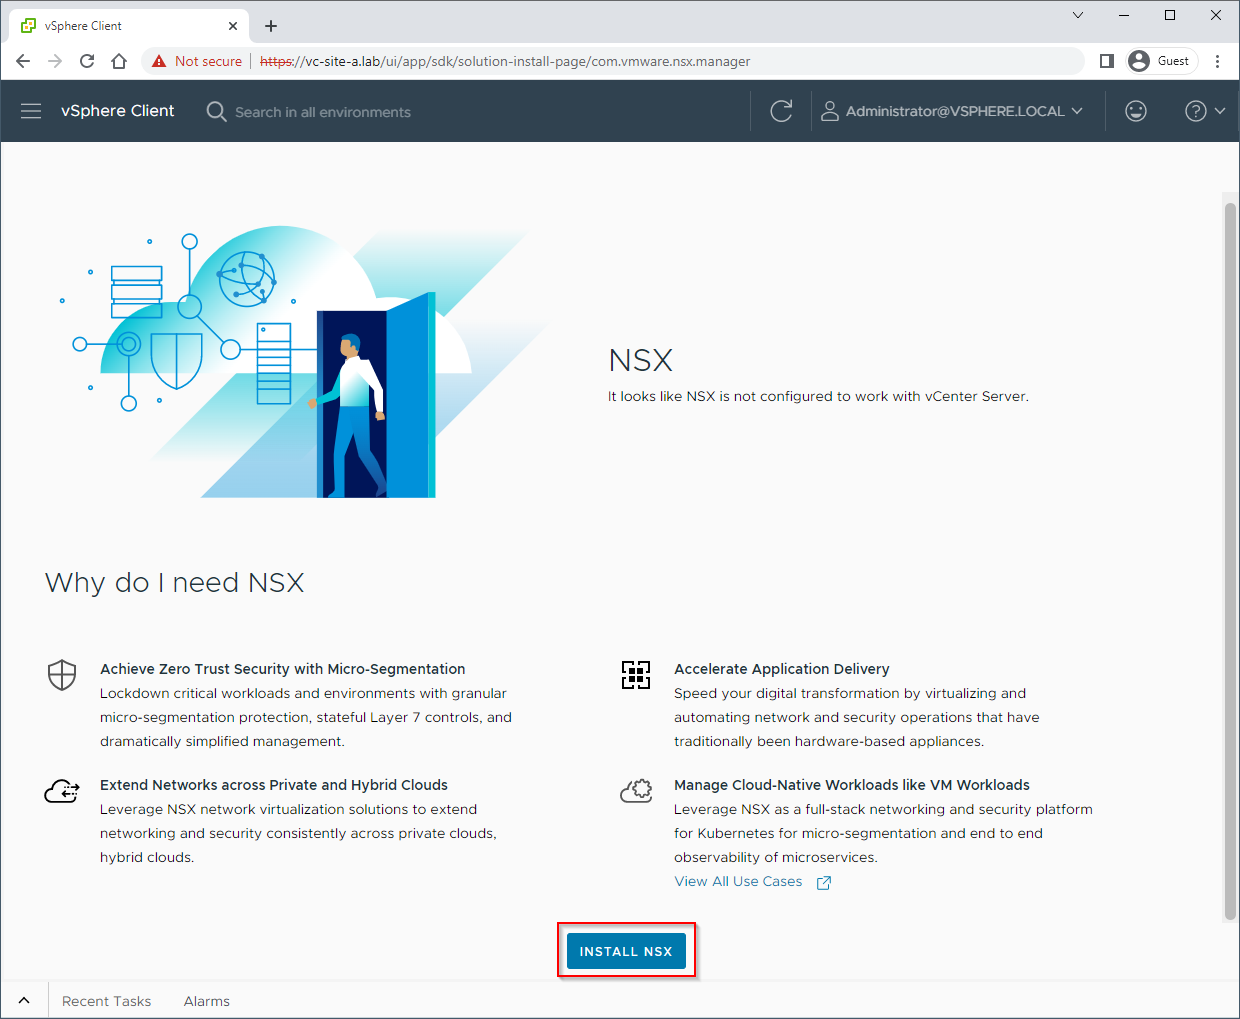
The install wizard starts. Select Install NSX:
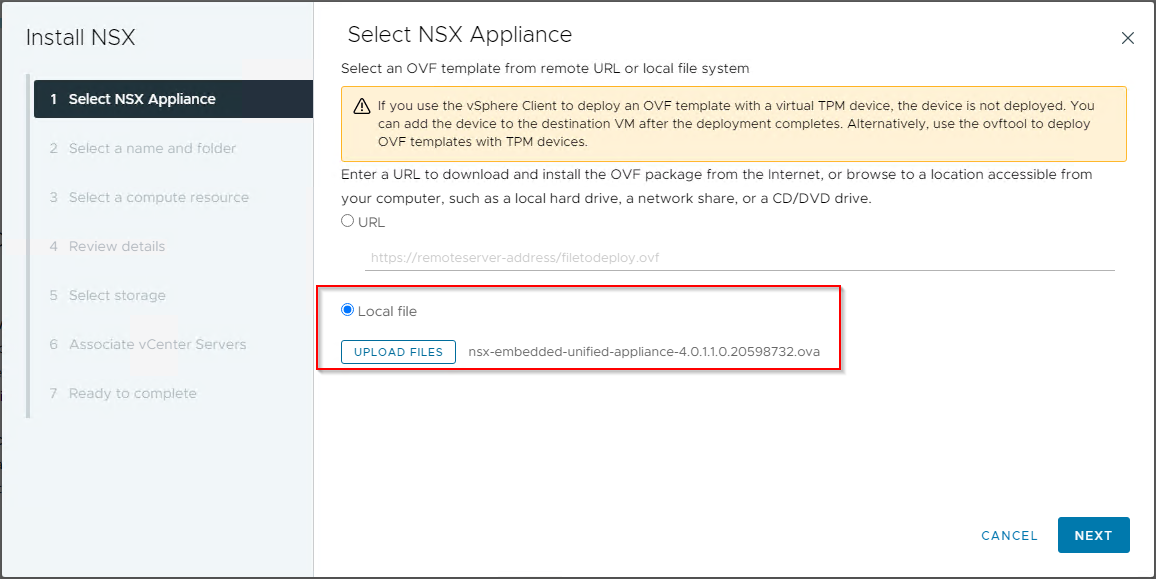
Supply location of downloaded NSX Manager with vCenter Plug-in OVA file:
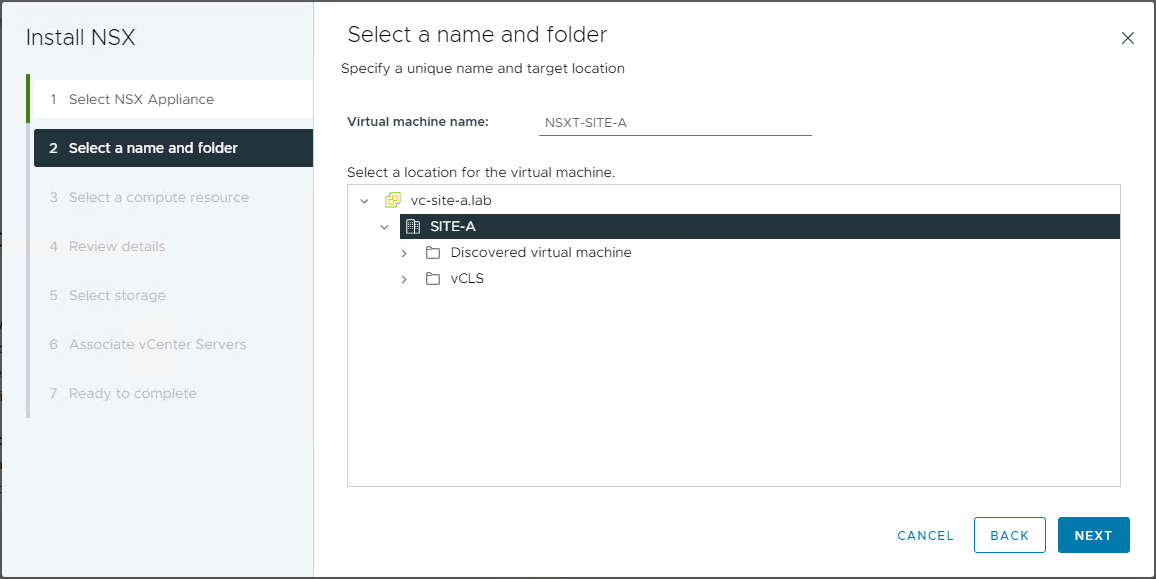
Name the VM and select an inventory location for the VM to reside:
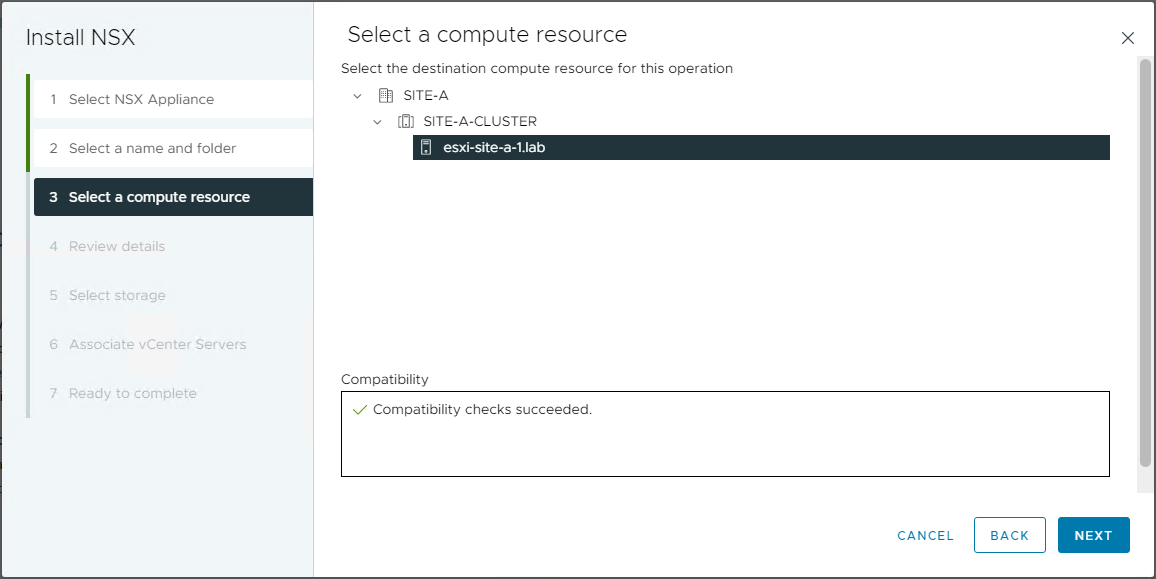
Select the ESXi Host (if DRS not enabled for your cluster):
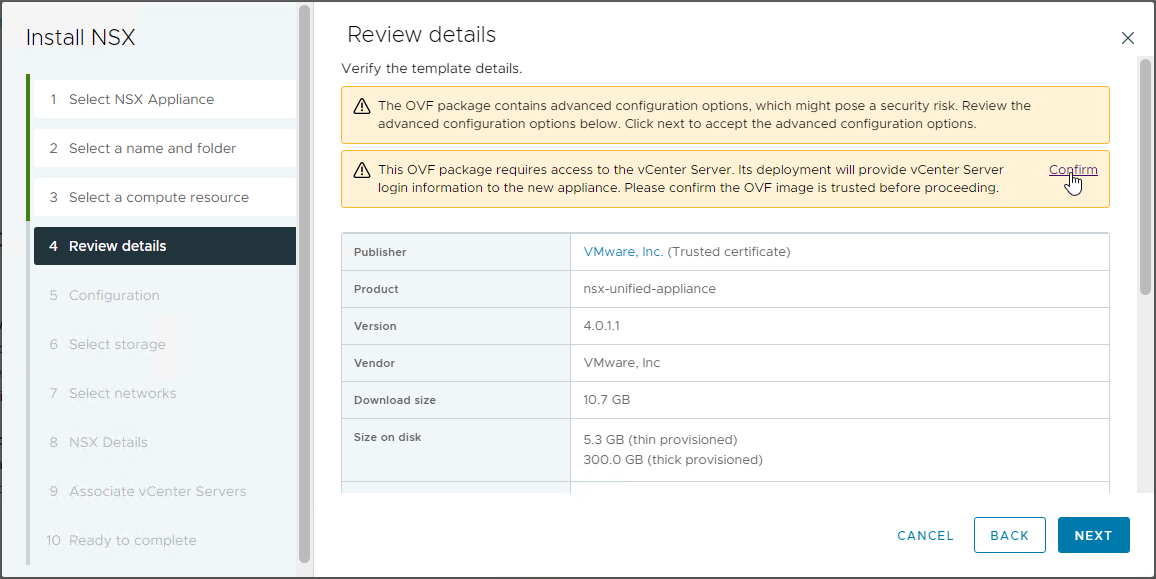
Confirm access to vCenter Server:
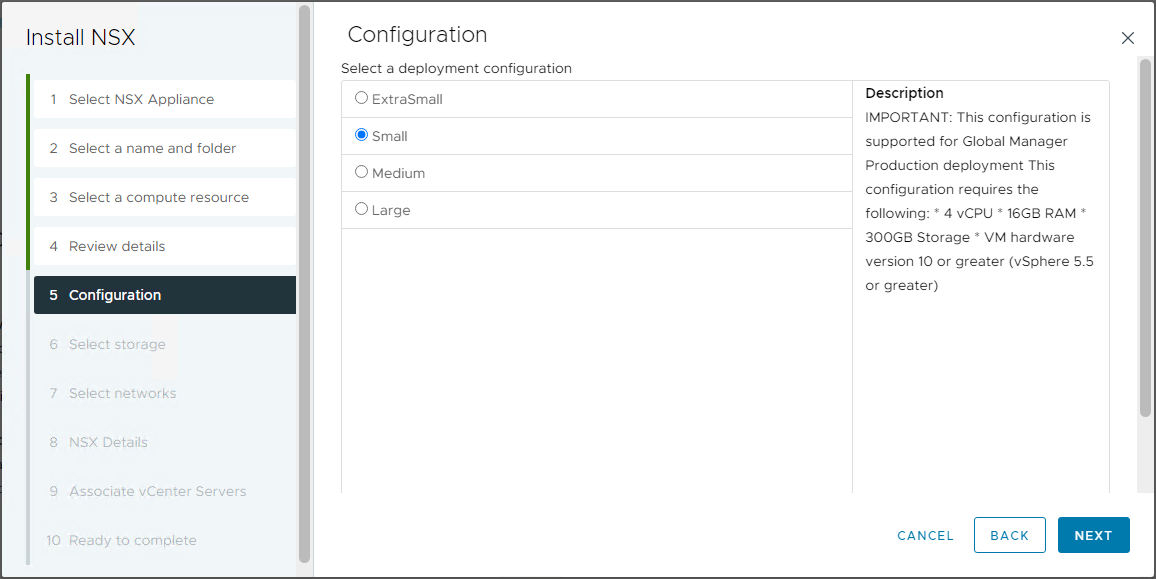
Select NSX Manager VM deployment size. For sizing requirements, see NSX 4.0 Manager VM Resource Requirements:
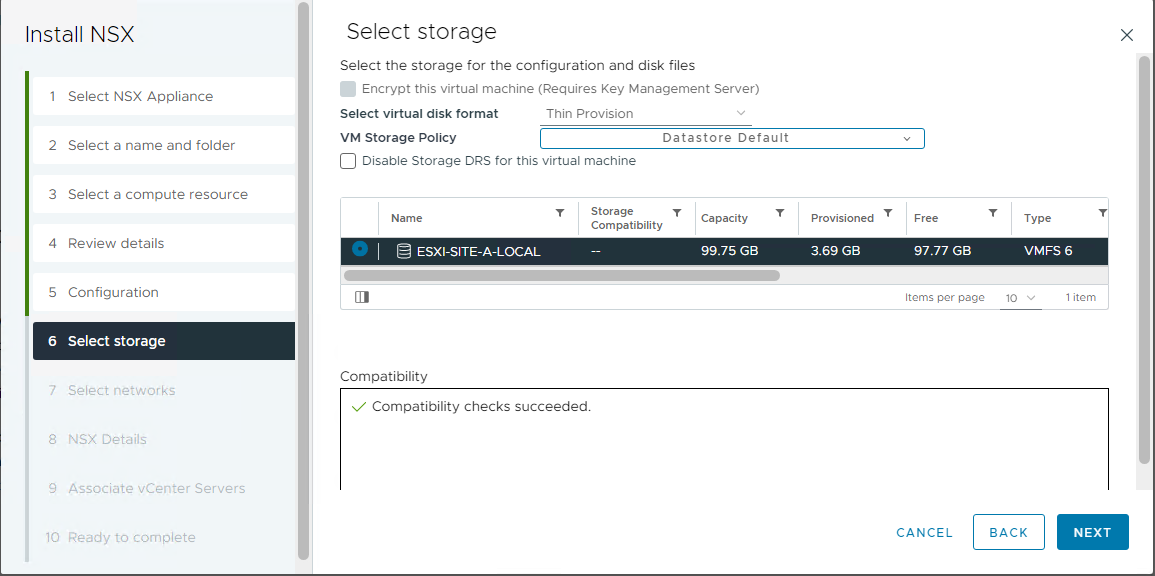
Select datastore for the NSX Manager VM:
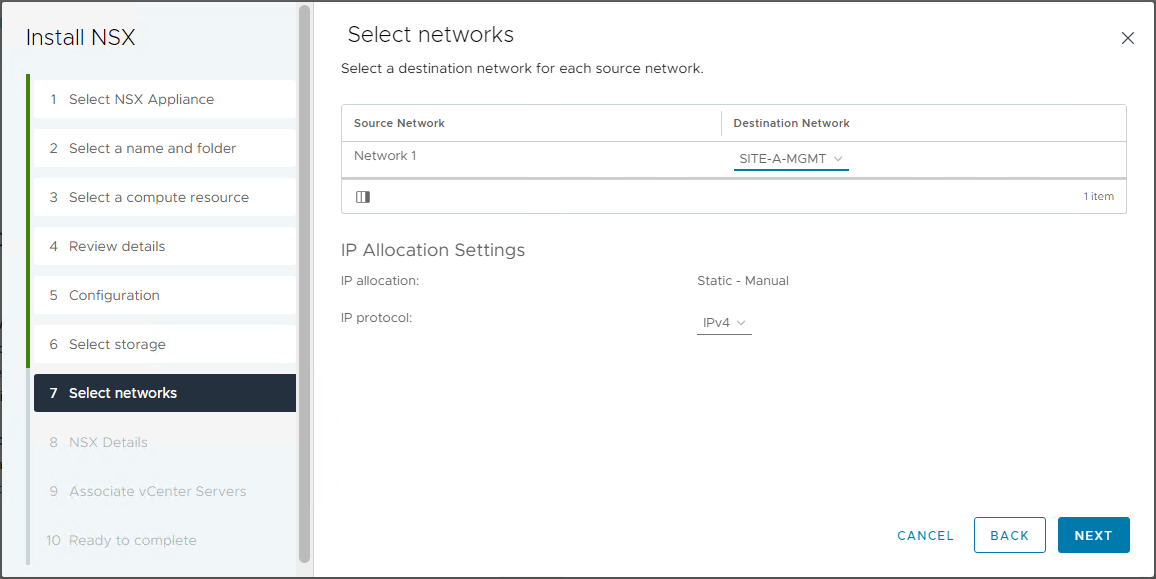
Select management network for the NSX Manager VM:
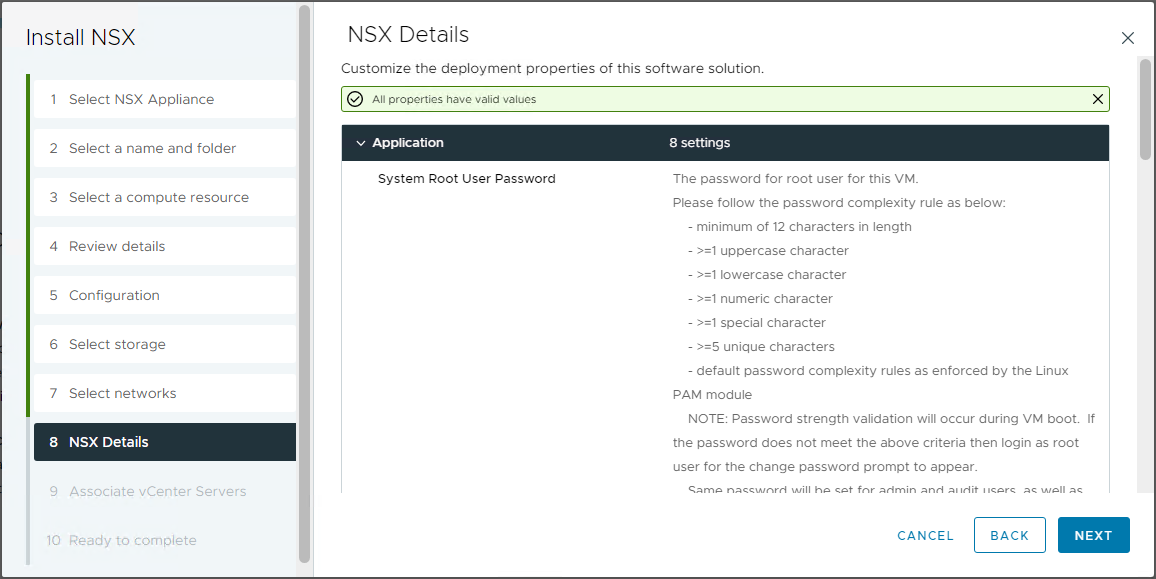
Complete the required information. At a minimum, you need to provide NSX Manager:
- Root account password
- Hostname
- IP address details (if not using DHCP)
- DNS details
- NTP details
Select vCenter to associate NSX with:

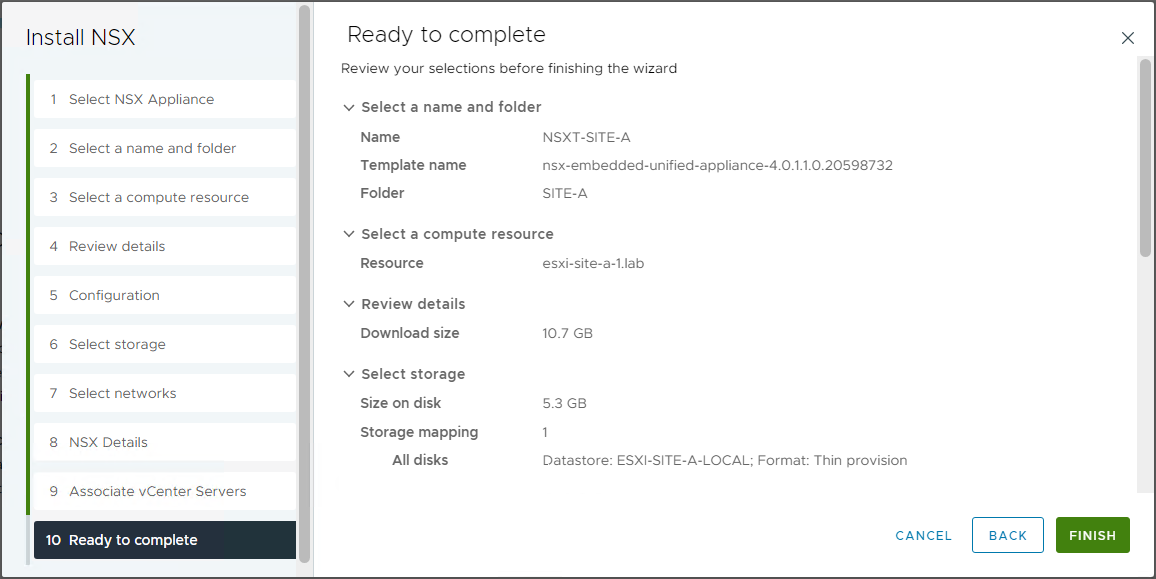
Review and finish NSX manager deployment wizard:
Allow some time for the NSX-T manager VM to complete it’s first boot activities and initial configuration. In normal circumstances this can take around 15 to 20 minutes to complete.
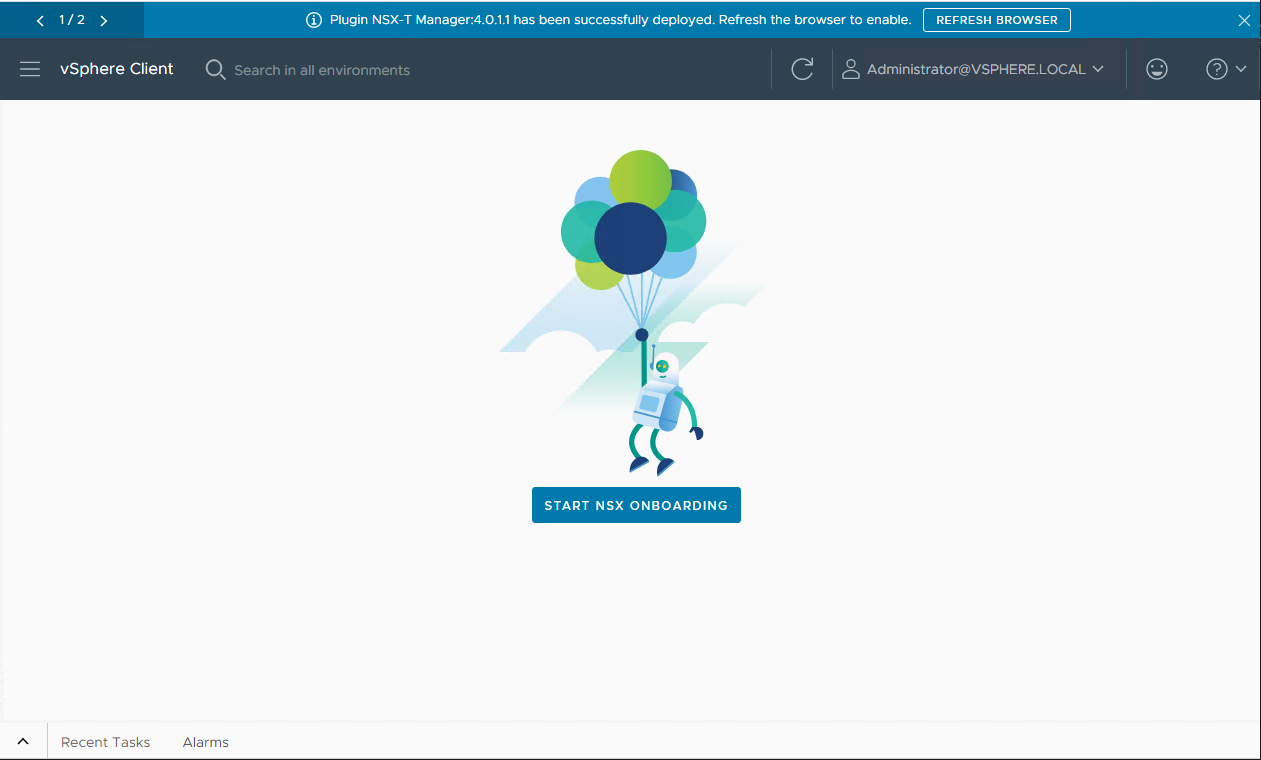
After refreshing the browser to load the NSX plug-in, Select NSX from the vSphere Client menu again:
Welcome indeed! Let’s supply our licence key:

Finally we arrive at the Getting Started Wizard page:
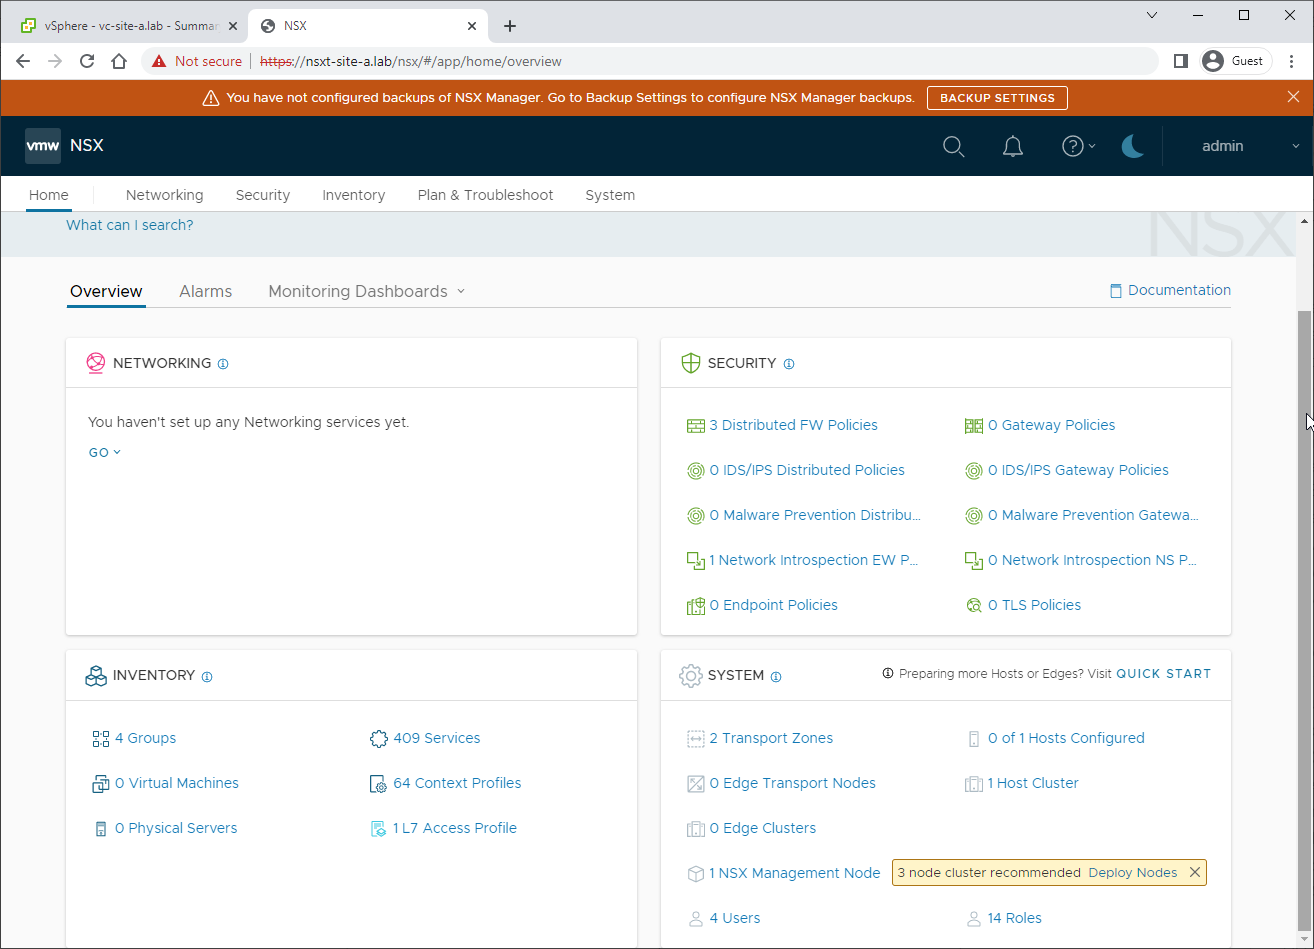
As a check, yes we can also browse and login directly to our newly deployed NSX manager:
Options
For those who don’t wanna follow no crazy wizard!!1! - that is those of a more hardcore or “back to basics” type of disposition, wishing to learn about the NSX installation process and the configuration that makes up an NSX deployment from the ground up by doing it manually, check out the following:
Manual NSX Installation: Security Only (also known as a Micro-Segmentation installation):
Manual NSX Installation: Virtual Networking (also known as an Overlay installation):
Automated NSX Installation: For those that don’t want to follow an NSX wizard OR complete a manual install:
Where we complete an NSX virtual networking installation using PowerShell and NSX API calls alone!
Options, options. Plenty of options!
Conclusion and Wrap Up
That will do it for this post. In upcoming posts we will follow the security only and virtual networking wizards to complete our NSX installs.
-Chris