


 Last time we looked at what needs to happen should we loose an NSX Data Center primary site. We also got familiar with our NSX test lab. If you’ve not seen that post, catch up now. It’s a great read.
 ![]()
As mentioned, this post is part 2 of a multipart series. Find the other parts here:
- Part 1: Why and Getting Familiar
- Part 2: This part - Bye-bye Site A!
- Part 3: Site A Back from the Dead!
- Part 4: Making Site A Primary Again
To recap, the NSX Data Center control plane components (consisting of the NSX Controller cluster and the Universal Logical Distributed Router (UDLR) control VMs) can only exist on one site; the primary site. In the event of loss of the primary site the control VMs must be recreated at a secondary site to reinstate the NSX control plane.
Overview
- The Lab
-
TL,DR - Process Overview
- [Optional Step for Planned Failover] Shutdown Site A
- Check Site B NSX Manager Registration
- Disconnect Secondary NSX Manger from Primary
- Promote Site B NSX Manager to Primary Role
- Deploy New Controller Cluster
- Deploy New UDLR Control VMs
- Verify Configuration of the UDLRs
- Verify Dynamic Routing Configuration of UDLRs and ESGs
- Test
- Conclusion and Wrap Up
In this post we will perform a controlled failover of Site A to Site B.
Why controlled? Because it includes the additional steps of preparing for the failover. Those thrust into the situation of having to recover from an unplanned failover can simply pickup the process at the Check Site B NSX Manager Registration step below.
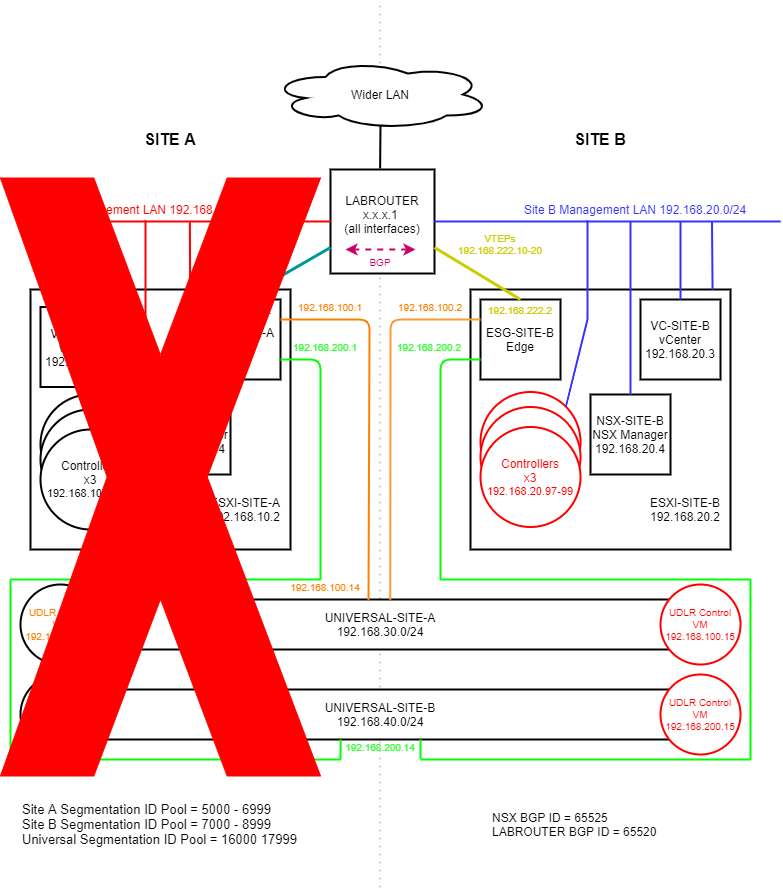
The Lab
 (Click image to zoom in)
As a refresher, here is where we are trying to get to:
- NSX Controller cluster is rebuilt on Site B
- Universal Site A UDLR control VM is rebuilt on Site B
- Universal Site B UDLR control VM is rebuilt on Site B
Additionally, Site B NSX Manager promoted to primary. The rebuilt VMs are shown in red at Site B in the above diagram.
TL,DR - Process Overview
To Lazy, Didn’t Read?
Look I get it. You are in a failure situation and need a simple overview of the steps required. You don’t need a big long article to follow. You just need simple steps. Well here you go:
- In case of a planned failover, shutdown the whole of Site A, including ESGs, UDLR control VMs, controller cluster and NSX Manager
- Check Site B NSX Manager registration
- Disconnect secondary NSX Manger from primary
- Promote Site B NSX manager to primary role
- Deploy new controller cluster
- Deploy new UDLR control VMs
- Verify configuration of the UDLRs
- Verify dynamic routing configuration of the UDLRs and ESGs
- Test
Breaking this down into chunks then:
[Optional Step for Planned Failover] Shutdown Site A
First, lets double check our failover prerequisites as discussed in here in part 1
Next, lets shutdown the whole of Site-A. That includes it’s Edge Service Gateway (ESG), the UDLR control VMs, controller cluster, NSX Manager and vCenter.
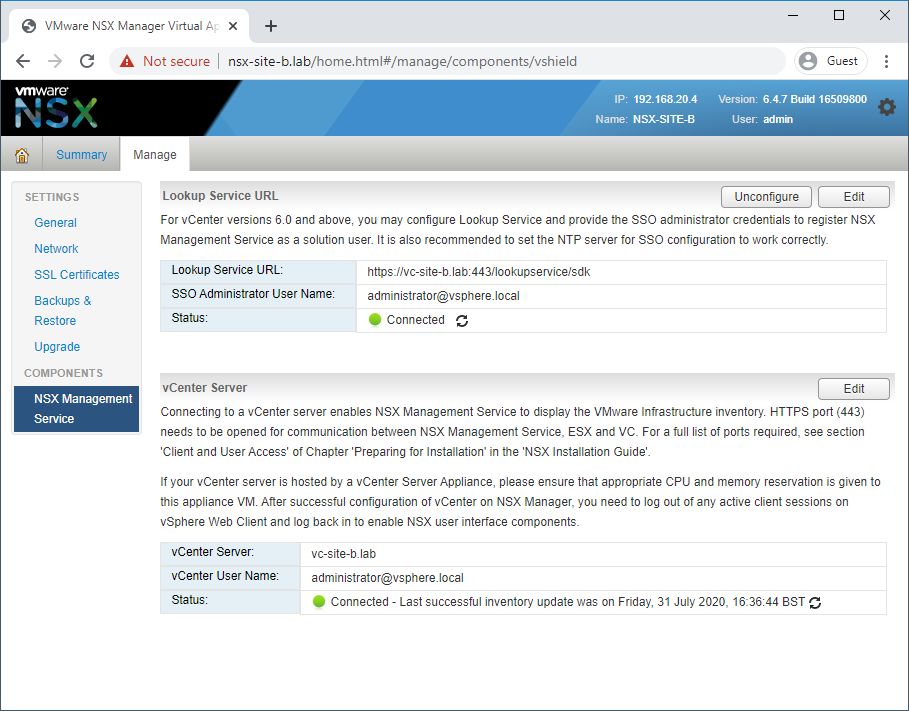
Check Site B NSX Manager Registration
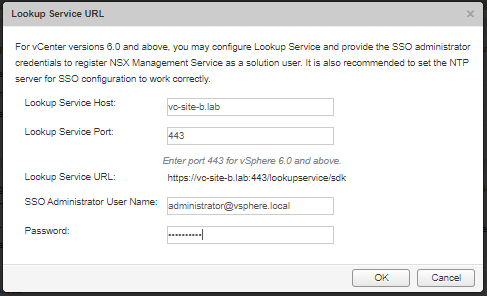
Access Site B NSX manager via web browser (lab: https://nsx-site-b.lab), login and navigate to Manage vCenter Registration.
If needed, edit (not reconfigure) Lookup Service URL to point to remaining vCenter (lab: vc-site-b.lab):
Confirm both connectivity status indicators show Connected:
Disconnect Secondary NSX Manger from Primary
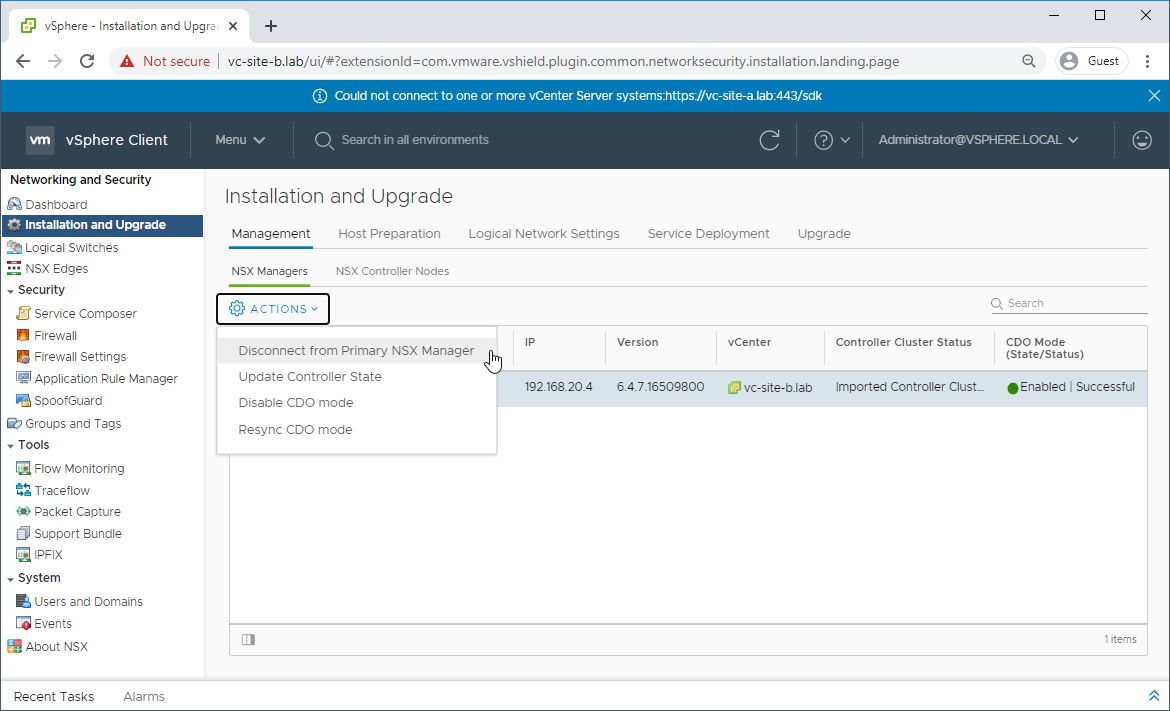
Log into vCenter using the Site B URL (lab: https://vc-site-b.lab) and navigate to Network and Security - Installation and Upgrade - Management - NSX Managers
Select the secondary NSX manager (lab: nsx-site-b.lab). Click Actions - Disconnect from the Primary NSX Manager and answer Yes to the prompt:
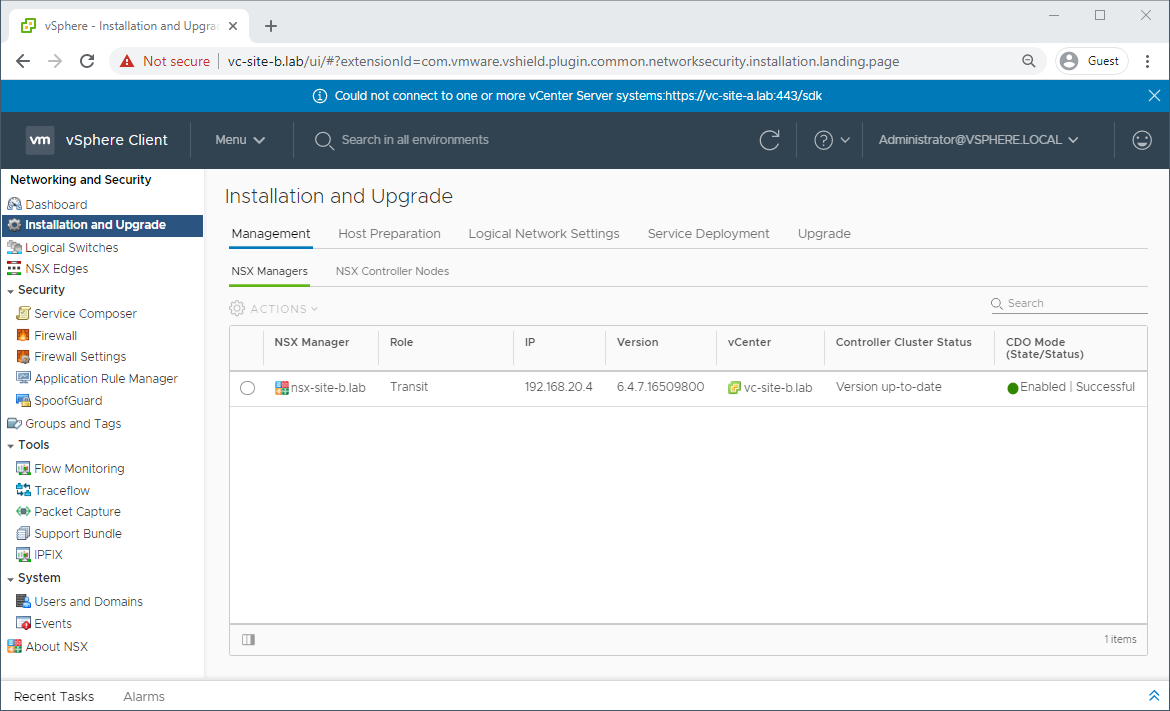
The NSX manager will now be in Transit Mode:
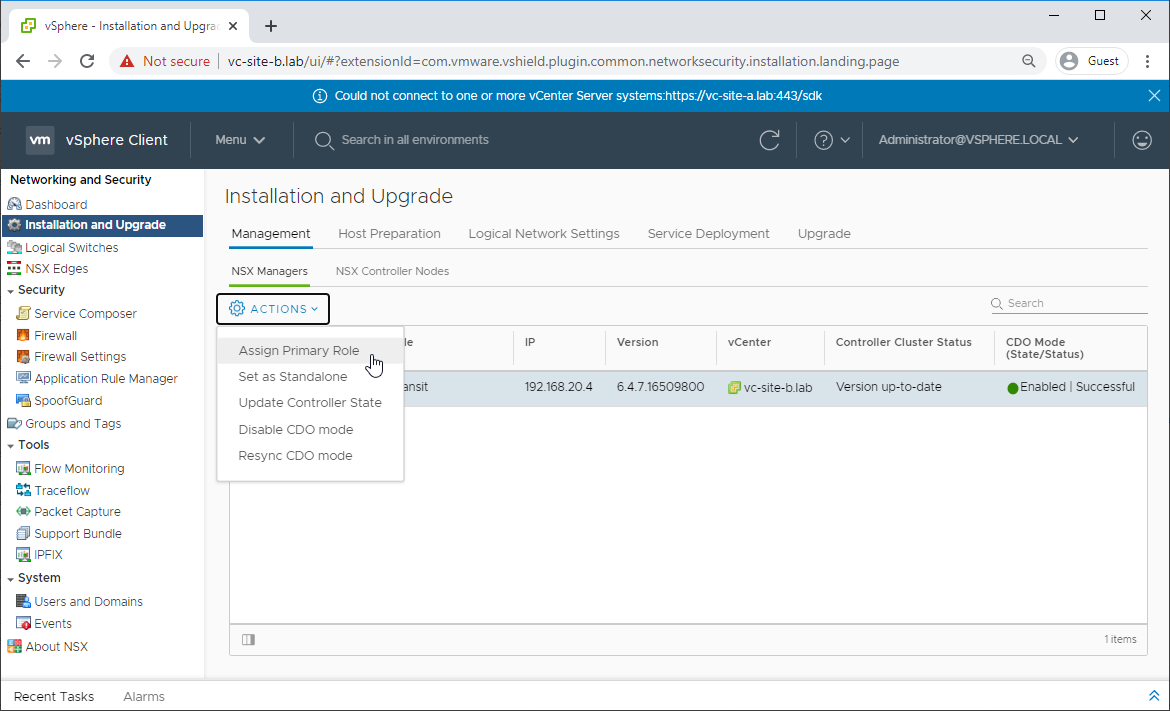
Promote Site B NSX Manager to Primary Role
Select the NSX Manager in Transit mode (lab: nsx-site-b.lab) and Click Actions - Assign Primary Role and answer Yes to the prompt:
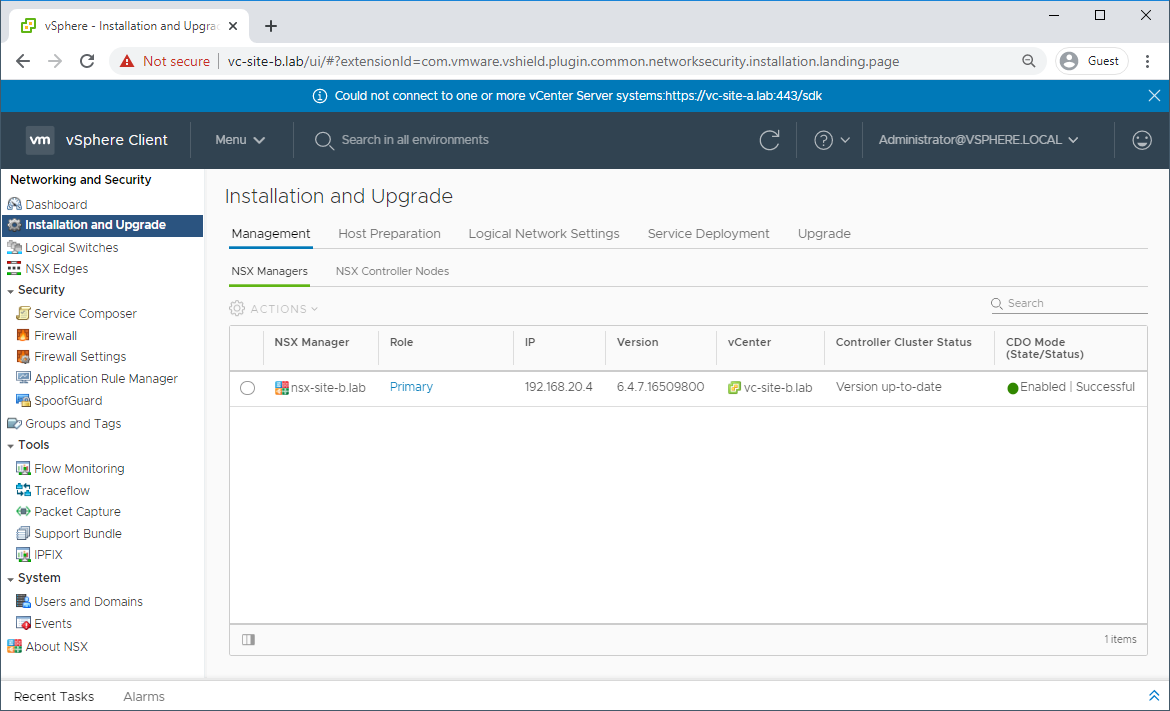
The NSX manager will now be in assigned role:
Deploy New Controller Cluster
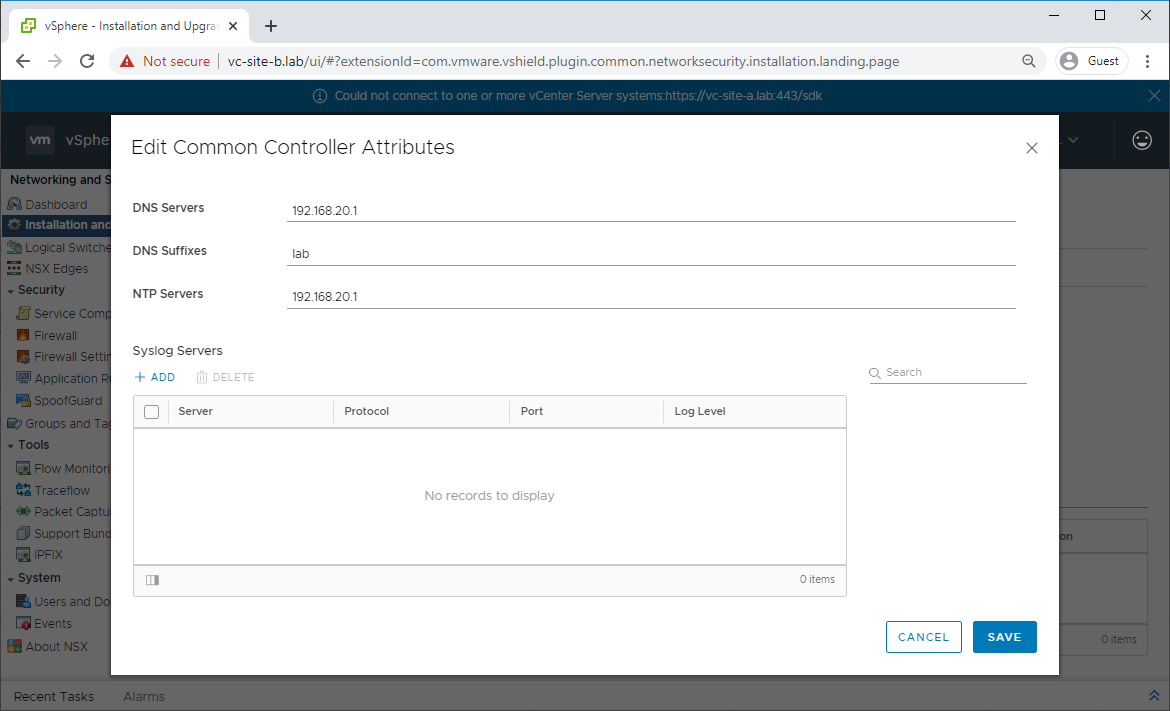
Navigate to Network and Security - Installation and Upgrade - Management - NSX Controller Nodes Click Edit and complete common controller attributes:
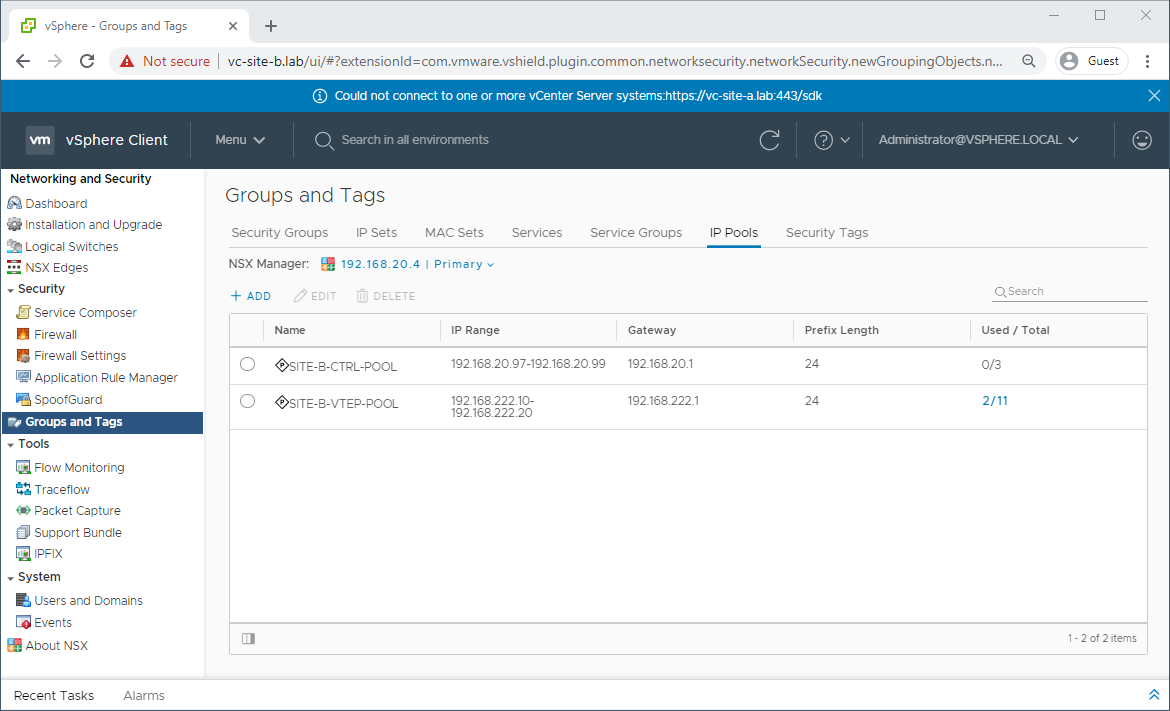
Navigate to Network and Security - Groups and Tags - IP Pools and confirm that you have a IP pool already defined for controllers on Site B:
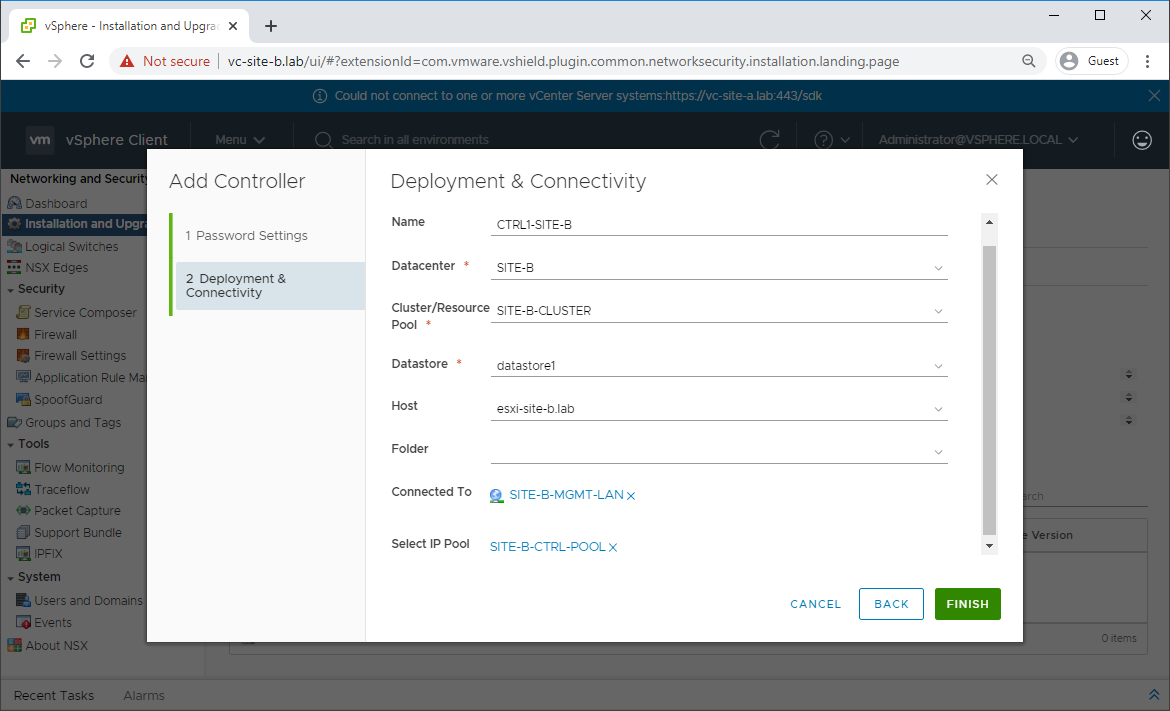
Back in Network and Security - Installation and Upgrade - Management - NSX Controller Nodes, click Add and complete the wizard to deploy the first controller:
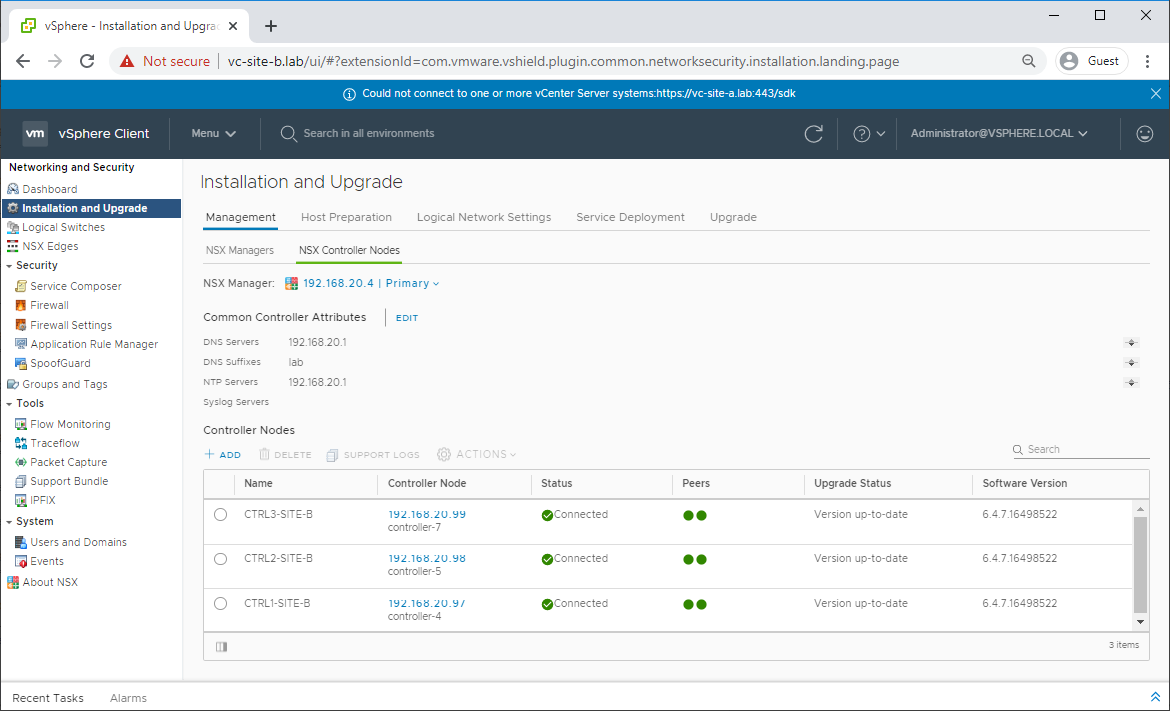
Once the deployment of the first controller is complete and the controller shows as Connected, repeat the process twice more to deploy two more controllers.
Once all three controllers have been deployed, confirm that they have correctly peered:
Deploy New UDLR Control VMs
Navigate to Network and Security - NSX Edges and select one of the previously deployed UDLRs. From there, select Configure - Appliance Settings - Add Edge Appliance VM and complete the wizard:
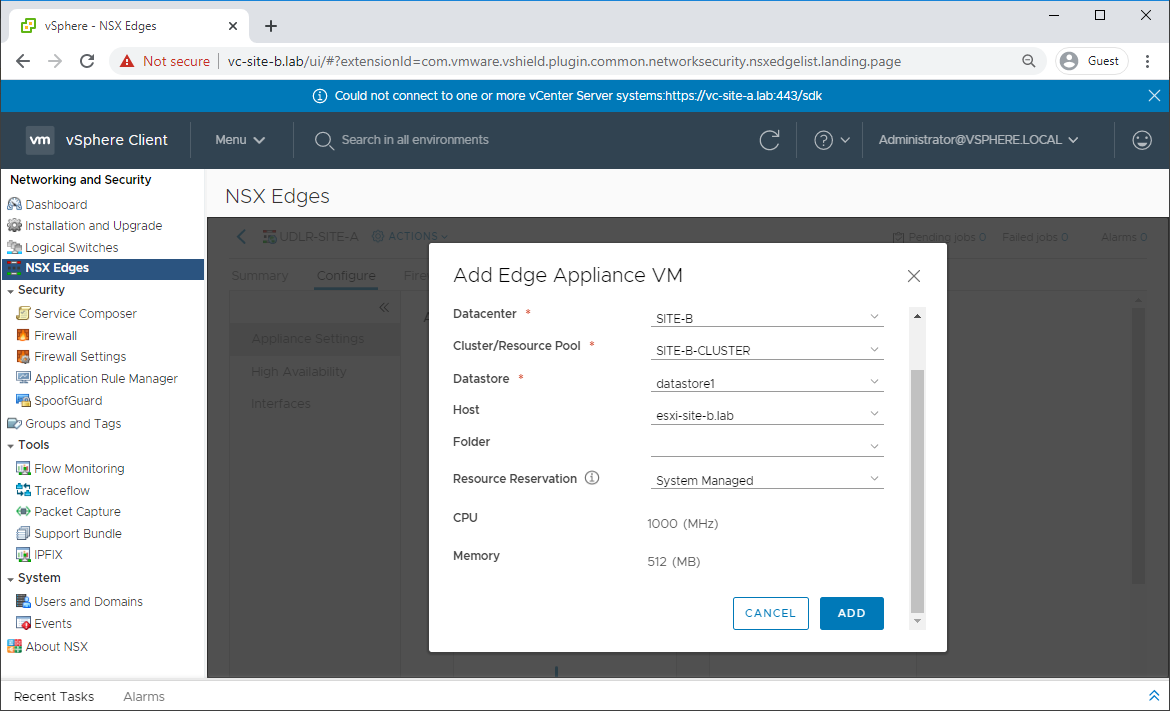
Once deployment completes, repeat for remining UDLRs in the environment.
Verify Configuration of the UDLRs
Navigate to Network and Security - NSX Edges and select one of the UDLRs. Select Configure - Interfaces and confirm that connectivity is as expected:
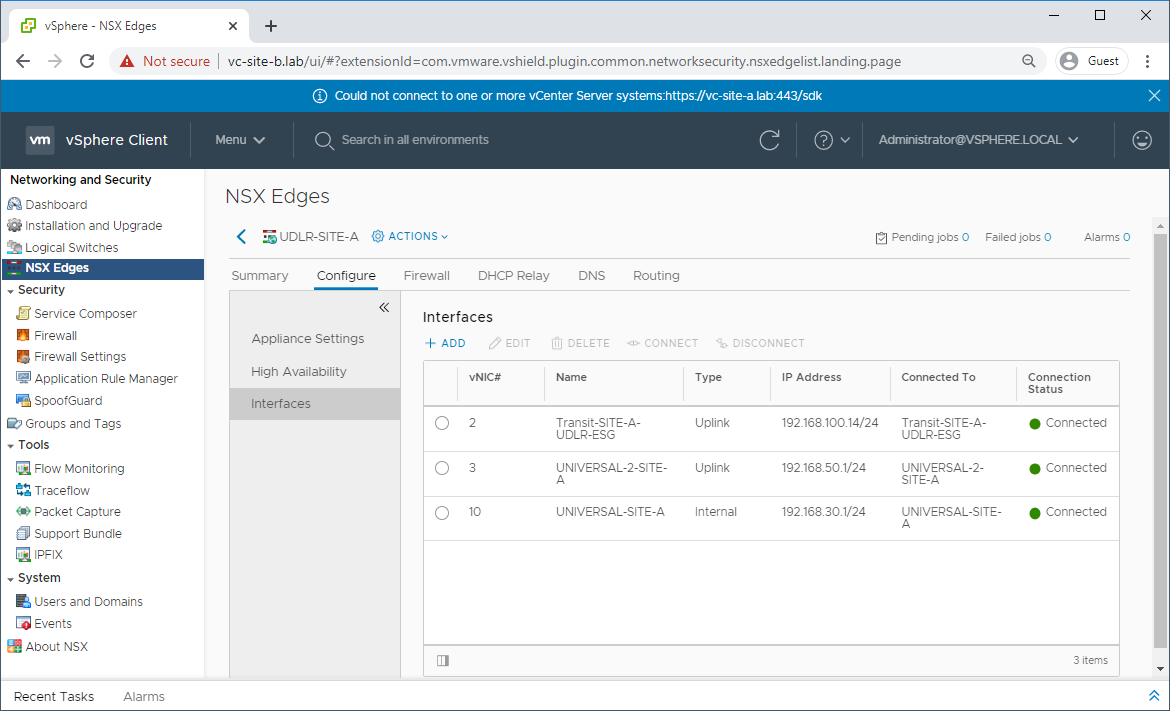
Confirm other settings such as firewall, DHCP Relay (if configured), etc.
Repeat verification checks on remining UDLRs in the environment.
Verify Dynamic Routing Configuration of UDLRs and ESGs
In my test lab, I’m using BGP for my dynamic routing. Your environment may be using OSPF so modify the following commands to fit your circumstance.
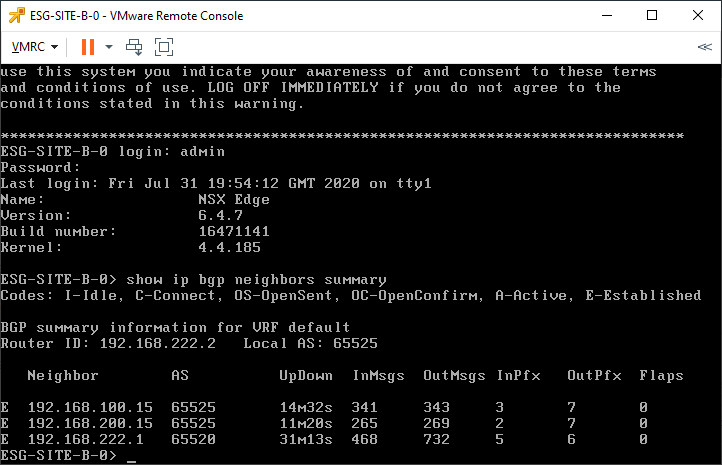
Open a console to the Edge VM and issue the command:
show ip bgp neighbours summaryConfirm that the Edge appliance shows and “E” (Established) status with all its configured neighbouring UDLRs (lab UDLRs: 192.168.100.15 and 192.168.200.15) and the upstream router (lab LABROUTER: 192.168.222.1):
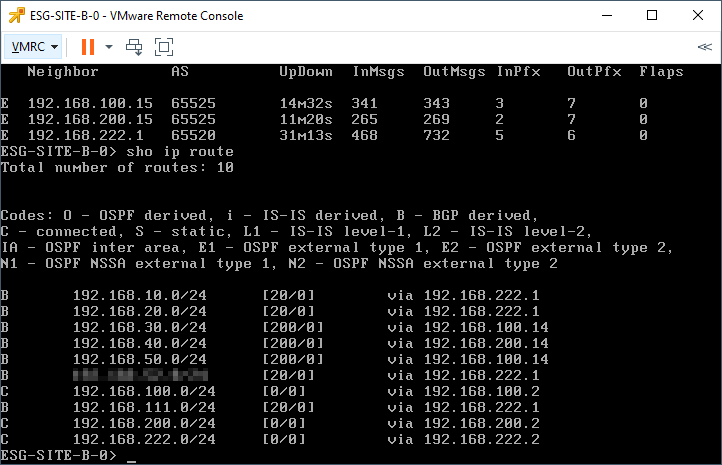
Next, issue the command:
show ip routeConfirm that the edge is receiving routes from both the UDLRs and the upstream router:
Test
Finally, run some trace routes to confirm that traffic is following the correct path into the environment:
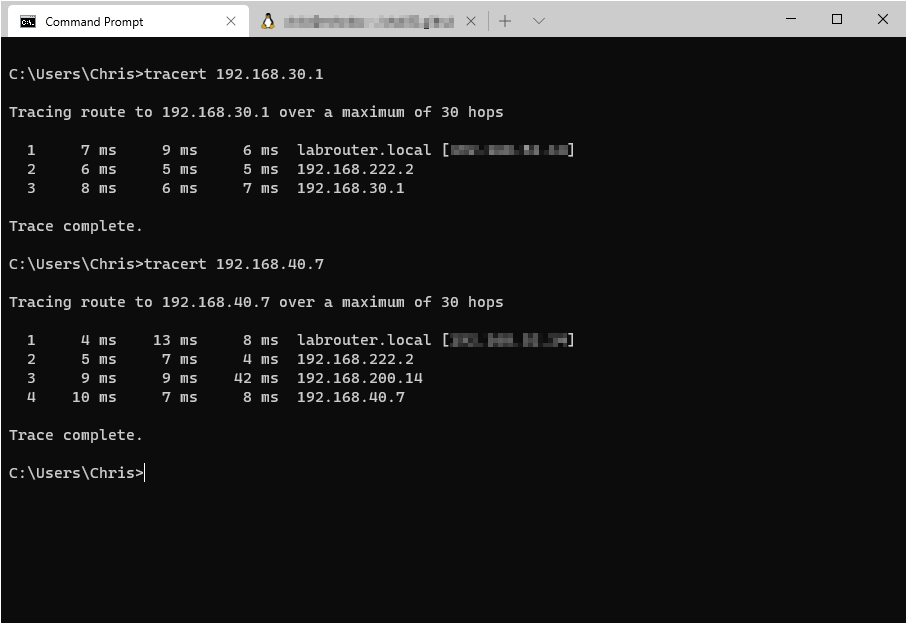
and out of the environment:

Conclusion and Wrap Up
In this post we recovered from an outage at our primary NSX for Data Center site, Site A. With the steps detailed in this post, we were able to regain our NSX control plane and prove correct traffic ingress/egress to and from our environment.
This was part 2 of a multipart series. Find the other parts here:
- Part 1: Why and Getting Familiar
- Part 2: This part - Bye-bye Site A!
- Part 3: Site A Back from the Dead!
- Part 4: Making Site A Primary Again
Next time in part 3, we’ll look at what happens when Site A returns from the dead. ![]()
Stay tuned..! ![]()
-Chris