 Last time we too a closer look at CPUIDs and EAX values to help us workaround installing ESXi 7.0 into a VMware virtual machine (VM) hosted on physical hardware that contains an unsupported CPU.
If you’ve not seen that post, catch up now. It’s a great read.
As mentioned, this post is part 3 of a multipart series. Find the other parts here:
- Part 1: Be gone CPU_SUPPORT Error!
- Part 2: CPUID and EAX Between Friends
- Part 3: This part (Lets Get Virtual to Physical)
To recap, the ESXi installer uses the CPUID instruction to identify the CPU(s) installed in the system. From the value obtained the user is told that their processor is either:
- Unsupported. At which point the installer quits. No ESXi 7.0 for you!
- Will be unsupported in a later ESXi version. The installer will allow install continuation.
- Nothing. The installer accepts that a valid CPU is present and silently continues the installation.
Overview
USB is Your Friend
We already know that we can install ESXi 7.0 into a modified VM. Next step is to pass a USB stick through to the VM and install ESXi onto that. We can then take that same USB stick and boot a physical server from it.
As we saw from part 1, once ESXi 7.0 is installed, it appears to boot perfectly fine on Westmere processors without a CPU mask being required…
That’s the plan anyway. Let’s get cracking.
Create a VM for ESXi Installation on USB
Create an ESXi VM in VMware Workstation the following specifications:
- ESXi 6.7 Compatibility
- Guest O/S VMware ESXi
- 2x CPUs (1 core per processor) minimum
- 4GB Memory minimum
- Bridged Networking (although networking not strictly necessary)
- Para-virtualised SCSI Controller
- SCSI disk of 1GB (We will be deleting this anyway)
Don’t forget to mount your ESXi 7 installer iso too!
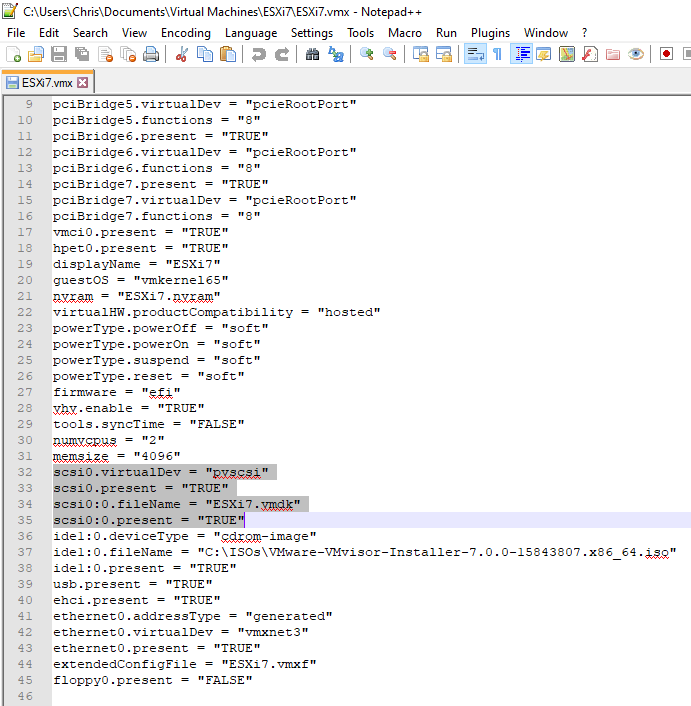
Close VMware Workstation and open the vmx file in a text editor. I use Notepad++. Find and delete all scsi entries:
Paste in the following CPU mask:
cpuid.80000001.edx = "---- ---- ---H ---- ---- ---- ---- ----"
cpuid.1.eax = "0000 0000 0000 0011 0000 0110 1100 0011"
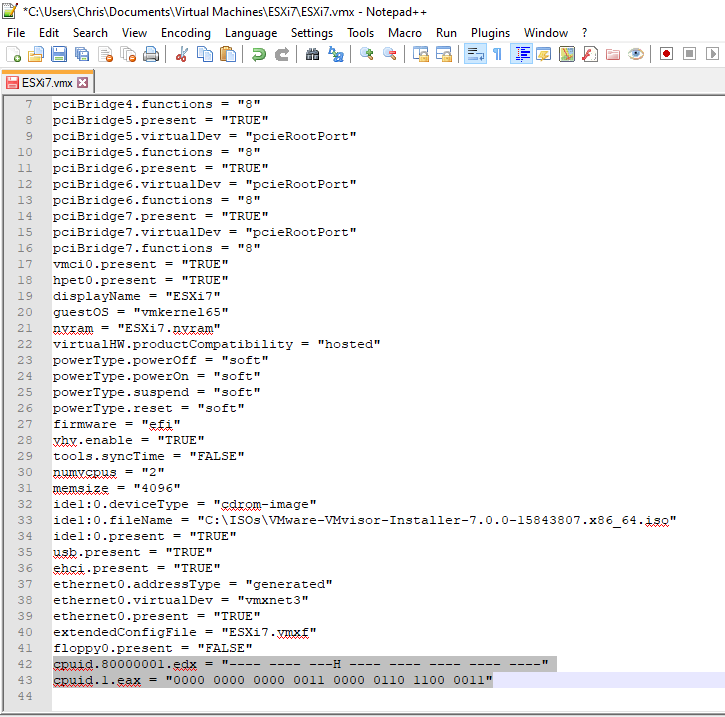
Save and close the vmx file and open VMware Workstation. Next, boot the VM. Whilst the VM is booting, connect the USB stick to the VM:

Once connected proceed to install ESXi onto the USB stick:
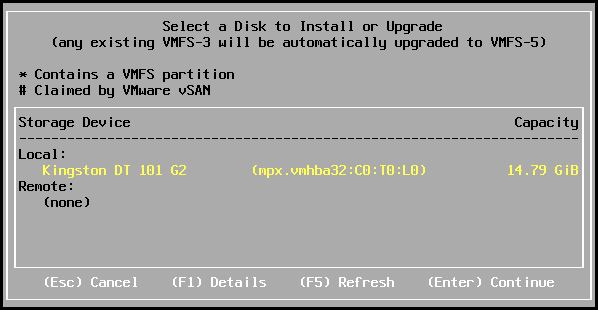
Once done, power down the VM and remove the USB stick. Ready to test!
Sample ESXi 7.0 vmx File
Should you have issues with creating the required VM, you can download a copy of my ESXi7 here: ESXi7.zip
Import into VMware Workstation and install ESXi onto your USB as detailed above.
ESXi 7.0 on Unsupported Hardware
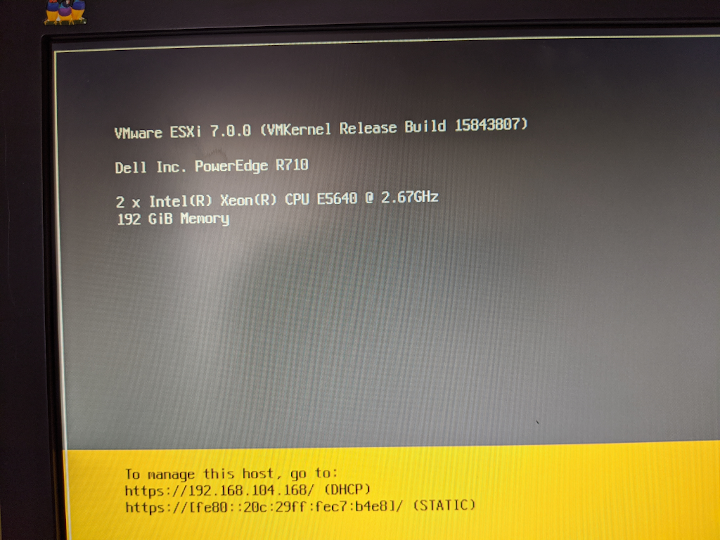
Follows is my testing of ESXi 7.0 on my Dell R710 fitted with westermere-ep Xeon CPUs. Excuse the picture quality! (I didn’t have enough time to get Java working for the iDRAC)
Insert the USB into the server, F11 for one-off boot menu, select the Usb stick and here we go…
Bingo! The money shot!! Boom! ![]()
Right, let’s see what works… First let’s check NICs:
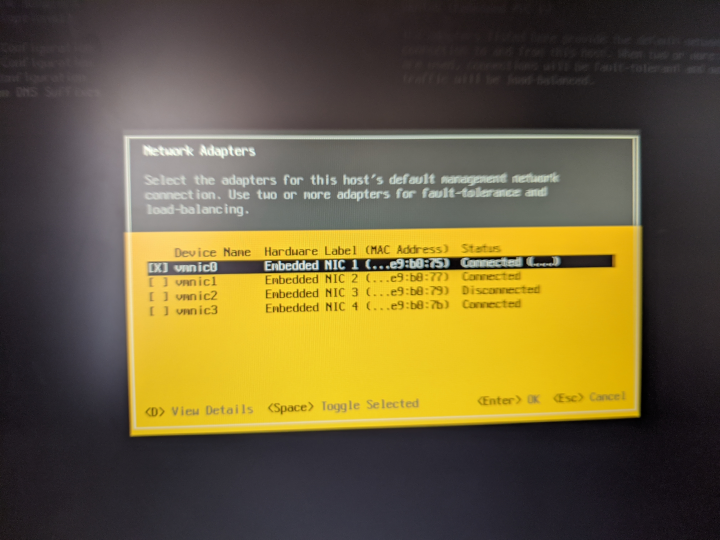
Yep we have network connectivity. All four built in Broadcom NICs detected. Not often I say this, but yay for Broadcom…
OK. Let’s check for data stores:
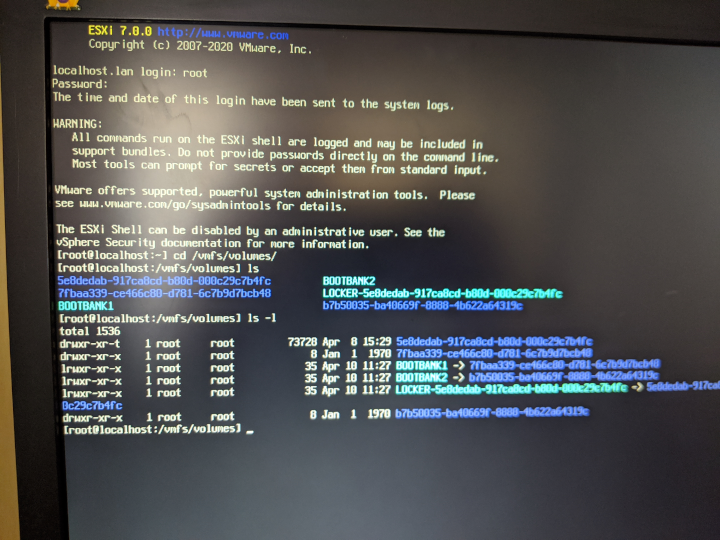
Hmm that’s strange. In previous ESXi versions we don’t usually see the bootbanks under /vmfs/volumes No matter. What are instantly distinguishable by their absence are the data stores.
As I have no need for super-duper speedy storage in my R710, I’m just using the built in PERC H700 array controller which presents two RAID5 backed drives to ESXi. Hmm, so the H700 array controller uses the megaraid_sas driver. Cross checking the excellent VMware ESXi Patch Tracker site yep, no megaraid_sas driver in ESXi 7… boo! ![]()
But I digress. That’s a job for another time and post.
The Smoking Gun?
After a reader posted a link to Allowing Unsupported CPU’s on ESXI 6.7 by Daniel Lumby, I started having a poke around the ESXi 7.0 install iso and looking in \UPGRADE\PRECHECK.PY file, I spotted the following:
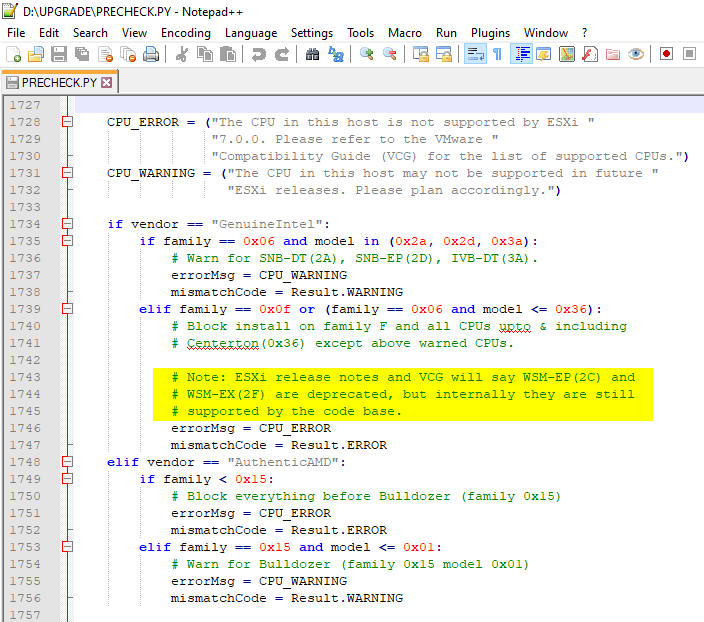
Note: ESXi release notes and VCG will say WSM-EP(2C) and WSM-EX(2F) are deprecated, but internally they are still supported by the code base.
VGC = VMware Compatibility Guide
WSM-EP(2C) = Westmere-EP CPUs
WSM-EX(2F) = Westmere-EX CPUs
![]()
![]()
![]()
![]() That will be why servers with Westmere CPUs boot and run fine then!!!
That will be why servers with Westmere CPUs boot and run fine then!!!
Conclusion and Wrap Up
Our task here was to see if could use what we learnt in parts 1 and 2 of this post series to create a modified VM and then use that VM to install ESXi 7.0 onto a USB stick
We then used that USB stick to boot a physical server. The server booted and was seen on the network without issue. Given a better choice of storage controller, we could even have mounted our datastores and potentially fired up a test VM for the LOLs of it.
We even found courtesy of comments left by VMware themselves that Westmere CPUs are supported by the ESXi code base.
Will There be a Part 4?
Possibly. Given the current lock-down in the UK, my “production” Dell R710 Is the only server I have access to whilst working from home. Given that my R710 hosts my pfSense VM and further testing requires shutting down all internet access from home, getting downtime on it is a little tricky at the moment. That said, I’ve a couple of ideas for incorporating a megaraid_sas driver into ESXi 7.0.
We also need to look at how to upgrade our USB stick when the first ESXi 7.0 patch drops…
Stay safe all.
-Chris


