 Back in August 2020, we took a look at VMware vSphere VM recovery on a budget. The main ‘thrust’ of the series was to look at cross site replication of VMware vSphere VMs without breaking the bank.
During the series we looked at deploying and leveraging vSphere Replication.
If you missed it, take a look now, it’s a great series if I do say so myself!
In this follow up series, we will look at achieving the same level of resiliency, however this time we will use Nutanix Protection Domains.
Overview
What is a Nutanix Protection Domain?
A protection domain is a group of VMs or volume groups that you can either snapshot locally or replicate to one or more clusters when you have a remote site configured. Prism Element uses protection domains when replicating between remote sites. Essentially a Nutanix Protection domain can achieve the same cross site VM resiliency that vSphere Replication can.
Requirements
Let’s look at the software requirements required to deploy VMware vSphere Replication and Nutanix Protection Domains:
VMware vSphere Replication:
- 2 x ESXi Clusters - Minimum of 1 ESXi host per cluster per site
- vCenter Server - Minimum of 1 vCenter Server managing both sites
- 2 x vSphere Recovery Appliances - Minimum of 1 appliance per site
Nutanix Protection Domains:
- 2 x Nutanix Clusters - Minimum of 1 node (can be AHV or ESXi) per cluster per site
And that’s it. Nutanix Prism Central (analogous to VMware vCenter) is NOT required. Specialist single use replication / recovery appliances are also not required.
All of the required functionality is built in to Prism Element running on the CVM VMs.
Let’s take a look at a two site Nutanix Protection Domain deployment:
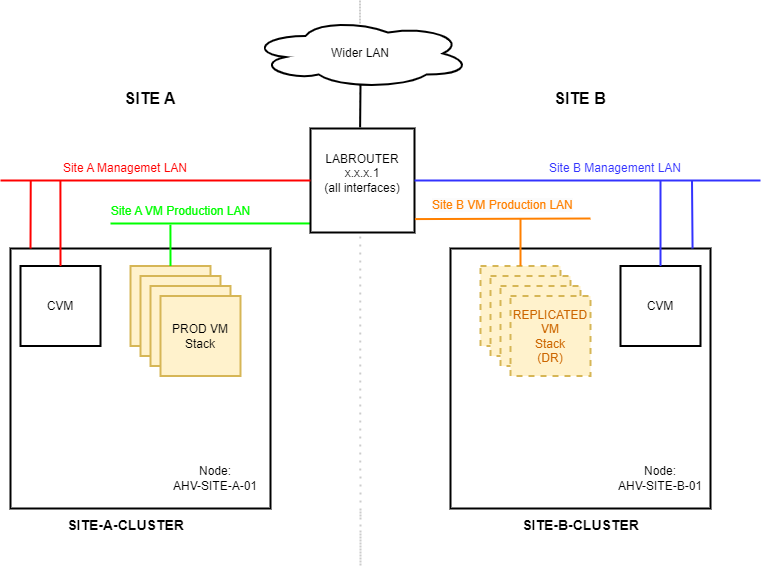
In the above diagram we have two sites (Site A and Site B) both running a single node AHV clusters. Site A is running our protected production VM Stack. Site B contains our replicated VMs.
The Site A replica VMs housed in Site B are offline until needed, for example in the event of a disaster. Other production VMs can also run at Site B, however for clarity I have not shown them in the above diagram.
Local Protection Domains
In the same way that vSphere replication can be configured to locally protect VM(s); Nutanix Protection Domains can also be configured to locally protect VM(s), keeping snapshots local to the cluster currently running the VM(s).
Let’s look at configuring local protection domains.
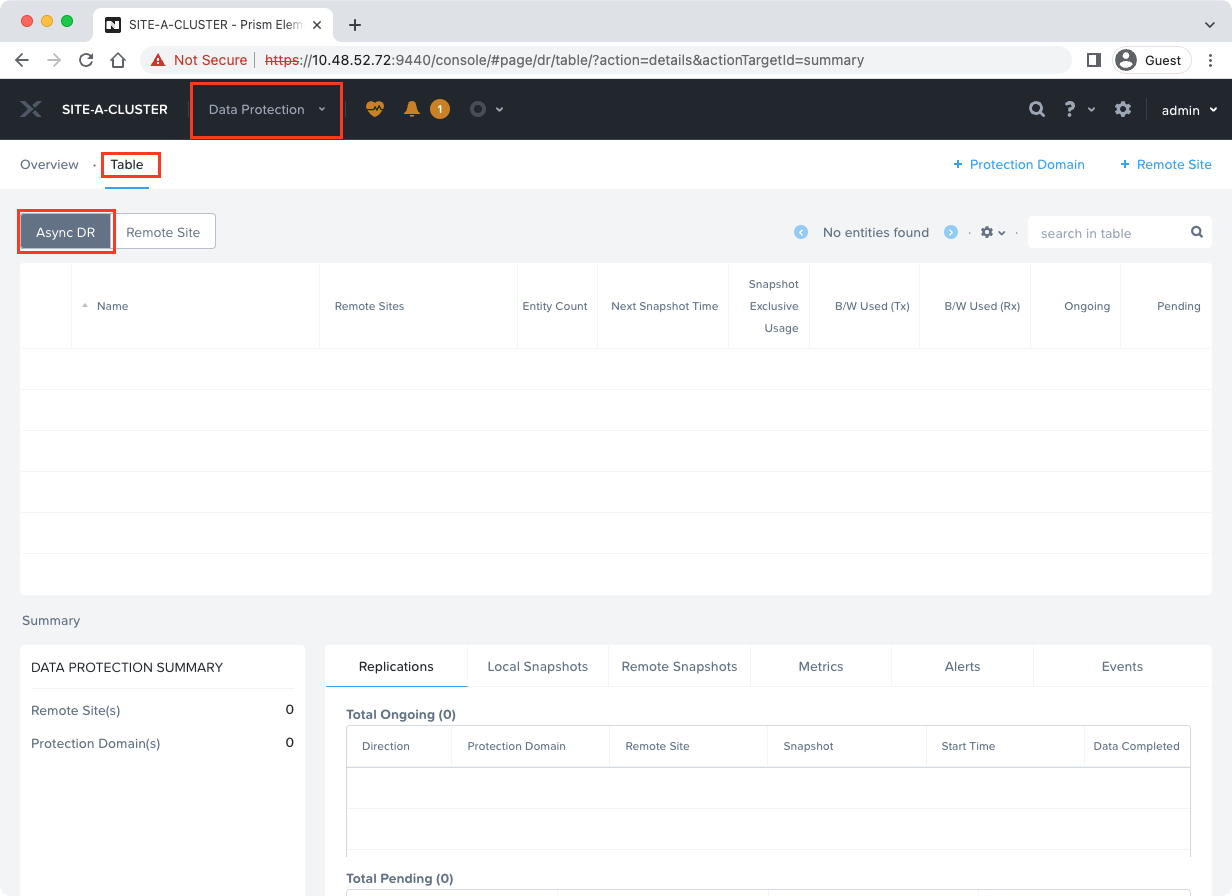
After logging into Prism Element running on the cluster with the VMs to be protected, use the drop down to select the Data Protection dashboard. From there, select Table and Async DR:
To create a protection domain, select + Protection Domain (top right) and Async DR. The protection domain wizard will launch:
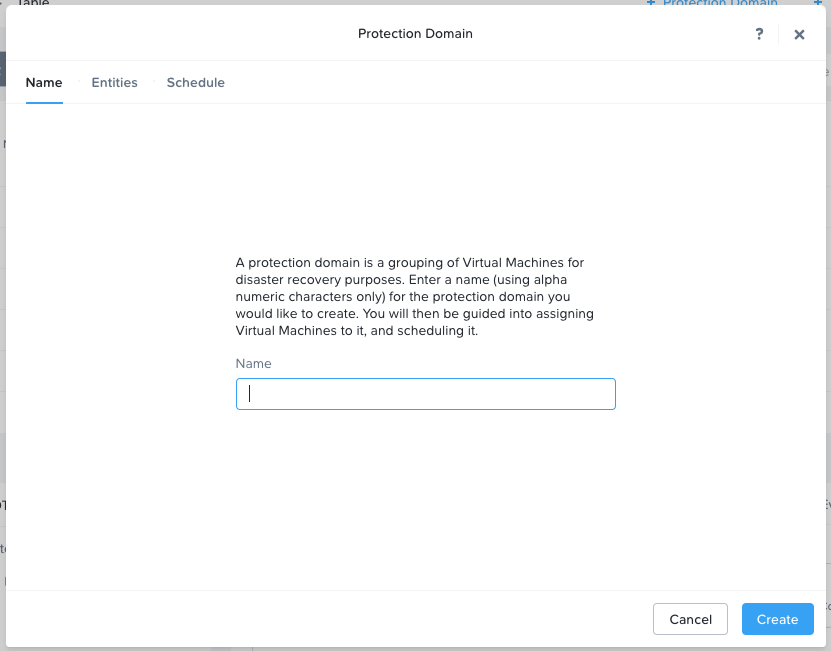
I’ll name my protection domain SITE-A-LOCAL-PD (PD for Protection Domain). Click Create to continue.
In the Entities screen, I’ll select my VM to protect, in my case my Windows 10 VM, I’ll create a new Consistency Group called SITE-A-LOCAL-CG (Consistency Group) and finally I’ll select Protect Selected Entities:
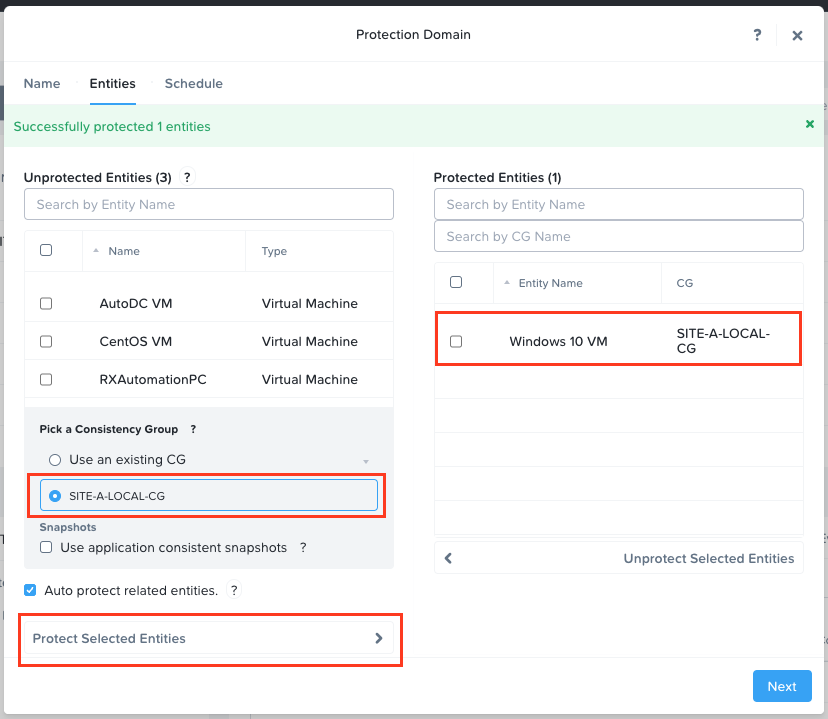
After clicking Next, select New Schedule.
I’ll create a snapshot every hour and hold onto the last 2 snapshots:
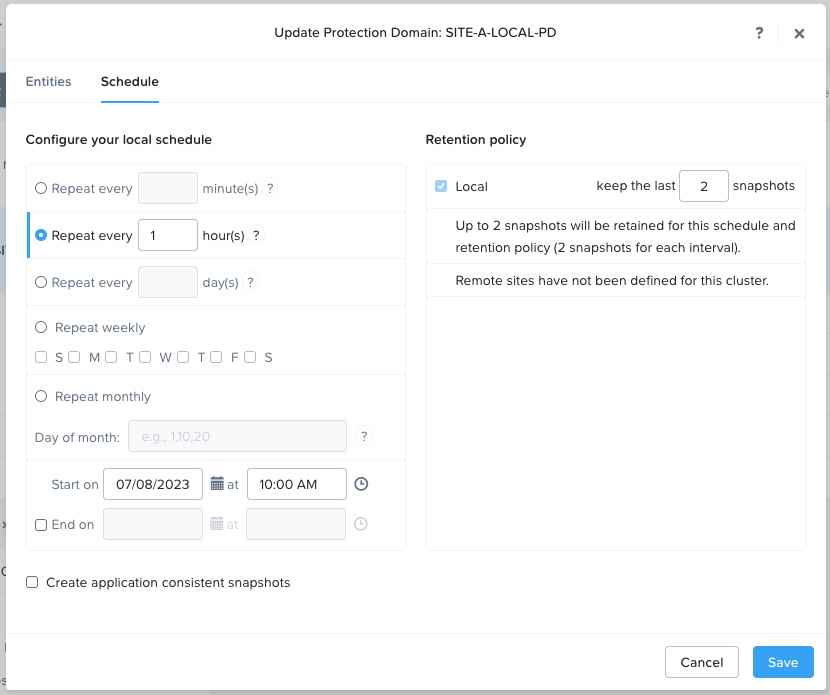
Finally I’ll select Create Schedule and Close to complete the protection domain creation.
Back at the Data Protection > Async DR > Table upon selecting the SITE-A-LOCAL-PD protection domain and then selecting the Local Snapshots table, I can see that a snapshot has already been created and is available for restore for the next two hours:

My VM is now locally protected.
Configuring Remote Sites for Protection Domains
Having a local protection domain is fine and has legitimate uses, however what happens if I loose my local site?
How about placing the protection domain snapshots on a remote site for recovery either at the remote site or back on our local site, once the local site is running again?
First off, let’s connect a remote site. Back in our Data Protection dashboard, let’s select Remote Site:
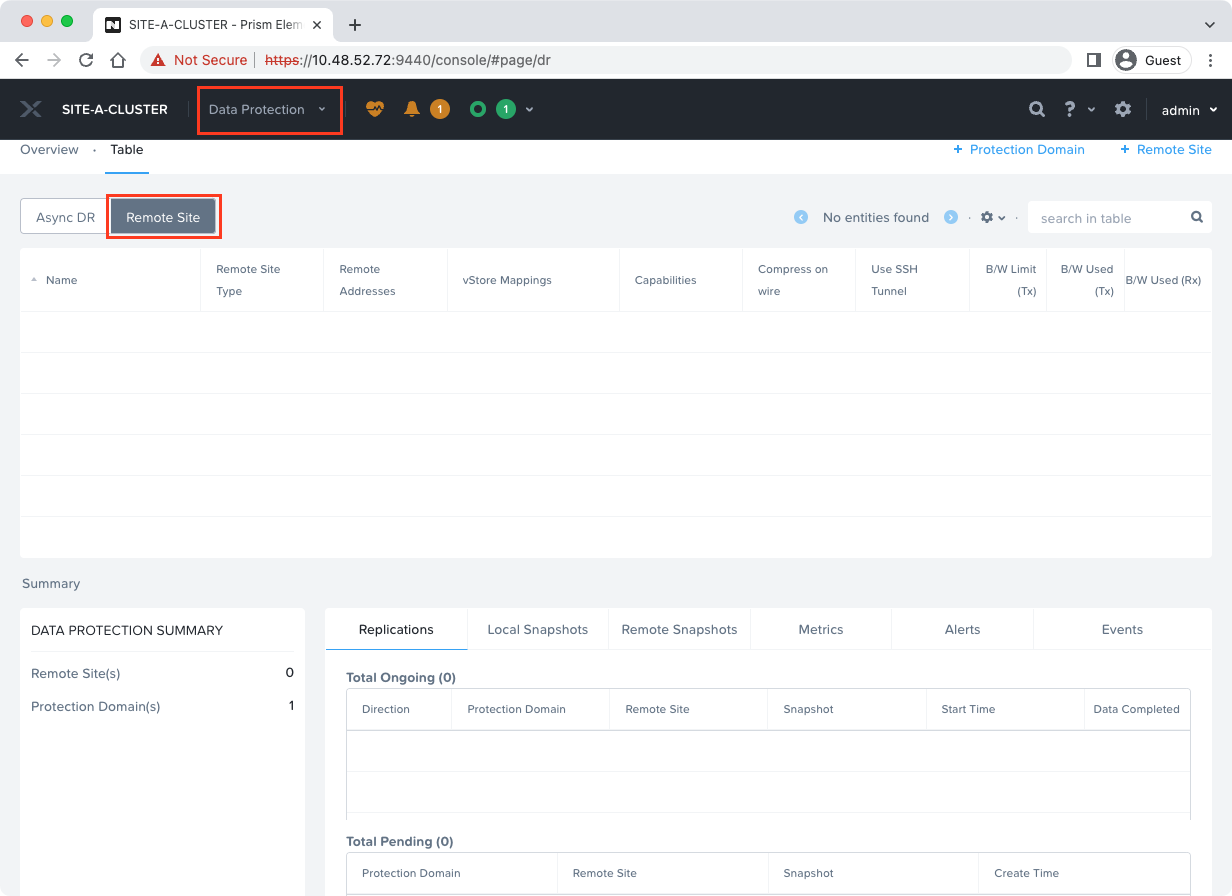
Select +Remote Site (top right) and Physical Cluster.
I’ll name my remote site cluster SITE-B-CLUSTER. As we are looking to use the remote site for disaster recovery, select Disaster Recovery
The Cluster Virtual IP of SITE-B-CLUSTER can be found by browsing to SITE-B-CLUSTER’s Prism Element as discussed here.
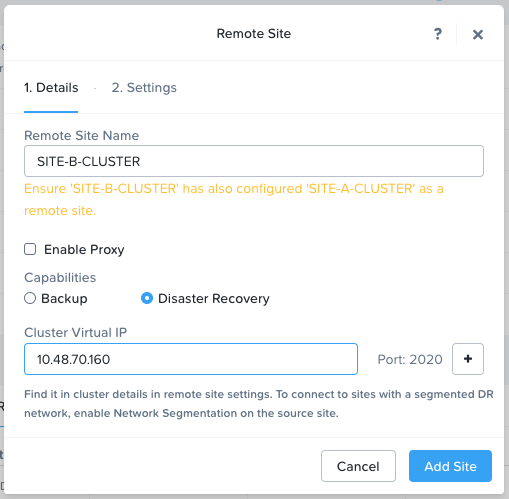
Click Add Site.
Optionally, I’ll configure my Network Mappings, that is I’ll map my Site A VM primary network to my Site B VM primary network. Both my Site A and Site B VM production networks are named “Primary”.
With this configured, data protection will be able to connect our Site A recovered VM(s) to the correctly mapped network at Site B:
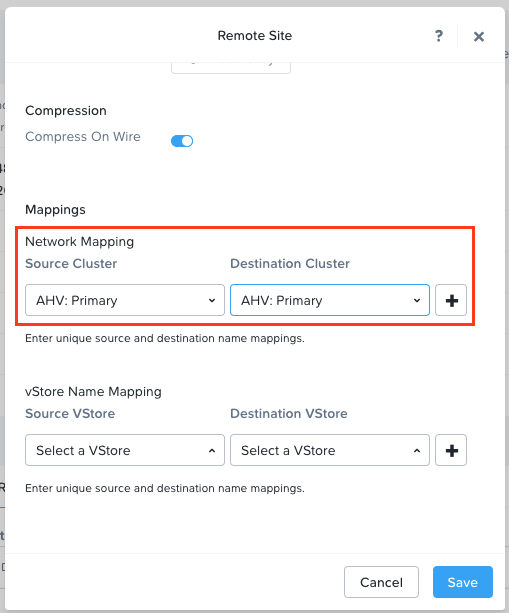
Hit Save to complete the wizard.
After logging onto Prism Element at Site B, add the reciprocal remote site (Site A) along with the network mappings:
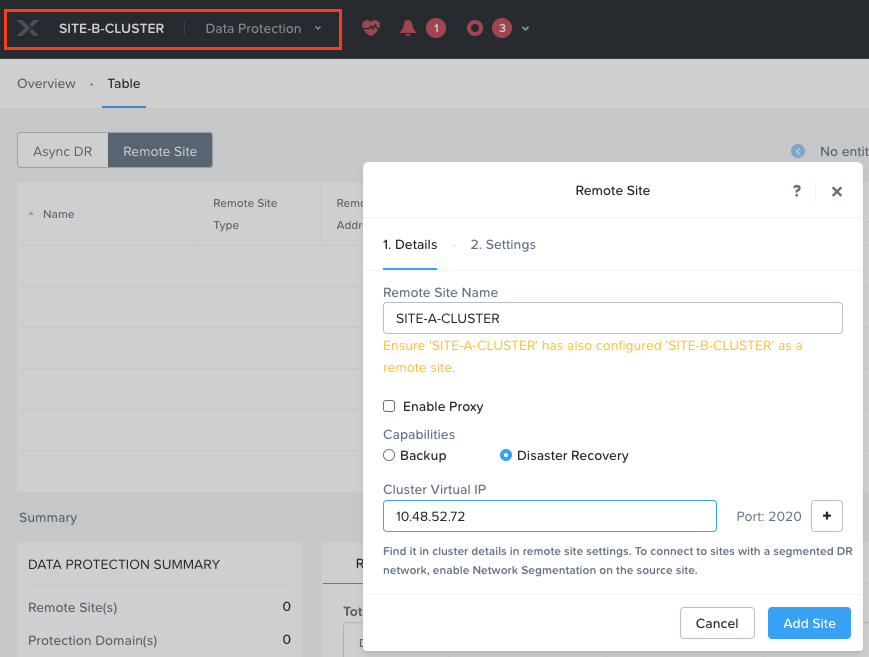
Creating a Site to Site Protection Domain
Unsurprisingly this is a “rinse and repeat” of the Local protection domain covered earlier. The only difference is the destination is SITE-B-CLUSTER on Site B.
I’ll call this protection domain Site-A-to-Site-B-PD (Protection Domain):
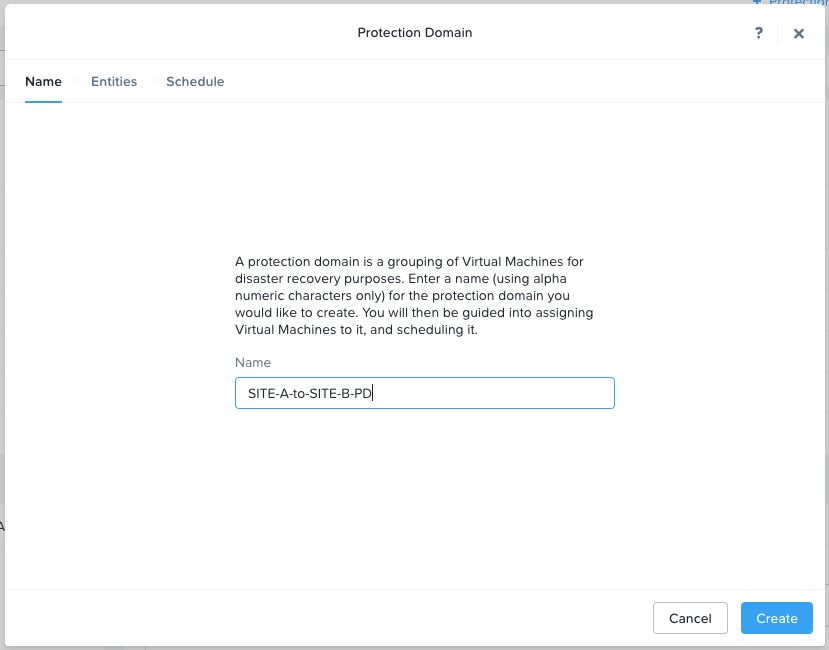
Again, I’ll create a consistency group for the protection domain and add the VM(s) I wish to protect:
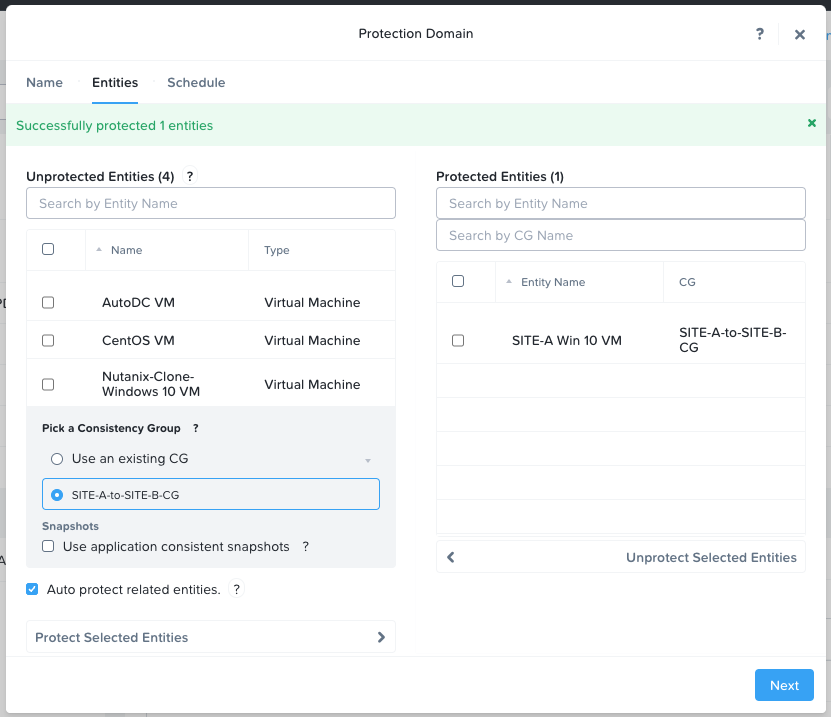
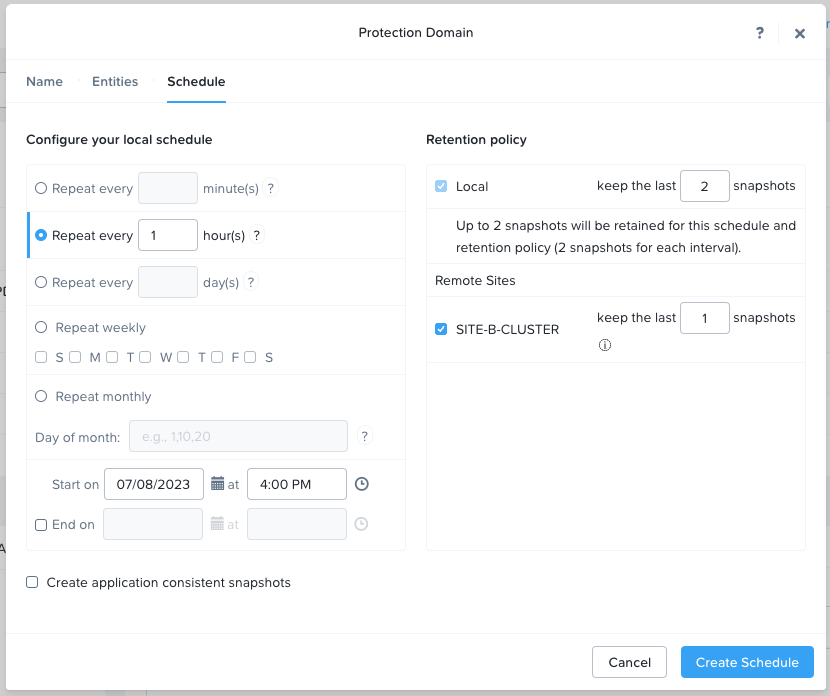
Finally, I’ll configure the protection domain to keep two hourly snapshots locally an replicate one hourly snapshot to SITE-B-CLUSTER on my remote site:
And that’s it!
Conclusion and Wrap Up
In this post we briefly looked at Nutanix Protection Domains in comparison to VMware vSphere Replication.
From there we found that we need no additional software, management or replication appliances in order to enable Nutanix Protection Domains.
Finally we configured both local and remote protection domains to ensure that our mission critical VMs were protected from disaster.
Next time we’ll get into a disaster and recover from it. Spoiler alert: Something like this.
-Chris


