


 Last time we recovered from the loss of our NSX Data Center primary site. If you’ve not seen that post, catch up now. It’s a great read.
 ![]()
As mentioned, this post is part 4 of a multipart series. Find the other parts here:
- Part 1: Why and Getting Familiar
- Part 2: Bye-bye Site A!
- Part 3: Site A Back from the Dead!
- Part 4: This Part - Making Site A Primary Again
To recap, the NSX Data Center control plane components (consisting of the NSX Controller cluster and the Universal Logical Distributed Router (UDLR) control VMs) can only exist on one site; the primary site. In the event of loss of the primary site the control VMs must be recreated at a secondary site to reinstate the NSX control plane. When we lost the primary site, we recreated them at secondary site to reinstate the NSX control plane. In this post we will promote Site A back to being our primary site.
Overview
- The Lab
-
TL,DR - Process Overview
- Remove Primary Role and Assign to Site A NSX Manager
- Deploy Site A Controller Cluster
- Deploy Primary Site UDLR Control VMs
- Delete Site B Controller Cluster
- Assign Secondary Role to Site B NSX Manager
- Confirm Site A UDLR Controller VM Clean Up
- Verify Configuration of the UDLRs
- Verify Dynamic Routing Configuration of UDLRs and ESGs
- Test
- Conclusion and Wrap Up
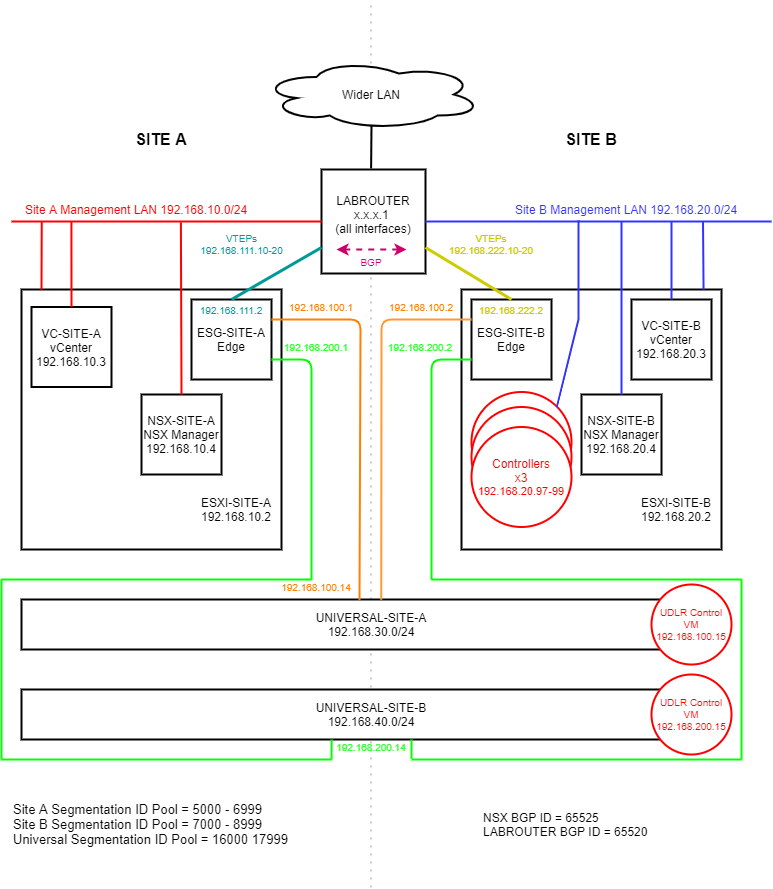
The Lab
 (Click image to zoom in)
As a refresher, here is where we are:
- NSX Controller cluster has been rebuilt on Site B
- Universal Site A UDLR control VM has been rebuilt on Site B
- Universal Site B UDLR control VM has been rebuilt on Site B
Additionally, Site B NSX Manager is now our primary manager.
We need to make Site A our primary site again.
TL,DR - Process Overview
To Lazy, Didn’t Read?
Yep, still got you covered:
- Remove Primary Role and Assign to Site A NSX Manager
- Deploy Site A controller cluster
- Deploy Site A UDLR control VMs
- Delete Site B controller cluster
- Assign Secondary role to Site B NSX Manager
- Confirm Site A UDLR controller VM clean up
- Verify configuration of the UDLRs
- Verify dynamic routing configuration of the UDLRs and ESGs
- Test
Remove Primary Role and Assign to Site A NSX Manager
Log onto Site A vCenter (lab: https://vc-site-a.lab/), navigate to Network and Security - Installation and Upgrade - Management - NSX Managers, select primary NSX Manager, click Actions - Remove Primary Role:
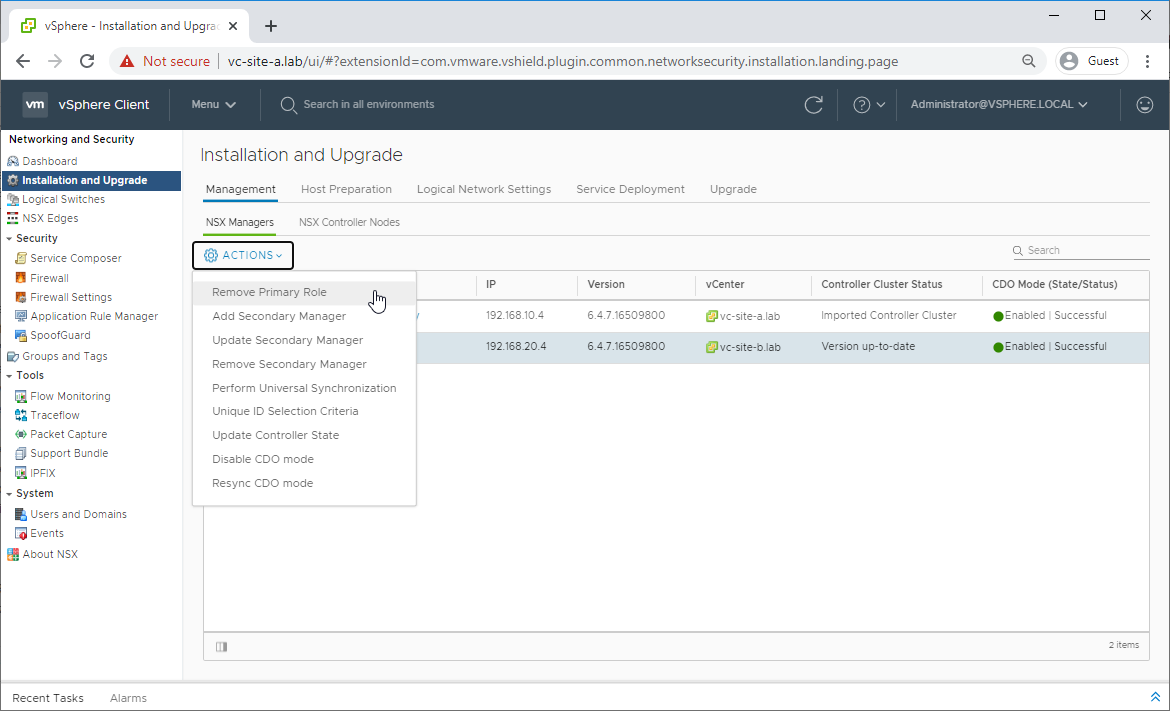
Answer Yes to continue.
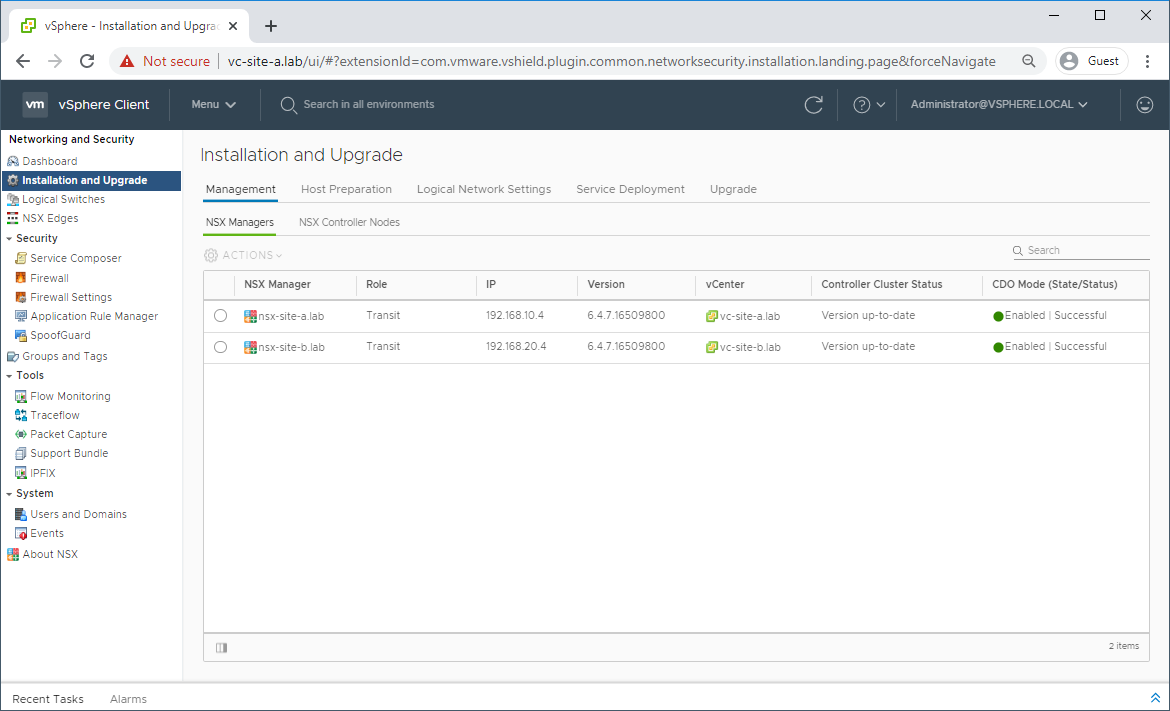
Once complete, both NSX Managers will be placed into transit mode:
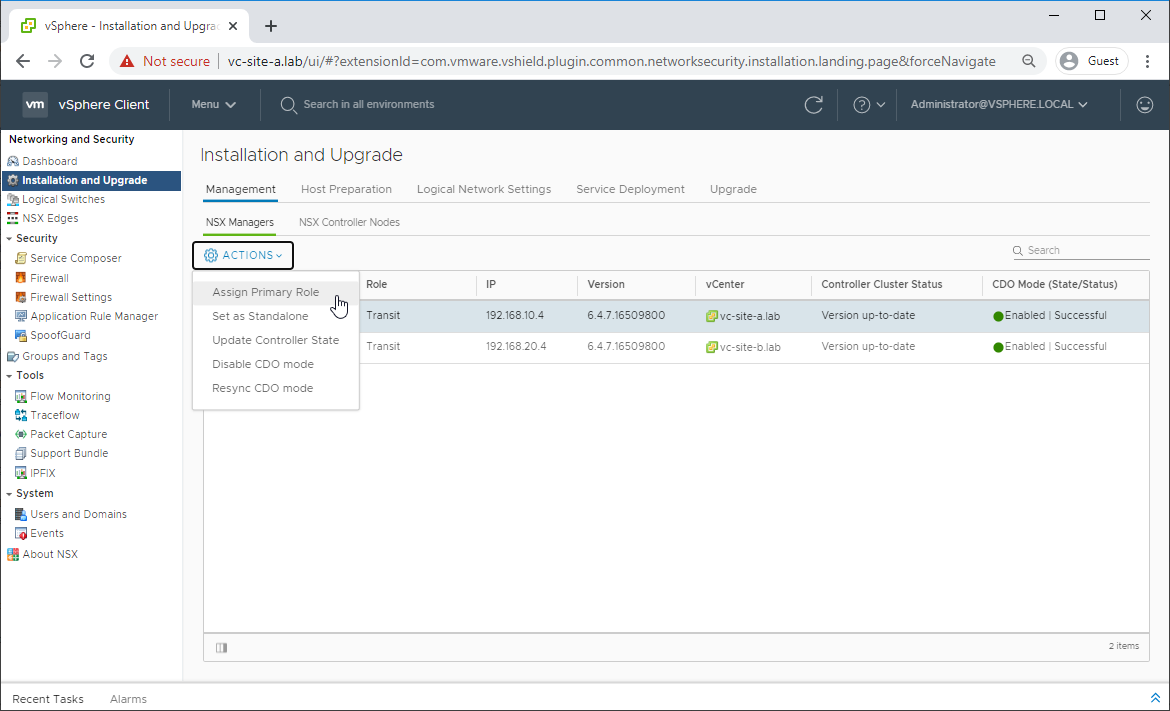
Select Site A NSX Manager and click Actions - Assign Primary Role:
Deploy Site A Controller Cluster
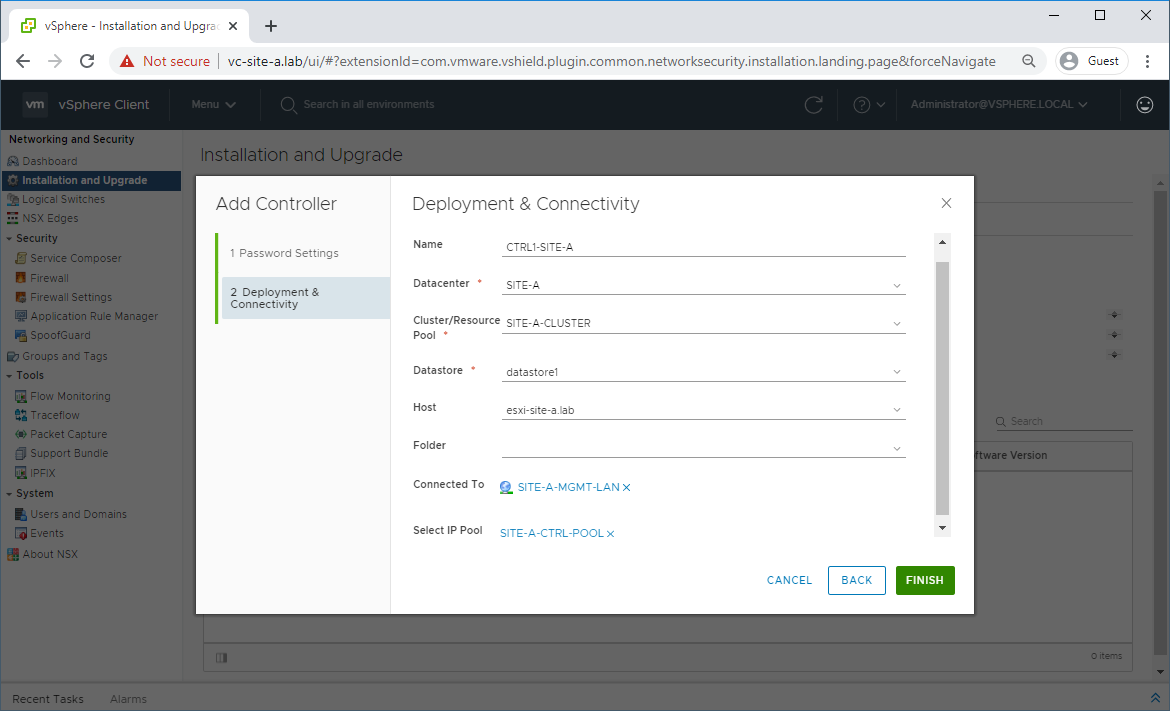
Navigate to Network and Security - Installation and Upgrade - Management - NSX Controller Nodes Confirm that Primary (Site A) NSX Manager is selected, confirm common controller attributes and click Add to deploy the first Site A controller:
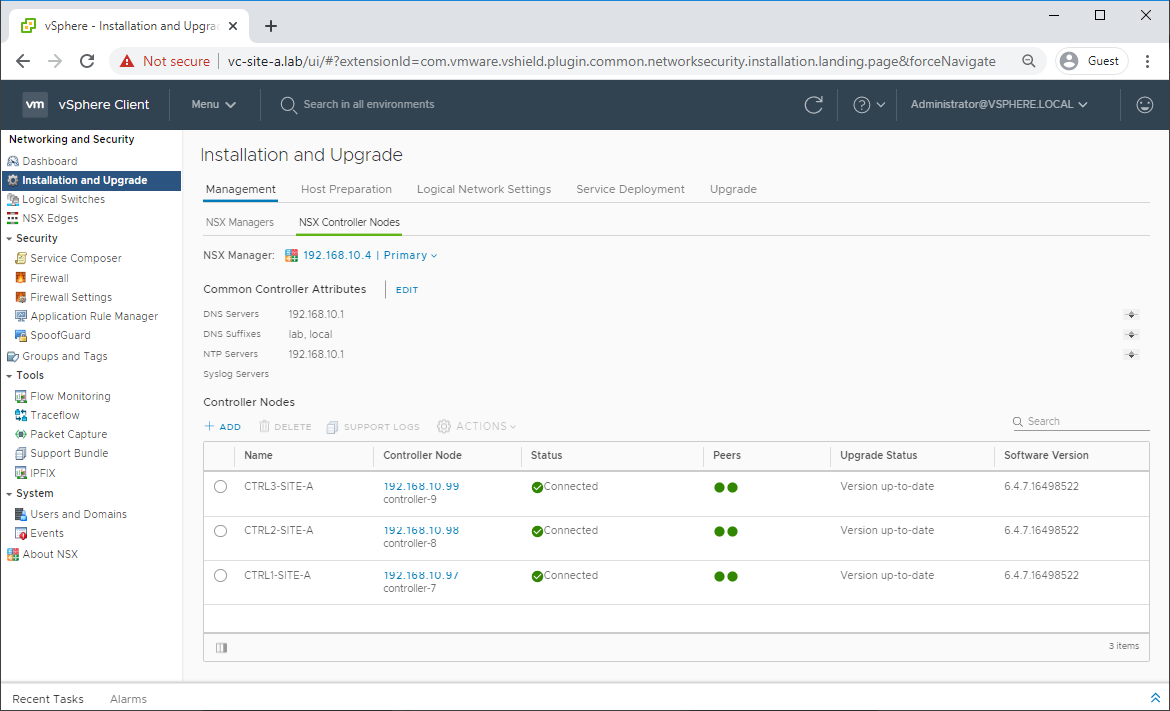
Once the deployment of the first controller is complete and the controller shows as Connected, repeat the process twice more to deploy two more controllers.
Once all three controllers have been deployed, confirm that they have correctly peered:
Deploy Primary Site UDLR Control VMs
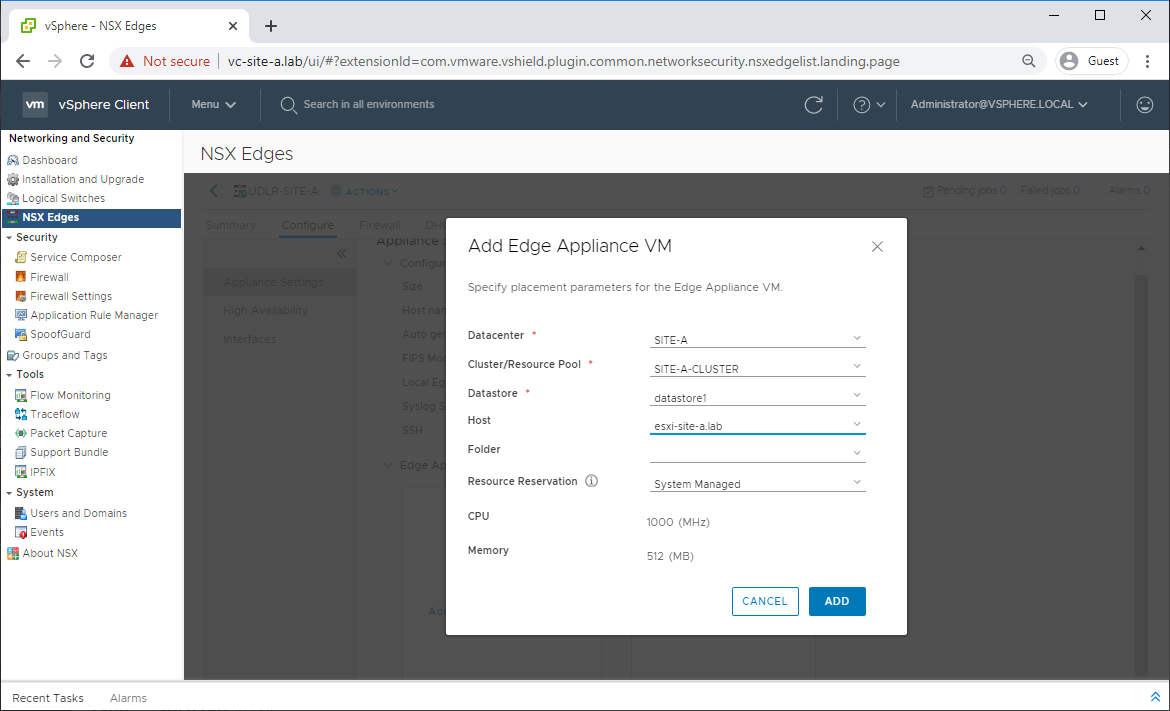
Navigate to Network and Security - NSX Edges, confirm that Primary (Site A) NSX Manager is selected and select one of the previously deployed UDLRs. From there, select Configure - Appliance Settings - Add Edge Appliance VM and complete the wizard:
Once deployment completes, repeat for remining UDLRs in the environment until deployment status for all primary site Edges equals Deployed:

Delete Site B Controller Cluster
Navigate to Network and Security - Installation and Upgrade - Management - NSX Controller Nodes and confirm that Transit (Site B) NSX Manager is selected. Select each controller in turn and select Delete, allowing time for deletion between each:
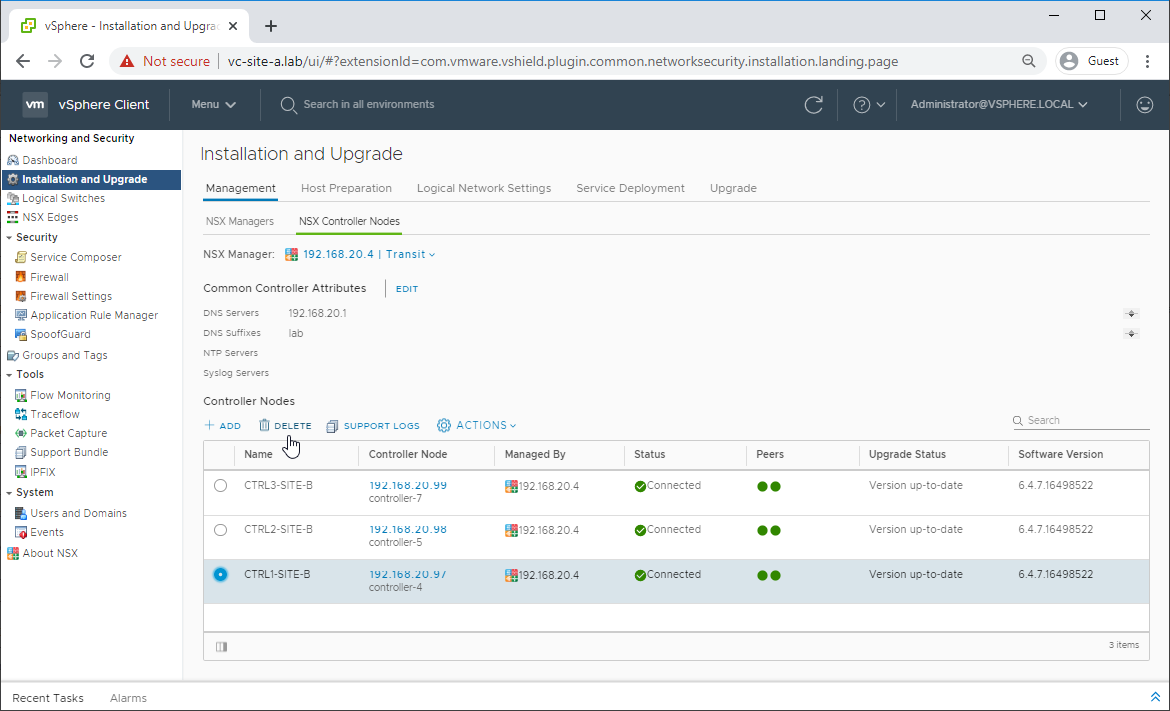
Upon deletion of the final controller, tick Proceed to Force Delete and click Delete:
Assign Secondary Role to Site B NSX Manager
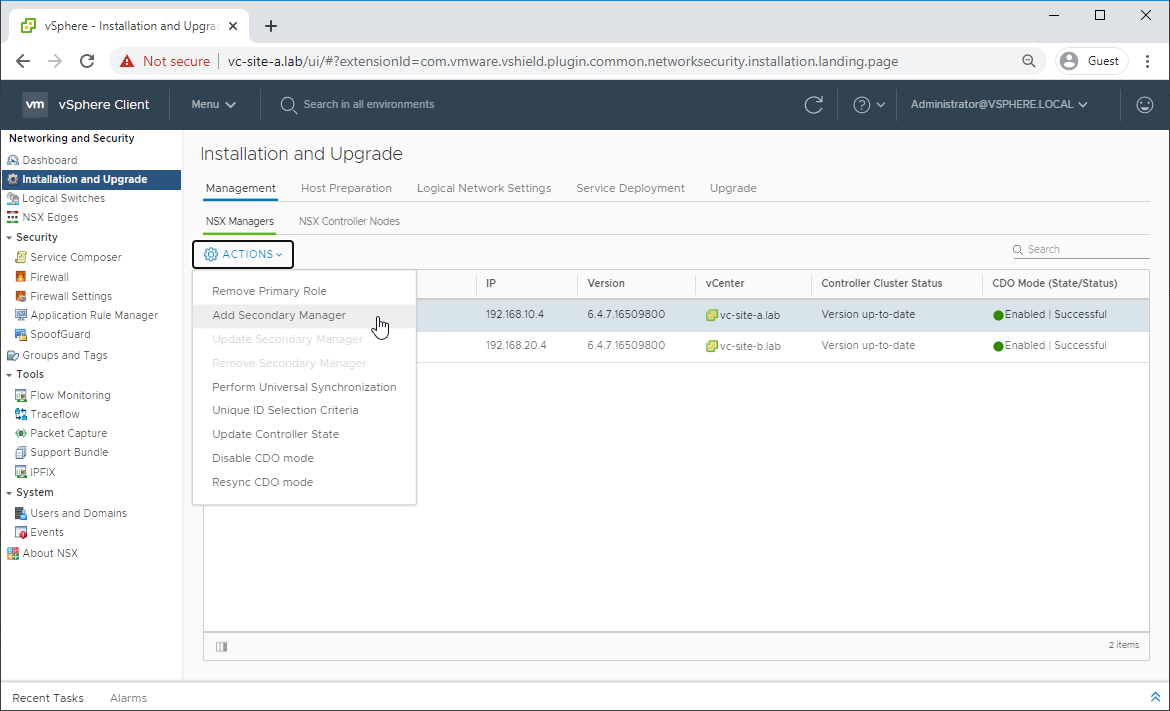
Navigate to Network and Security - Installation and Upgrade - Management - NSX Managers, select primary NSX Manager, click Actions - Add Secondary Manager:
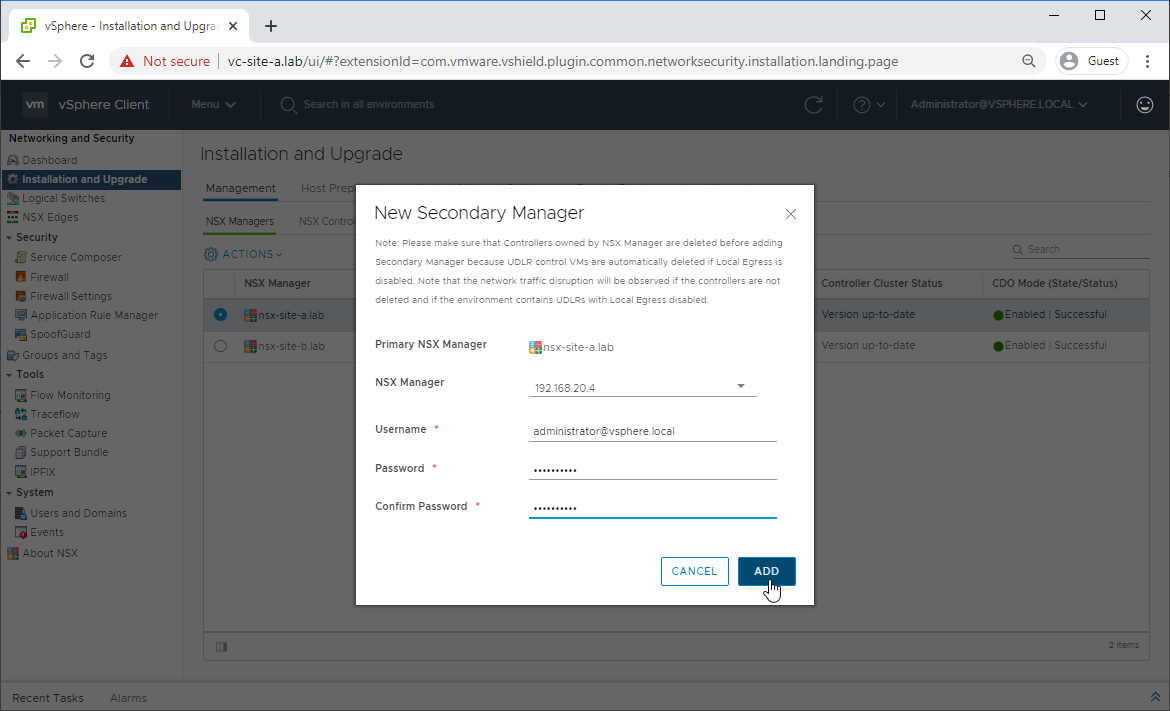
Complete wizard and click Add:
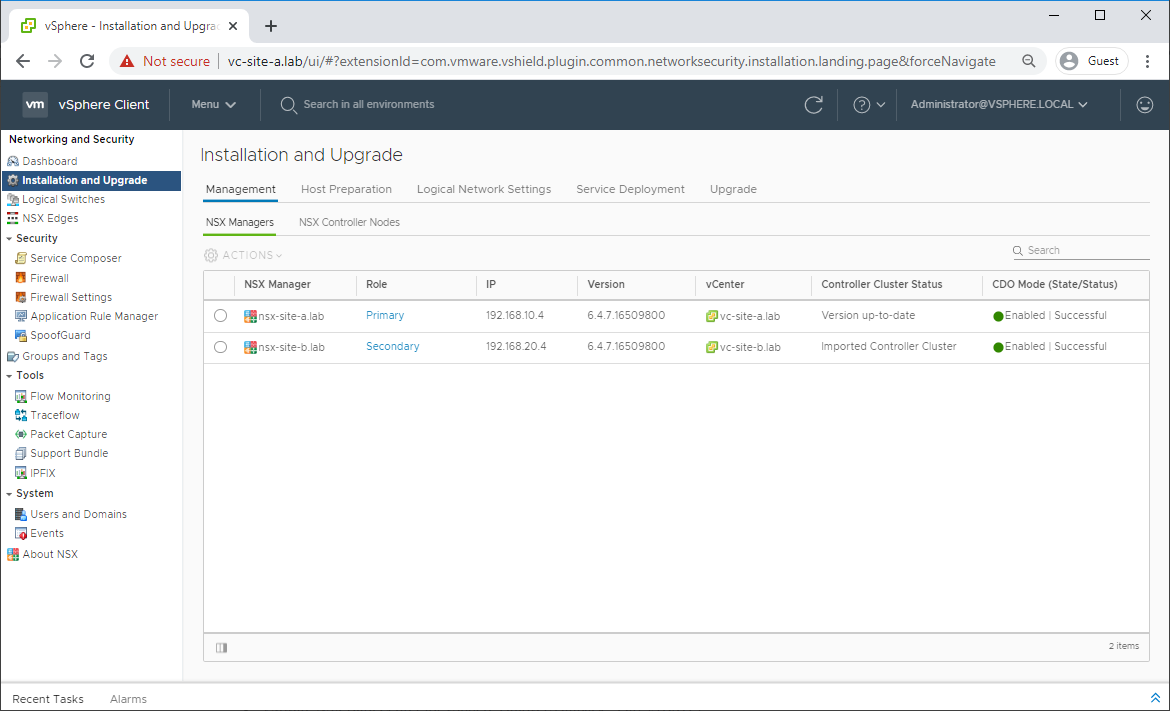
Accept thumbprint and confirm that Site B NSX Manager is now listed as a Secondary Manager:
Confirm Site A UDLR Controller VM Clean Up
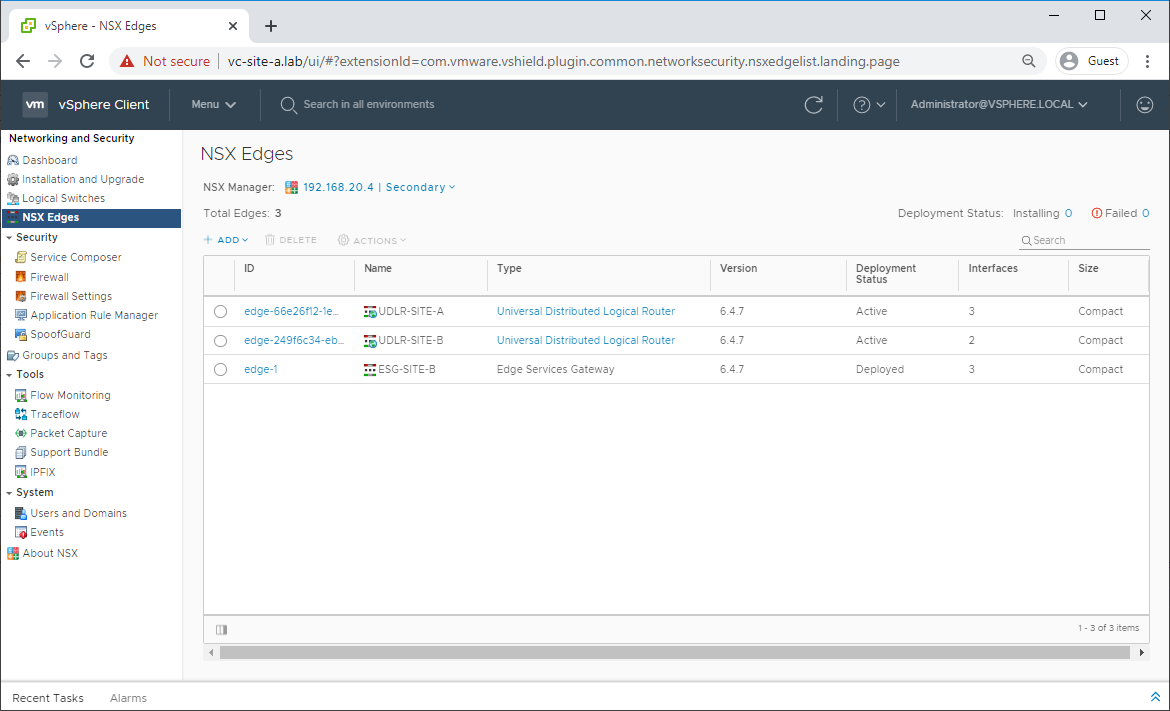
Navigate to Network and Security - NSX Edges, confirm that Secondary (Site B) NSX Manager is selected and confirm status of UDLRs is listed as Active instead of Deployed:
Finally, confirm that the controller VMs have been deleted from the secondary site:
Verify Configuration of the UDLRs
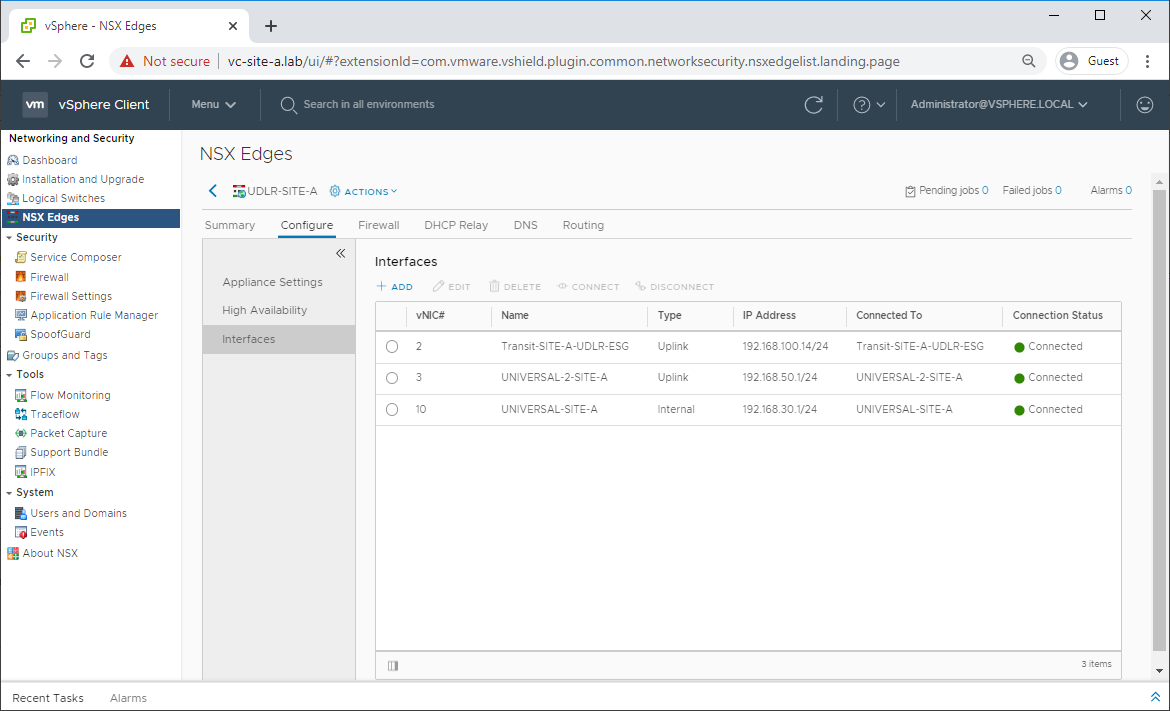
Navigate to Network and Security - NSX Edges in the primary site and select one of the UDLRs. Select Configure - Interfaces and confirm that connectivity is as expected:
Confirm other settings such as firewall, DHCP Relay (if configured), etc.
Repeat verification checks on remining UDLRs in the environment.
Verify Dynamic Routing Configuration of UDLRs and ESGs
In my test lab, I’m using BGP for my dynamic routing. Your environment may be using OSPF so modify the following commands to fit your circumstance.
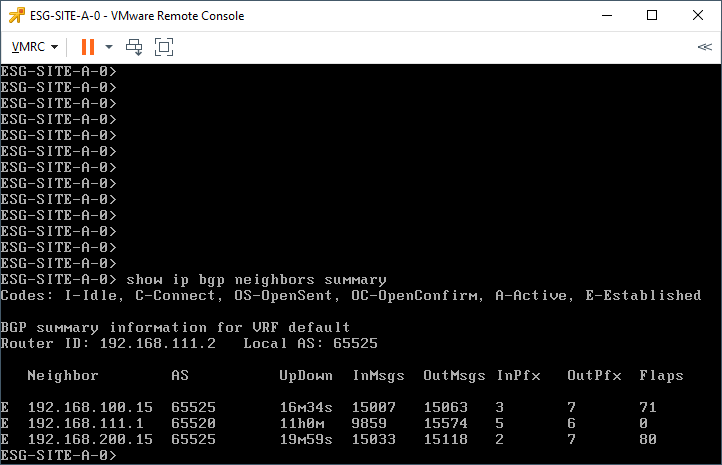
Open a console to both of the Edge VMs in turn and issue the command:
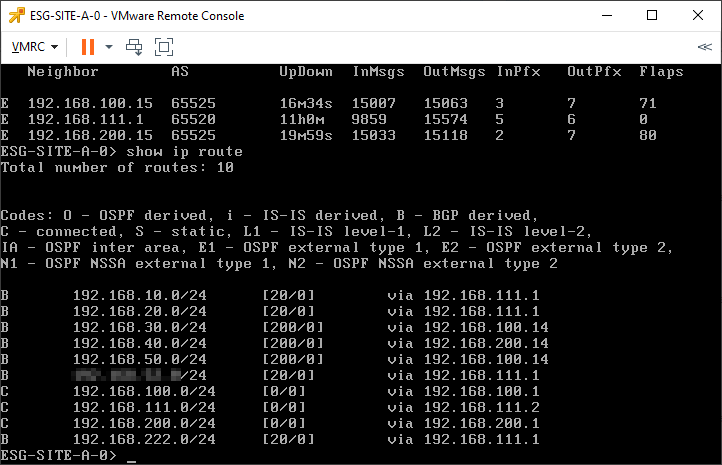
show ip bgp neighbours summaryConfirm that the Site A Edge appliance shows and “E” (Established) status with all its configured neighbouring UDLRs (lab UDLRs: 192.168.100.15 and 192.168.200.15) and the upstream router (lab LABROUTER: 192.168.111.1):
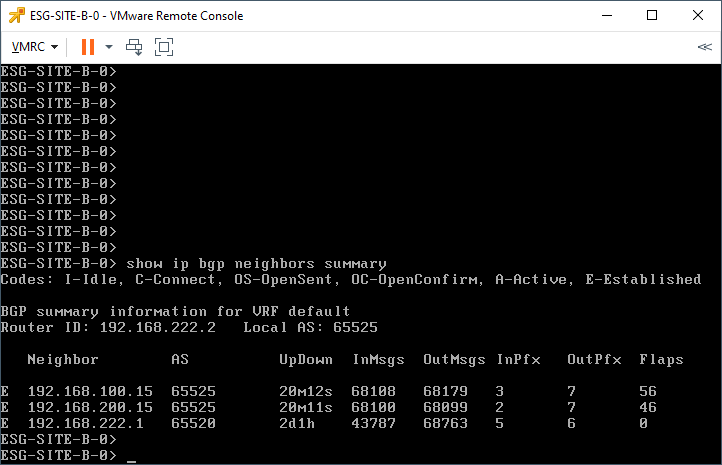
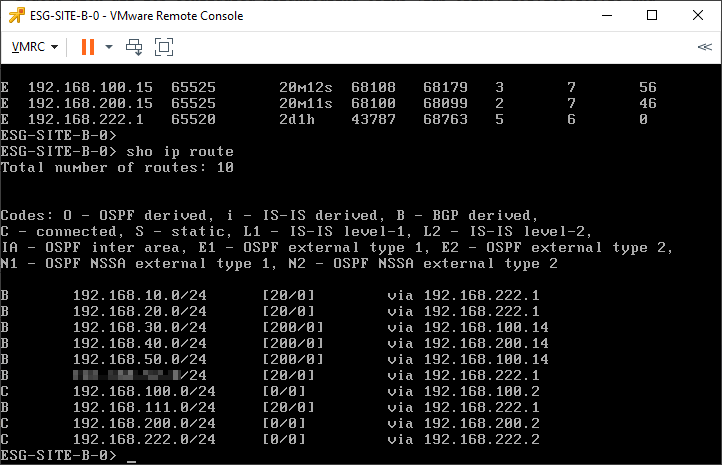
Confirm that the Site A Edge appliance shows and “E” (Established) status with all its configured neighbouring UDLRs (lab UDLRs: 192.168.100.15 and 192.168.200.15) and the upstream router (lab LABROUTER: 192.168.222.1):
Next, issue the command:
show ip routeConfirm that the both edges are receiving routes from both the UDLRs and the upstream router:
Test
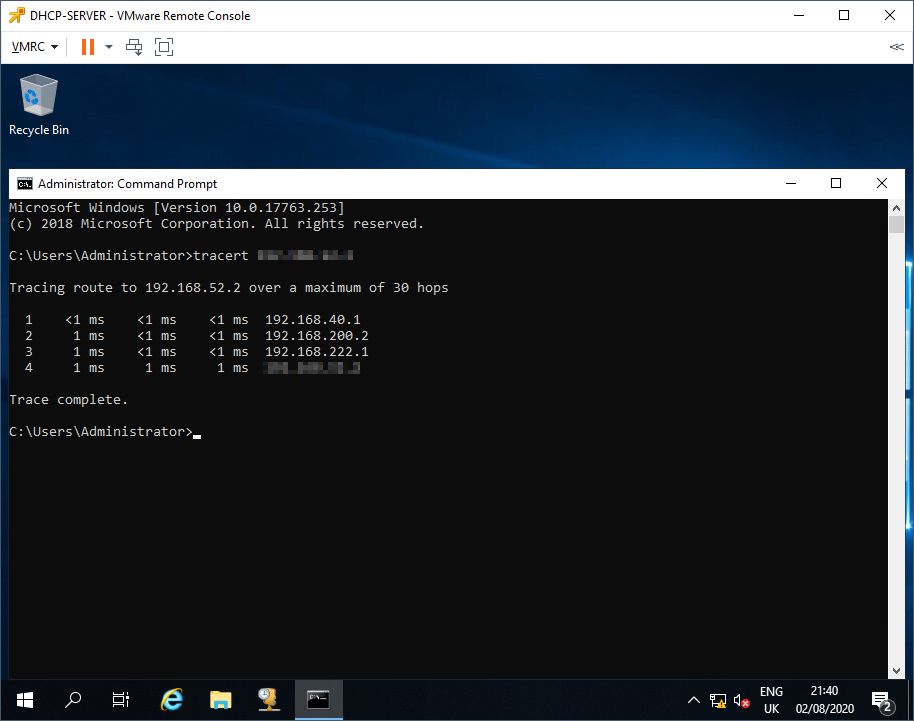
Finally, run some trace routes to confirm that traffic is following the correct path into the environment:
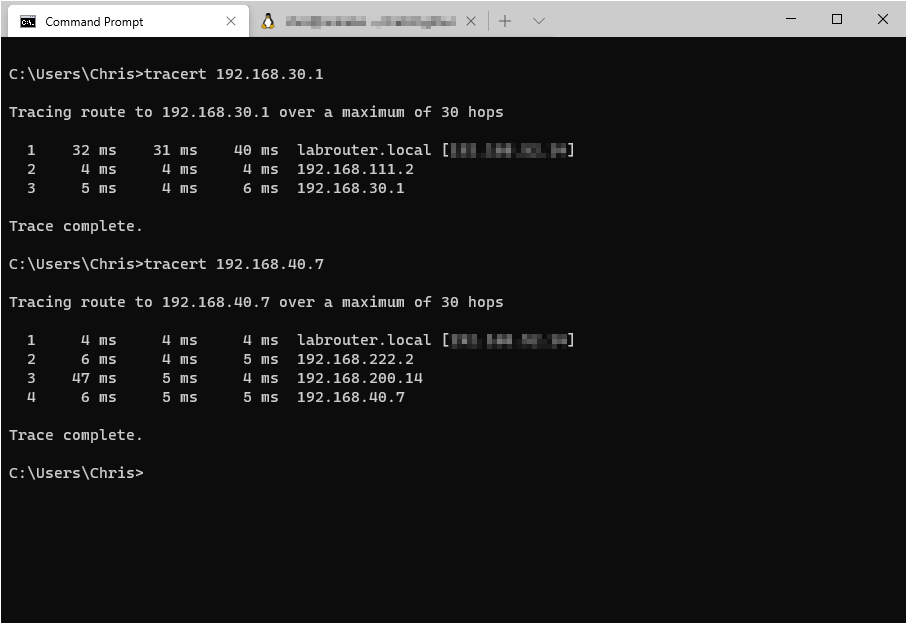
and out of the environment. Site A:
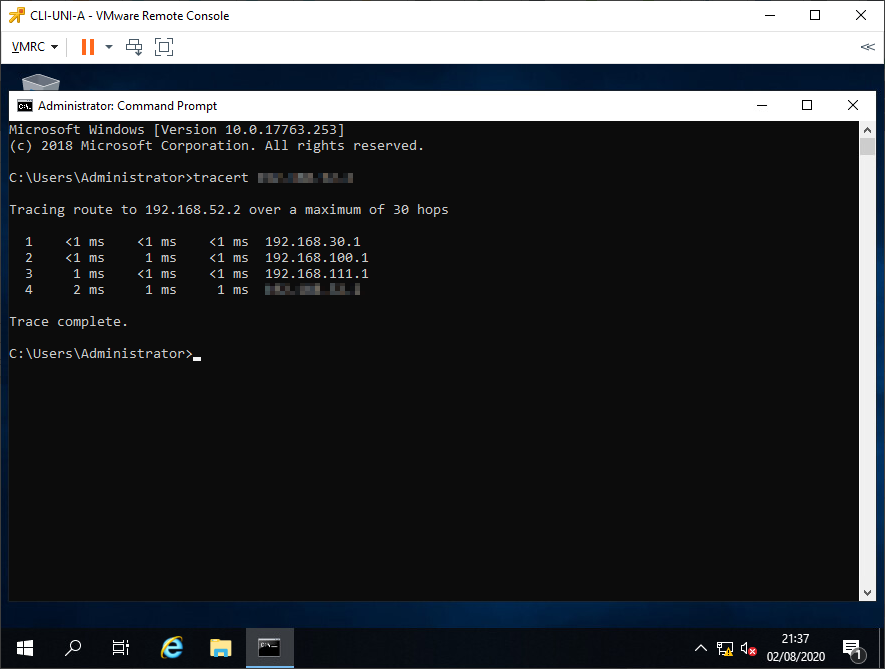
Site B:
Conclusion and Wrap Up
So there we have it. The complete failure of an NSX Data Center primary site, promotion of secondary site to primary site status and subsequent recovery of control plane in remaining site. Once the failed site came back online the repromotion of the site to primary status and the clean up of temporary control plane in the newly demoted site.
Phew! That’s it for this multipart series. Hope you enjoyed it. Remember to a link to this series safe. You never know when you may need it!
Find the other parts here:
- Part 1: Why and Getting Familiar
- Part 2: Bye-bye Site A!
- Part 3: Site A Back from the Dead!
- Part 4: This Part - Making Site A Primary Again
All in all, a bit of a mission this one, but well worth it should disaster ever strike. ![]()
-Chris