


 Over the previous couple of posts we looked at creating two Virtual Private Clouds (VPCs), one each for The Globex Corporation and Initech LLD.
Due to various constraints, neither company required a “Rolls-Royce” cloud hosting solution. The golden rules set by each company were hosting simplicity and Nutanix products. As you can probably guess, PolarClouds Hosting Co. was able to meet the requirements of both clients with ease.
If you missed either of the previous parts of this series on how this was achieved, catch up now:
- Virtual Private Cloud Basics with Nutanix Flow - Part 1
- Virtual Private Cloud Basics with Nutanix Flow - Part 2
So Chris what’s this then? I thought we were done. Both tenants happy with their VPCs: Nutanix products used, simplicity ruled and job done. Why part 3?
Let me explain.
Overview
Missed a Bit! Network Policy
Embarrassingly, I missed a small piece of configuration from part 1. Yeah, it happens. Let’s fix.
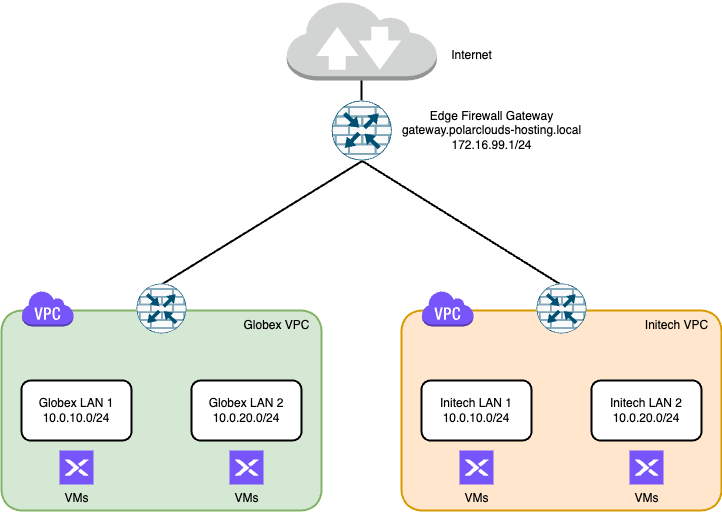
To allow traffic between subnets inside our VPCs, for example between Globex LAN 1 and Globex LAN 2, or Initech LAN 1 and Initech LAN 2, we need to add a network policy to each of the tenant VPCs.
From the Nutanix Prism Central dashboard, expand Networking and Security, select Virtual Private Clouds. Select a VPC, select Network Policies and Create Policy.

So our complete Globex VPC Network policies are as follows:
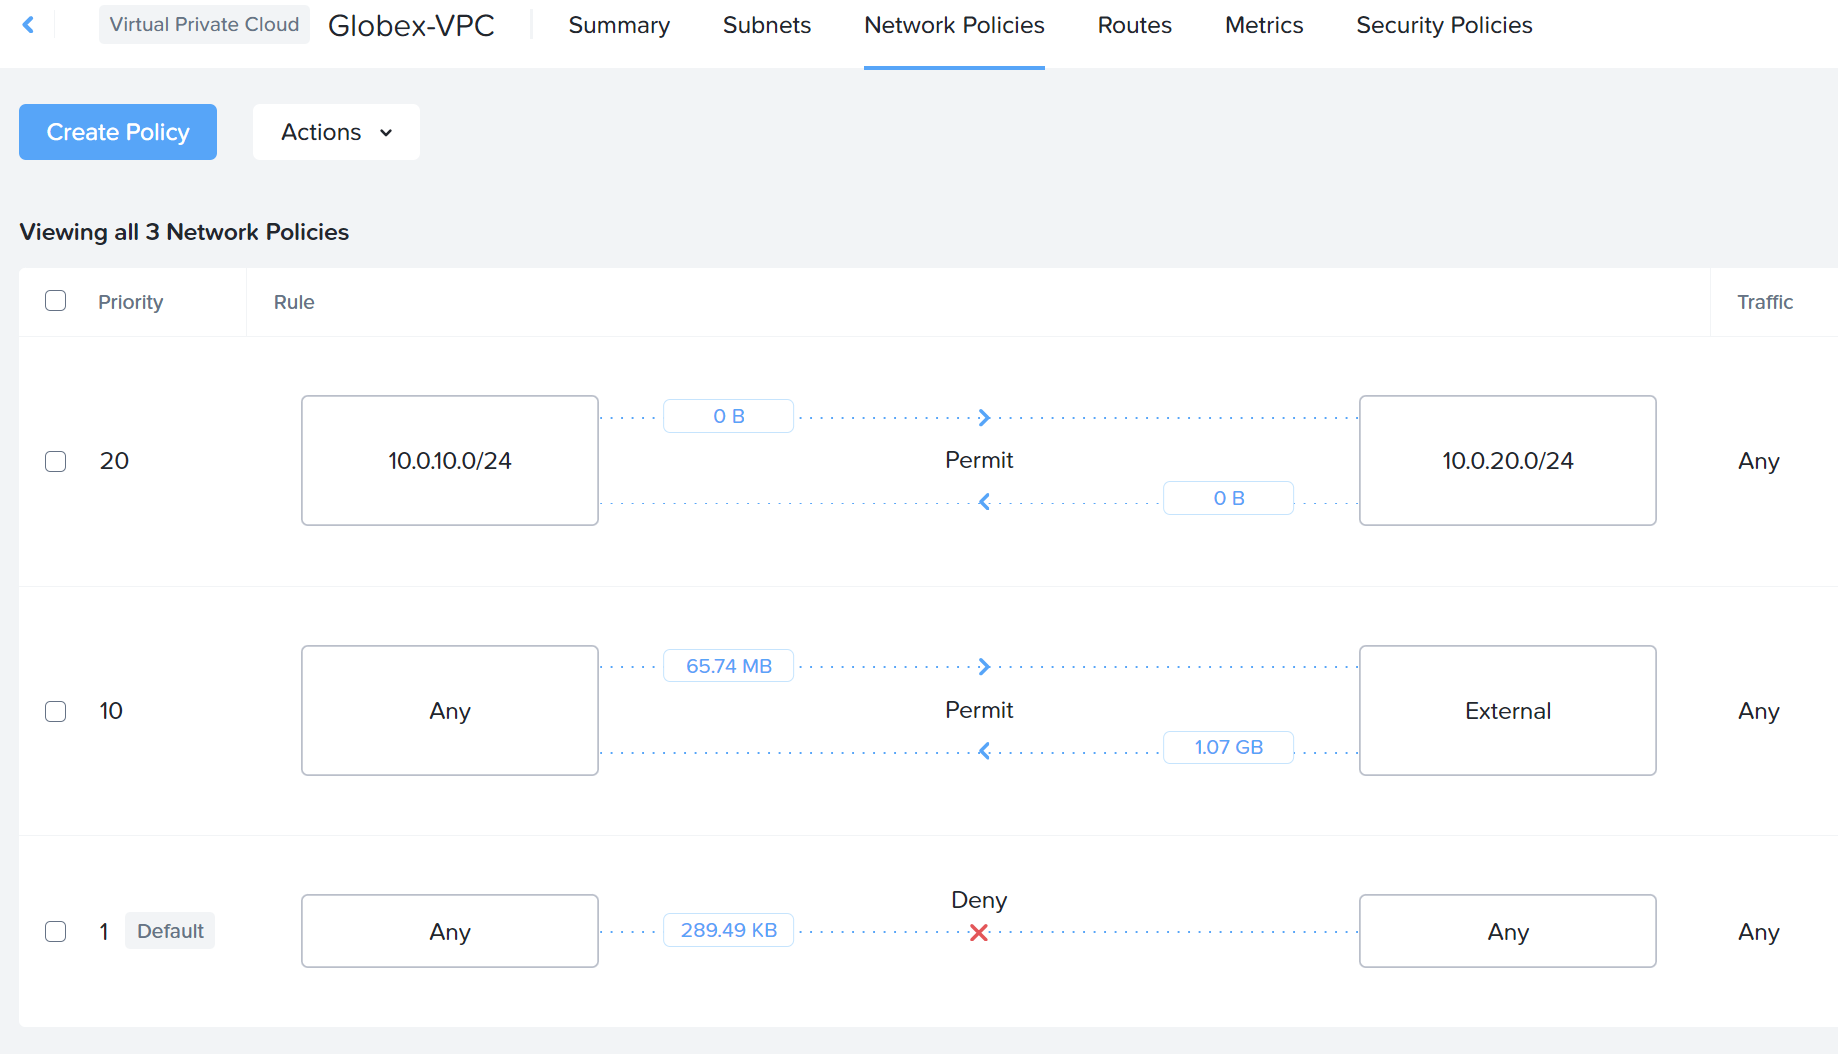
Don’t forget to repeat for Initech. Once implemented, tenant LANs within each VPC will be able to communicate.
Client VPN Access to VPCs
In part 2, I touched on VPN connectivity when discussing Destination Network Address Translation (DNAT) and floating IPs.
The TL,DR is that to allow Globex/Initech headquarters access to their tenant VMs we would need to implement three things:
- A Windows jump server housed in the tenant VPC
- A DNAT IP address assigned to the jump server
- A security policy (aka firewall rules) to allow RDP access to the tenant jump server
What if I told you we can remove the need for ALL of the above AND provide an even simpler method of access AND increase security all in one go?
Crazy.
Enter Tailscale
What’s Tailscale?
Put simply, Tailscale allows you to create a virtual private encrypted flat mesh network between any client. This network is often referred to as a tailnet. Rather than duplicate the Tailscale documentation here, go take a look at What is Tailscale?
What’s more is that Tailscale is an absolute demon at NAT traversal - that is negotiating Network Address Translation as covered in Part 2 - SNAT and DNAT.
How? Read how here.
TL,DR? How about a video instead:
The result is that if a Tailscale client can get to the internet, a destination NAT is NOT required for incoming traffic. Therefore we can dispense with:
A DNAT IP address assigned to the jump serverA security policy (aka firewall rules) to allow RDP access to the jump server
Finally, rather than running a Windows jump server, we will deploy a Tailscale Subnet router instead.
Finally, finally - Tailscale personal is free for up to 100 devices.
Tailscale Subnet Router
Tailscale is most effective when you install its client on all devices within an organization, including clients, servers, and virtual machines. This ensures that traffic is securely encrypted from end to end and simplifies the process of relocating machines between different physical locations. Think mobile phones moving between 5G, WiFi etc.
However there are situations where that is not possible or desirable. For example, inside a VPC.
In this situation you can utilize a subnet router to access these devices through Tailscale. Subnet routers serve as gateways, forwarding traffic from your Tailscale network to your physical subnet. Again, rather than replicating the Tailscale documentation here, see Subnet routers and traffic relay nodes in the Tailscale documentation.
So using a Tailscale subnet router, clients on the tailnet at Globex HQ, for example, can access ALL of their VMs in their VPC directly, without the need for the Windows Jump server.
Therefore, we no longer need:
A Windows jump server housed in the client VPC
Byeeee!
Install Tailscale
We will need to run the Tailscale subnet router on something however… For simplicity and conservation of resources, I chose to deploy a Debian server VM in each VPC. For example, the Globex VM:

Two vCPUs and 1GB memory is plenty.
After a basic netinst of Debian 12, choosing just ssh server and standard utilities as part of the install (therefore no desktop environment), I had a VM that I could install Tailscale upon.
The following steps are taken from the Tailscale on Debian documentation. Chris was the user added as part of the Debian install process.
Bit of house keeping, install curl and sudo. Add chris to the sudo-ers group:
apt install curl sudo
adduser chris sudo
Add the Tailscale repository key and repositories:
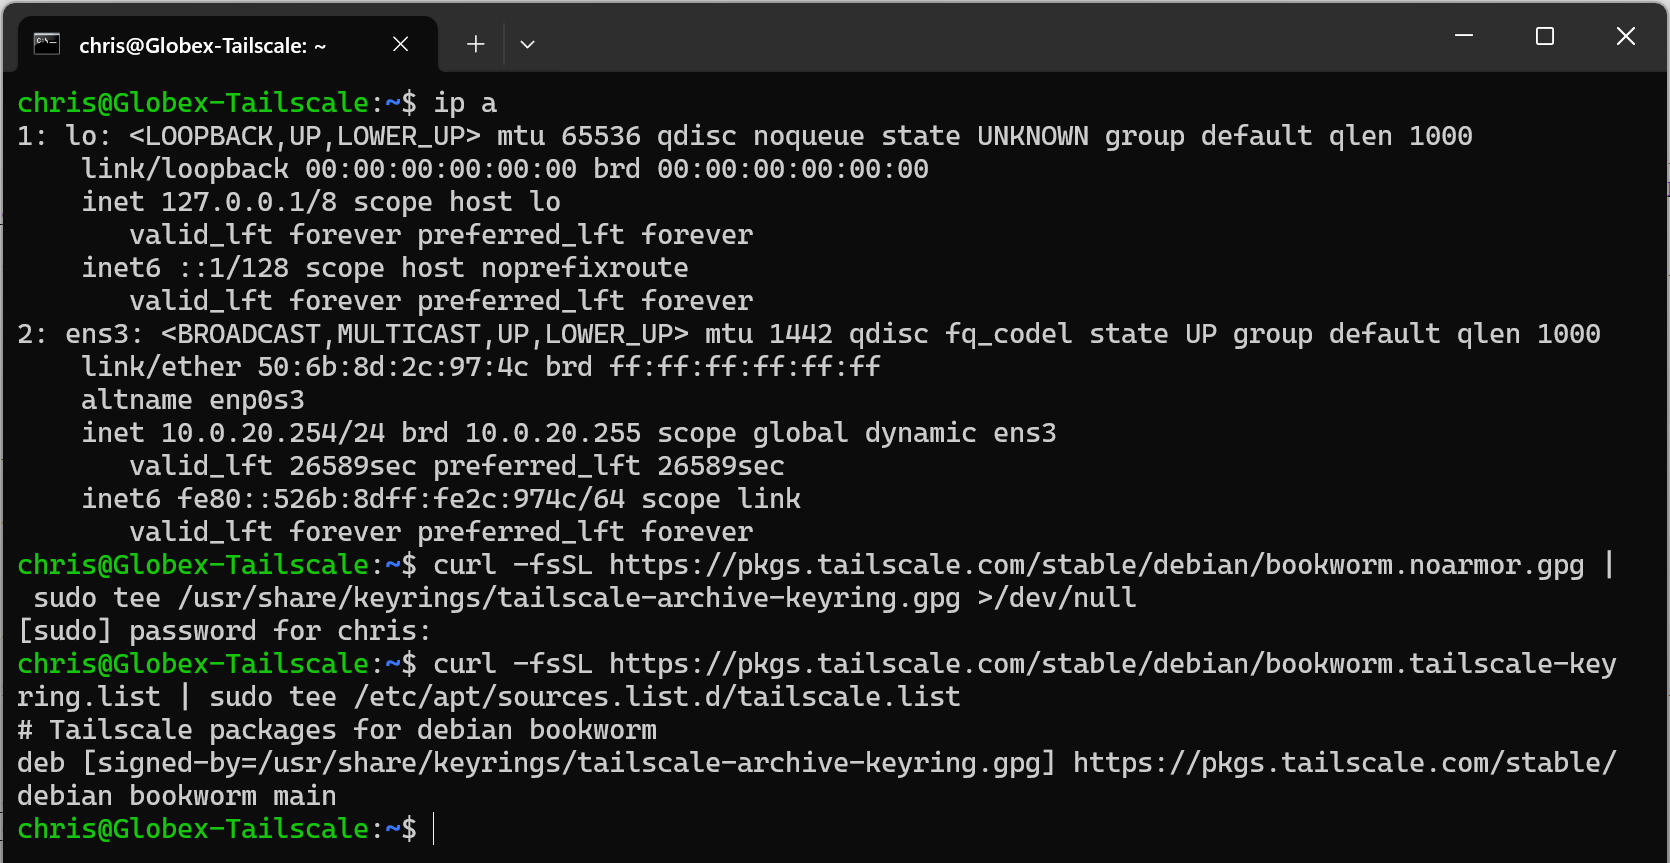
curl -fsSL https://pkgs.tailscale.com/stable/debian/bookworm.noarmor.gpg | sudo tee /usr/share/keyrings/tailscale-archive-keyring.gpg >/dev/null
curl -fsSL https://pkgs.tailscale.com/stable/debian/bookworm.tailscale-keyring.list | sudo tee /etc/apt/sources.list.d/tailscale.list
Yep all good:
Next, let’s install Tailscale:
sudo apt-get update
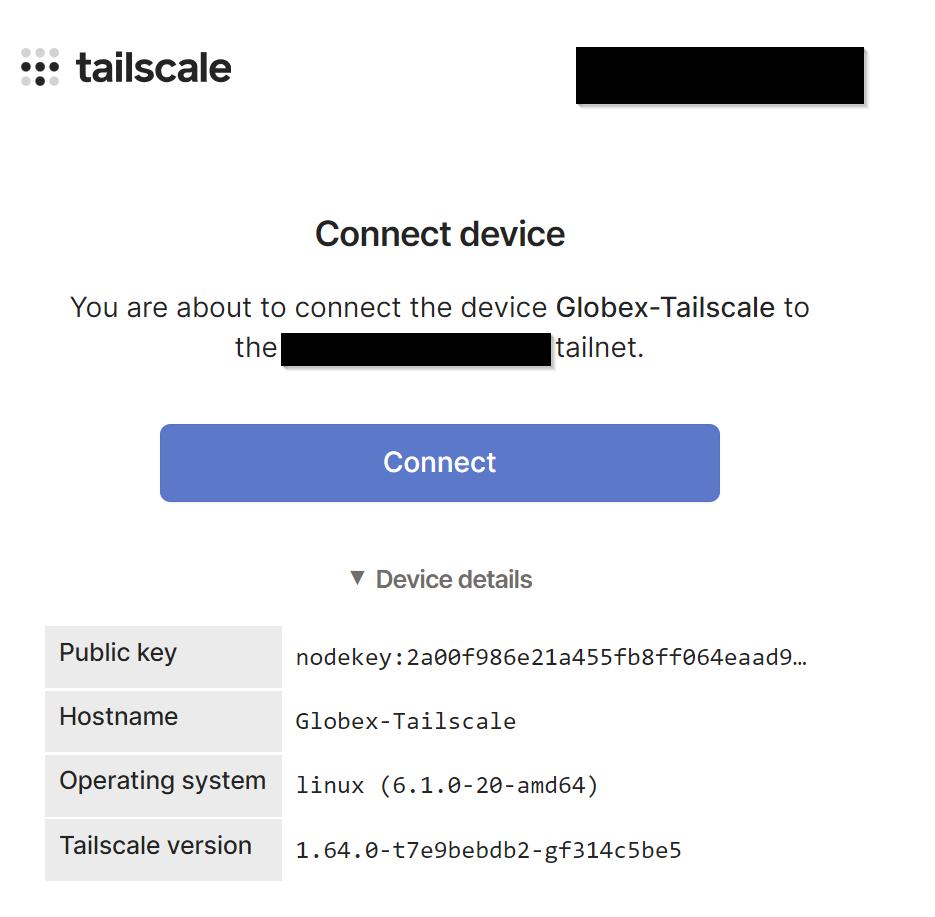
sudo apt-get install tailscaleOnce that’s complete, let’s start the Tailscale client:
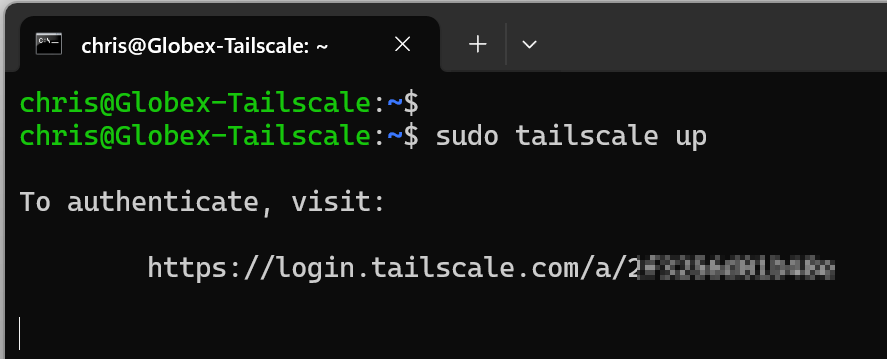
On our Tailscale admin console, let’s approve the client:
Next, let’s approve the connection of the debian server to our tailnet:
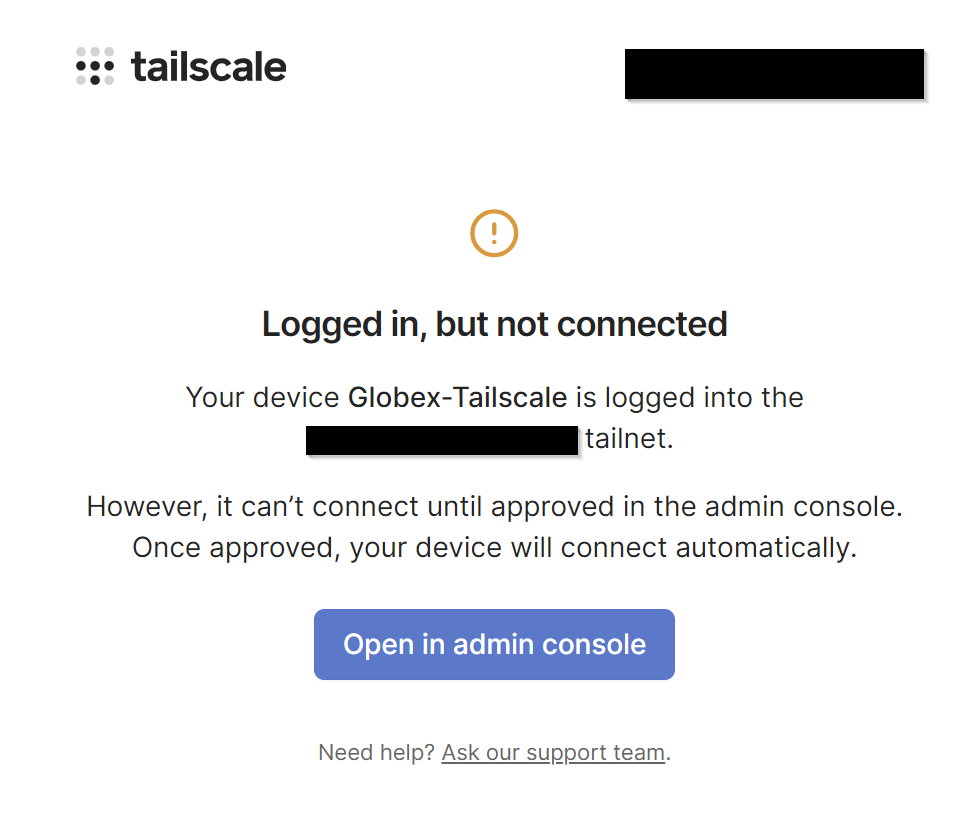
And Approve:
Back on server you should see that the node has been successfully added to the tailnet.
Install Tailscale Subnet Router
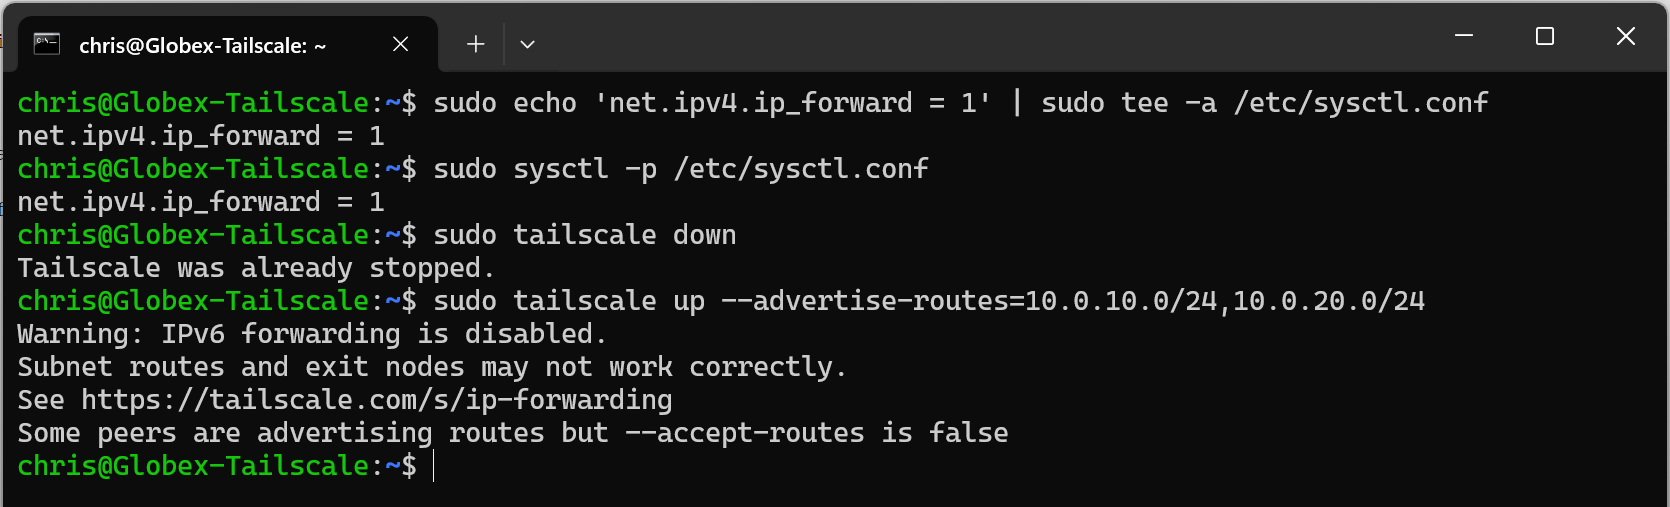
With Tailscale installed, we need enable IP forwarding and advertise the Globex VPC subnets to the tailnet:
1
2
3
4
sudo echo 'net.ipv4.ip_forward = 1' | sudo tee -a /etc/sysctl.conf
sudo sysctl -p /etc/sysctl.conf
sudo tailscale down
sudo tailscale up --advertise-routes=10.0.10.0/24,10.0.20.0/24
Breaking the above down:
- Line 1: Update kernel parameters to enable IP forwarding
- Line 2: Reload kernel parameters from updated file
- Line 3: Shutdown Tailscale
- Line 4: Restart Tailscale advertising routes to the VPC networks over the tailnet
Which when run looks like this:
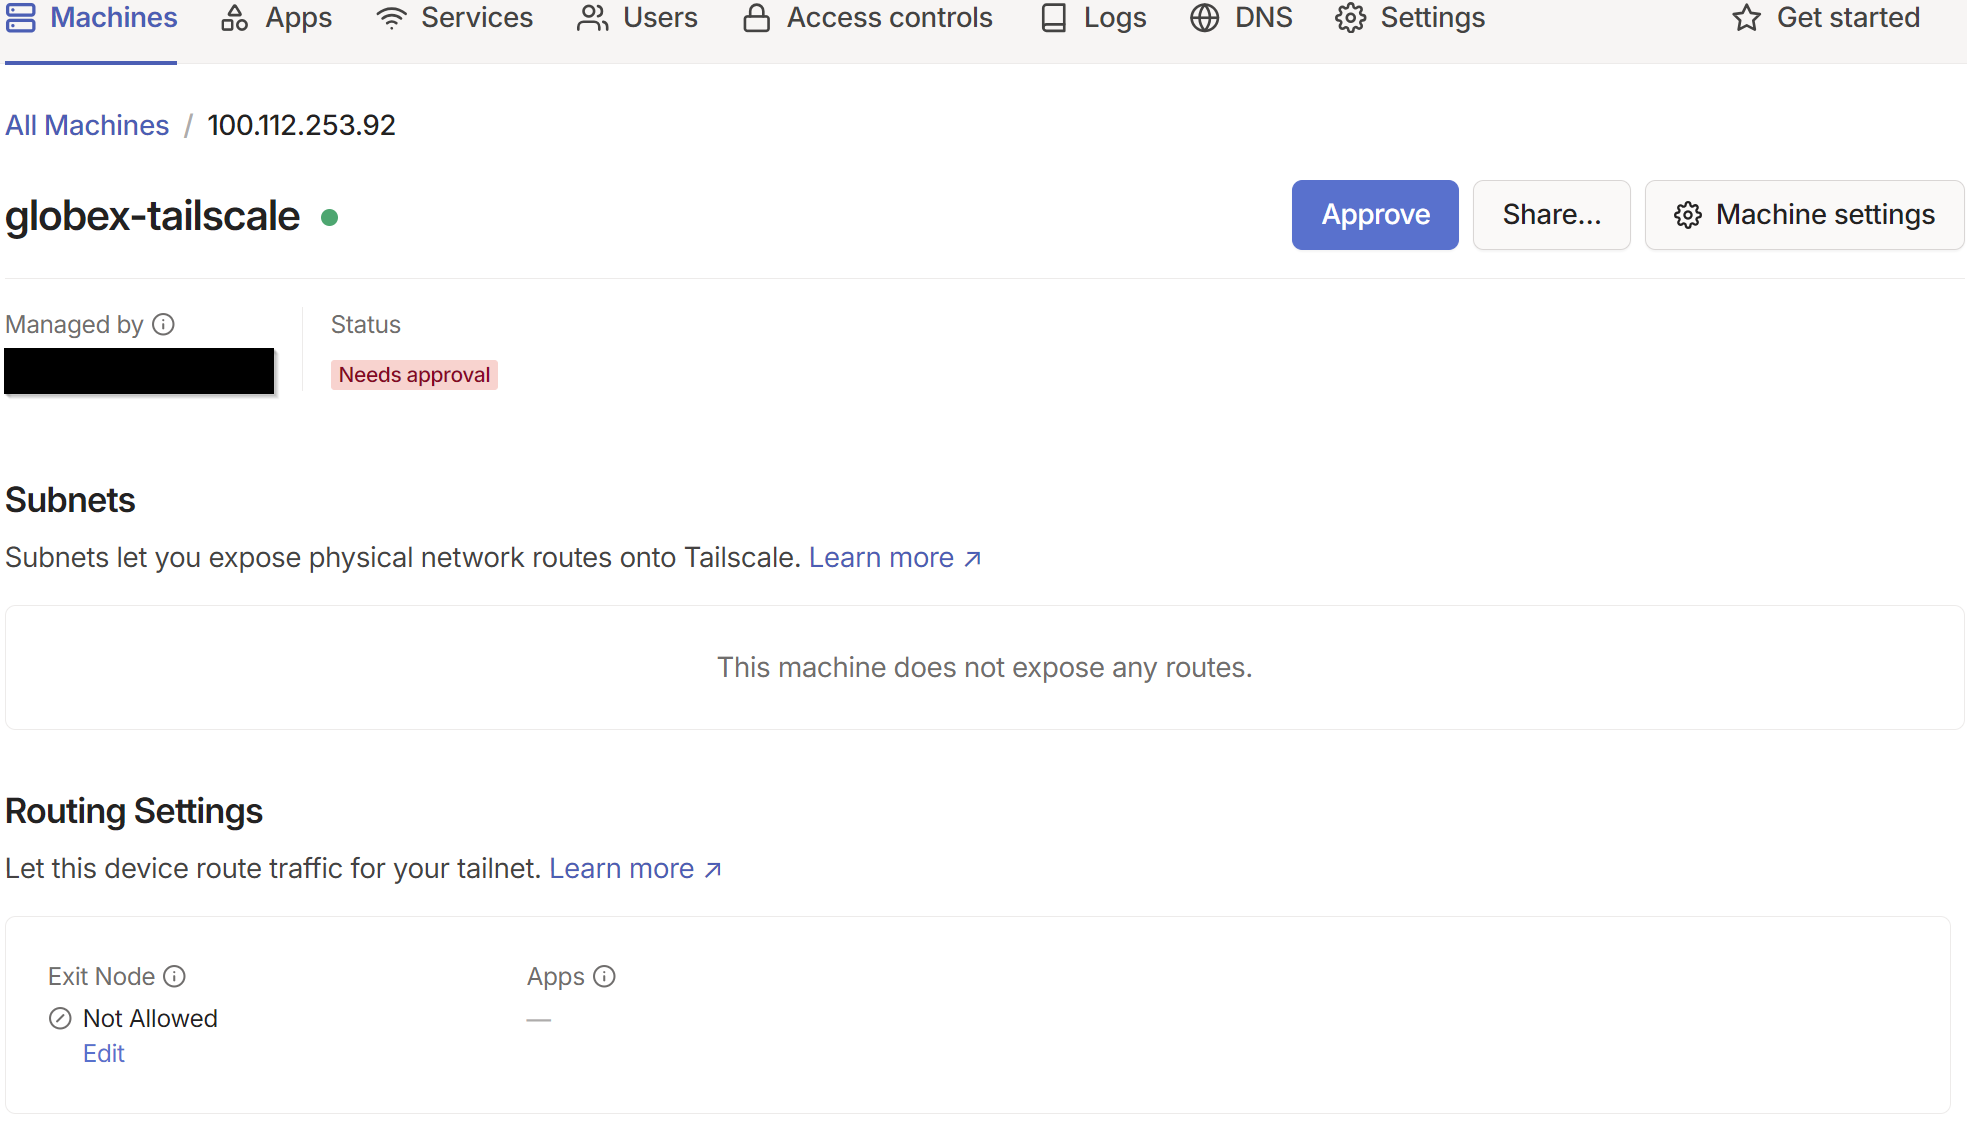
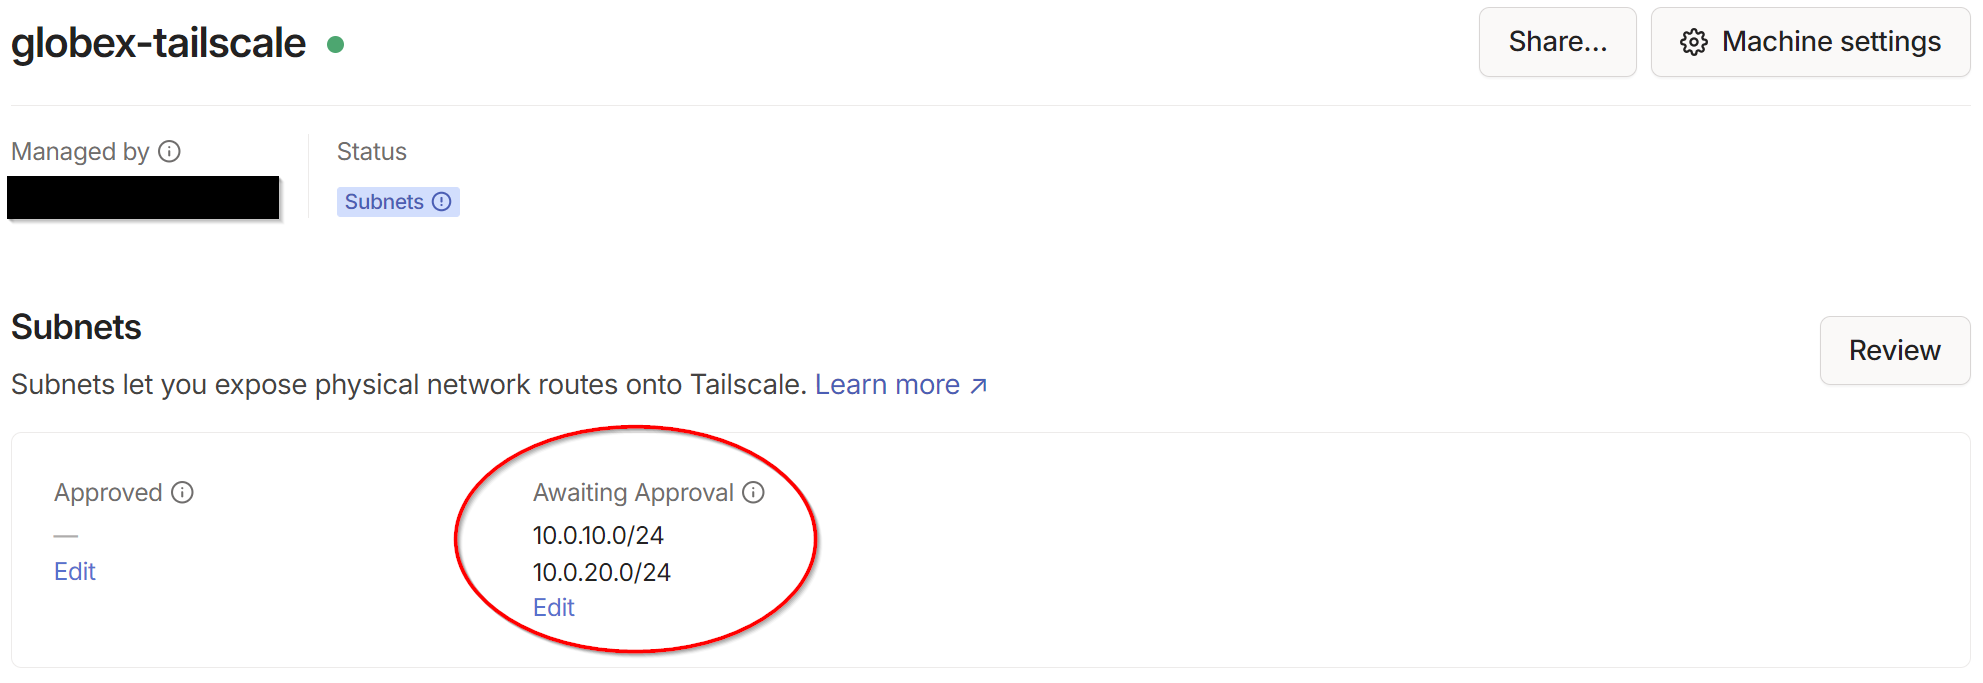
Next,back on the Tailscale admin console, we can see that the globex-tailscale VM is now advertising the two routes:
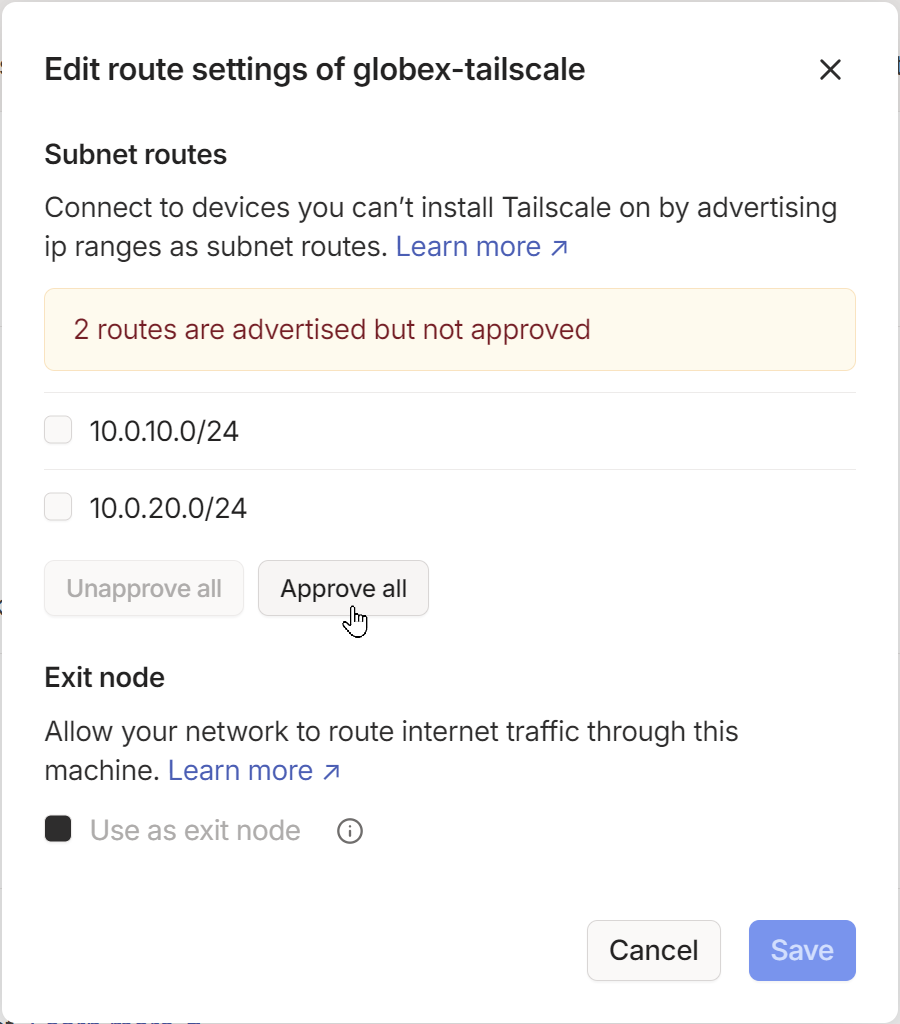
Clicking Edit under the routes to approve, Approve all and Save:
Job done. Tailscale installed and subnet routing enabled. Nice.
Clean Up on VPC!
Let’s clean up our unwanted infrastructure and configuration.
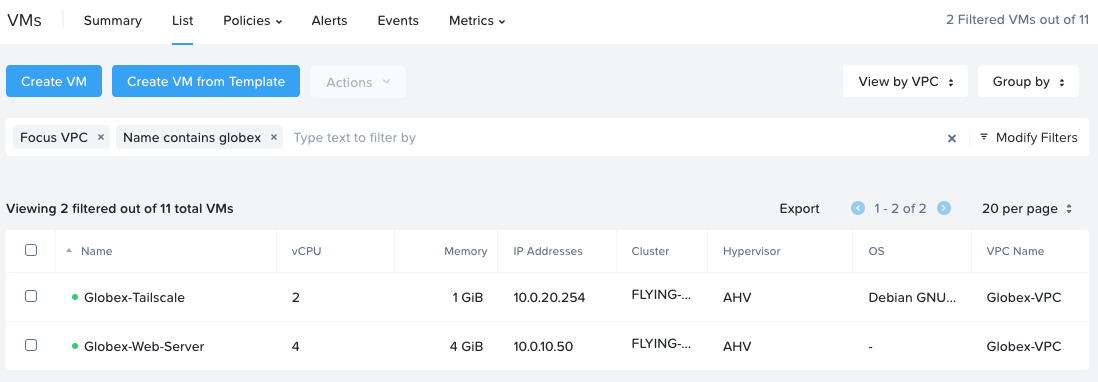
First off delete the Globex-Jump-Server. Our new list of Globex VMs is now:
Next, delete the Globex Jump Server security policy.
Remember we do not need a security policy to access the tenant VPC; Tailscale’s NAT traversal takes care of VPC VPN access for us.
Globex have just one security policy now:

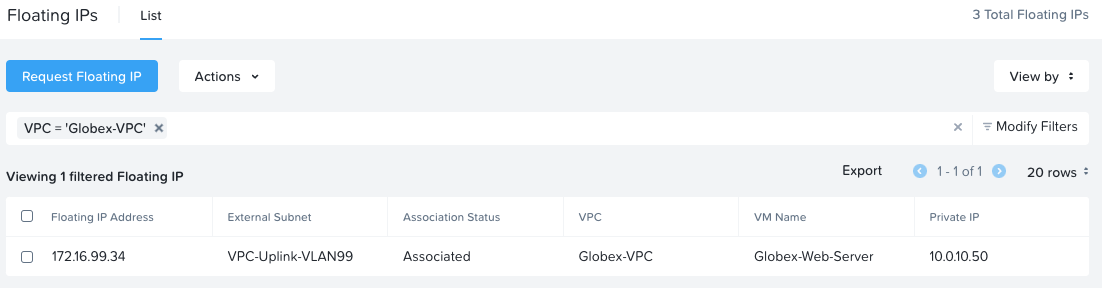
Next, delete the floating IP that was associated with the Globex Jump Server. Globex floating IPs are now:
Finally, lets add the Globex-Tailscale VM to the Globex-VMs:Jump-Servers category to allow us RDP access to the web server via it’s existing security policy:
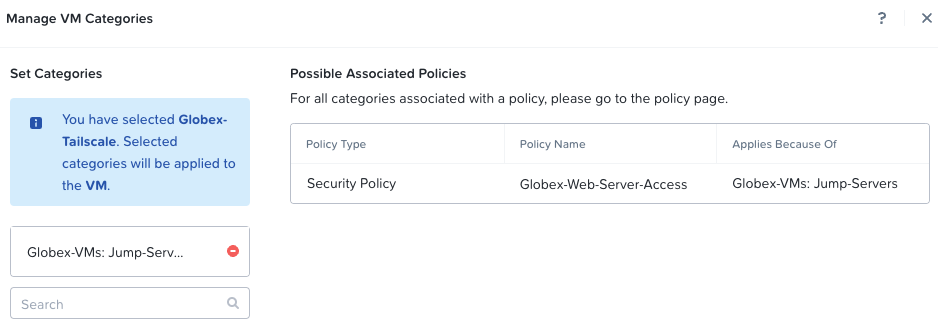
Importantly: For all other VMs placed on the Globex VPC subnets we will not need to add any further security polices.
Why? Only VMs with incoming connectivity (i.e. only VMs with DNATs and floating IPs) will need security policies.
Testing
Testing from Windows client connected to Tailnet that the globex-tailscale VM is indeed accessible on it’s VPC IP address, and that an RDP session can be created to the Globex Web server:
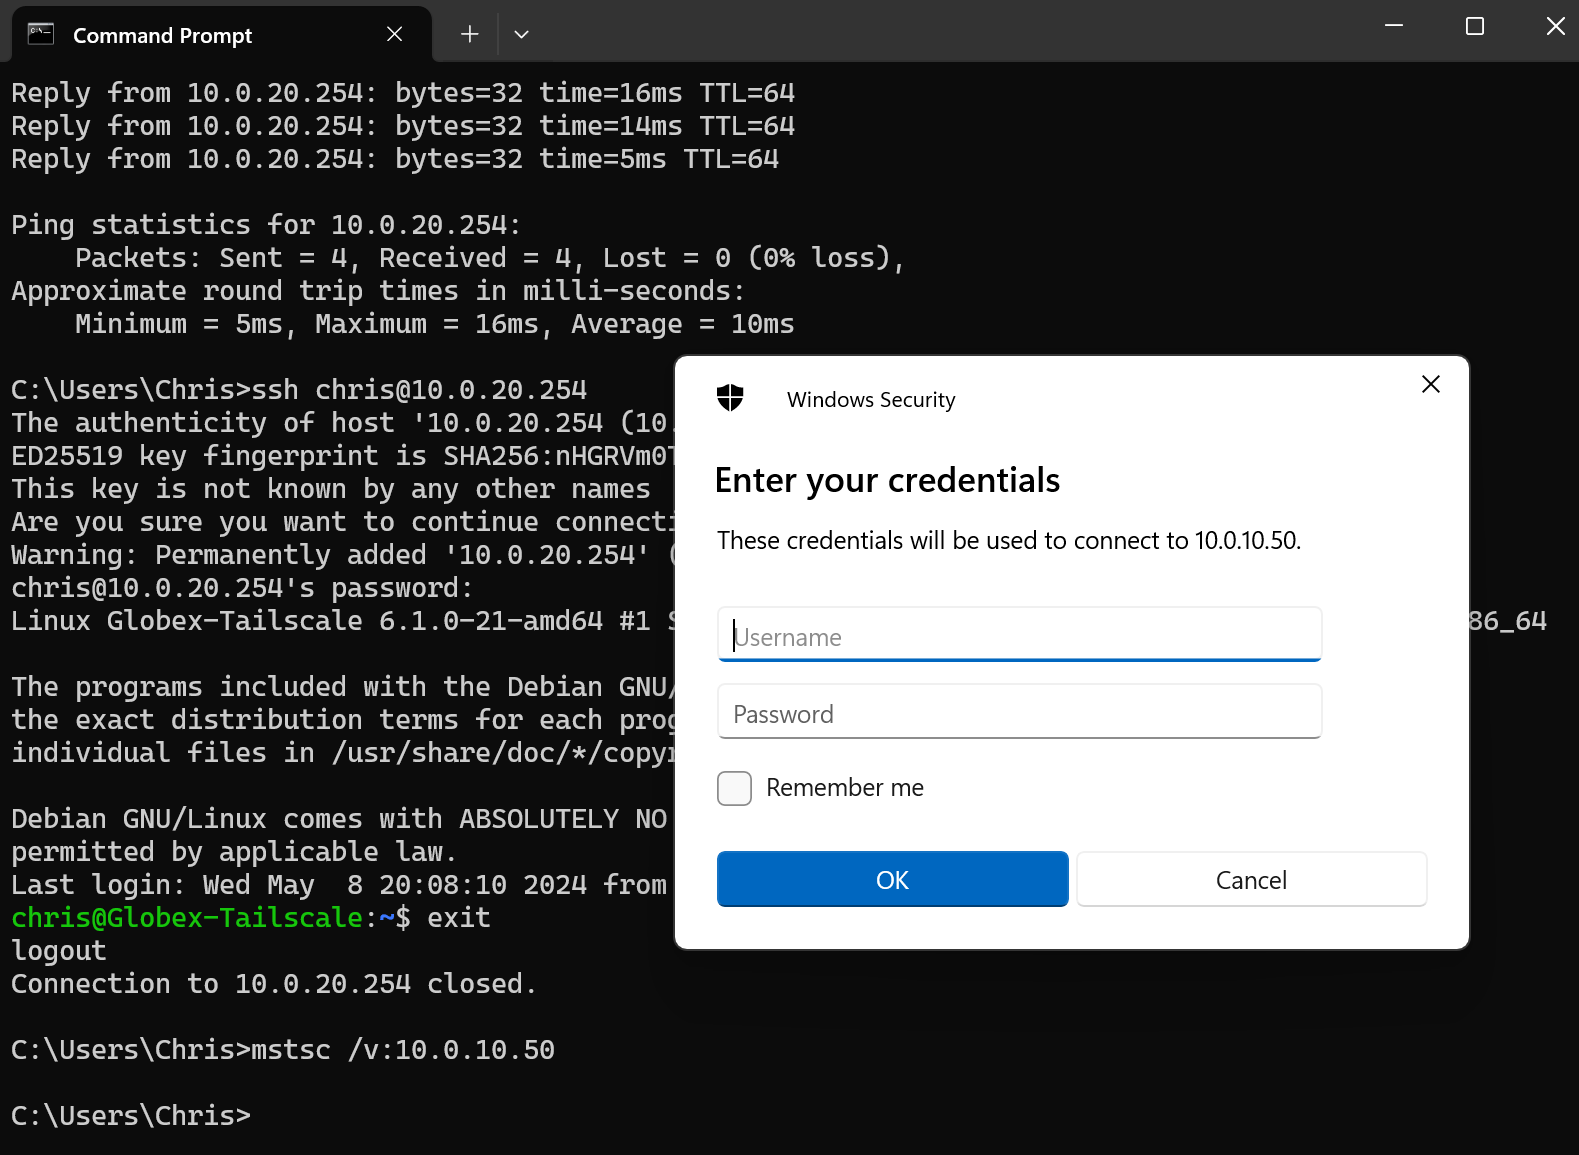
Looks good.
Testing RDP to Globex Web Server from a MacOS machine that is also a member of the Globex Tailnet:
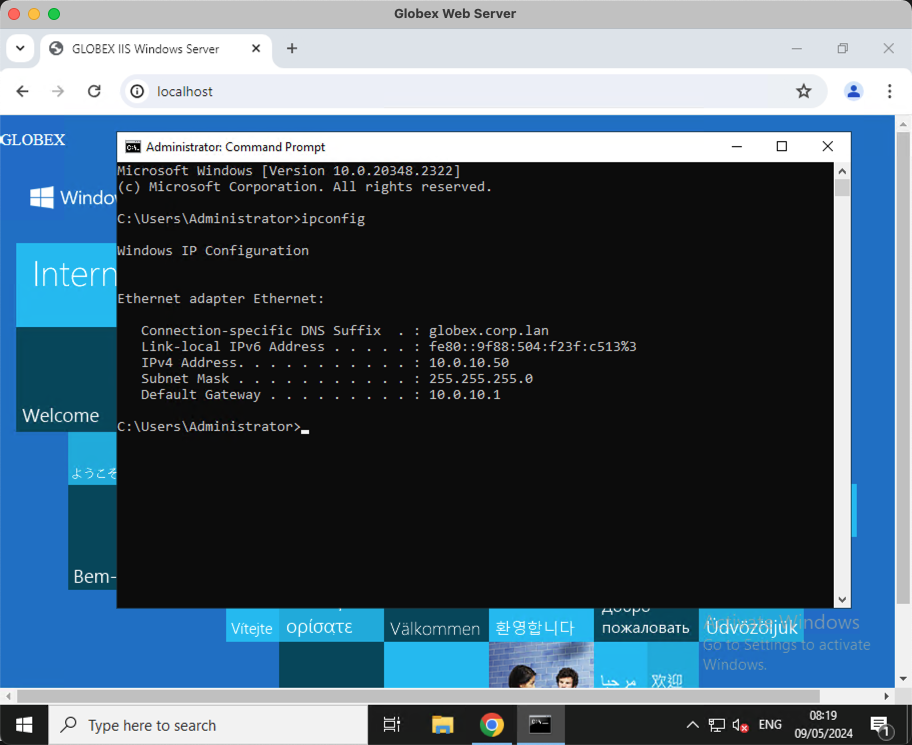
Nice!
Conclusion and Wrap Up
So the unexpected third act is complete. You made it to the end… Again!
In this post we covered a small piece of missing VPC configuration. Without it, our subnets inside our VPCs were isolated from each other. Fixed now.
Secondly, we simplified our VPCs even further: We provided an easier method to access VMs located in the VPCs, we removed a newly superfluous Windows jump server VM, removed unneeded security policies and floating IPs.
With those gone, the net result is that we increased the security of the Globex and Initech tenant VPCs. How?
Remember that unsolicited traffic inbound for Globex is only able to access via the single floating IP bound to the web server, 172.16.99.34? Let’s run a full portscan against that single DNAT IP:
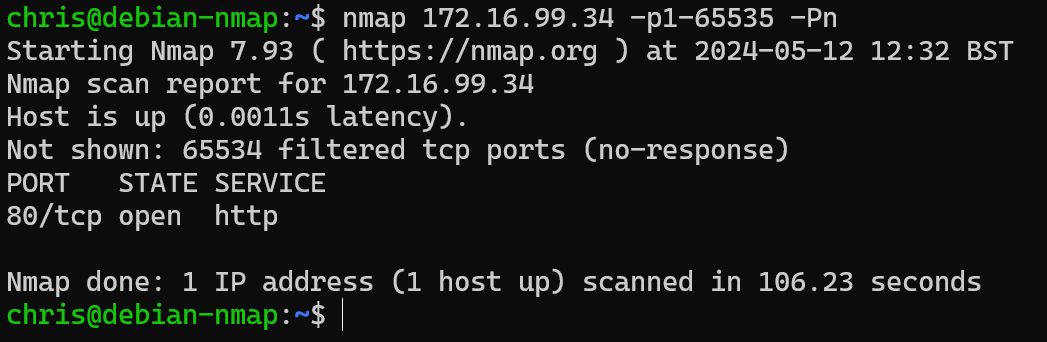
As expected, just the one port open and allowing internet traffic into the Globex VPC: port 80 http. Nice and secure, thanks to our security policy.
Thanks to Tailscale we have precisely zero IP addresses or ports required for client VPN access to their respective tenant VPCs.
So that’s it, again. Yes, part 3 was unexpected, but I think you’ll agree - it sure delivered!
-Chris