


 In this post I want to look at deploying a Nutanix Community Edition 2.0 as a nested VM under VMware ESXi.
Those that follow me on LinkedIn will already be aware of a little spoiler which may or may not mean that I’m going to spending some more time looking into and learning about the Nutanix product portfolio…
For everyone that comes here to enjoy my regular VMware content, you need not worry - that content is certainly not going away.
What’s more is that Nutanix products can be layered on top of VMware products to augment functionality. From Nutanix vs. VMware: Comparing Hyperconverged Infrastructure and Hybrid Cloud Solutions:
In fact, while many Nutanix customers choose to run ESXi on the Nutanix platform today, a number of others choose Microsoft Windows Server Hyper-V and even more customers are now switching to Nutanix AHV to reduce virtualization licensing costs, enable a single pane-of-glass management across hypervisors, and provide the ability to run business-critical workloads.
Quite why anyone would want to run Hyper-V… ![]()
Overview
Nutanix - Introduction & Architecture
Nutanix AOS (Acropolis Operating System) is the company’s primary operating system for its Hyper-Converged Infrastructure (HCI) products. It provides a comprehensive set of data services, including storage, networking, security, and management capabilities, all integrated into a single platform.
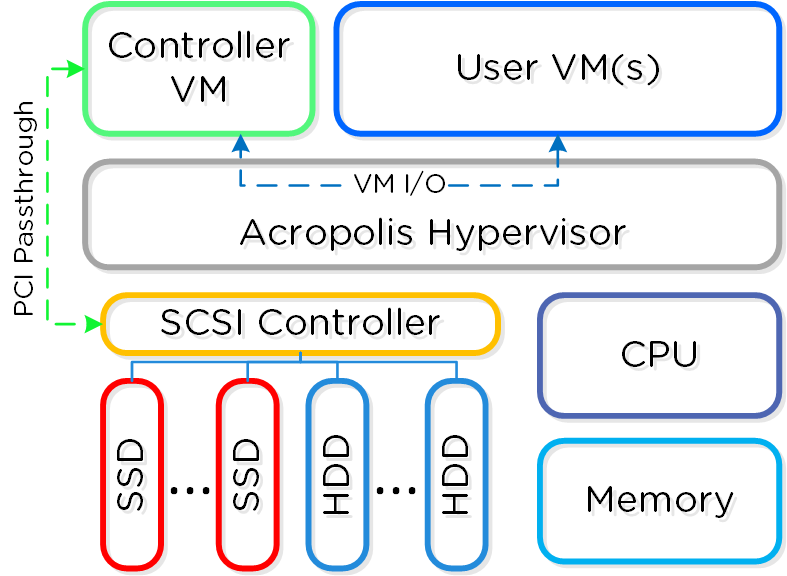
Nutanix AHV (Acropolis Hypervisor) is Nutanix’s native hypervisor, which allows customers to run multiple virtual machines on a single physical server. AHV is built on open-source KVM technology and is included as part of Nutanix AOS.
One major difference to ESXi is that AHV uses a Controller VM (CVM) to manage storage local to the hypervisor, as seen in green below:
Nutanix - For the vSphere Admin
I’m sure this will upset both VMware and Nutanix supporters alike (Microsoft Hyper-V supporters are already annoyed at my comment above) but here goes.
To understand the Nutanix product portfolio and how it would potentially map to the VMware product portfolio, lets lay the products against each other:
| VMware Product | Nutanix Product | ||
|---|---|---|---|
| ESXi | AHV | ||
| ESXi Host Client | PRISM Element | ||
| vSAN | AOS Storage | ||
| vCenter | PRISM Central | ||
| VMtools | Nutanix Guest Tools / VirtIO | ||
| NSX | Flow | ||
| Converter | Move |
With everyone suitably annoyed, let’s move on! ![]()
Right, let’s learn through doing.
Nutanix ISO Download
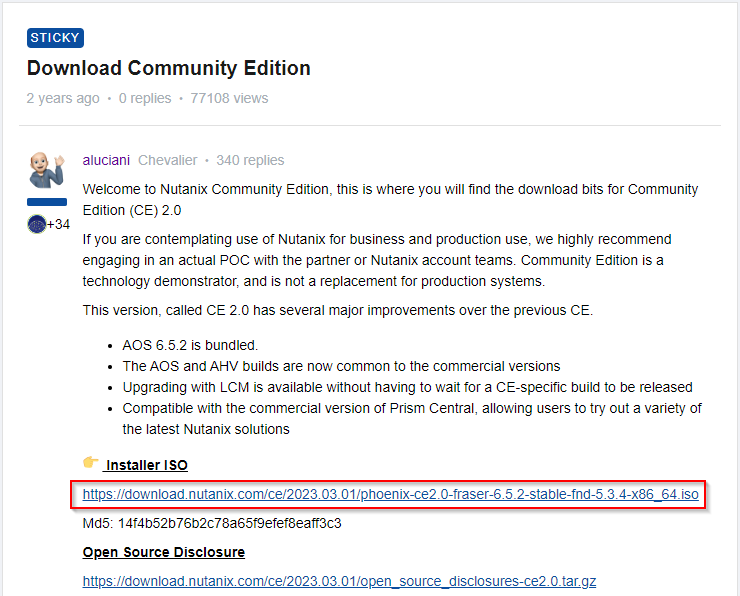
We will deploy the Community Edition 2.0 (released March 2023) available HERE, no login required.
Download the CE 2.0 ISO phoenix-ce2.0-fraser-6.5.2-stable-fnd-5.3.4-x86_64.iso:
IP Addresses and ESXi Config
Now that we have our ISO, to successfully deploy it as a VM running on ESXi, we need the following:
Two IP Addresses:
- One for the AHV Host
- One for CVM (Storage Controller VM) running on the AHV host
In my lab, I’ll use the following:
- Nutanix Host: AHV-SITE-A-1 - 192.168.10.51
- Nutanix CVM: CVM-SITE-A-1 - 192.168.10.50
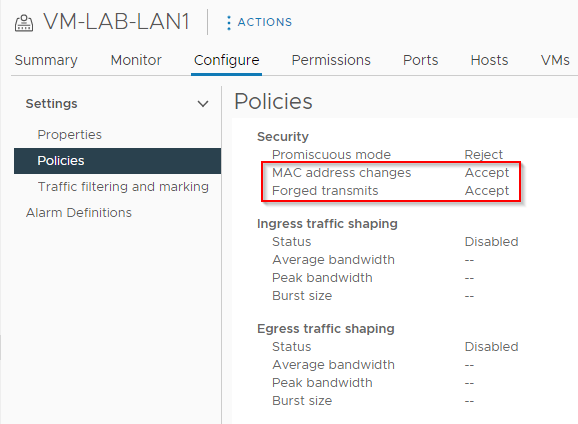
As we are running VMs under our AHV VM, we need to enable the following on our ESXi vSwitch portgroup:
As below:
Our Nutanix AHV host and CVM will require internet access. This is required so that they can access our Nutanix NEXT account (link provided to create a free account later on if you don’t already have one) and download various updates.
AHV VM Config
Let’s create our VM. A VM with the following configuration is required:
- Compatibility: ESXi 7.0 U2 and later
- Guest OS Family: Linux
- Guest OS Version: CentOS 7 (64-bit)
- 8 CPUs
- Expose hardware assisted virtualization to the guest OS - Ticked
- 32GB RAM
- SCSI Controller VMware Paravirtual
- 16GB HDD - SCSI(0:0)
- 200GB HDD - SCSI(0:1)
- 500GB HDD - SCSI(0:2)
- 1 VMXNET3 Network Adapter
- VM Options > Boot Options > Firmware > BIOS
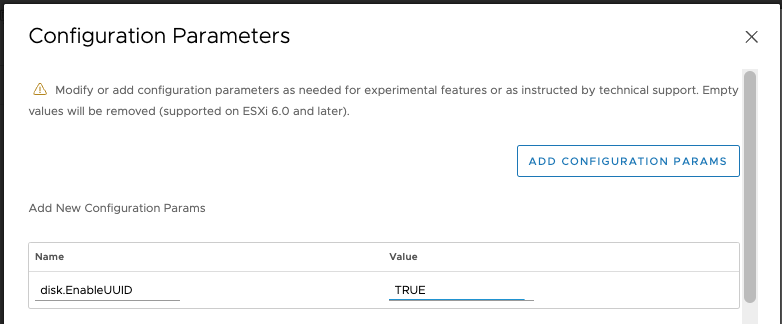
Finally, so that ESXi always presents consistent disk UUIDs to our AHV VM, we need to set disk.EnableUUID to TRUE in our AHV VM advanced settings. This can be achieved as follows:
- Select the AHV VM and select Actions > Edit Settings
- Select VM Options and expand the Advanced section
- Click EDIT CONFIGURATION
- Select ADD CONFIGURATION PARAMS
- Add the param name disk.EnableUUID and set the value to TRUE
Further details on setting disk.EnableUUID can be found in the resolution section of VMware KB52815.
Click OK to save and power the AHV VM as normal.
Once booted from the phoenix-ce2.0-fraser-6.5.2-stable-fnd-5.3.4-x86_64.iso and after a short delay, the following is seen:
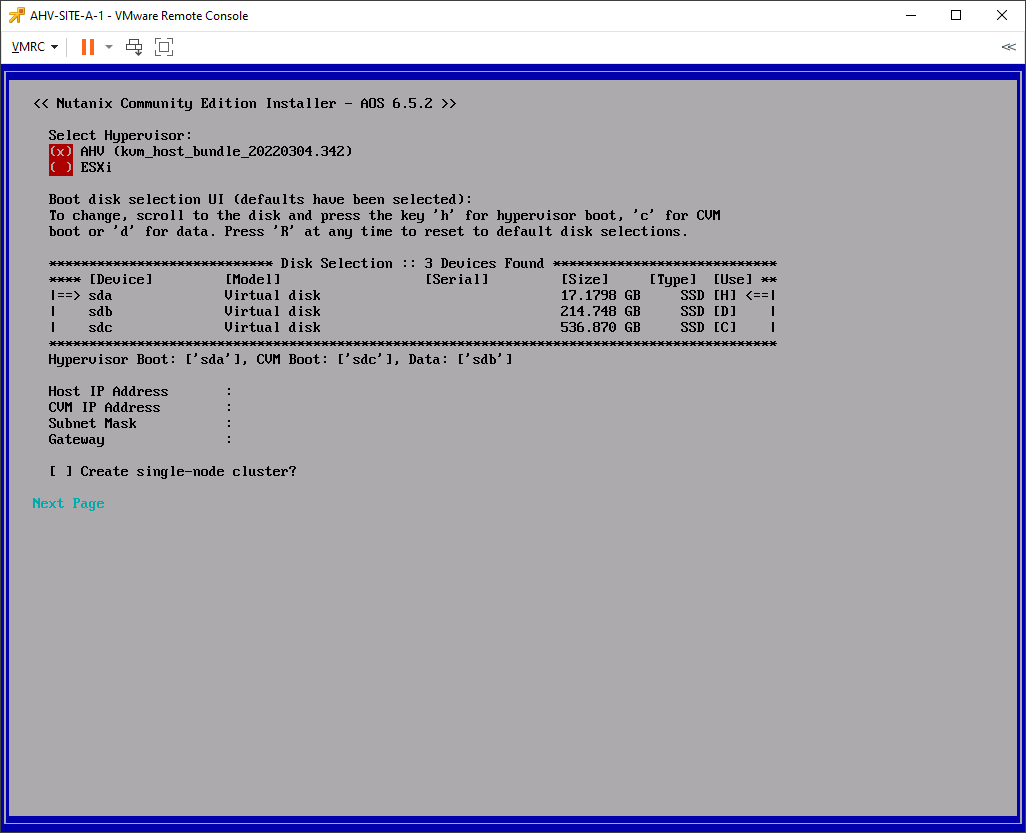
Select and verify the following:
- AHV Install
- 16GB = Hypervisor Boot [H]
- 200GB = Data [D]
- 500GB = CVM Boot [C]
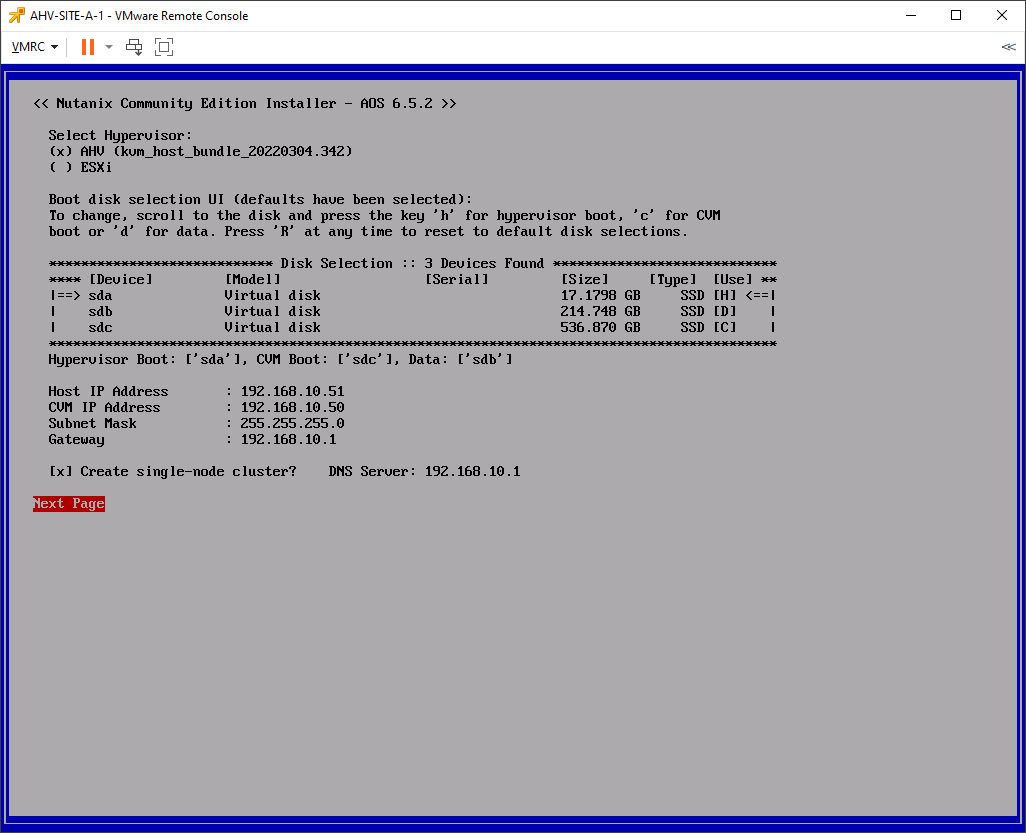
Then enter, using tab to move between selections:
- Host IP address
- CVM IP address
- Subnet mask
- Gateway
- Check the single-node cluster box
- DNS server IP address
Once completed, the configuration should resemble the following:
On the next page, scroll to end of and accept licence agreement and tab to start the installation.
After allowing around 10 mins for the initial installation, press Y to reboot.
After allowing around another 10 to 20 mins for a nice cup of coffee the host and CVM to boot and complete installation, ping the AHV host and the CVM. Both should be available.
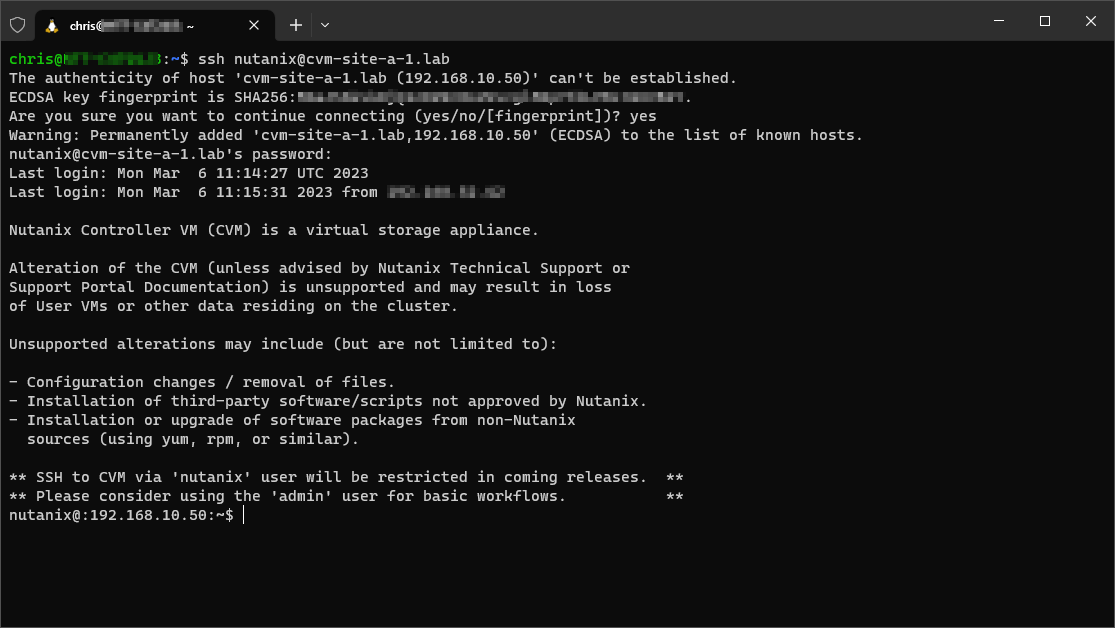
Next, SSH to it CVM using the following credentials:
- Username: nutanix
- Password: nutanix/4u
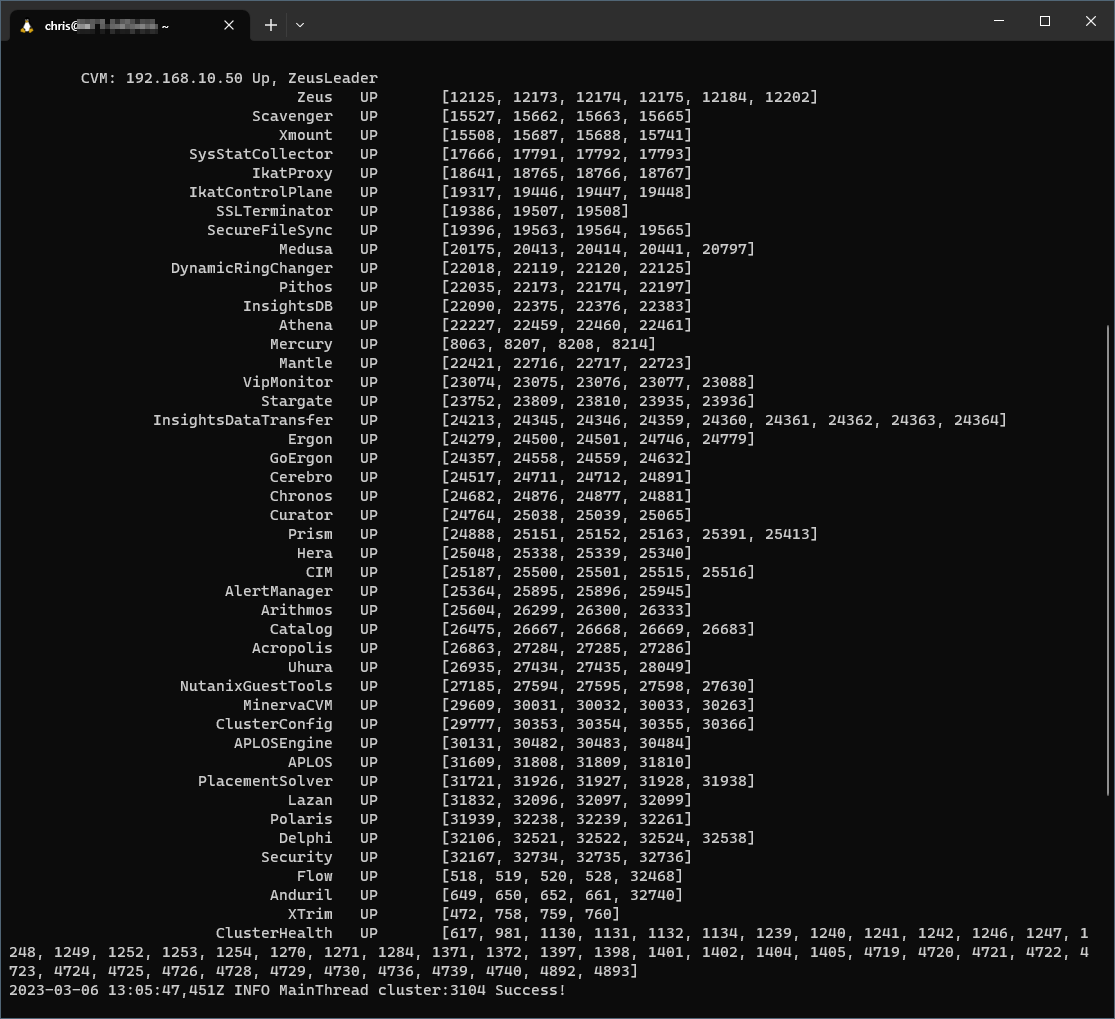
Execute the following command to check the status of the cluster:
cluster statusConfirm the output resembles the following showing that all services are up:
If some services return the status of “DOWN”, issue the following command to start them:
cluster startNext, open a browser and browse to:
https://<CVM IP or FQDN>:9440If you receive “You cannot visit right now because the website sent scrambled credentials that Chrome cannot process.” from Google Chrome as shown below:

Type thisisunsafe and Chrome will continue to the PRISM login page.
Login using the same credentials as before:
- Username: admin
- Password: nutanix/4u
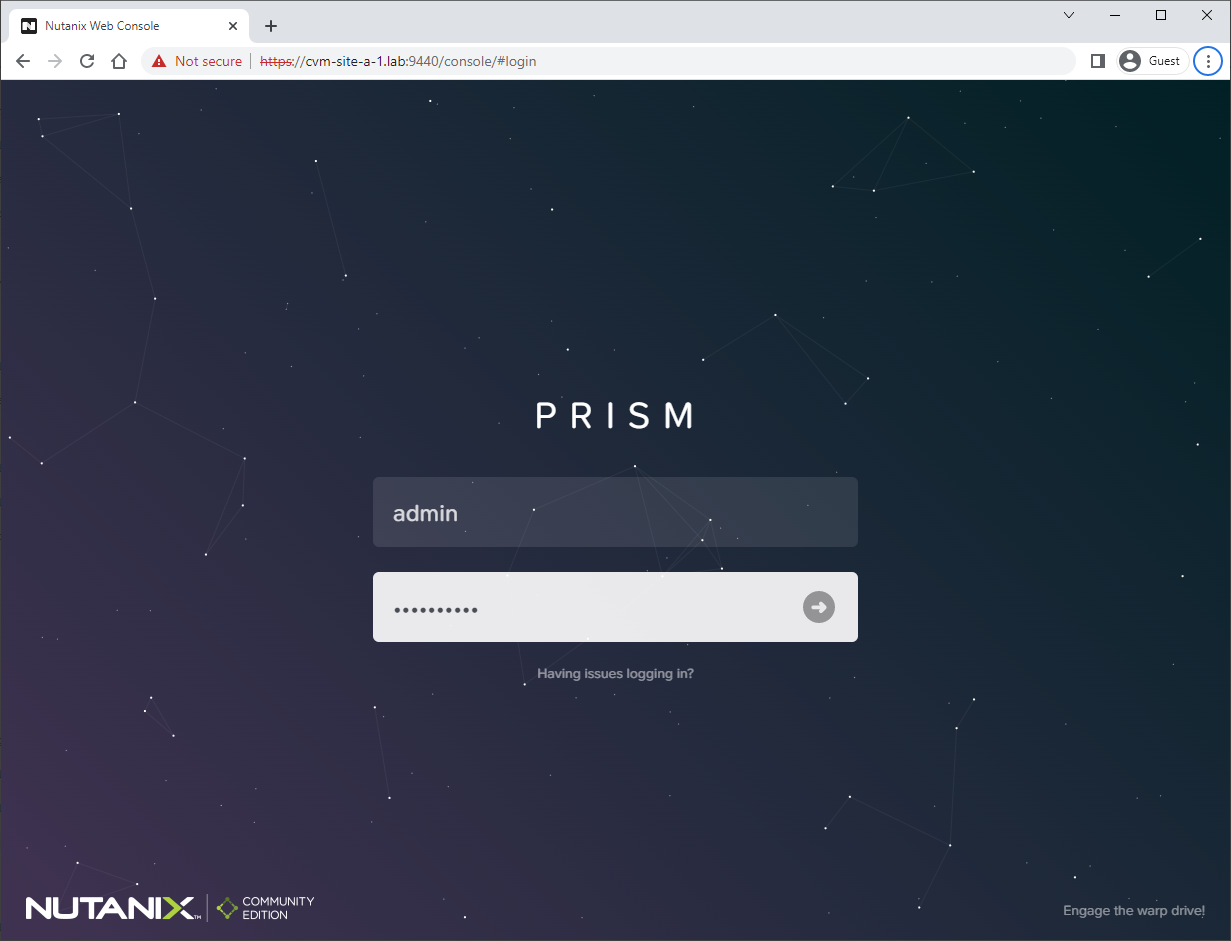
When prompted, change password and login again with your new password.
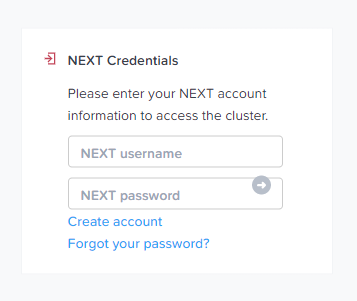
Next enter your Nutanix portal credentials (Use the link to create a free account if you don’t already have one):
If you receive the error “Unknown host, could not reach NEXT server. Please configure name server”:
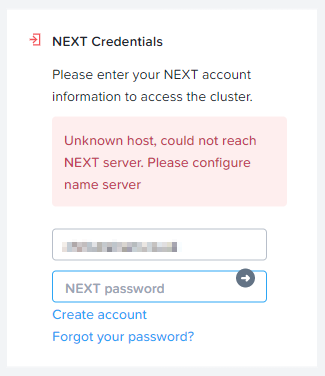
Guess what, you’ll need to configure a DNS server. SSH back into the CVM and use the following commands to check, remove and add DNS name servers:
ncli cluster get-name-servers
ncli cluster remove-from-name-servers servers="<INCORRECT DNS SERVER IP>"
ncli cluster add-to-name-servers servers="<CORRECT DNS SERVER IP>"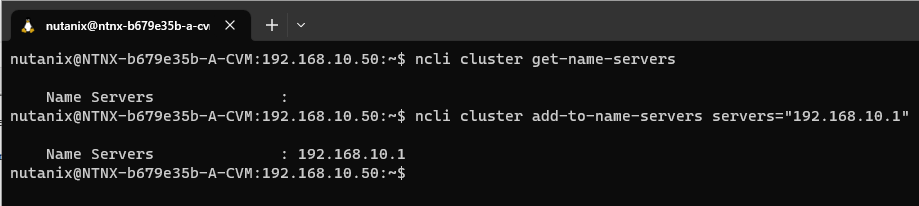
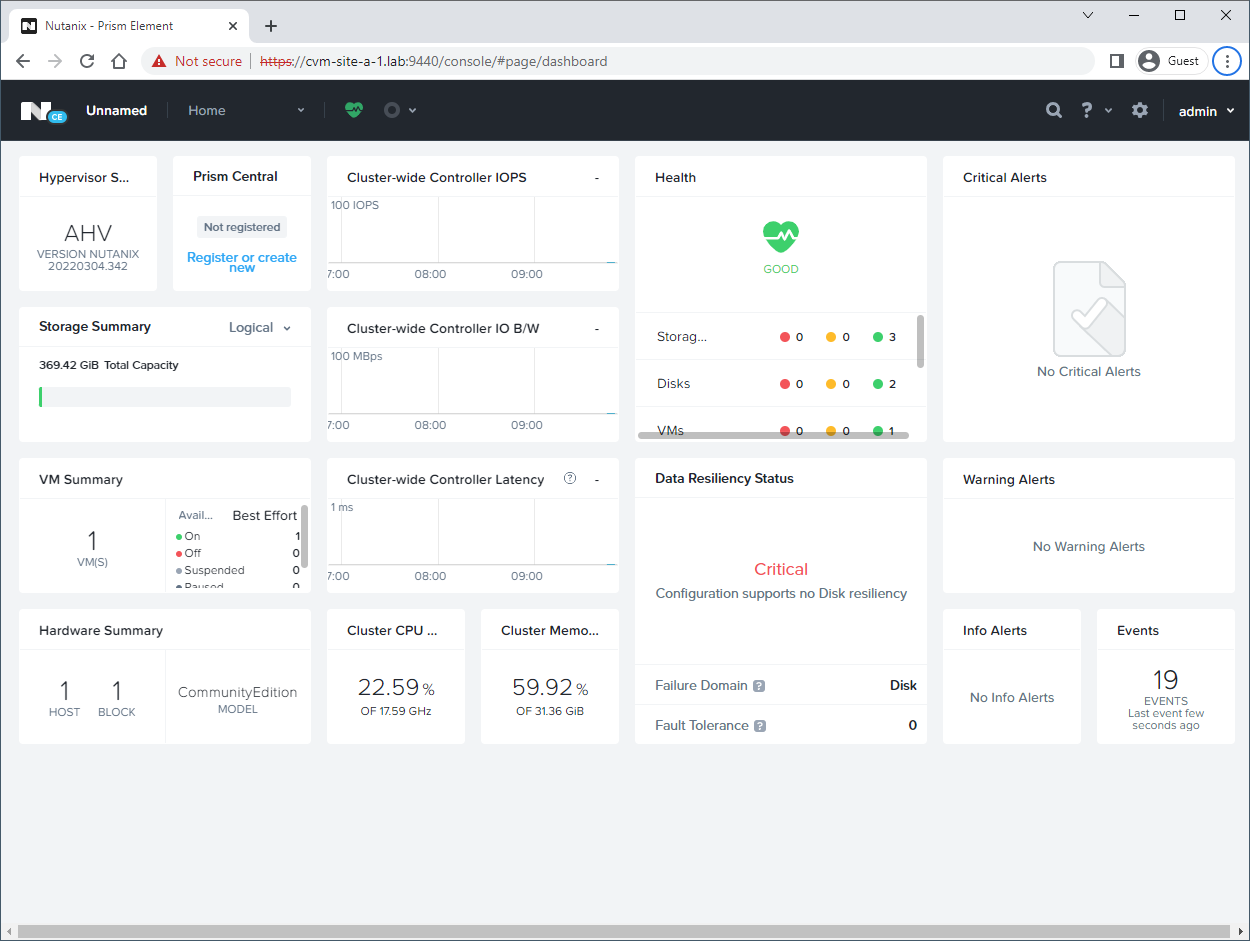
After reattempting to login, you should be presented with the Prism Element console:
Installing VMware Tools
Whilst VMware recommend the use of Open-VM-Tools, I’m going to install the ESXi bundled version of VMtools for ease of installation and avoidance of “dependency hell”.
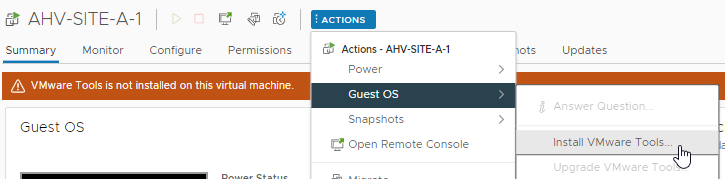
Mount the VMtools ISO image in the normal way:
SSH into the AHV host (not the CVM) using these credentials:
- Username: root
- Password: nutanix/4u
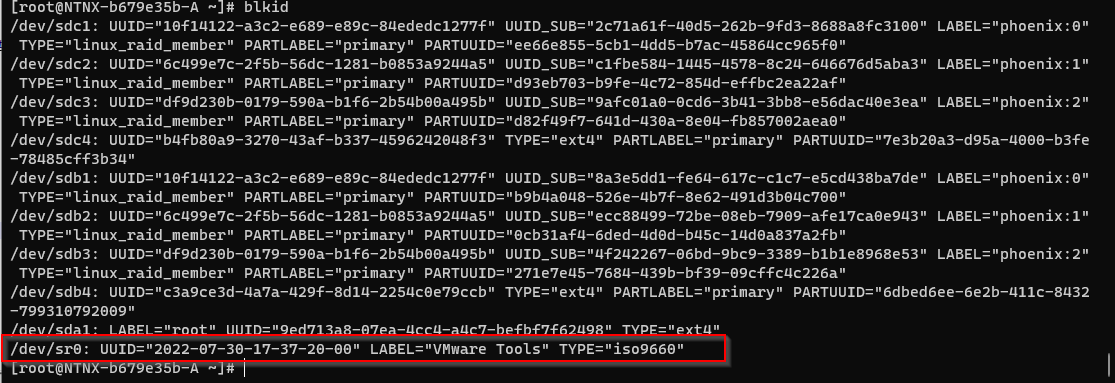
Run the following command to find the mounted VMtools ISO:
blkidAs can be seen below, VMtools ISO is available at /dev/sr0:
Next, create a mount point, mount the VMtools ISO and take a look at the contents of the ISO image:
mkdir /media/iso
mount /dev/sr0 /media/iso
ls /media/iso
Next, let’s copy VMwareTools-10.3.25-20206839.tar.gz to /root and extract it:
cp /media/iso/VMwareTools-10.3.25-20206839.tar.gz /root/
cd /root
tar -xf VMwareTools-10.3.25-20206839.tar.gz
Launch the installer:
cd vmware-tools-distrib
./vmware-install.pl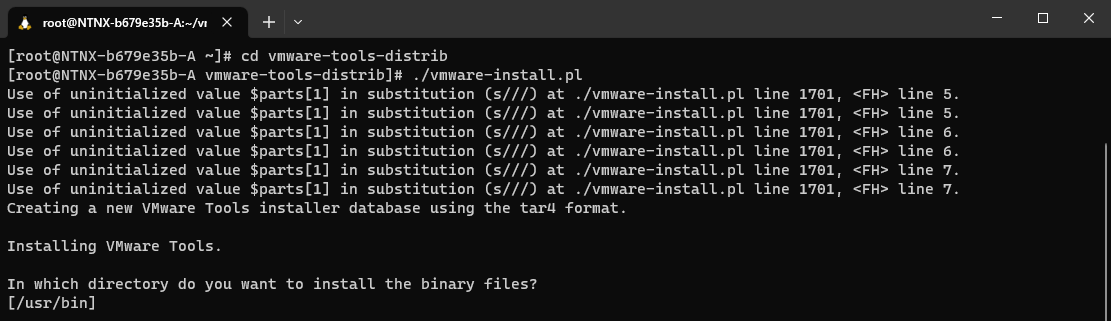
Accept the defaults for all options (just press RETURN).
Confirm VMTools is running:
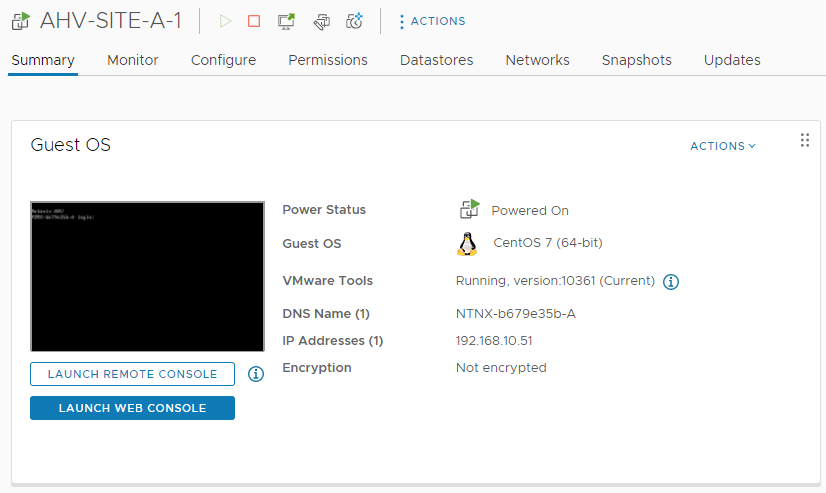
That is the basics done.
Updates
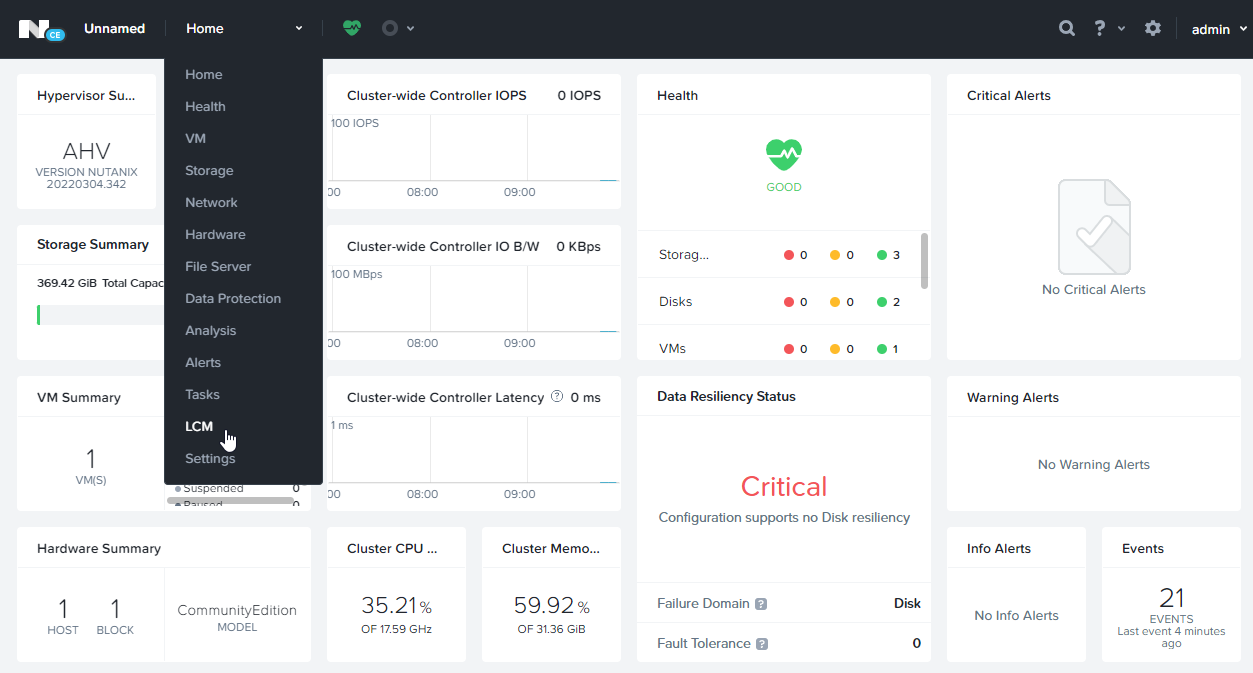
From the menu bar, select LCM as below:
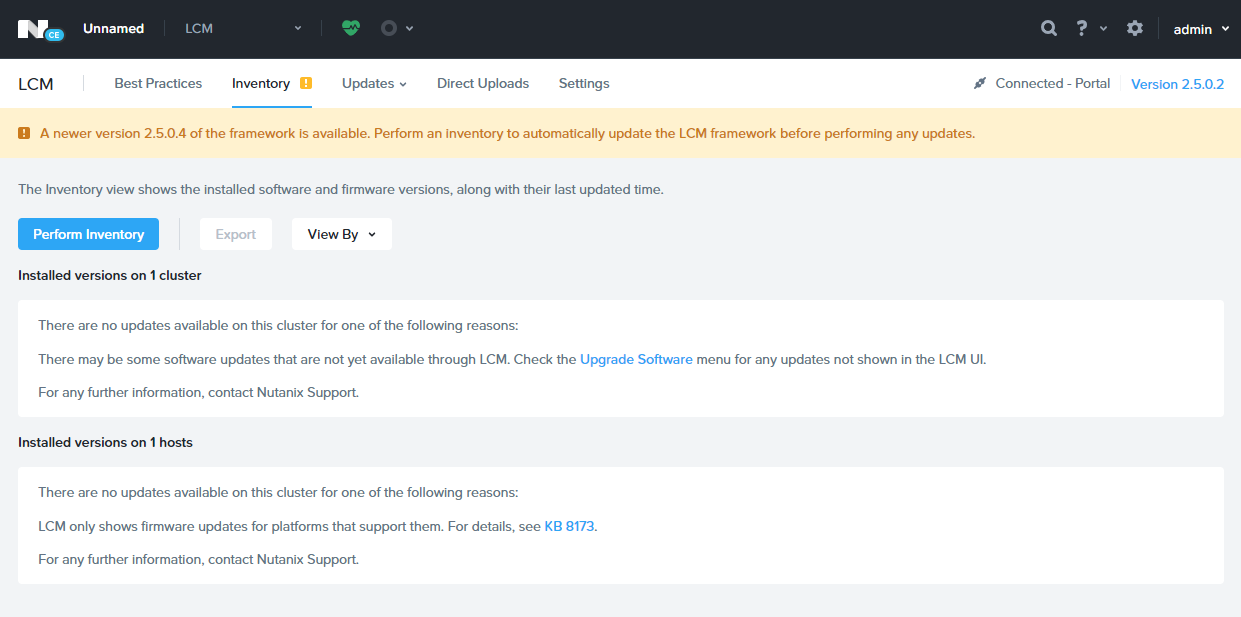
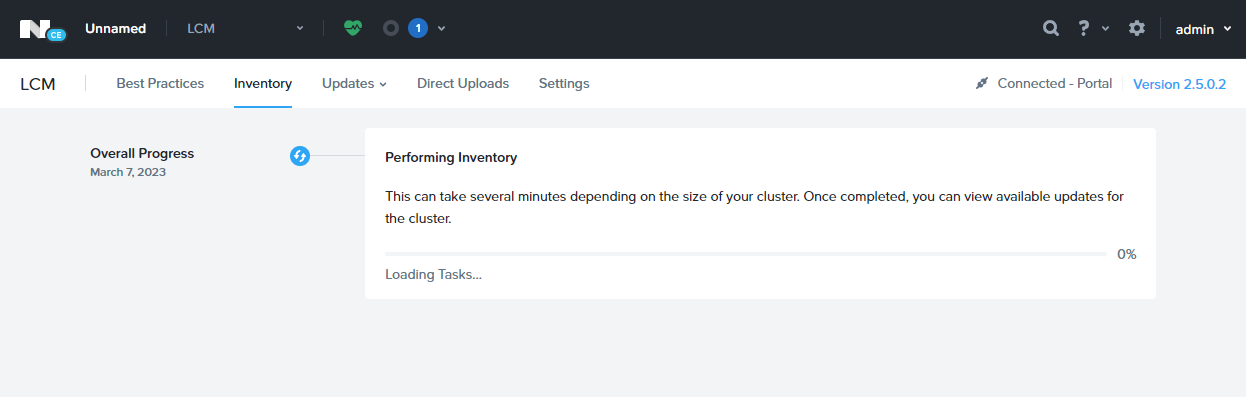
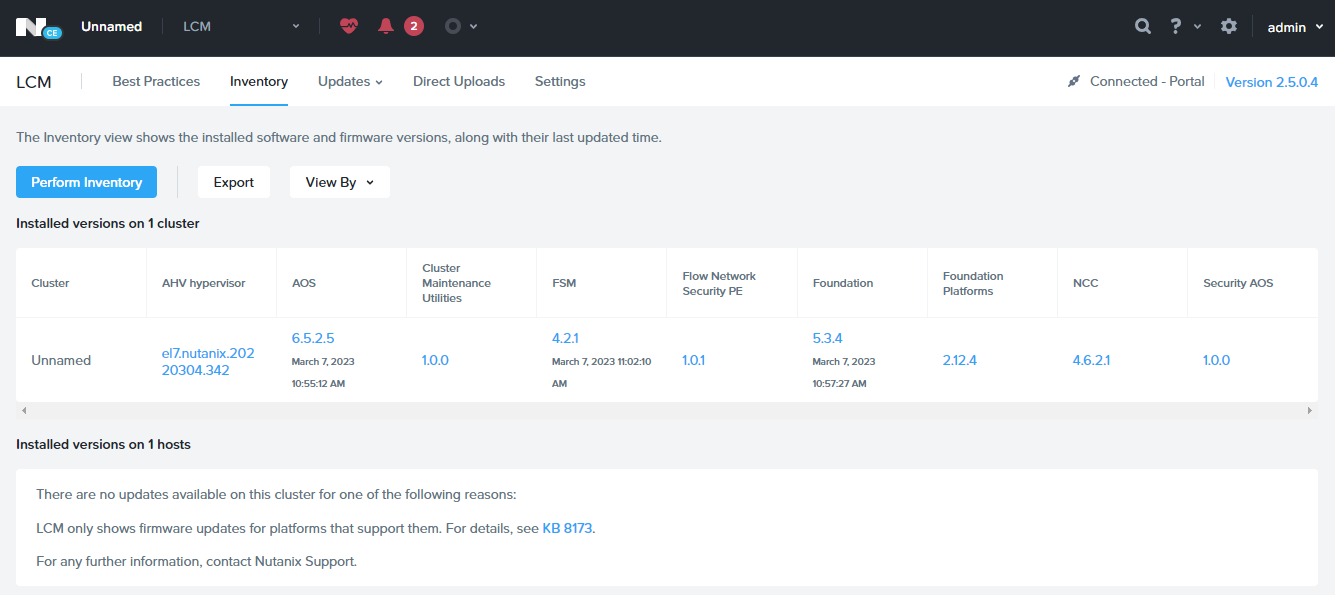
Click Inventory > Perform Inventory:
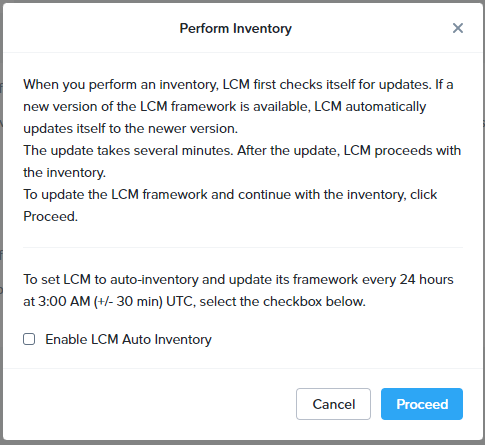
Click Proceed:
Allow time for the inventory and LCM update to complete:
Click on Updates > Software to view available updates. Yep, some updates are available to be applied. Select all and then View Update Plan:
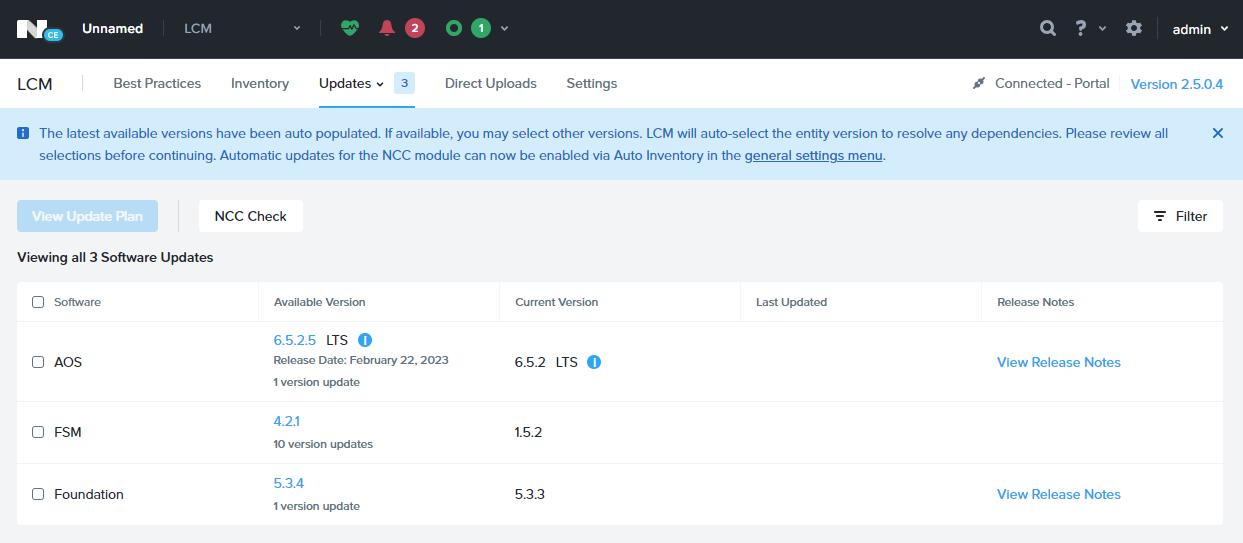
Select all updates and click View Update Plan:
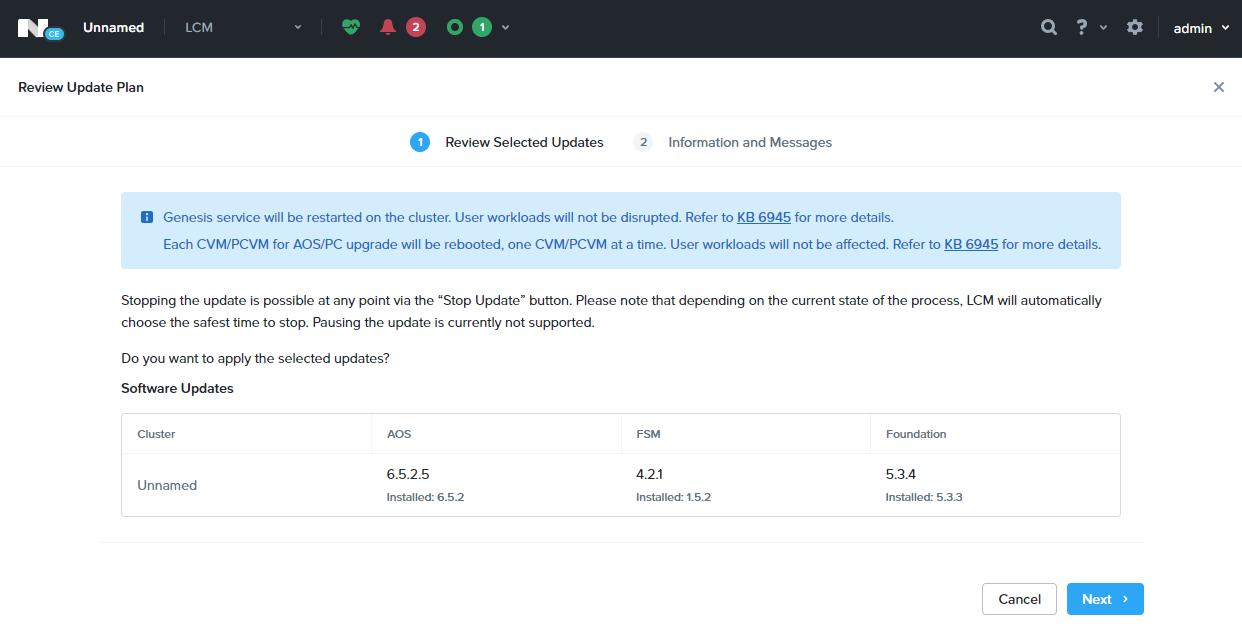
Click Next to continue and click Apply Updates. Allow time for the updates to be applied:
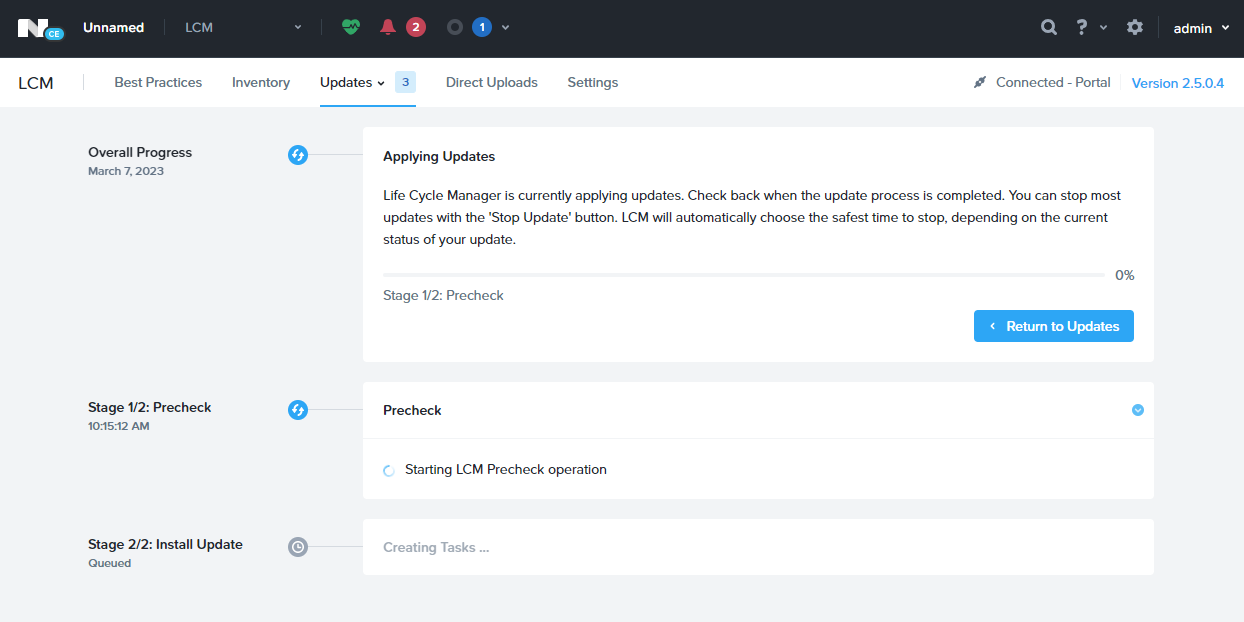
Depending on the updates being applied, connectivity to PRISM may drop. Simply allow time for the updates to install and reconnect after.
Job done:
Conclusion and Wrap Up
That will do for our first look at Nutanix AHV and PRISM Element. In this post we deployed Nutanix Community Edition 2.0 and updated it to bring it right up to date, in readiness for the deployment of virtual machines.
In future posts we will be looking to finish our AHV host configuration, spinning up some VMs and potentially deploying PRISM Central.
This post is part 1 of a multipart series. Find the other parts here:
- Part 1: This Part: Now it’s Time for Something Different
- Part 2: Configuration and Test VM Build
-Chris