


 Last time we configured a Windows 2012R2 Windows Deployment Services (WDS) Server to deploy Windows installations over the network. All pretty standard stuff.
In case you missed it, have a read here to see what we did.
Now it’s time use our WDS server to deploy something other than (boring old) Windows. Yep, lets start pushing WDS to do something else.
This time: Deploy VMware ESXi.
Overview
Step 1: WDS Client Boot Image
First off we need to extend the boot mechanism used by the WDS clients as the standard Microsoft boot image is only really any good for deploying Windows. We do this by replacing the standard Windows PXE boot image with a PXElinux boot image. PXElinux is a lightweight bootloader for network booting. It is closely related to Syslinux used for standard filesystem booting (hard drives, floppies etc) and Isolinux used for booting from CD’s, DVD’s etc.
First off, download a copy of Syslinux v4.07 from here. Yes, later versions are available, but v4.07 is known to work with WDS, so v4.07 it is.
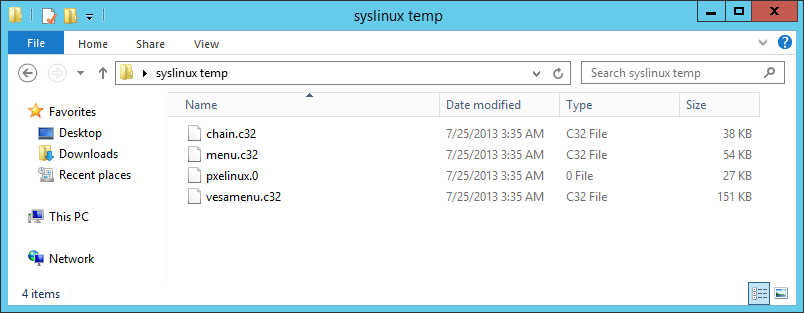
From the zip we need the following four files:
syslinux-4.07.zip\core\pxelinux.0
syslinux-4.07.zip\com32\chain\chain.c32
syslinux-4.07.zip\com32\menu\menu.c32
syslinux-4.07.zip\com32\menu\vesamenu.c32
Extract them into a temporary folder for ease:
Then copy the four files into our remote install boot folders, here:
C:\RemoteInstall\Boot\x86\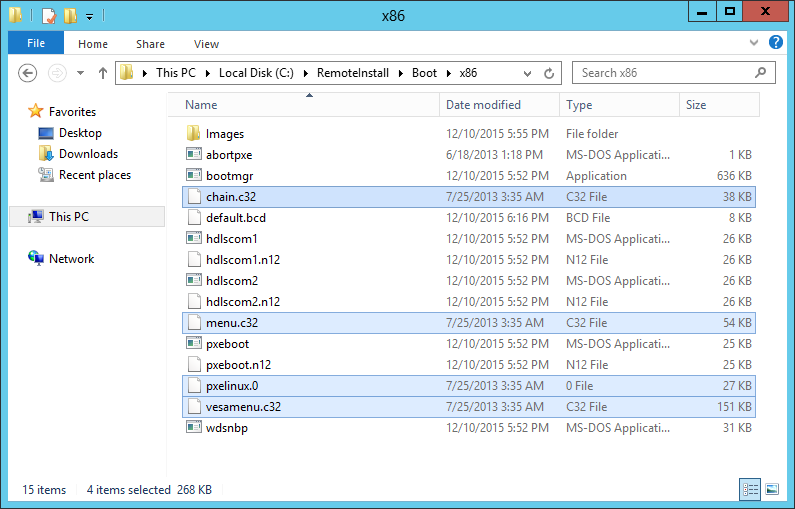
And here:
C:\RemoteInstall\Boot\x64\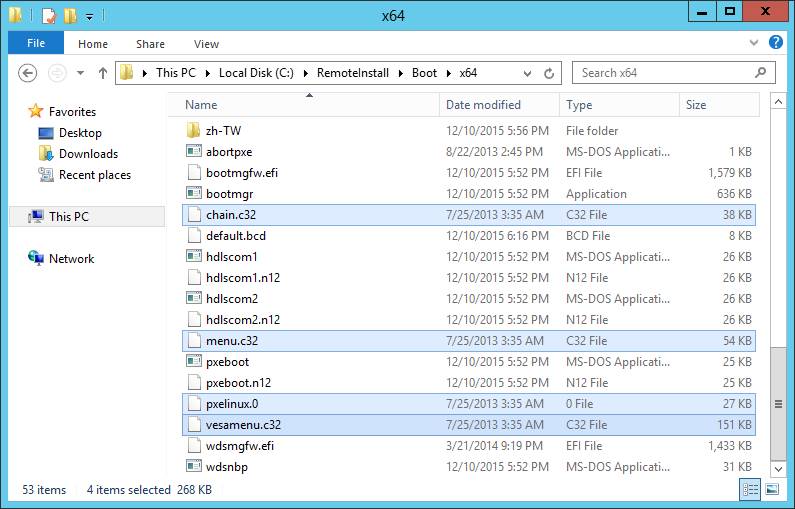
Rename the Microsoft pxeboot.n12 files to pxeboot.0 to allow them to be called from PXElinux:
rename C:\RemoteInstall\Boot\x86\pxeboot.n12 pxeboot.0
rename C:\RemoteInstall\Boot\x64\pxeboot.n12 pxeboot.0
Create two additional folders called pxelinux.cfg
mkdir C:\RemoteInstall\Boot\x86\pxelinux.cfg
mkdir C:\RemoteInstall\Boot\x64\pxelinux.cfg
Within each pxelinux.cfg folder, create a file called default with no extension:
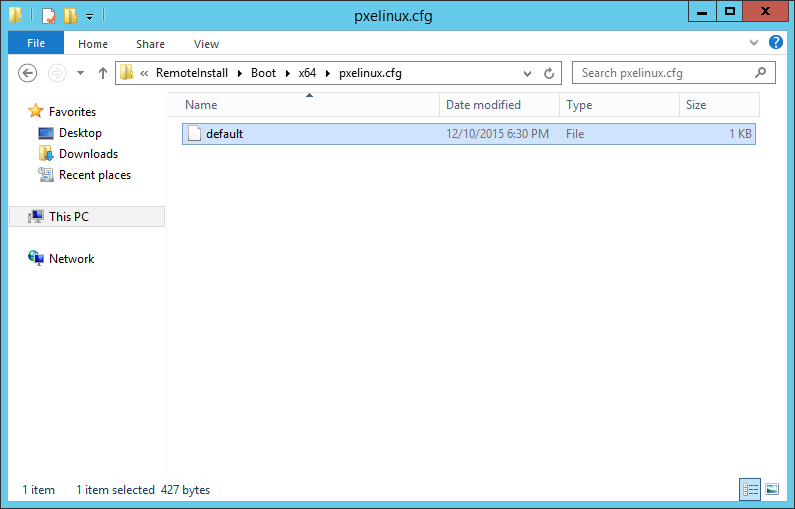
These default files will be the menu files seen when the WDS clients boot. We have separate menus for x64 and x86 bootable clients.
Paste the following text into the C:\RemoteInstall\Boot\x86\pxelinux.cfg\default menu file:
DEFAULT      menu.c32
PROMPT       0
MENU TITLE Chris' WDS PXE Boot Menu (x86)
MENU AUTOBOOT Starting Local System in 10 seconds

# Option 1 - Exit WDS PXE Linux & Boot Normally
LABEL bootlocal
      MENU LABEL ^Boot Normally
      MENU default
      LOCALBOOT 0
      TIMEOUT 100
      TOTALTIMEOUT 9000

# Option 2 - Run WDS
LABEL wds
      MENU LABEL ^Windows Deployment Services Boot
      KERNEL pxeboot.0
Paste the following text into the C:\RemoteInstall\Boot\x64\pxelinux.cfg\default menu file:
DEFAULT      menu.c32
PROMPT       0
MENU TITLE Chris' WDS PXE Boot Menu (x64)
MENU AUTOBOOT Starting Local System in 10 seconds

# Option 1 - Exit WDS PXE Linux & Boot Normally
LABEL bootlocal
      MENU LABEL ^Boot Normally
      MENU default
      LOCALBOOT 0
      TIMEOUT 100
      TOTALTIMEOUT 9000

# Option 2 - Run WDS
LABEL wds
      MENU LABEL ^Windows Deployment Services Boot
      KERNEL pxeboot.0
Run an administrative command prompt and paste in the following commands to tell WDS server to use the syslinux provided pxelinux.0 files for client booting:
wdsutil /set-server /bootprogram:boot\x86\pxelinux.0 /architecture:x86
wdsutil /set-server /N12bootprogram:boot\x86\pxelinux.0 /architecture:x86
wdsutil /set-server /bootprogram:boot\x64\pxelinux.0 /architecture:x64
wdsutil /set-server /N12bootprogram:boot\x64\pxelinux.0 /architecture:x64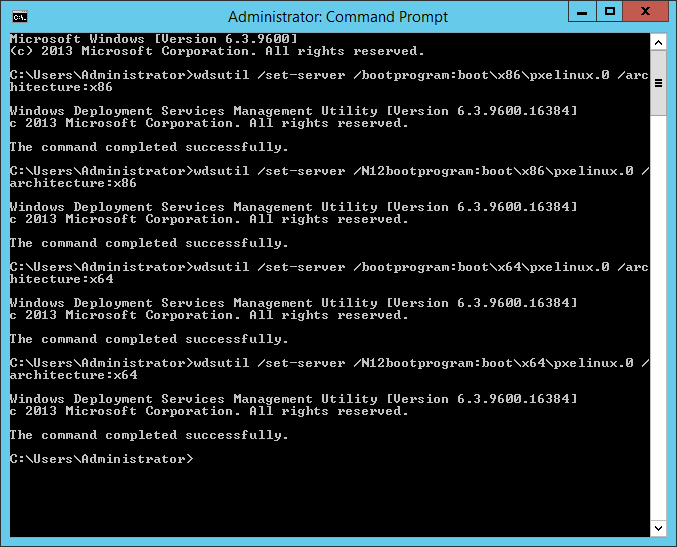
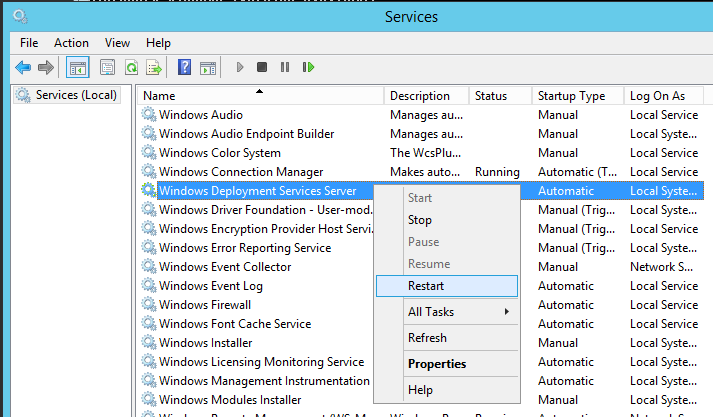
Finally, restart the WDS server service:
Ready to test!
Step 2: Testing PXElinux Booting
Before we move onto ESXi, lets check that WDS is pushing PXElinux and that our clients can still run WDS installs.
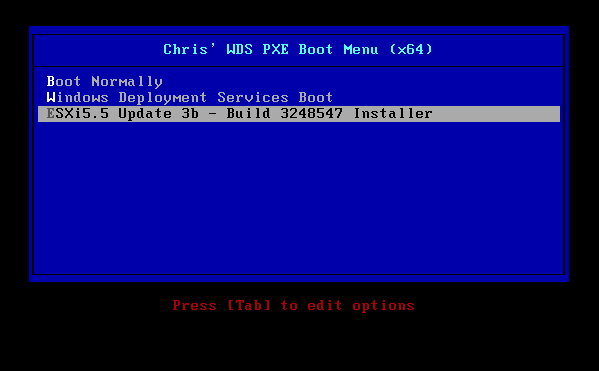
Upon PXE booting a client you should see the following menu appear:

Selecting Boot Normally should quit the menu and allow the client to boot from internal disk(s) whilst selecting Windows Deployment Services Boot should tell the client to carry on with a WDS boot and Windows install, same as before.
Step 3: Adding VMware ESXi Image to WDS Server
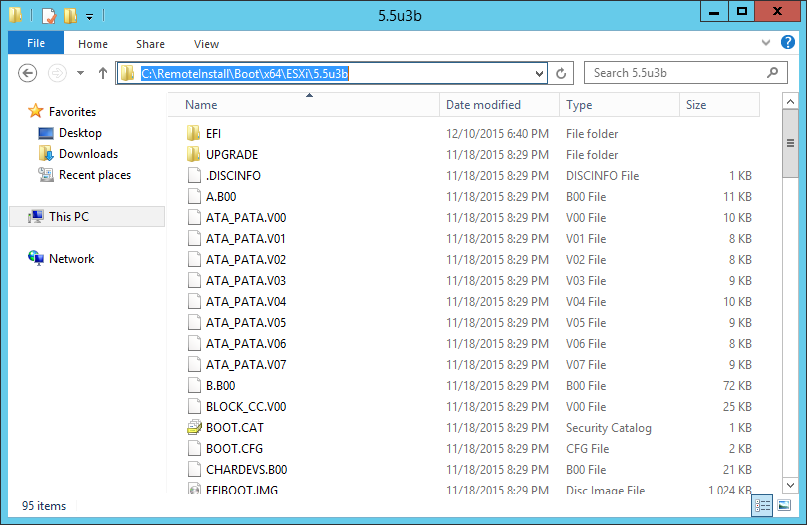
As I’m intending to deploy ESXi v5.5 Update 3b installs via my WDS server, my folder structure will be:
C:\RemoteInstall\Boot\x64\ESXi\5.5u3b You can choose to use whatever folder structure you like under C:\RemoteInstall\Boot\x64\ As I say, I’m deploying ESXi 5.5 Upadte 3b so this folder structure makes sense to me.
Extract your ESXi iso file to your chosen folder:
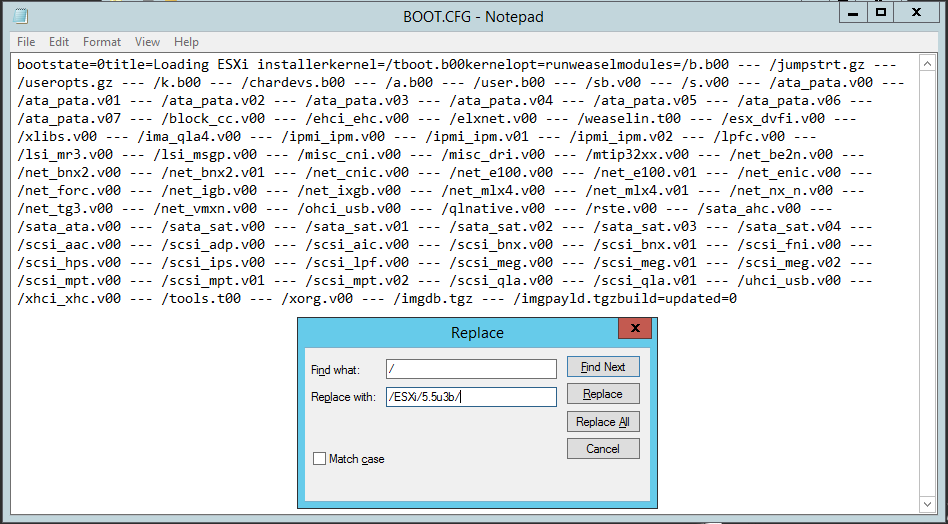
Once extraction has completed, open the BOOT.CFG file from your ESXi folder with notepad.
We need to append our boot path to all the files listed in this file. This path needs to match the path of our ESXi files.
I’m lazy, so I just CTRL-H (find and replace), complete the two boxes and hit Replace All:
Voila:
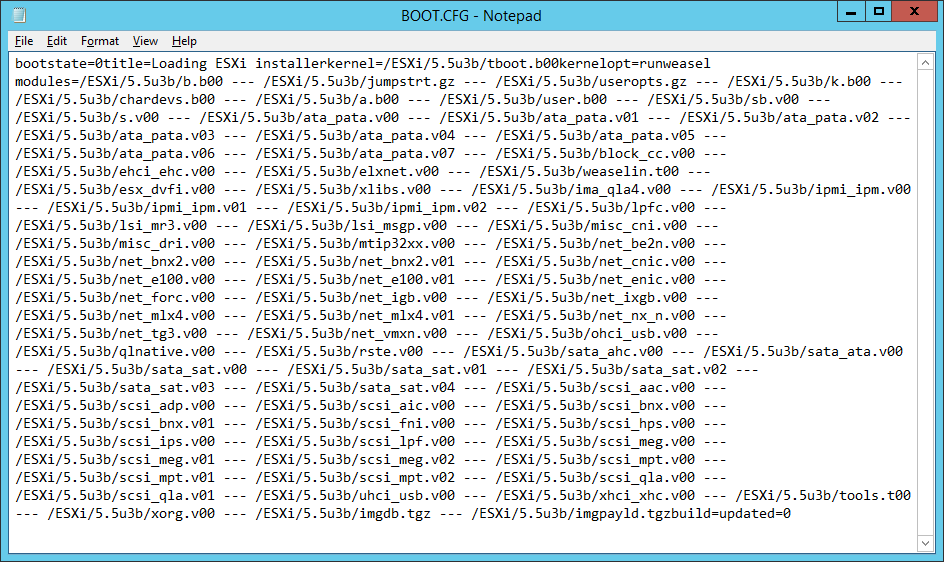
Save and close BOOT.CFG.
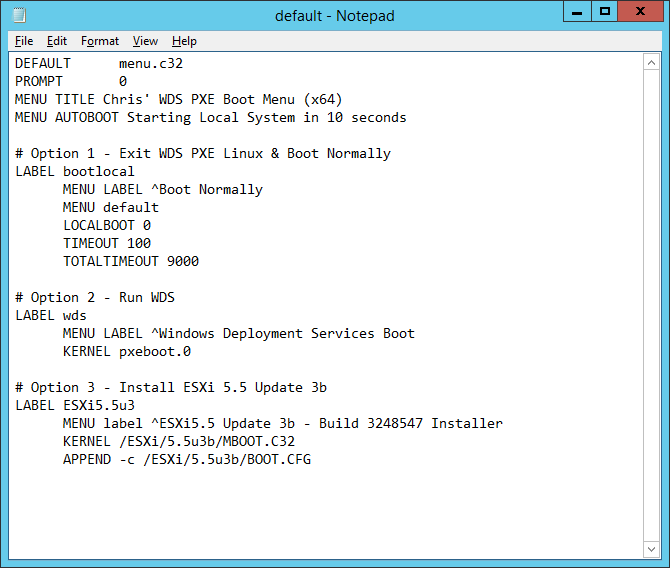
Finally, add an entry the C:\RemoteInstall\Boot\x64\pxelinux.cfg\default menu file:
# Option 3 - Install ESXi 5.5 Update 3b
LABEL ESXi5.5u3
      MENU label ^ESXi5.5 Update 3b - Build 3248547 Installer
      KERNEL /ESXi/5.5u3b/MBOOT.C32
      APPEND -c /ESXi/5.5u3b/BOOT.CFG
My x64 menu now looks like this:
Save and close.
Deploying ESXi via Windows Deployment Services Server
So then… Lets do this!
Boot my client and select the ESXi install option:
Looking pretty damn good:

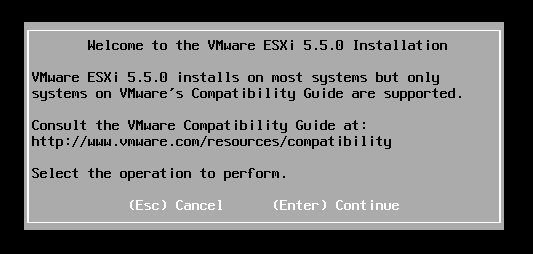
Welcome!
….answer some questions….let the installer complete….
Success, success!
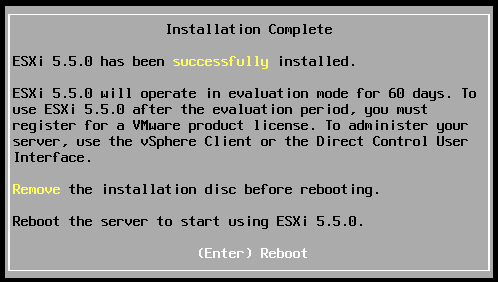
So there we have it - Windows Deployment Services server deploying VMware ESXi.

Winner, Winner, Chicken Dinner!
Next time WDS booting Windows PE and various other system diagnostic tools.
-Chris