 Last time we deployed and configured our vSphere replication appliances, catch up now. It’s a great read.
 ![]()
This time we will configure our vSphere replication appliances and kick off some replications.
Overview
The Lab
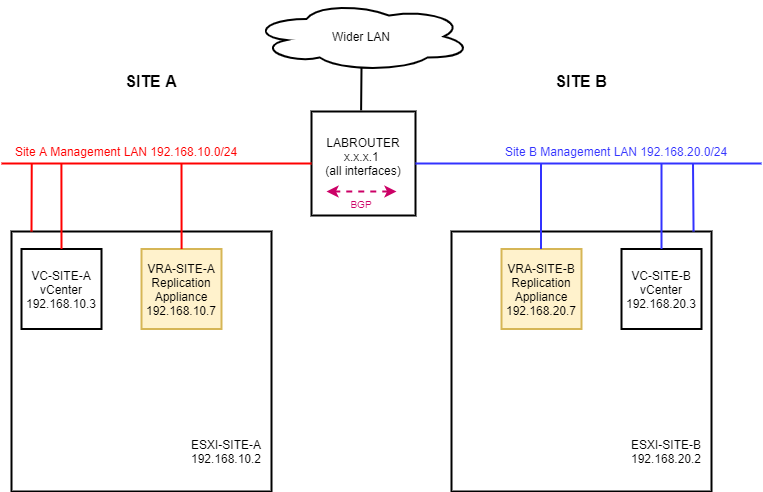
We have vSphere replication deployed into my two site lab:
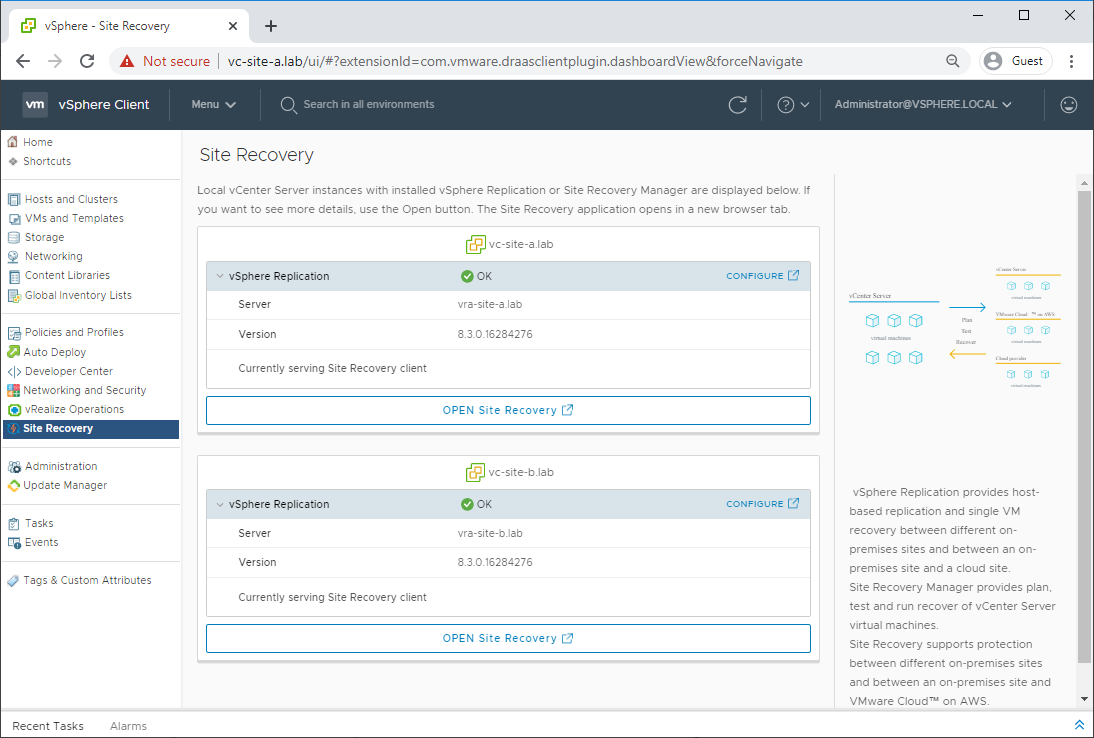
Which looks like this in vCenter - Site Recovery:
Site Pairing
Before we can replicate VMs across sites, we need to set up our site pairing.
From vCenter - Site Recovery, click OPEN Site Recovery for our first site (lab: vc-site-a.lab, Site A):
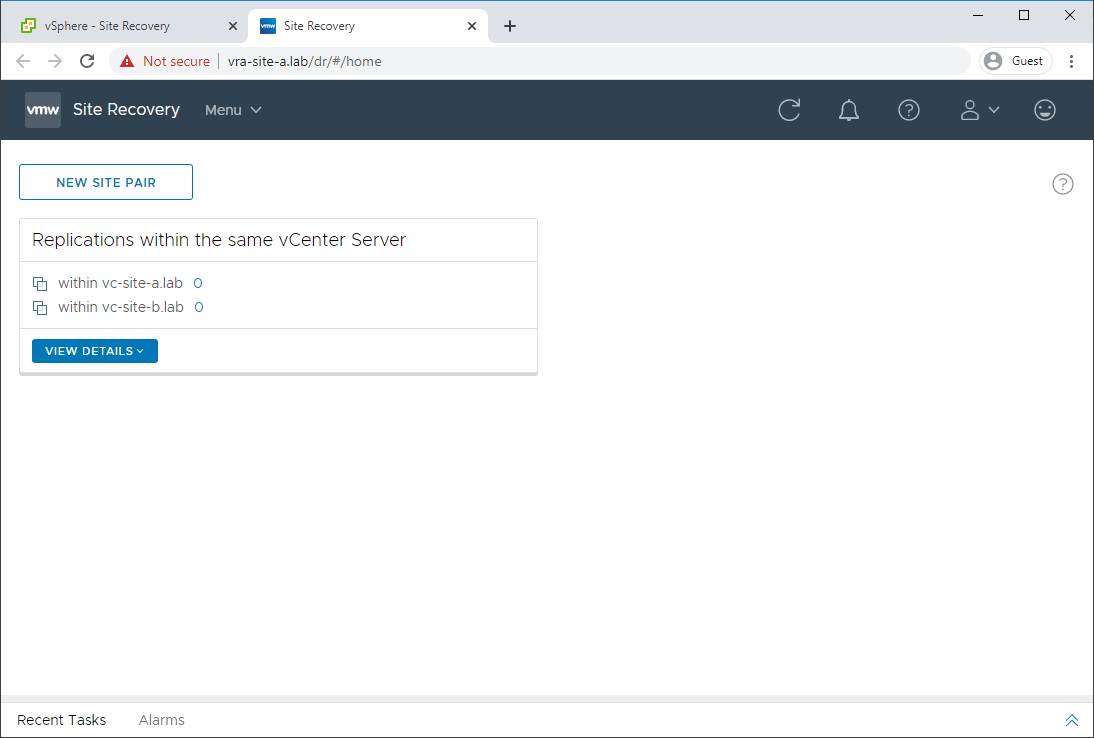
Click New Site Pair, select our local vCenter (lab: vc-site-a.lab), enter the details of our remote vCenter (lab: vc-site-b.lab) and click Next:
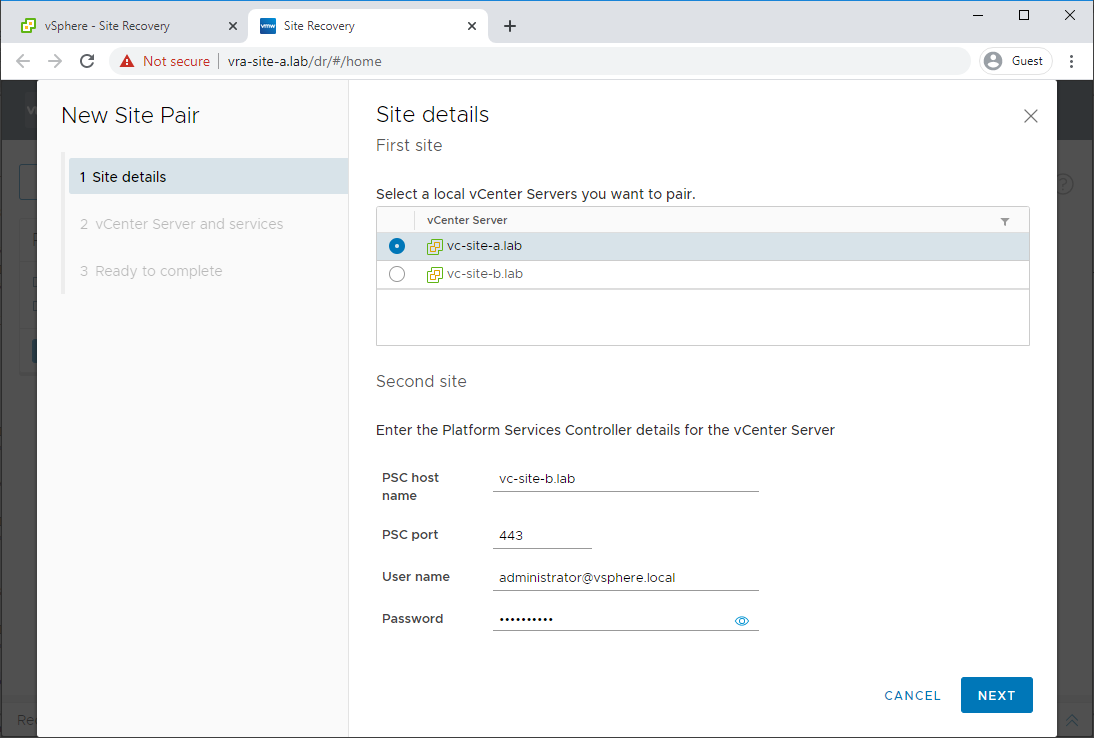
If prompted, accept certificate warning.
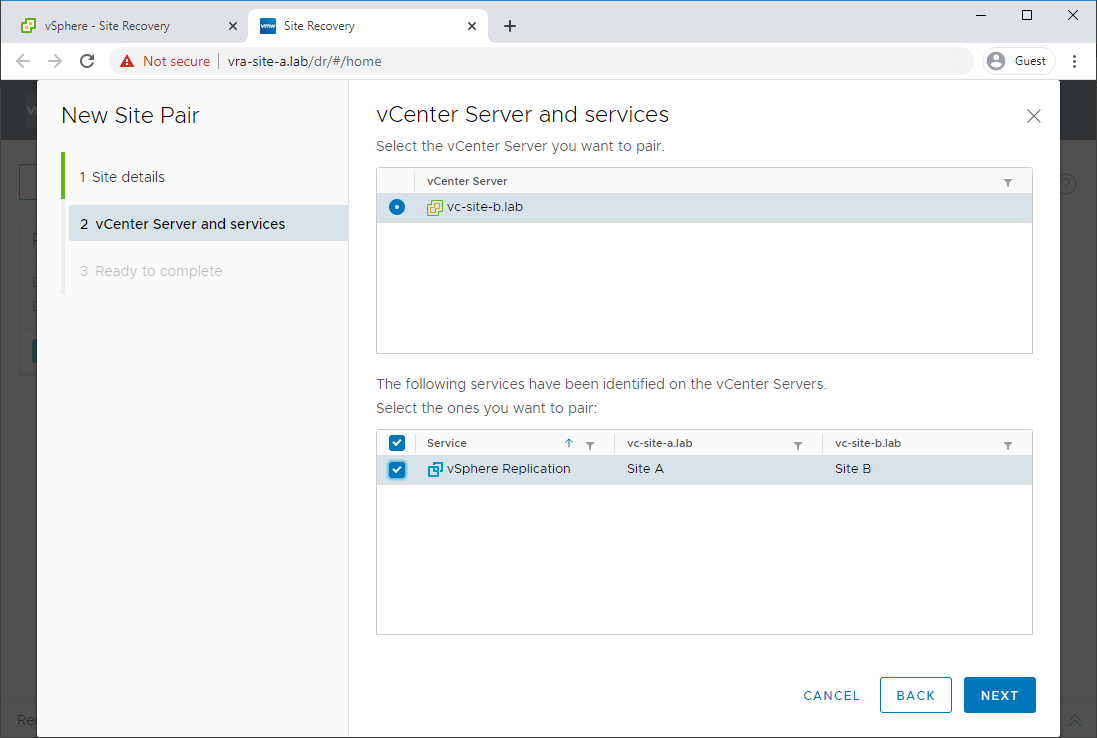
Select second site vCenter along with it’s replication appliance and click Next:
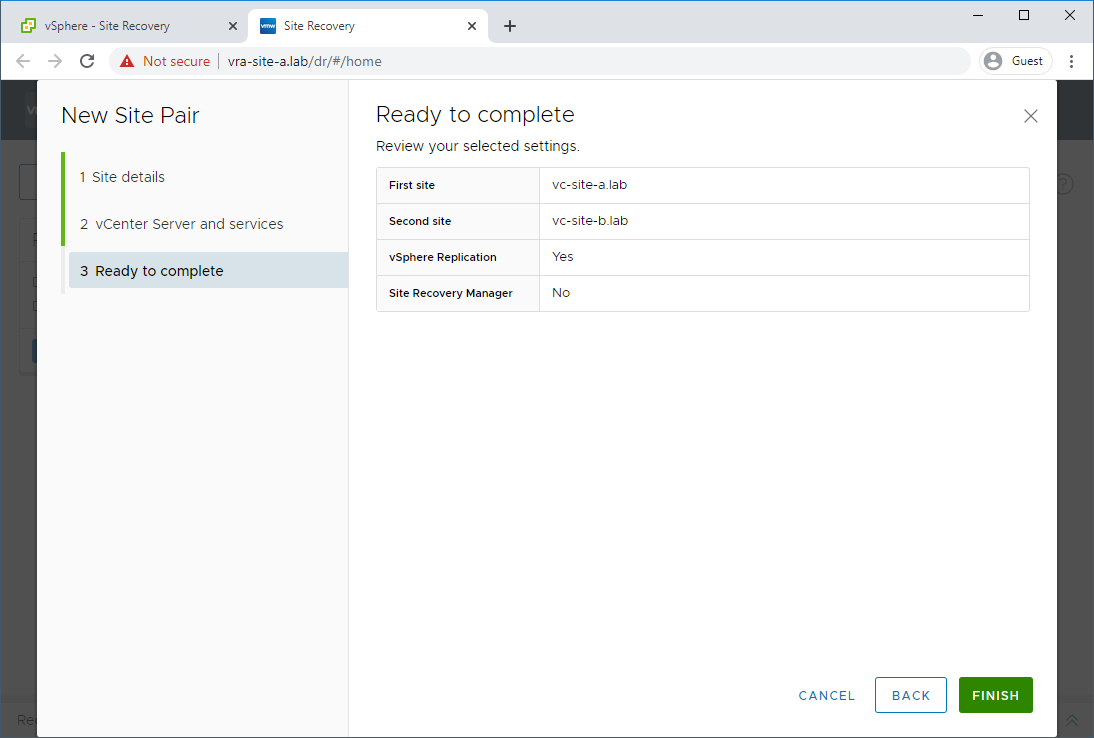
Confirm configuration and click Finish:
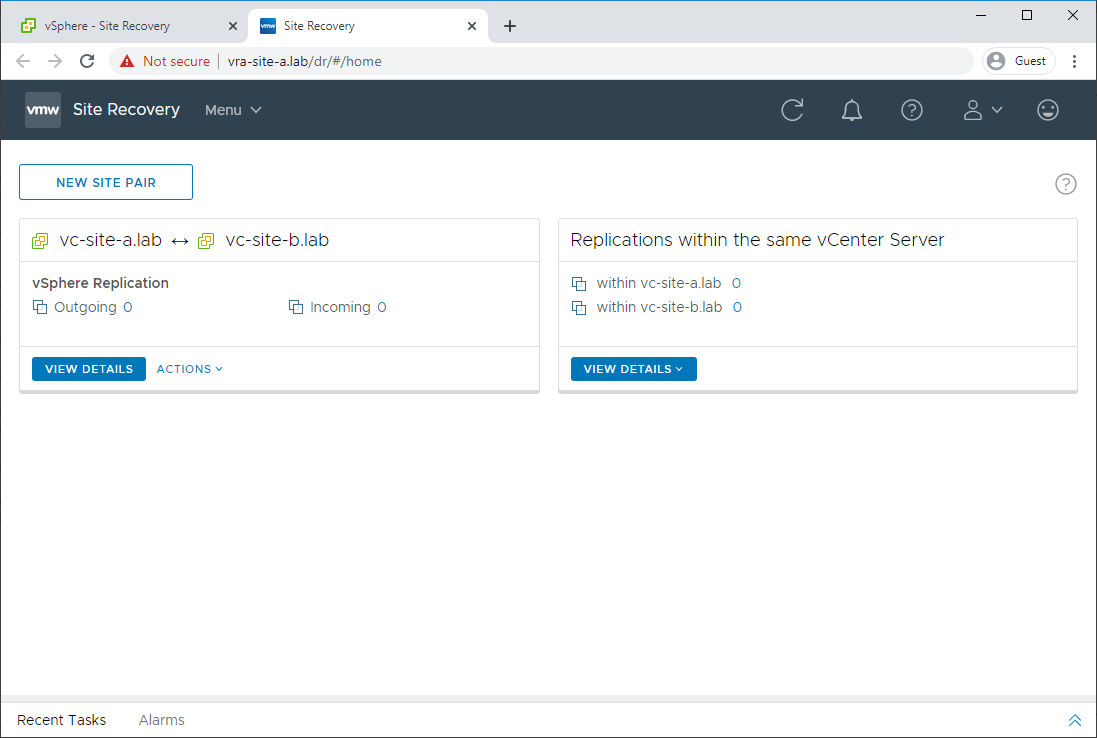
Back in Site Recovery, the site pair should now be detailed:
Configure VM Replication
Now that we have the sites paired, let’s get some VM replication up and running.
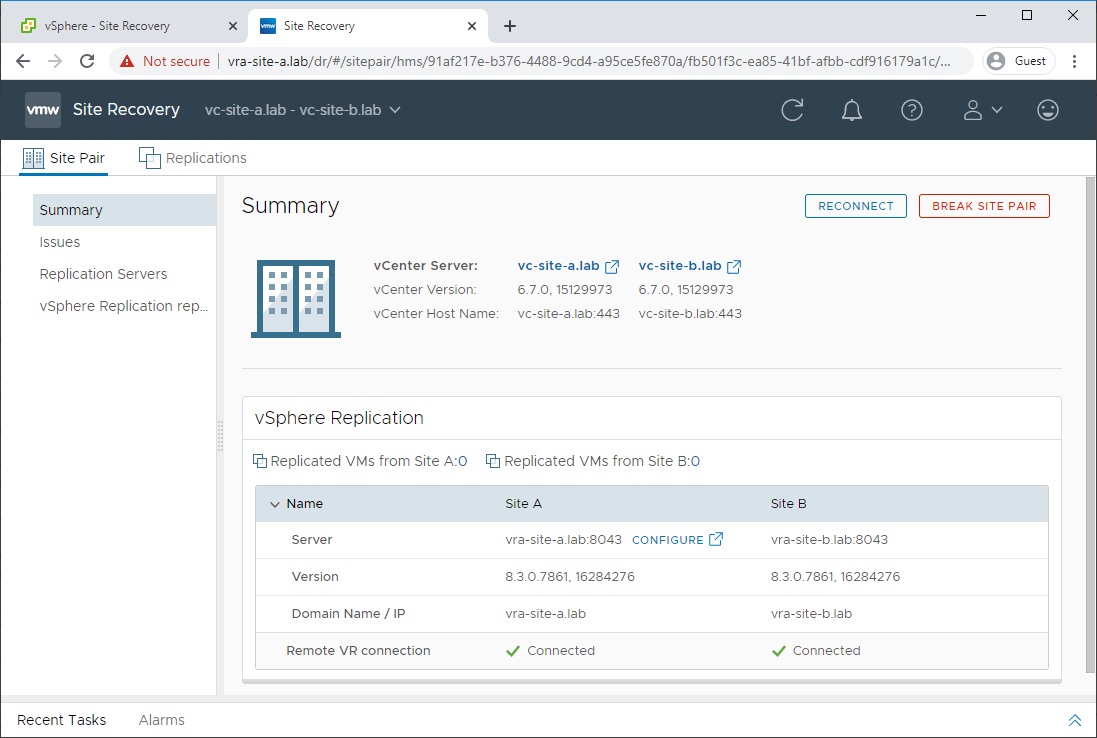
From Site Recovery, click View Details under the site pair created above. Confirm that the appliances are connected:
Click Replications and New:
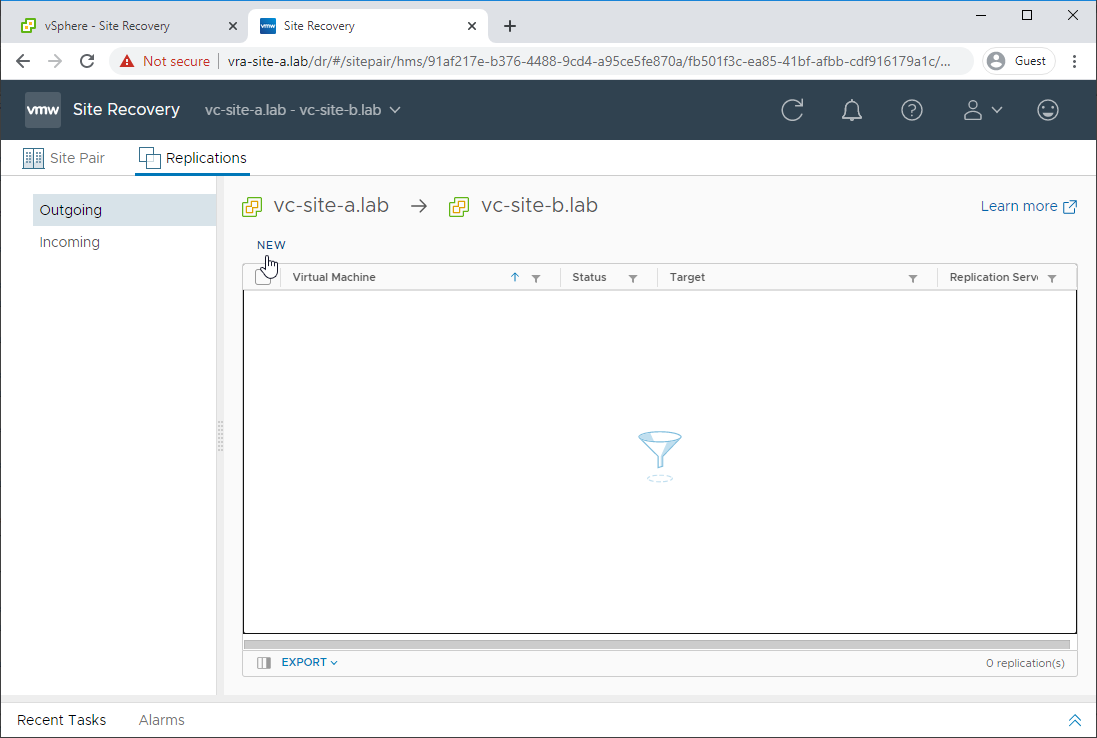
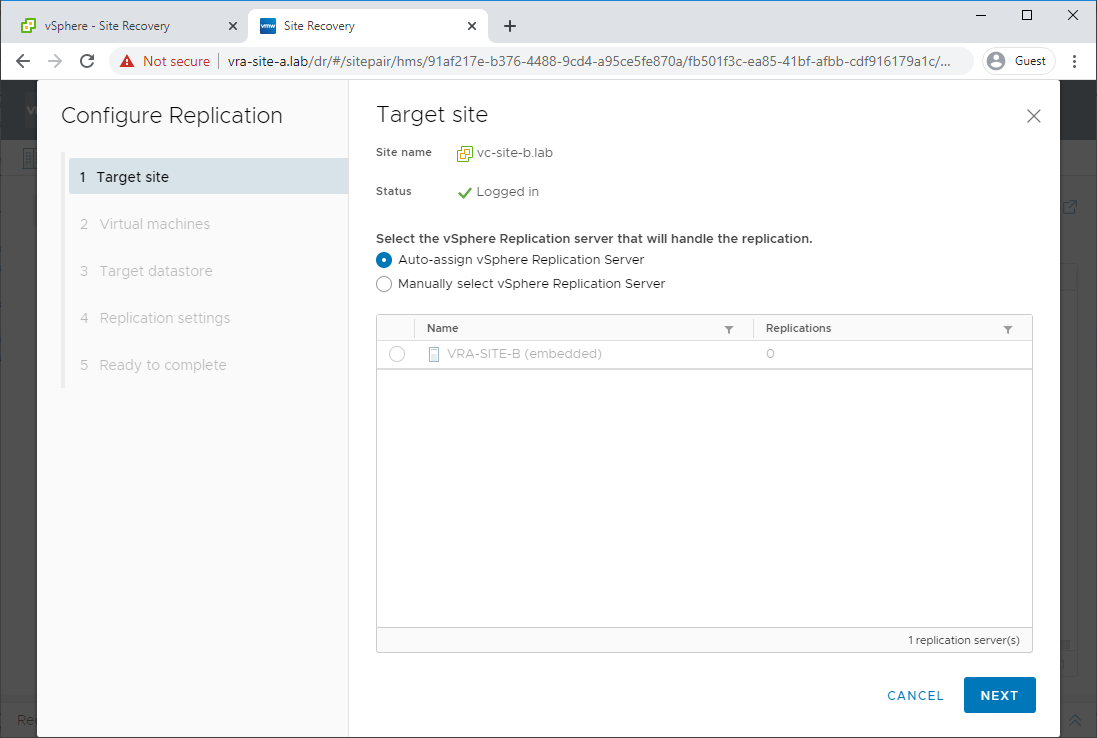
Confirm target site and click Next:
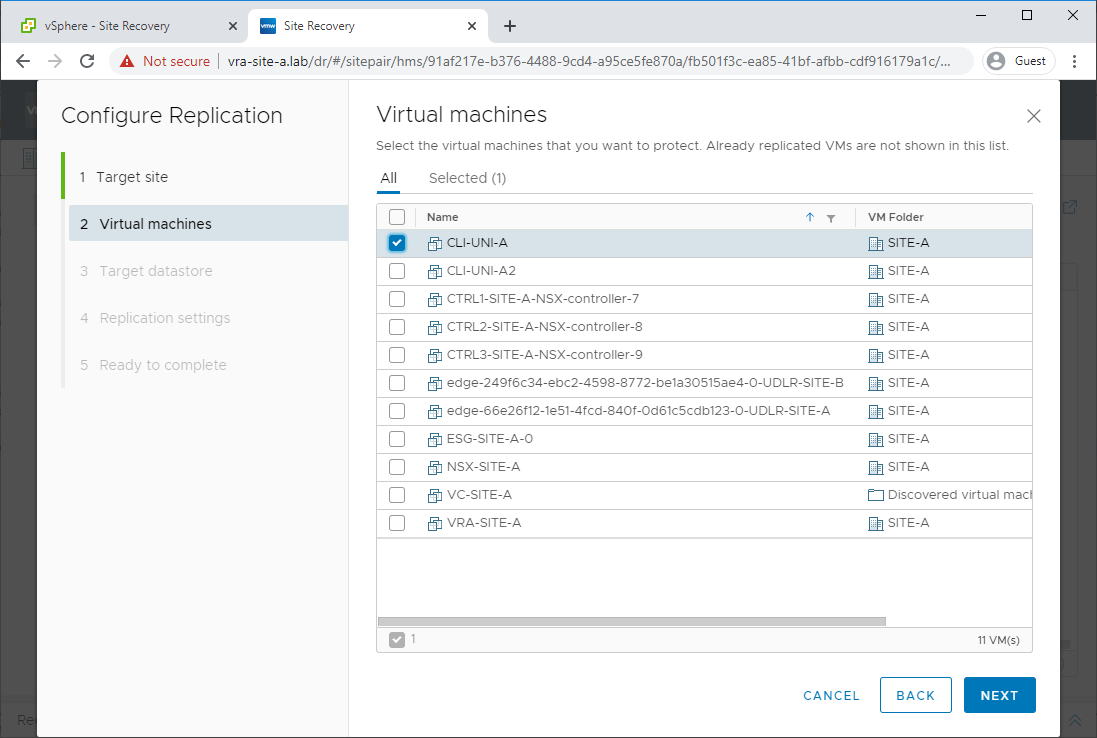
Select a VM from the inventory and click Next:
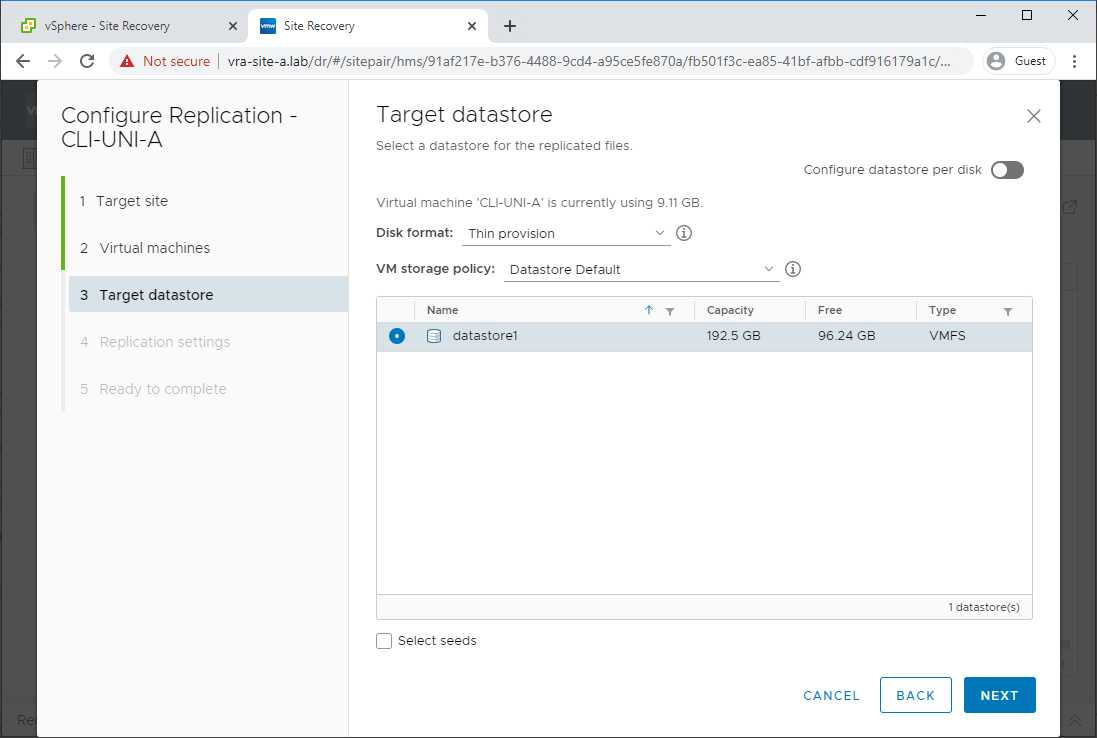
Select target datastore, modify disk format if required and click Next:
Configure RPO, Enable point in time instances if required, enable network compression for VR data (recommended) as required and click Next:
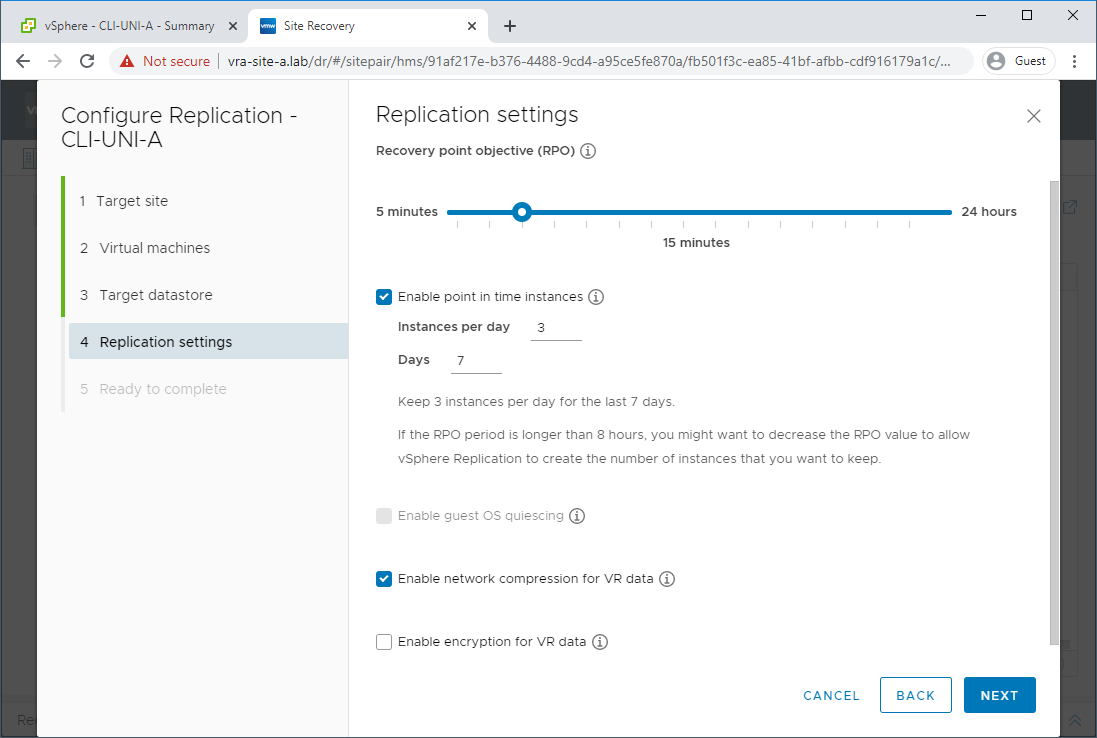
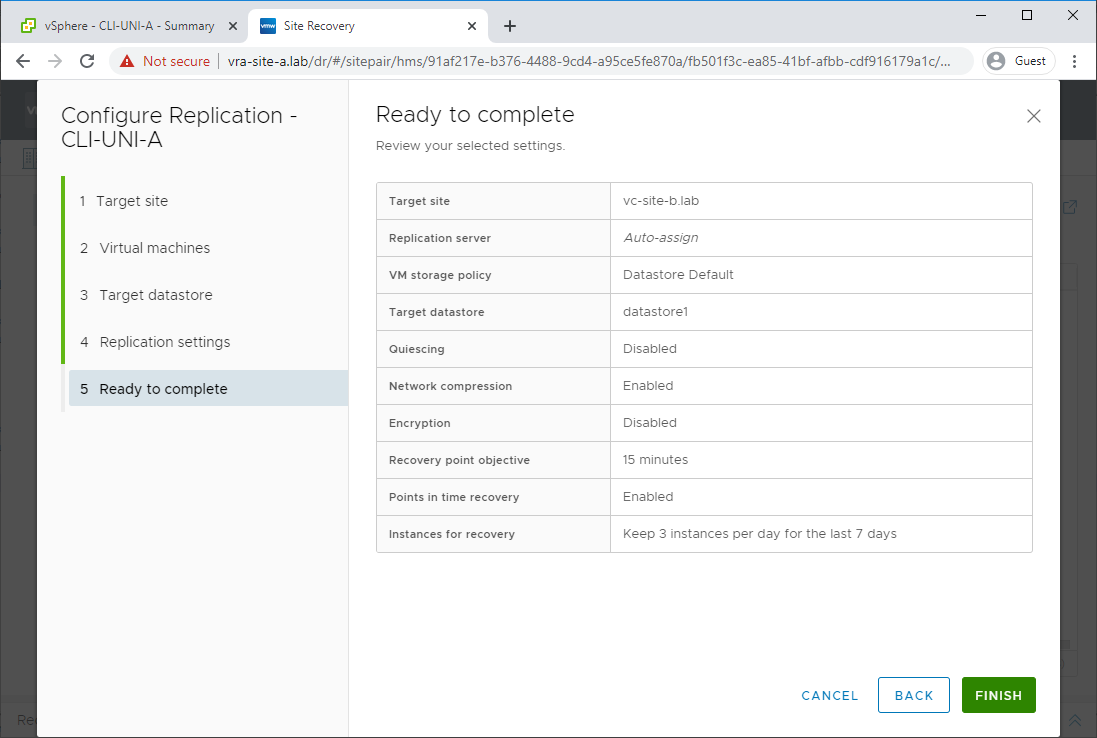
Review configuration and click Finish:
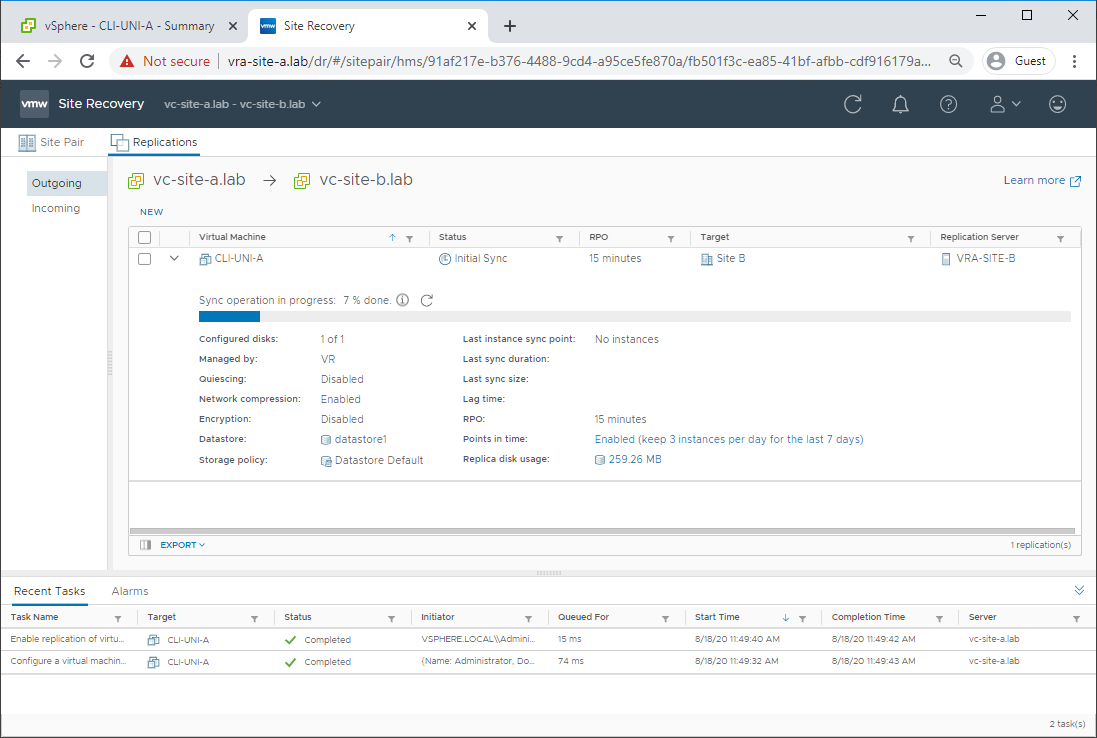
Back under Replications - Outgoing, confirm that initial sync begins:
Repeat for any further VMs to be replicated.
Conclusion and Wrap Up
In this post we paired our sites, configured vSphere replication and got our VM(s) replicated.
Next time we’ll try to recover a replicated VM from a disaster… ![]()
![]()
This was part 2 of a multipart series. Find the other parts here:
- Part 1: No money, no problem: Introduction and Deployment
- Part 2: This part - Site Pairing and Replication Configuration
- Part 3: Disaster Strikes!
-Chris


