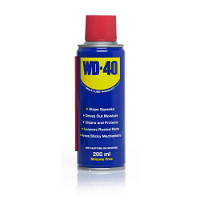
A bit of a departure of recent times on this blog, but stick with me (no pun intended) and I’m sure you’ll find this little pro tip as handy as I did.
I finally decided to get to a task that had been outstanding for a while, re-sealing around the tray in our shower. The main reasons why this task had been outstanding were simple:
- Removal of the old mastic (or silicone sealant) around the tray
- Trying to get a semi professional application of new mastic without getting new mastic everywhere
…so yeah, pretty much the whole job! Let me elaborate a little.
Removal of the old stuff pretty much means scratching and scraping at the old mastic with Stanley knives, chisels, screwdrivers, paint scrapers for what seems like hours whilst trying not to scratch either the shower tray or the wall tiles around the shower tray.
Application of the new stuff means trying to get a nice “bead” of mastic around the shower tray that not only looks semi-professional (I’ll be happy if it just goes on ok and looks ok) but does what it is supposed to do and stop water from getting into the gap between tray and tiled wall.
So I duly kicked off my task of scratching and scraping. After all of thirty seconds, I thought “there must be a better way… I can’t be the only one in the world wanting to remove mastic quickly and easily with minimum effort… There must be an alternative… to Google!!” (Yep, that’s how I think! Don’t you?)
One click later and I’m watching this video:
Sure picture quality is not the best, but after a 1 minute 50 second YouTube watch, I get the message: Spray the old mastic with WD40!!!
One trip to my garage later and I’m dousing the shower tray mastic with WD40…. Will it work, will it work, will it work?
Yes!
The mastic is coming away from the shower tray and the wall tiles by itself! I can see it pealing away on it’s own! Well, that was easy!
Minimal scraping with a knife and a screwdrive and it was done.
To clean the WD40 off ready for the new mastic, I simply used white spirit applied using a paint brush (to get into all the nooks and crannies) and a sponge. I was soon ready to re-seal the shower tray in tripple quick time.
I applied my first bead of new mastic down the first side of the shower try rather badly. (I’m definitely no mastic professional!) Hmm, It needed a little smoothing. I could use a finger to smooth it. Hmm but I dont want to get mastic all over my finger, clothes, wall, (basically everywhere) as that’ll just make the bead look worse… Hmmm…
I know… WD40!
Quick spray of WD40 on my finger, quick smooth of the mastic and a semi-professional look was achieved! I’m no expert, but that’ll do me!
A job I had not at all been looking forward to make super simple by WD40.
I recommend you reach for the WD40 next time you need to re-mastic around your shower, bath, sink, whatever. You’ll be glad you did!
-Chris
(Not affiliated to WD40 in anyway, although open to offers)


