 Photo: Randy Faith
Another month another set of vSphere patches. This month, VMware have just released vSphere 6.7 Update 3 for ESXi and vCenter.
It occurred to me that I hadn’t previously detailed how I go about patching vSphere environments including my NSX-V Lab. To rectify that, what follows is the method I use to patch and update vSphere.
Yes, there are other ways to achieve the same outcome using update manager etc. Using this method, we simply grab the updates from the VMware update site, push them to the correct locations and install.
What follows is a whistle-stop guide to update a vSphere environment. Whilst it is by no means exhaustive, the method detailed here:
![]() Can be employed in an isolated environment
Can be employed in an isolated environment
![]() Is fully supported by VMware
Is fully supported by VMware
![]() Simple!
Simple!
![]() Serves as a reminder to me - for the next time
Serves as a reminder to me - for the next time ![]()
It goes without saying (although I’m saying it here!), that this guide is written with the target audience being the experienced vSphere administrator.
Overview
Confirming Compatibility
As previously mentioned, I need to patch my NSX lab. As NSX runs as a plug-in to vCenter, I need to confirm that updating vCenter won’t cause NSX any issues. Other VMware products such as Site Recovery Manager plug-in to vCenter in the same way.
The version of NSX I have running in my lab is 6.4.5. I need to confirm that this version is compatible with my target vSphere version; in this case vCenter 6.7 update 3 and ESXi 6.7 update 3.
Lets have a look at the VMware Product Interoperability Matrices
Plumbing in NSX for vSphere 6.4.5 in section 1, VMware vCenter Server 6.7 U3 and VMware vSphere Hypervisor (ESXi) 6.7 U3 into the tool produced the following results:

All looks good.
Updating vCenter
Task one is to update vCenter. The golden rule when applying updates to vSphere environments: vCenter must be of equal or greater version to the ESXi hosts it manages.
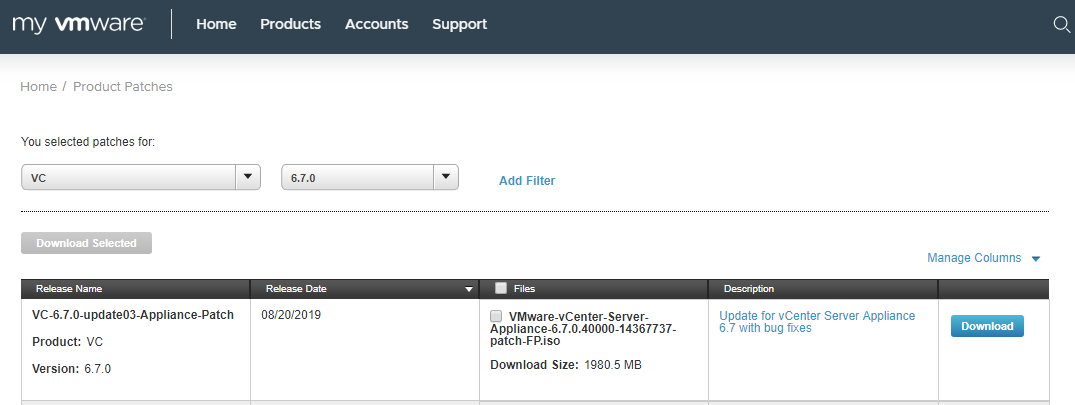
Head over to VMware patch download site and grab the vCenter update bundle iso file. This is the one I need:
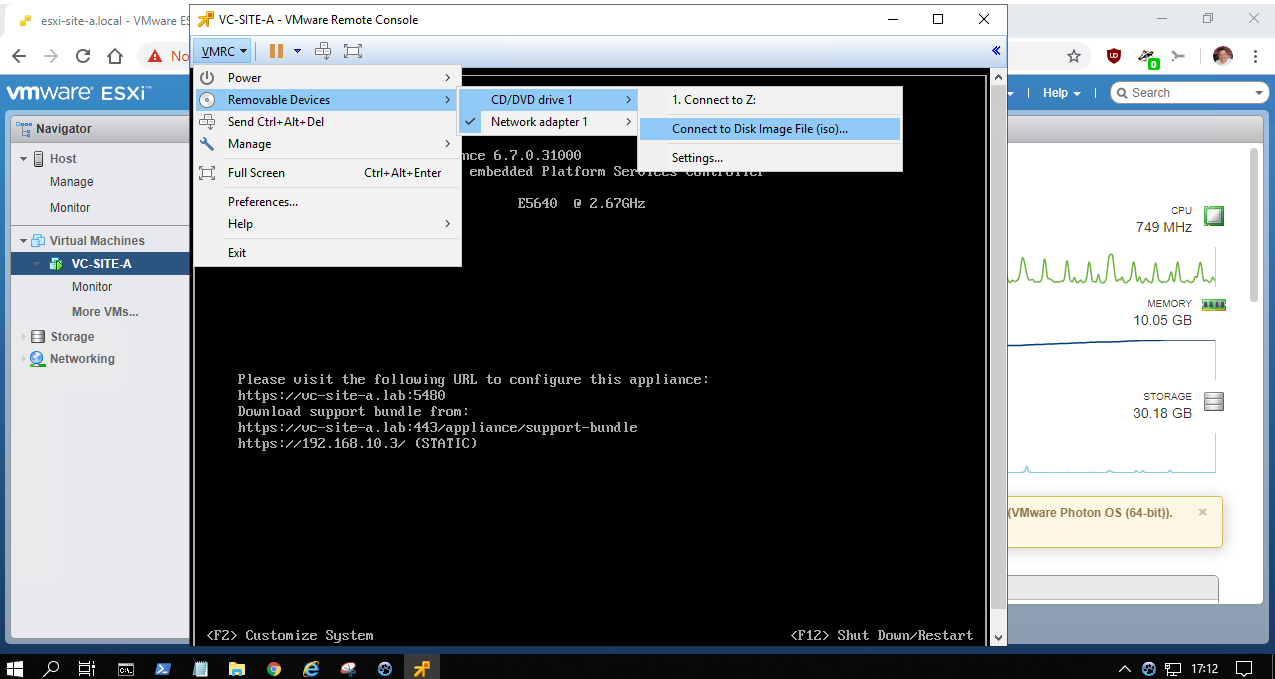
Next, we need to mount the downloaded iso file onto one of the lab vCenter servers. Simplest way is to open a console to the vCenter server from the ESXi management interface and mount the iso to the CD/DVD drive using the VMRC client:
Then we need to login as root to our vCenter via https://<vCenter FQDN or IP Address>:5480 Select Update - Check Updates - Check CD ROM:
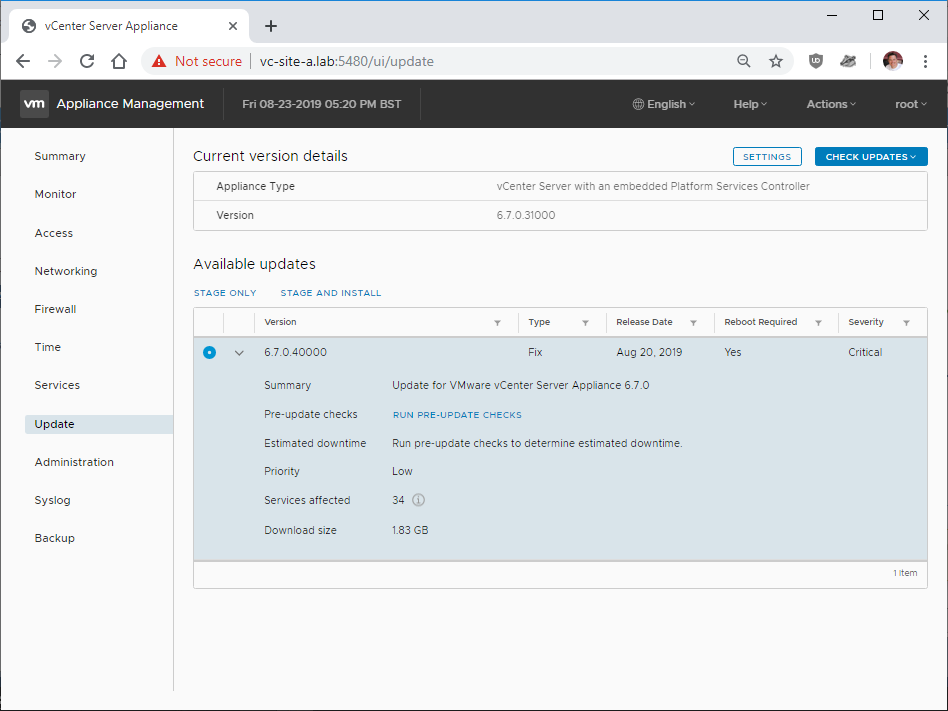
Open the “twistie” and click Run pre-update checks. Once complete, click Stage and Install. Complete the licence, CEIP and backup confirmation wizard and hit finish. The update will now install:
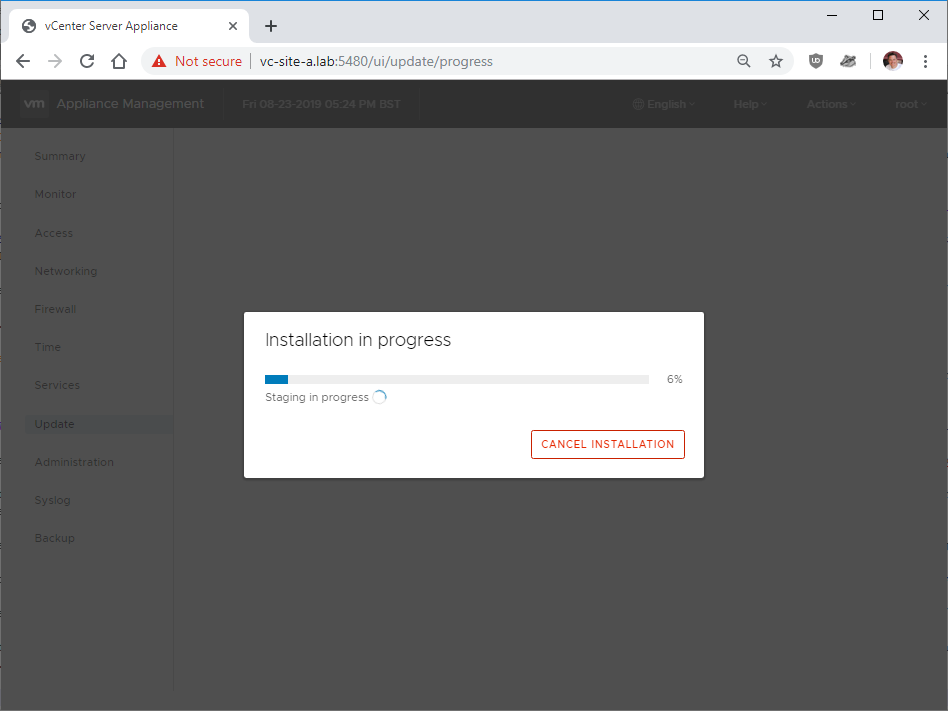
Keep an eye on the vCenter console via VMRC. Once the update installation has completed, the vCenter VM should reboot.
Once vCenter has booted, log on and confirm all working OK, including NSX and any other vCenter plugins you may have.
Repeat update process for any other vCenter servers in your environemnt.
Updating ESXi
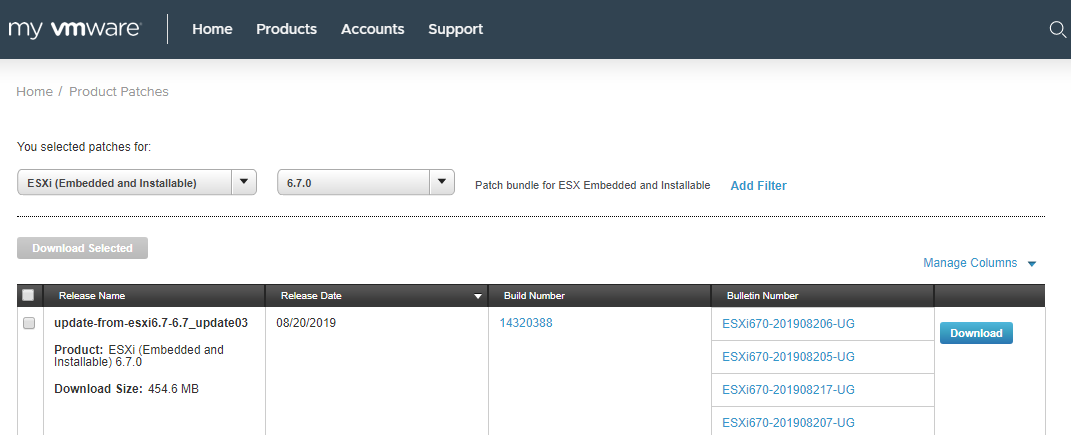
Head over again to VMware patch download site and grab the required ESXi update zip file. This is the one I need:
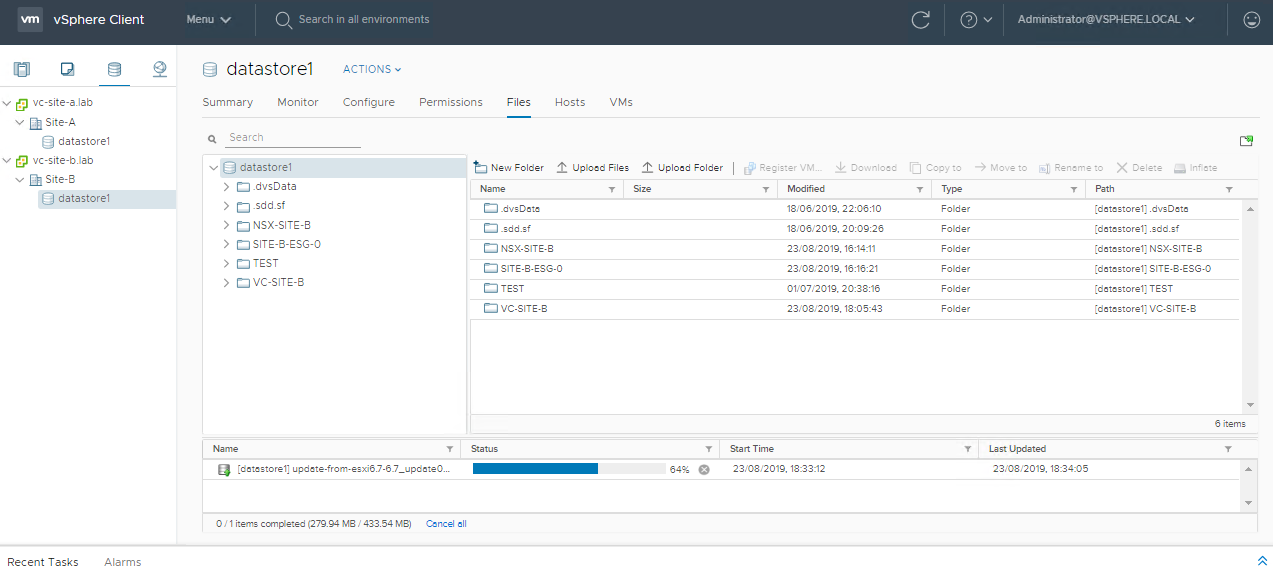
Upload the update zip file to your ESXi host using the datastore browser:
Enable SSH, connect to the host and login as root.
Run the command esxcli software sources profile list -d </path/to/patch zip> to list the image profiles contained within the update:
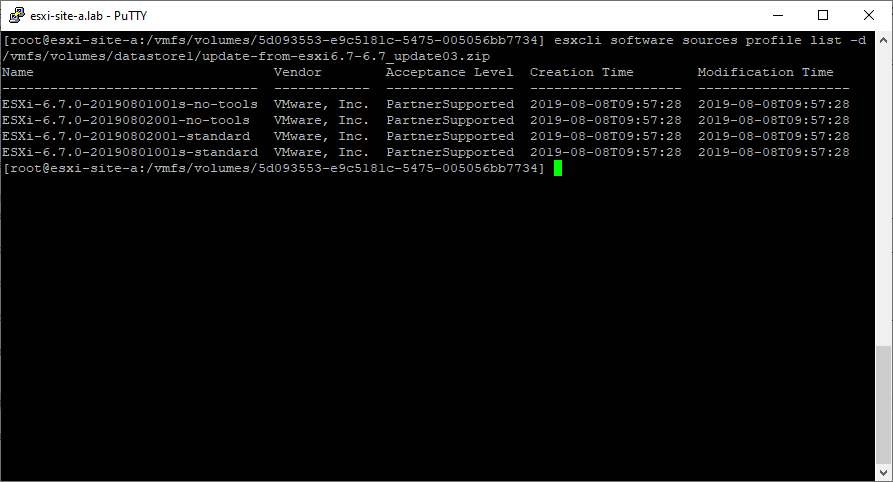
As you can see from the above, the update includes four profiles:
-
ESXi-<update version>s-no-tools- Contains security patches only with no VMware Tools -
ESXi-<update version>-no-tools- Contains all patches with no VMware Tools -
ESXi-<update version>-standard- Contains all patches and VMware Tools -
ESXi-<update version>s-standard- Contains security patches only with VMware Tools
As I’m going to install all patches and update VMware tools, I’m going to opt for profile 3 ESXi-6.7.0-20190802001-standard
Use the command esxcli software profile update -d </path/to/patch> -p <image profile> to install the update:
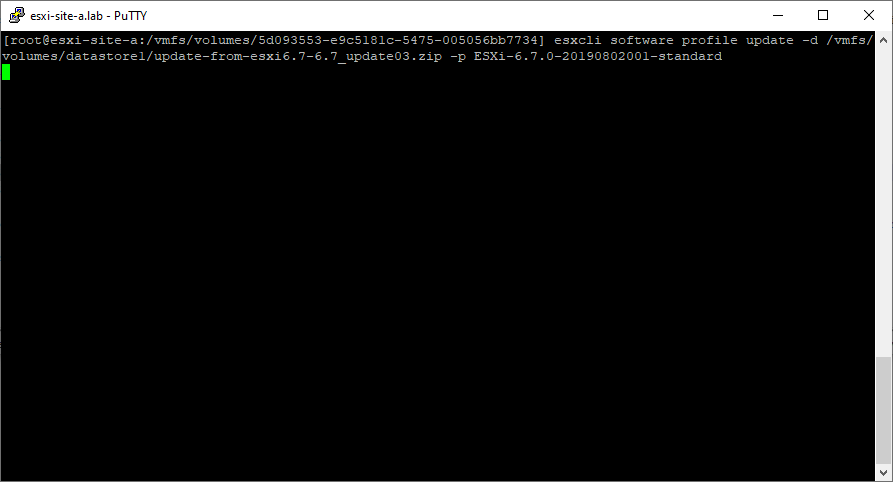
Yes, my lab is a little old:
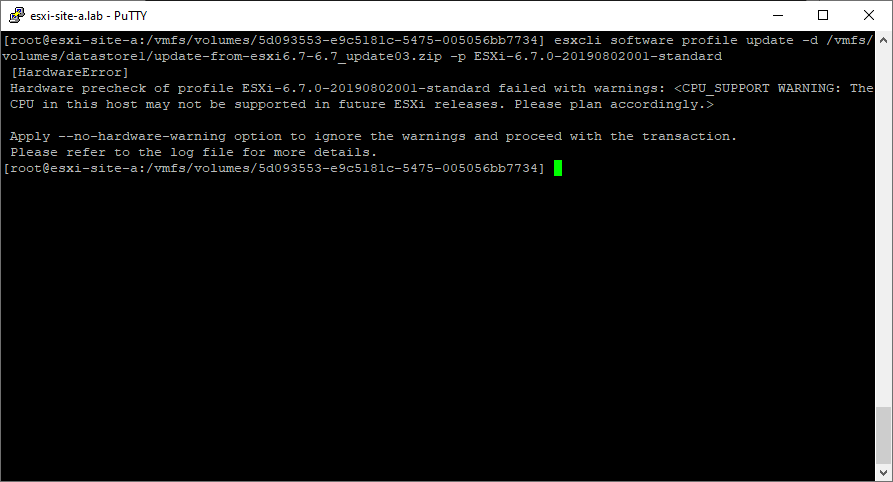
Lets try again: esxcli software profile update -d </path/to/patch>-p <image profile> --no-hardware-warning
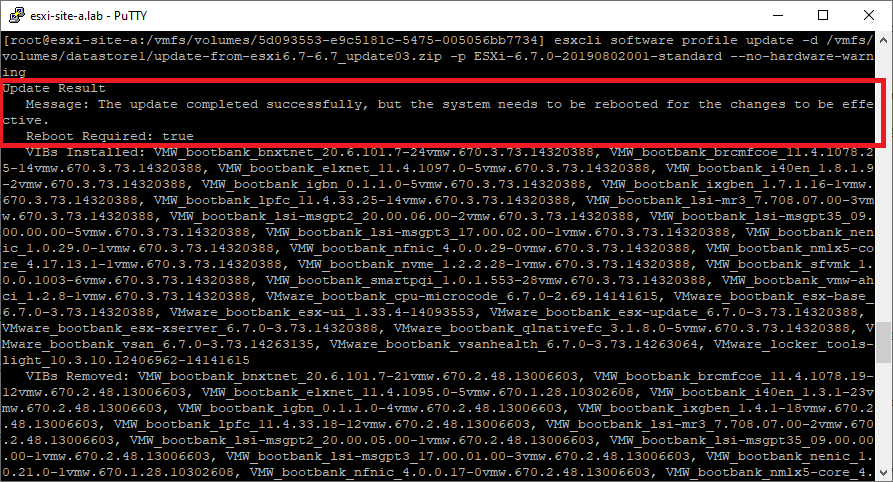
That’s better. Reboot time!
Boom! Done:
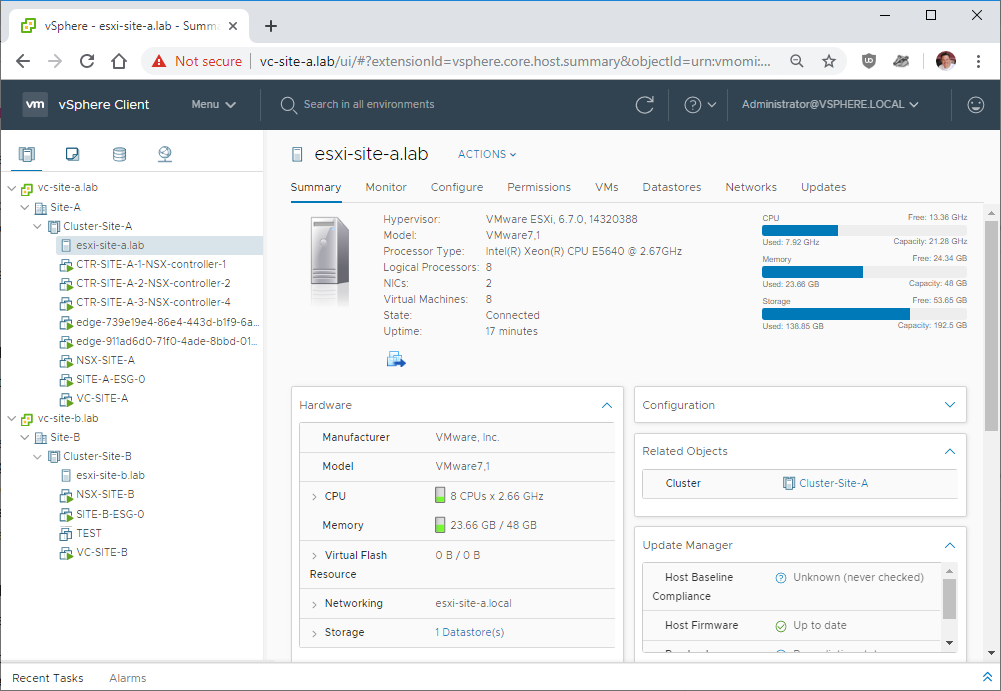
On to patching my other lab host! ![]()
Happy patching.
-Chris


