 In this post we are going to dive into the world of the VMware Certificate Authority and it’s management modes as well as taking a look at vCenter certificates and ESXi certificates. We will also place our VMware Certificate Authority in Hybrid mode.
Overview
VMware Certificate Authority
The VMware Certificate Authority (VMCA) is included in each vCenter Server deployment. Out of the box, VMCA provisions all vCenter and ESXi host certificates.
Functionality exists to decouple VMCA from provisioning ESXi host certificates. This is discussed in ESXi Certificate Mode Switch Workflows, however for the rest of this post we will assume that our VMCA is provisioning our ESXi host certificates for us.
vCenter Certificates
At deployment, the VMCA will create three certificates for vCenter. The roles of these certificates are as follows:
- Machine SSL Certificate: Used to secure user connectivity to vCenter via the vSphere web client
- VMware Certificate Authority: The root certificate used to sign certificates created by the VMCA
- STS Signing Certificate: Used by the Security Token Service to issue, validate and renew security tokens. Further information on STS
These certificates can be seen via the vSphere web client by browsing to vSphere Client > Administration > Certificates > Certificate Management
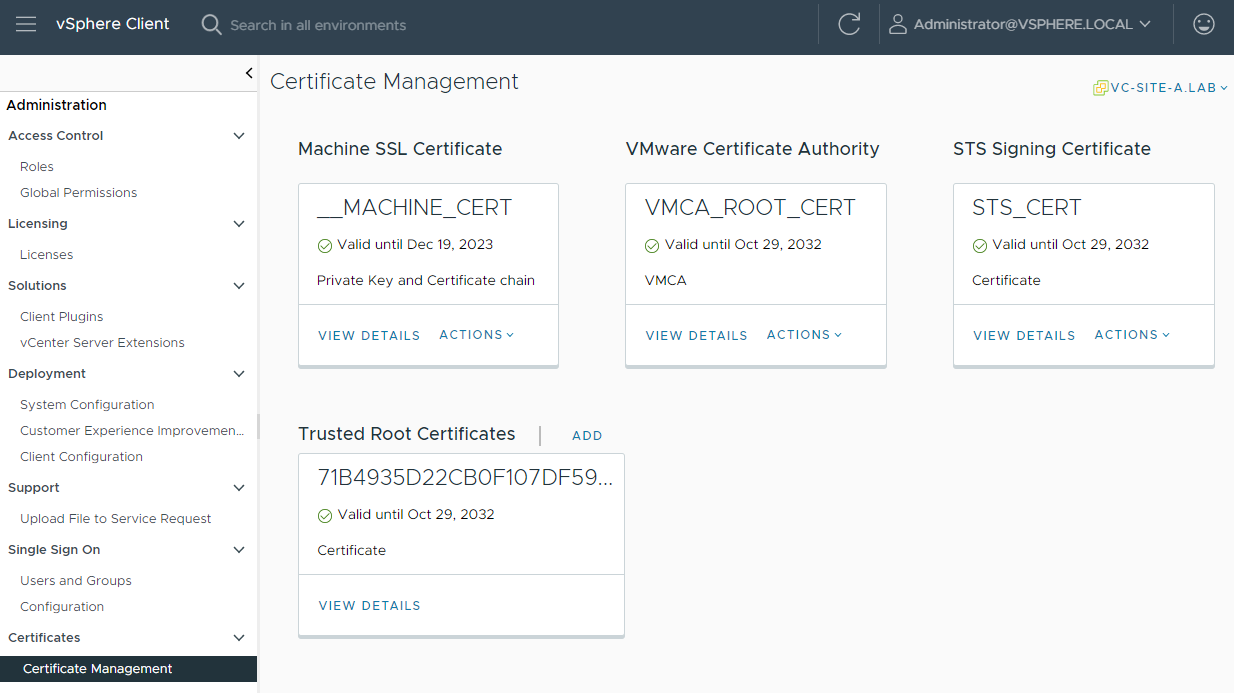
The root certificate is also listed as a trusted root certificate.
VMCA Management Modes
Certificates handled by the vCenter VMCA can be managed in four ways. These are:
- Fully Managed Mode: (default) VMCA uses it’s install time generated CA certificate to sign all certificates used in the environment
- Subordinate CA Mode: VMCA operates as a subordinate Certificate Authority (CA), a delegated authority from an internal or corporate CA
- Full Custom Mode: VMCA is not used. All certificates must be managed and installed manually throughout the vSphere estate
- Hybrid Mode: VMCA uses a supplied replacement certificate for user connectivity to vCenter via the vSphere web client. All other certificates are signed by VMCA using it’s install time generated root certificate
Note: in both fully managed hybrid modes, neither the ESXi hosts nor the vSphere web client have self-signed certificates. Certificates are generated by VMCA and signed by the VMCA root certificate as discussed above.
Which Management Mode to Use?
It is up to you and your internal or corporate organisation.
Fully Managed Mode
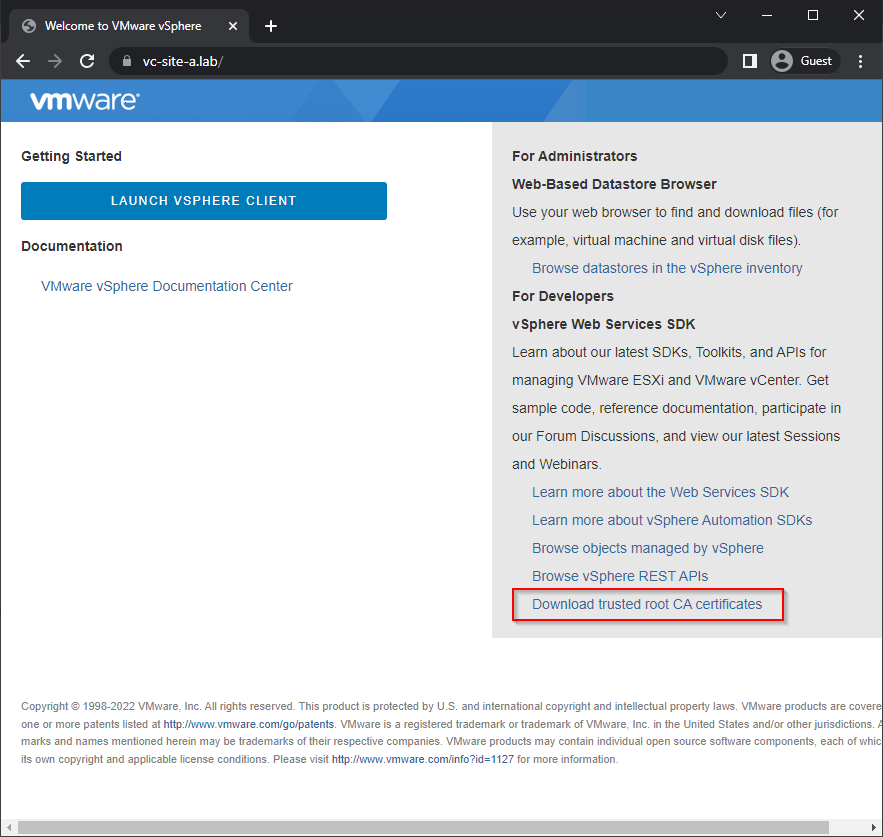
The default “do nothing” mode. To trust the VMCA install time certificates, each vSphere web client user must download and install the root CA certificate created by VMCA at install time:
Subordinate CA Mode
This might be something that your organisation finds undesirable as it does involve creating and importing a special delegation certificate. If this delegation certificate is stored or intercepted or misplaced, it could be used to impersonate your internal or corporate organisation. Should you wish to pursue the the Subordinate CA Mode the process is covered in this post on Derek Seaman’s IT Blog.
Full Custom Mode
This mode requires the most amount of effort. All certificates throughout the environment need to be manually installed and replaced before they expire. In large environments the certificate application and subsequent replacement tasks can become unwieldy very quickly.
Hybrid Mode
The middle ground. The certificate used for user connectivity to vCenter via the vSphere web client is replaced with one generated by an internal or corporate CA. This means that users accessing vSphere do not have to download and install the root CA certificate created by VMCA at install time. VMCA continues to provision STS and ESXi certificates using it’s install time generated root certificate.
Because the VMCA install time generated root certificate is used for ESXi certificate provisioning, users may still receive an untrusted certificate warnings when browsing to ESXi hosts directly. To work around this, users can download and install the root certificate created by VMCA at install time, as discussed in Fully Managed Mode above.
Configuring VMCA Hybrid Mode
We now know about VMCA, ESXi certificate modes and VMCA management modes, lets look at putting our VMCA into Hybrid mode.
Confirm Client Access Certificate
Let’s confirm which certificate is being used for accessing the environment via the vCenter client website. Log into vSphere web client and select vSphere Client > Administration > Certificates > Certificate Management:

Let’s take a closer look at the machine certificate (__MACHINE_CERT). Click View Details and make a note of the thumbprint:
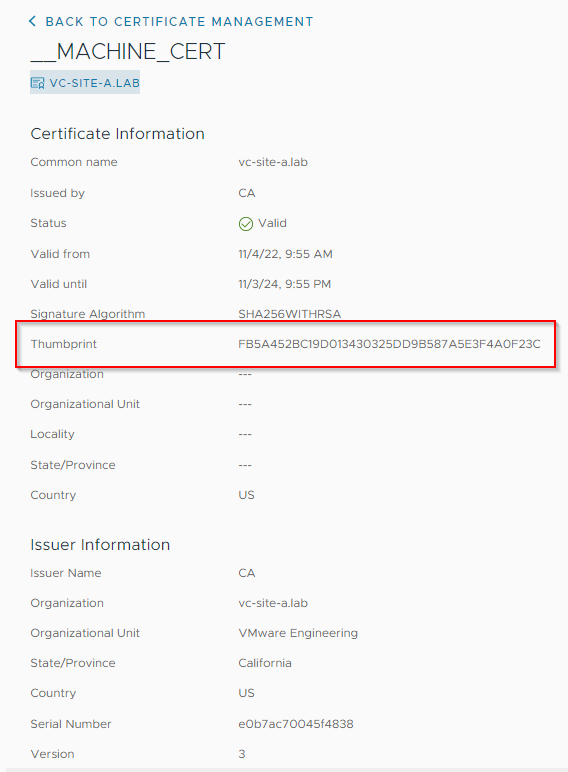
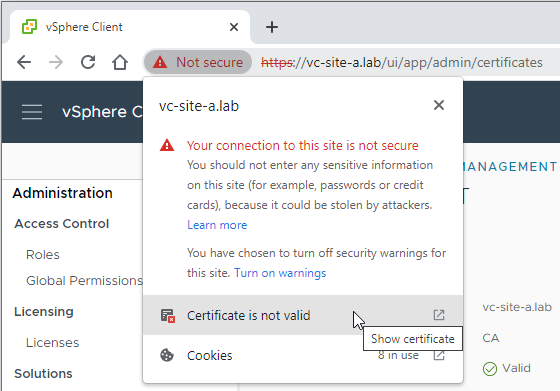
Next, lets double check the certificate we are using to access vCenter. In Chrome, click on the warning on the task bar and then on Certificate is not valid to show further details:
Finally, lets check that our browser reported SHA-1 fingerprint matches that of our vCenter machine certificate:
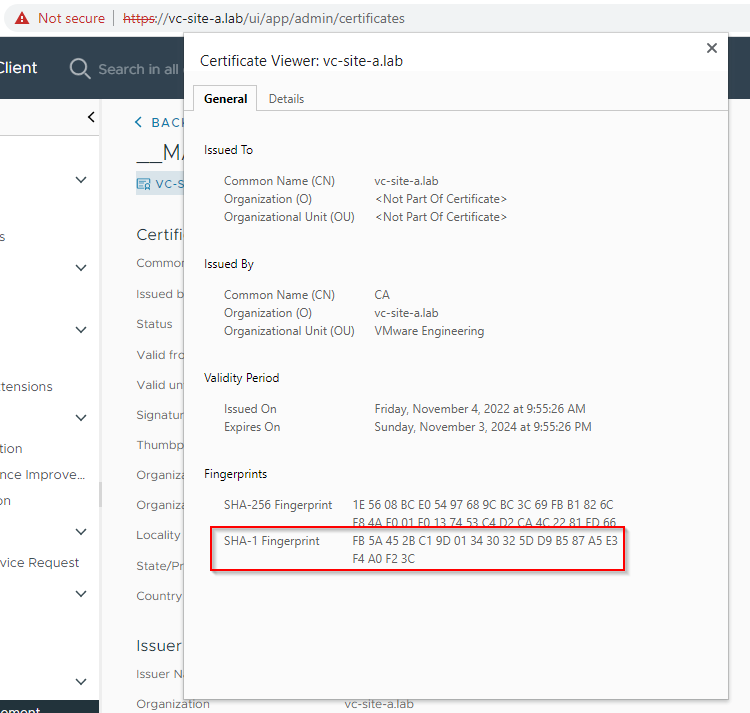
It does indeed.
Request Replacement Machine Certificate
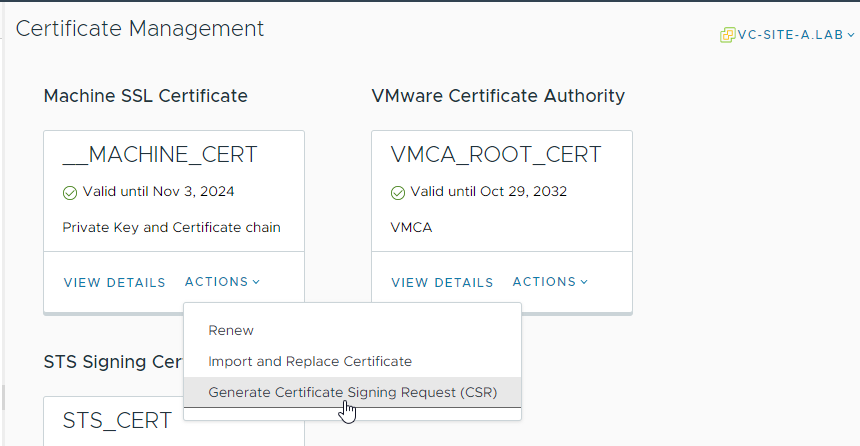
Back in vSphere Client > Administration > Certificates > Certificate Management, select Actions in the Machine Cert box and select Generate Certificate Signing Request (CSR):
Complete the required info:
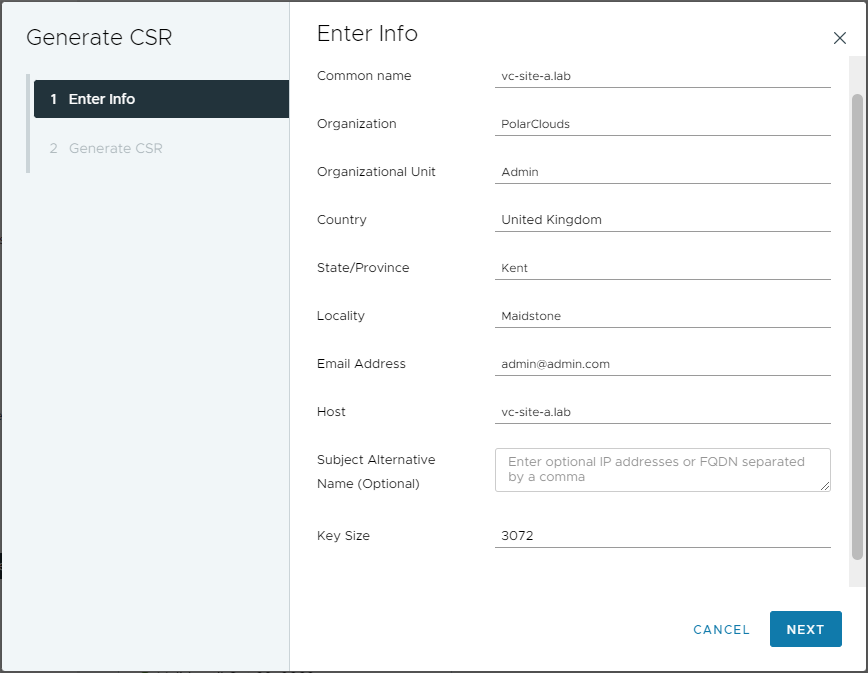
Click Next. Once generated, the CSR can copied or downloaded for processing via the internal or corporate organisation CA:
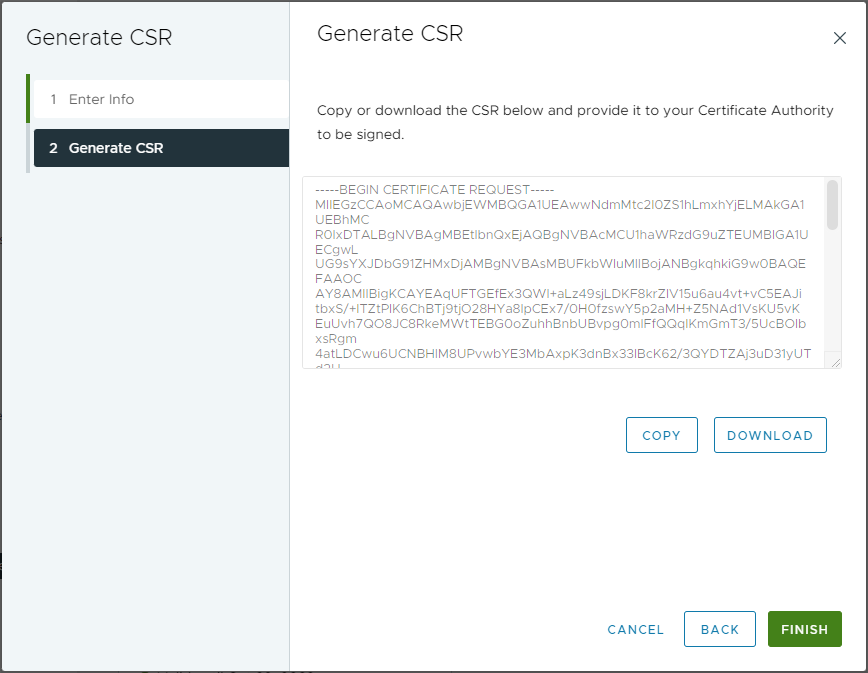
Finally click Finish.
Process Certificate Signing Request
I use OPNsense as my lab CA. Other CA’s are available. Here is how to process a CSR using an OPNsense CA.
Log in to OPNsense, select System > Trust Certificates and click +. From there, select Sign a Certificate Signing Request and paste in the CSR:
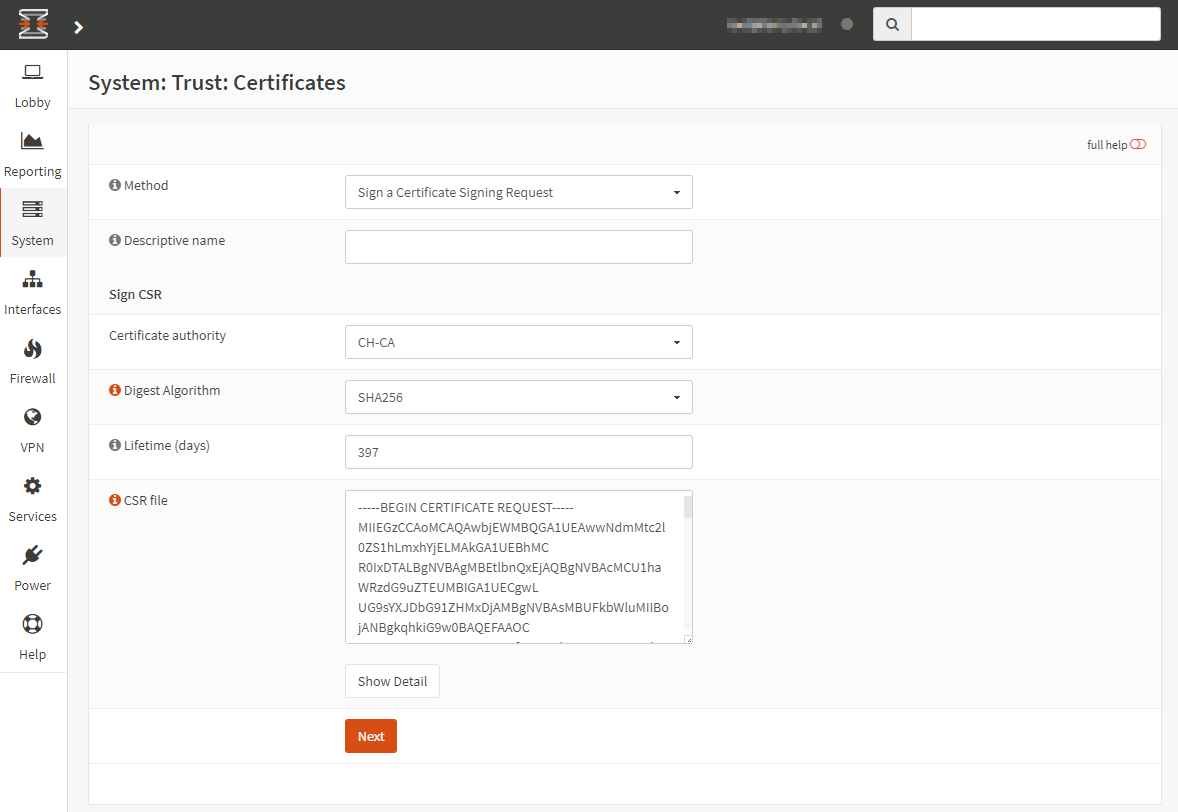
Complete the Descriptive name, Digest Algorithm (recommend SHA256 or greater) and Lifetime (recommend 397 days - here’s why) fields. Then click Next.
Confirm Subject Alternative Name fields, ensure Key Usage is set to digitalSignature, nonRepudiation, keyEnciphermet and Extended Key Usage is set to Server Auth:
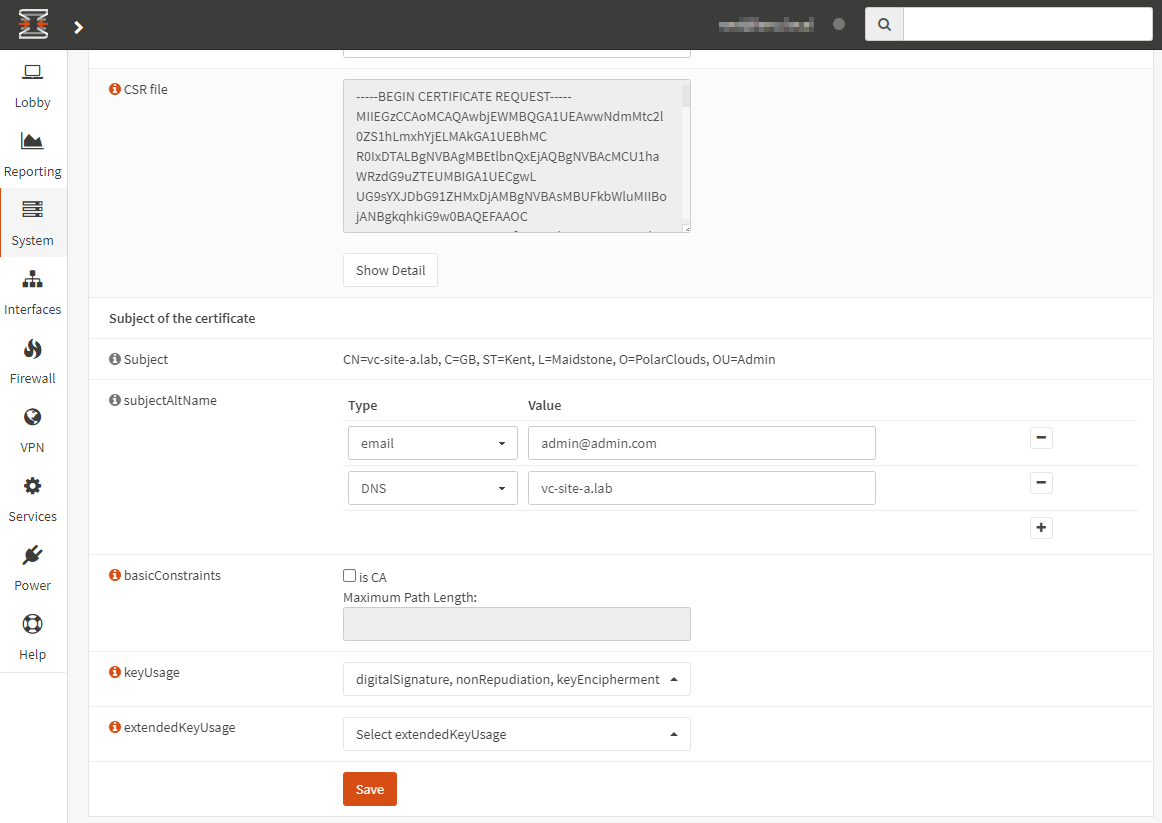
Click Save. Finally, find the newly generated certificate and export:
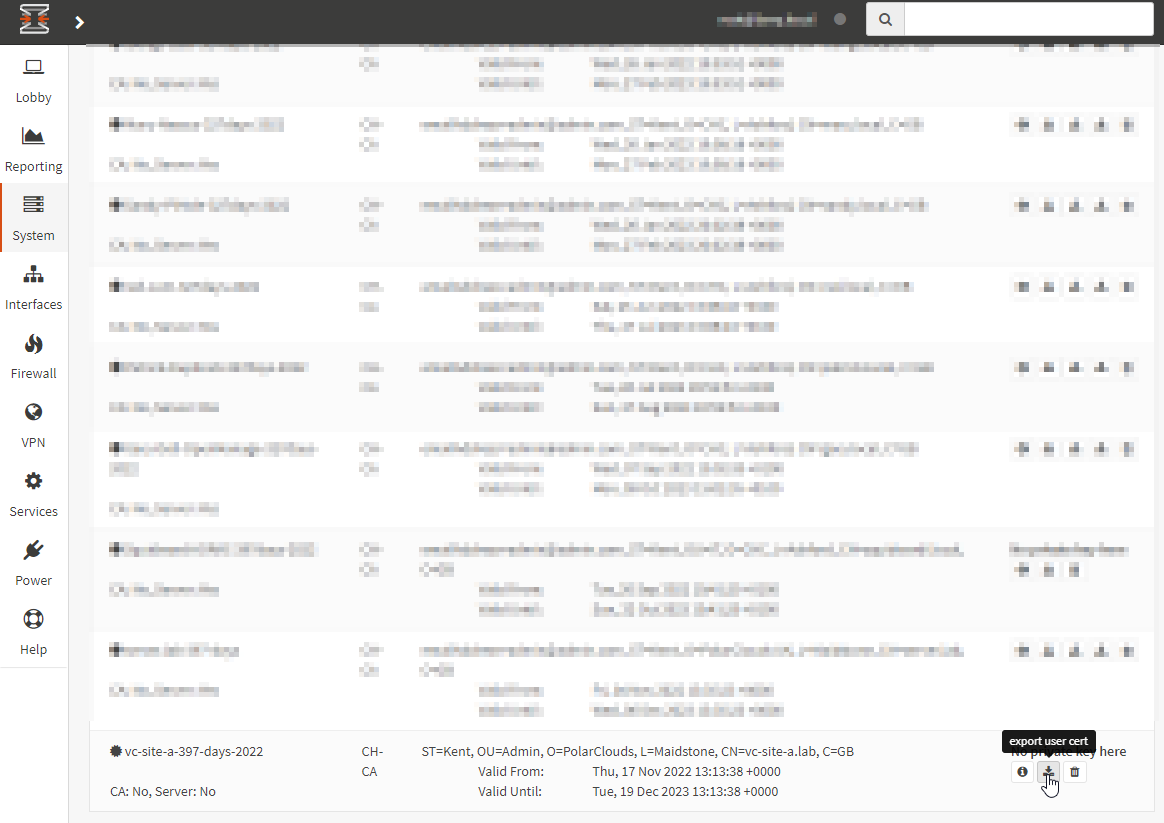
Import Certificate
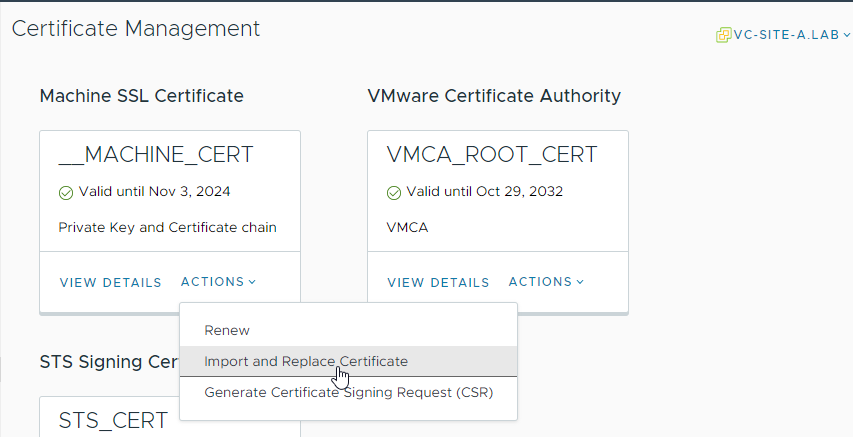
Back in vSphere Client > Administration > Certificates > Certificate Management, select Actions in the Machine Cert box and select Import and Replace Certificate:
Select Replace with external CA certificate where CSR is generated from vCenter Server (private key embedded):
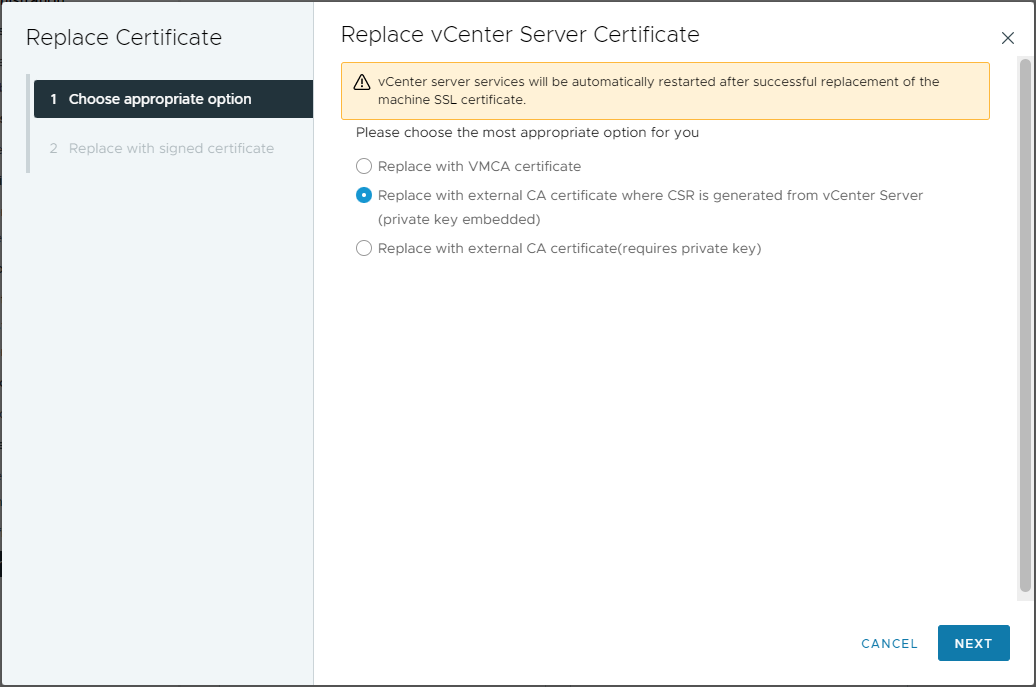
Click Next.
Find and upload newly created Machine SSL certificate and root certificate from your CA:
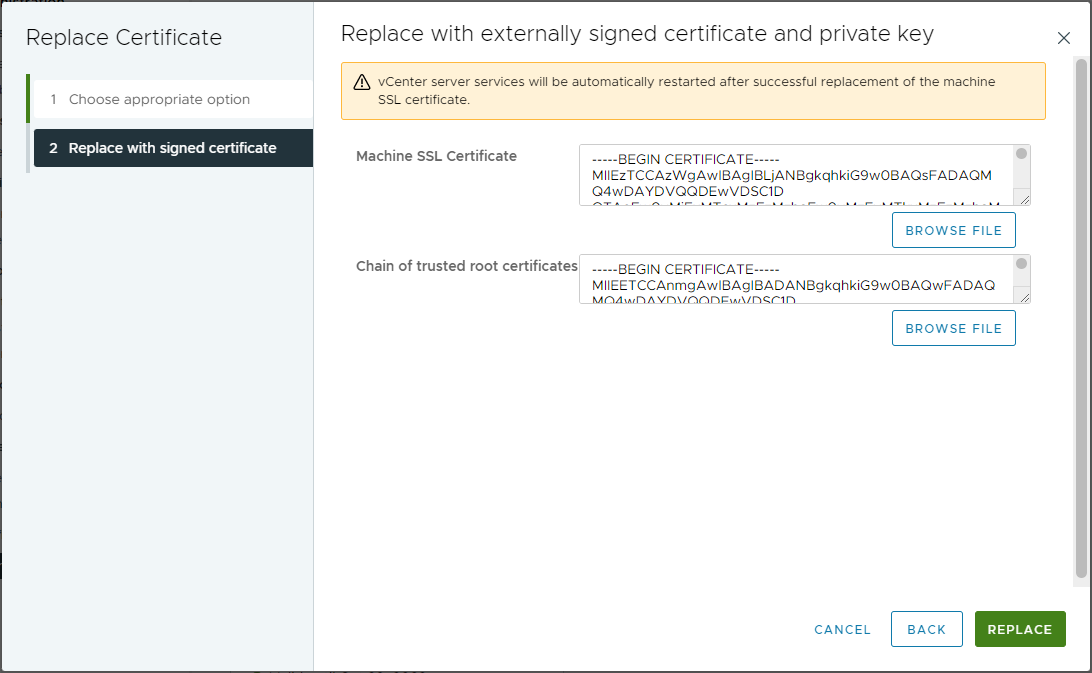
Finally, click Replace. If successful, you should be met with the following dialogue:
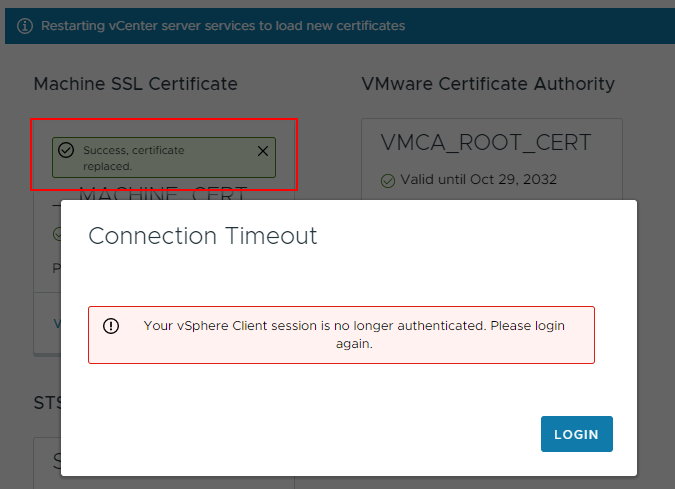
If you experience an “Error occurred while fetching tls: 0” error when replacing the certificate:

Try copying and pasting the vCenter certificate and CA certificate crt file contents into step 2 of the replace certificate wizard, rather than using the browse file buttons. Also double check KB 89424.
Certificate Replacement Confirmation
After allowing time for vCenter to reload, lets take another look. Immediately we see by the presence of the padlock in the URL bar that we are using trusted certificates for the session. Let’s also look again at the certificate presented:

Yep, that looks good. The Organisation listed is PolarClouds and the certificate was issued by our internal CA.
Back in vcenter Administration > Certificates > Certificate Management, lets take view the details of the __MACHINE_CERT again:
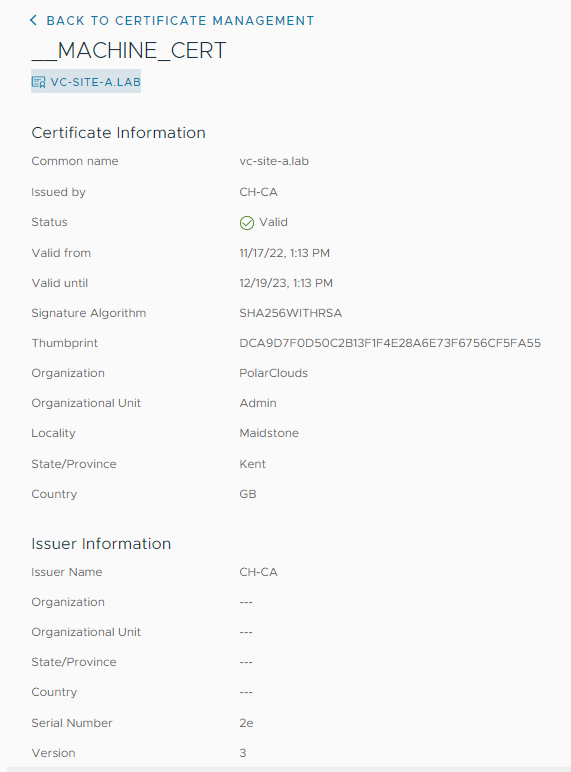
Indeed, we are using replacement certificate for vSphere web client as the vCenter is using our replacement certificate as its __MACHINE_CERT.
ESXi Certificates
As discussed above, when VMCA is in Hybrid mode the certificates used by our ESXi servers will be signed by VMCA using it’s install time generated CA certificate. Let’s check.
In this lab I have just one ESXi host:
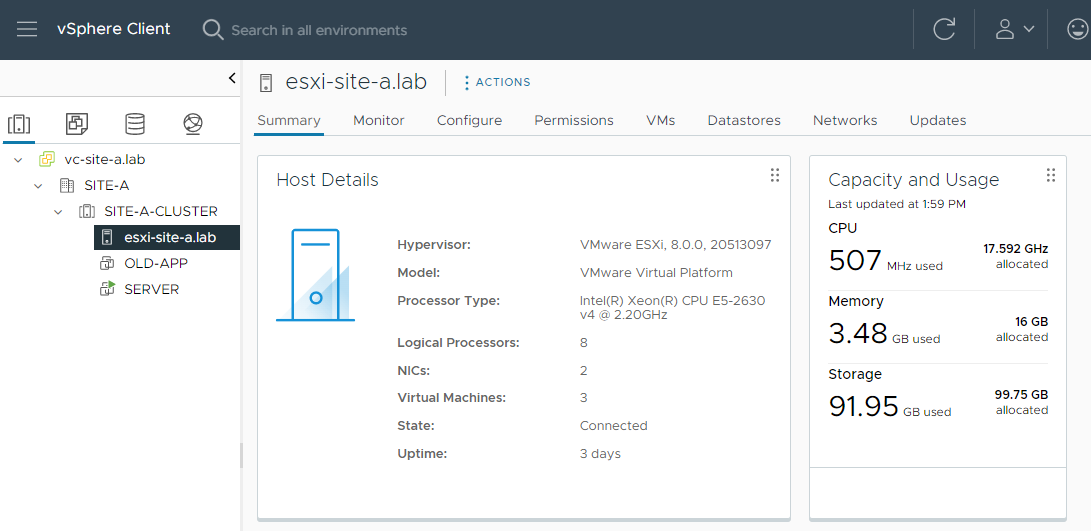
Browsing to the host and checking the certificate it presents:

Yep, our ESXi host is presenting a certificate signed by our VMCA and it’s install time root certificate.
Bonus Round: NSX
As I am reusing the infrastructure created for my TLS Version and Cipher Filtering with NSX Firewall post (go take a look, it’s a great read!), I have NSX deployed in my environment. Lets check that NSX can still connect to our vCenter.
OK, vCenter (or Compute Manager as NSX calls it) connection status is showing as down:

Looking closer at the error:
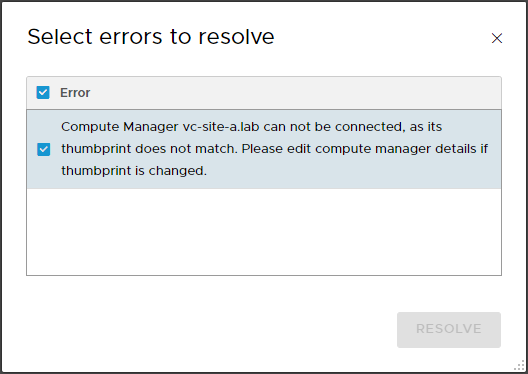
The Resolve button remains greyed out so editing the compute manager, we can see that it is indeed expecting to use the SHA-256 thumbprint from our original VMCA signed certificate rather then our new certificate:
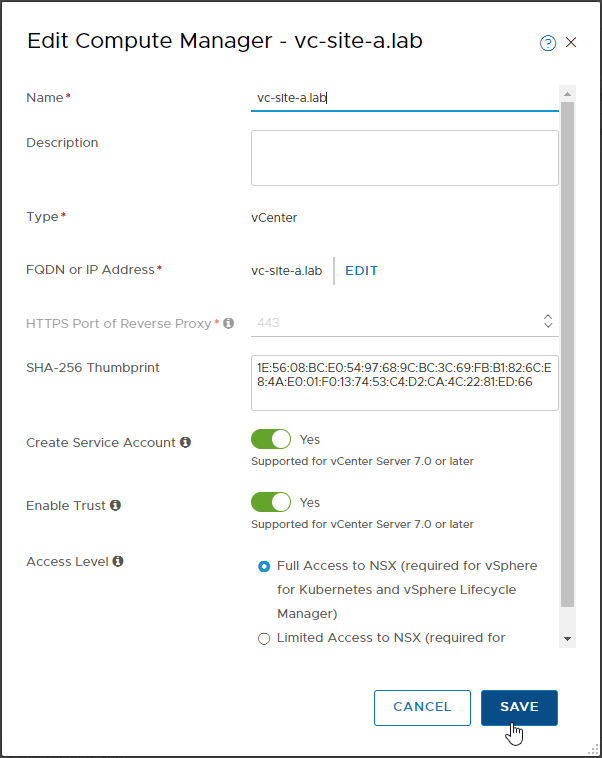
Clicking Save, the inconsistency is picked up:
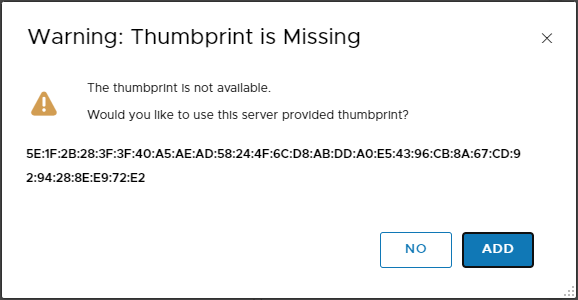
After clicking Add and allowing time for the connection to be re-established, we can see that our compute manager connection is now up:

Conclusion and Wrap Up
In this post we looked at the VMware Certificate Authority (VMCA), the four VMCA management modes, briefly looked at ESXi host certification modes and finally we placed our VMCA into Hybrid mode. As a bonus we reconfigured NSX to connect to vCenter using our replacement vCenter certificate.
Whilst VMCA Hybrid mode doesn’t completely remove all certificate warnings when accessing all parts of the vSphere environment, it is a nice “halfway house”: Certificate warnings are resolved for vCenter access, although not for direct ESXi host access.
Besides, when was the last time you needed to logon to an ESXi host directly?
If you still wish to learn more, take a look at the VMware vSphere blog post vSphere 7 – Certificate Management. The same applies to vSphere 8.
-Chris


