


 File this one away under “I hope I won’t ever need this, but just in case here it is anyway”.
As a last resort before investigating data restoration from backup(s), or even starting to look for data recovery services, the vSphere On-disk Metadata Analyzer (VOMA) tool can be used to identify and fix incidents of logical volume metadata corruption.
In this post we will take a closer look at VOMA.
Overview
Symptoms
The following may be observed:
- No access to files located on a datastore
- Reports of metadata errors in the vmkernel.log file
Risks
VOMA is potentially a tool of last resort and as so it should be treated as such. Because VOMA requires all VMs on a suspect volume to either have been powered off or migrated away from the suspect volume (if possible), there are situations where data may become permanently unavailable. Because of this it is always advisable to have current backups of VMs in an environment.
There may be situations where the deletion and recreation of a datastore may be preferable over a repair attempt.
Using VOMA
OK, so you understand the risks, you’ve migrated and/or powered down your VMs and you are ready. Lets look at using the tool.
First open an SSH connection to your ESXi host and issue the command:
voma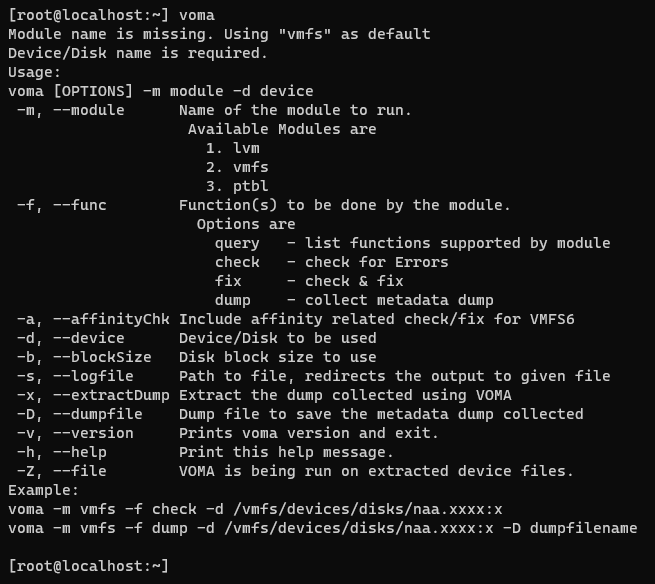
To find the device name of the volume that is having the issues, use the command:
esxcli storage vmfs extent list
As you can see for the above screenshot, my datastore DATASTORE-01 has a device name of mpx.vmhba0:C0:T1:L0.
As VOMA must be run against the partition rather then the device, we need to suffix our device name with :1. Therefore my device becomes mpx.vmhba0:C0:T1:L0:1.
First off we will check for errors on my VMFS volume using the following command:
voma -m vmfs -f check -d /vmfs/devices/disks/mpx.vmhba0:C0:T1:L0:1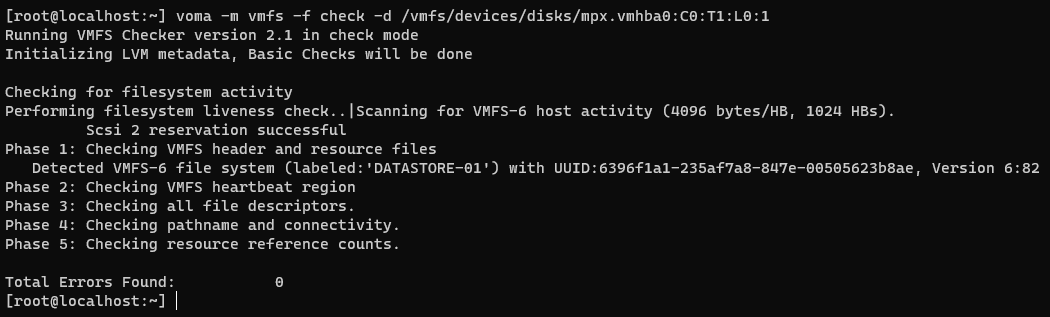
In my test environment screenshot above, I’m not seeing any errors reported by VOMA. If you are reading this post, you will probably be seeing a different result.
If you are and you don’t have current good backups and/or you don’t already have a ticket open with VMware support, then I advise you STOP HERE and REVIEW.
To continue to try and fix errors with VOMA (usual disclaimers apply!), the following command may be used:
voma -m vmfs -f fix -d /vmfs/devices/disks/mpx.vmhba0:C0:T1:L0:1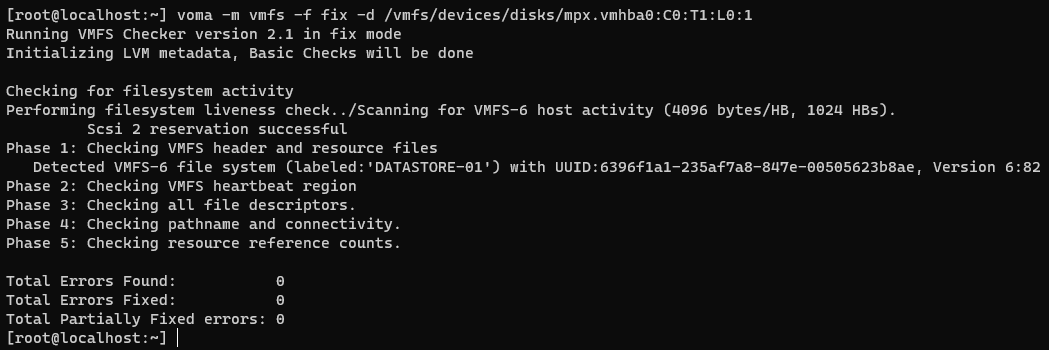
Further Reading
The following resources offer further information on using VOMA:
- Using vSphere On-disk Metadata Analyzer (VOMA) to check VMFS metadata consistency (2036767)
- Checking Metadata Consistency with VOMA
- Use VOMA to Check Metadata Consistency
- Using VMware vSphere On-disk Metadata Analyzer to re-create missing partition tables on VMware ESXi (2103078)
- Data recovery services for data not recoverable by VMware Technical Support (1015413)
Conclusion and Wrap Up
In this post we took a closer look at the vSphere On-disk Metadata Analyzer (VOMA) tool.
Will VOMA help me in my situation?
Well only you can make that call. If you are already looking at data restoration / recovery situation, then VOMA might just be able to help.
-Chris