


 In observance of National Lazy Day 2022… Yeah I know, it was 5 days ago… But hey, who’s counting?
Back when, VMtools used to be updated with each ESXi patch installation. Just patch ESXi, an updated VMTools would be rolled in and away we go; VMs to update.
Not any more.
So what is the simplest way to handle VMTools updates?
Follows is the Lazy Guide.
Not that VM admins are lazy - far from it! VM admins have other things to do; Networking with NSX-T, Storage with vSAN, Compliance with vRO, Cloud Management with vCD, Disaster Recovery with SRM to name a few. You know, other stuff to be getting on with… ![]()
Overview
- Overview
- Download Latest VMTools
- With vCenter Method
- Stand-alone ESXi (Without vCenter) Method
- Installing VMTools in VMs
- Automating VMTools Updates (GUI Method - With vCenter)
- Automating VMTools Updates (GUI Method - Without vCenter)
- Automating VMTools Updates (Script Method - Both With and Without vCenter)
- Conclusion and Wrap Up
Overview
Other methods of updating VMtools are available such as the VMTools Repository Method, the Manual Method and the SCCM method.
Whilst those methods are okay, they do require either “getting down and dirty” with the vCenter/ESXi API (the repository method), lots of intervention (the manual method) or a System Center Configuration Manager (the SCCM method).
We are going to go simplicity. This method requires two steps:
- Update VMtools package via a baseline profile / update
- Configure VMs to auto update when a new version of VMtools is detected
As a bonus, we will look at achieving the above in both an enterprise deployment (I.E with vCenter Server(s)) and a smaller single host / stand-alone environment, without vCenter.
Finally, this post will take the form of a “beginners guide” with extra hand-holding and screenshots for those new to vSphere or unfamiliar with updating VMTools using these methods.
Download Latest VMTools
The permanent link to download VMtools is https://www.vmware.com/go/tools. For both with and without vCenter methods below, we require the VMware Tools Offline VIB Bundle.
With latest VMtools VIB in hand, lets get to it.
With vCenter Method
TL;DR - Import VIB, create a baseline, attach and remediate.
Import VIB + Create Baseline
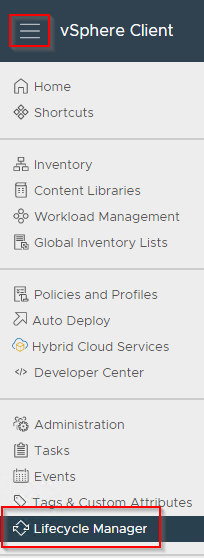
From vCenter client (https://vcenter.fqdn/ui/), select Menu > Lifecycle Manager:
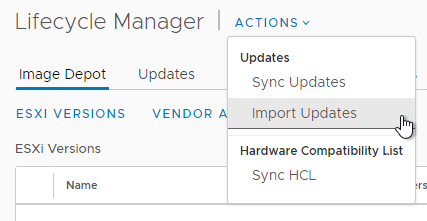
 Select Actions > Import Updates:
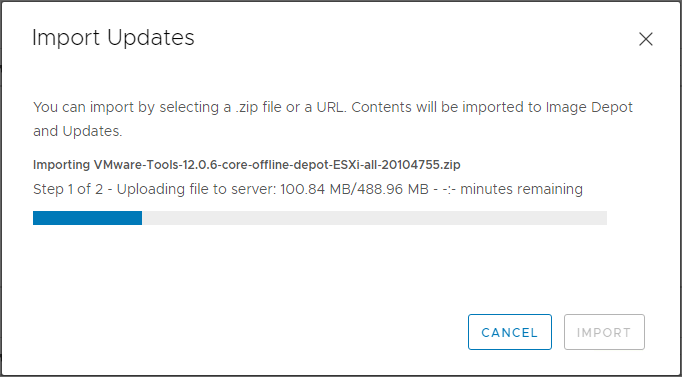
Select previously downloaded VMtools VIB and allow to upload:
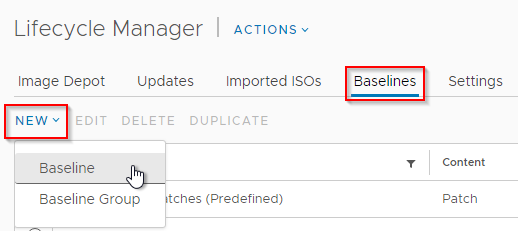
Select Baselines > New > Baseline:
Enter Baseline name, description and select Patch:
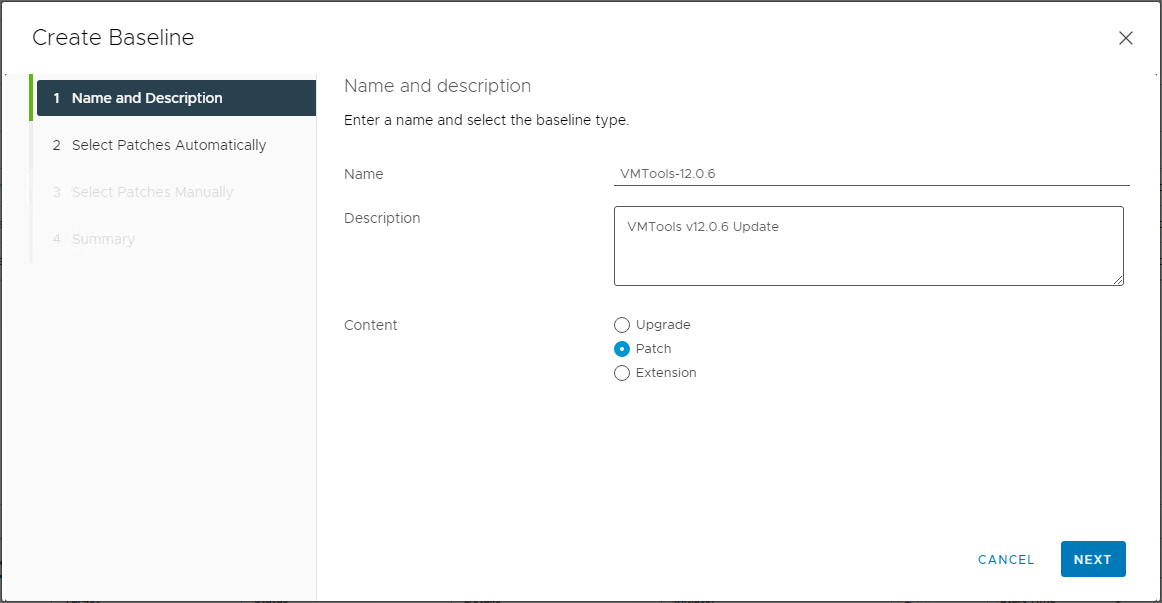
Click Next.
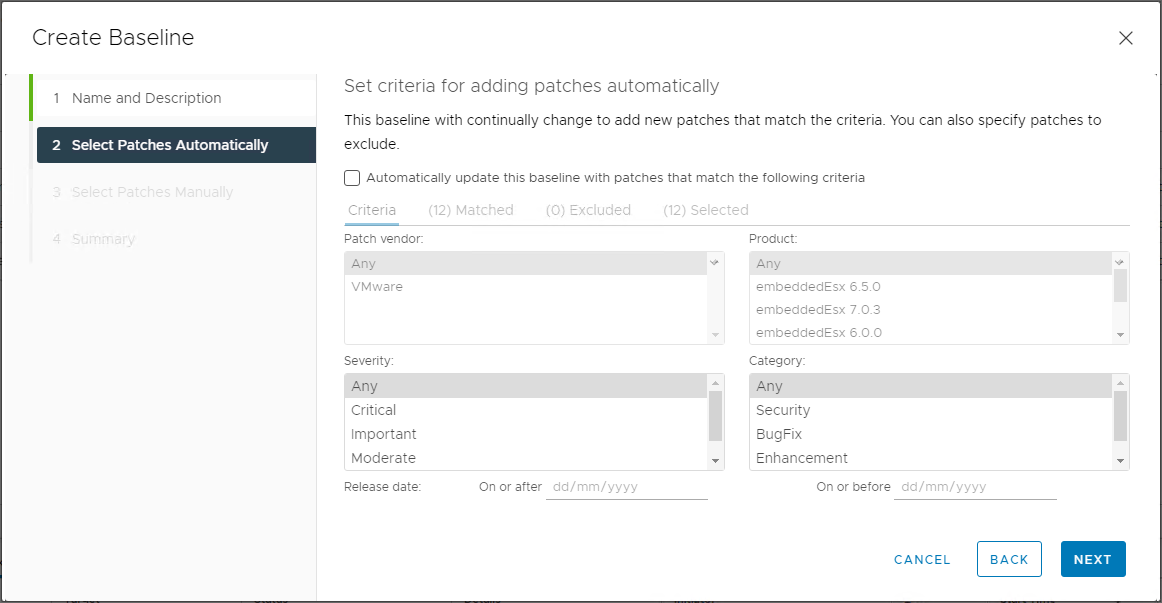
Untick “Automatically update this baseline with patches that match the following criteria” and click Next:
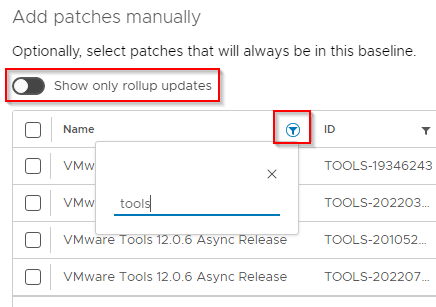
Deselect “Show only rollup updates” and filter name on tools:
Select the version VMtools that matches your newly uploaded VMTools and ESXi versions. In my case below, I’m selecting VMTools version 12.0.6 and ESXi 7.0.*:
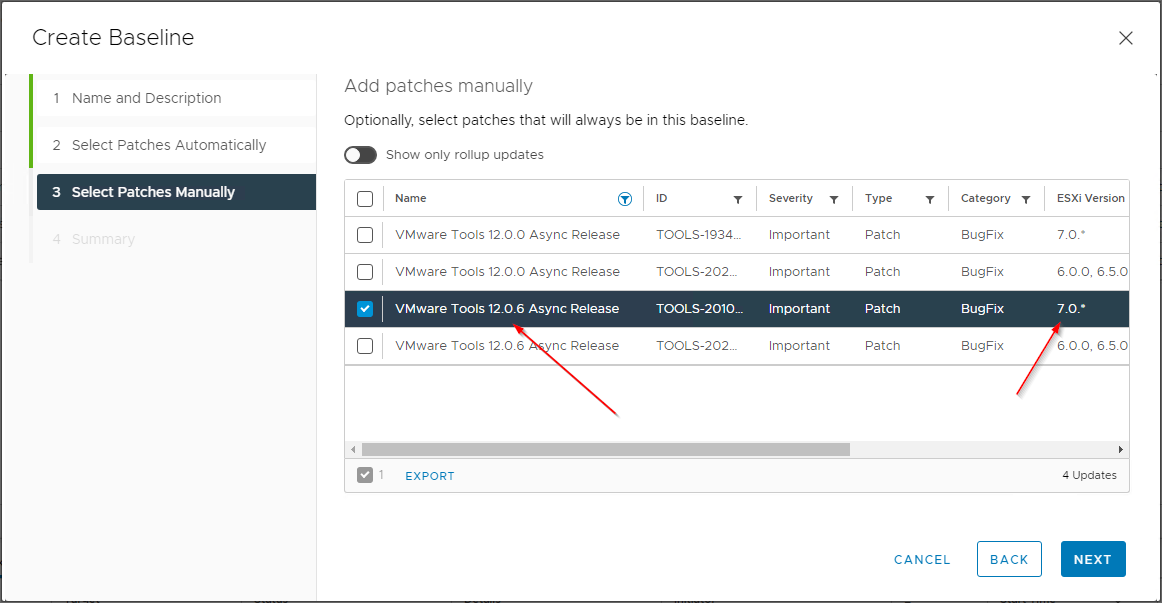
Click Next, confirm all looks correct and finally click Finish:
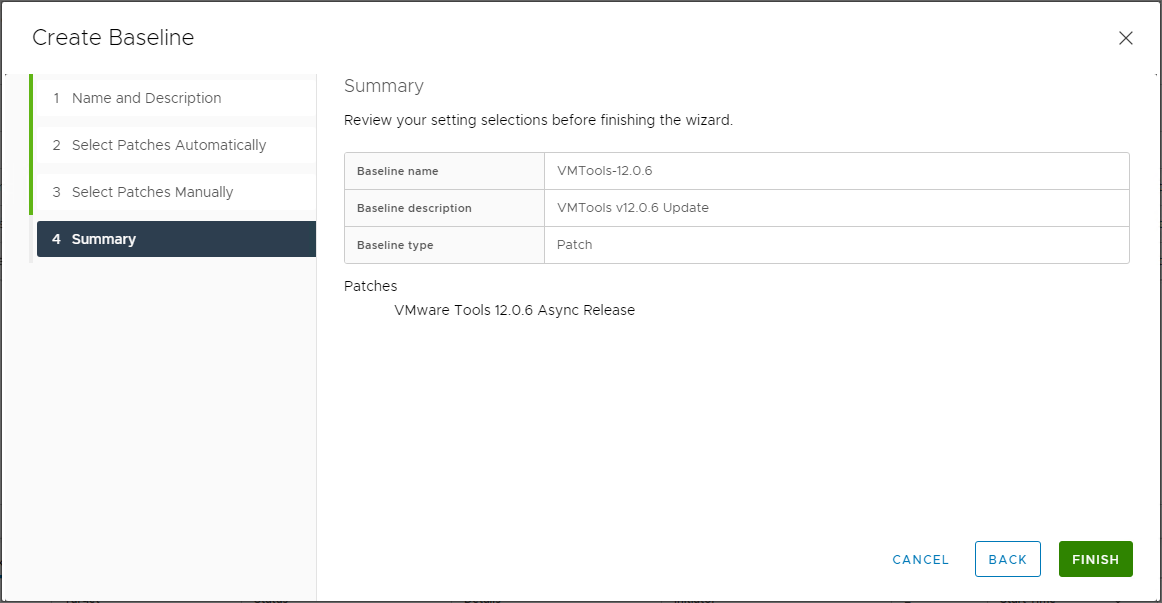
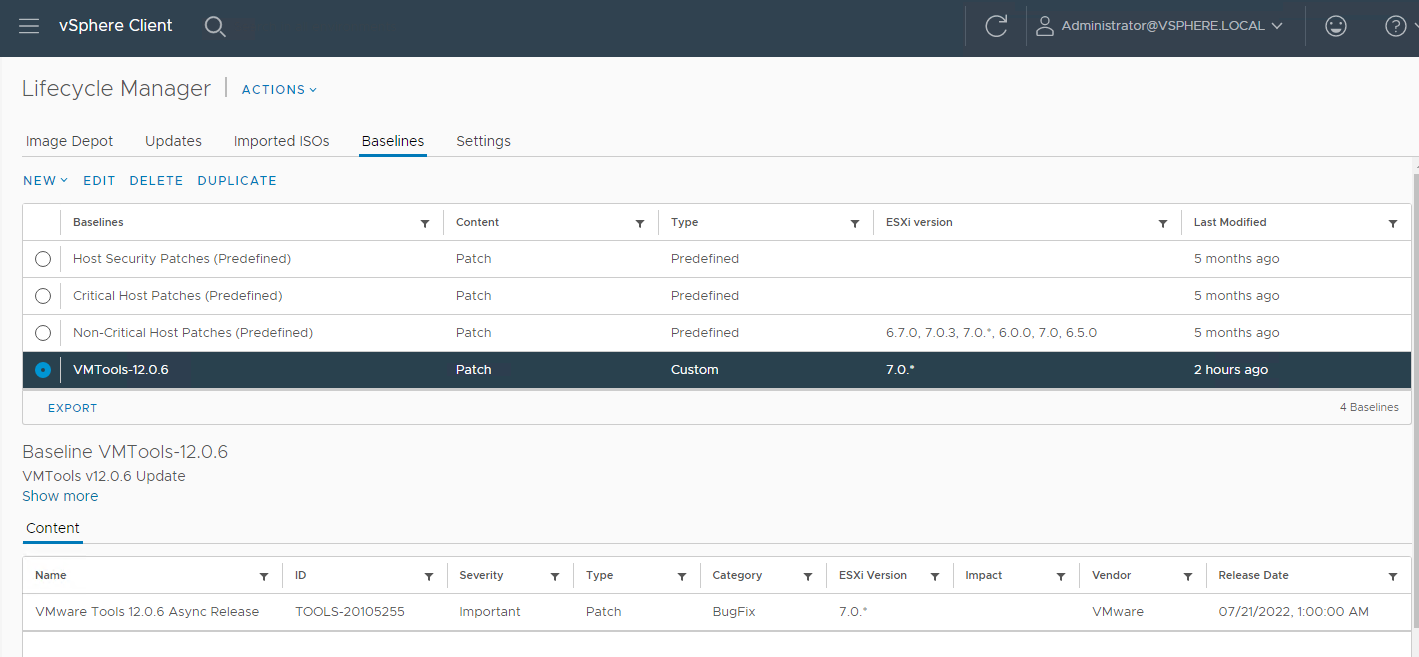
Yep all looks good:
Attach Baseline and Update Hosts
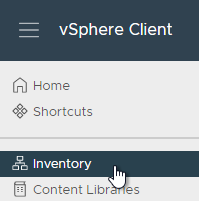
Select Menu > Inventory:
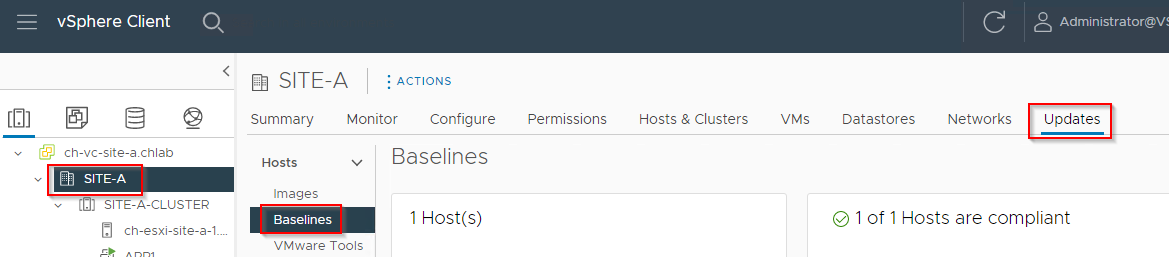
As we want ALL ESXi hosts in our site to have the updated VMTools package, we will attach the baseline at our site level. Select your datacenter (in my case “SITE-A”), Updates and Baselines:
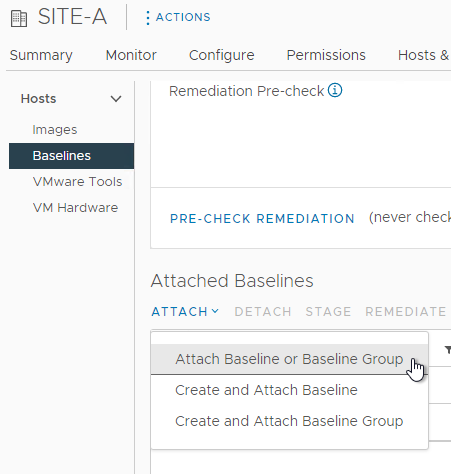
Scroll down and select Attach Baseline or Baseline Group:
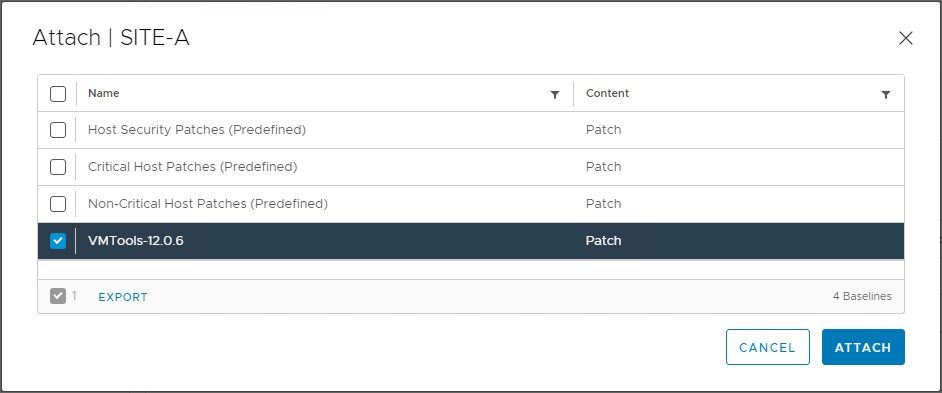
Select the previously created VMTools baseline and click Attach:
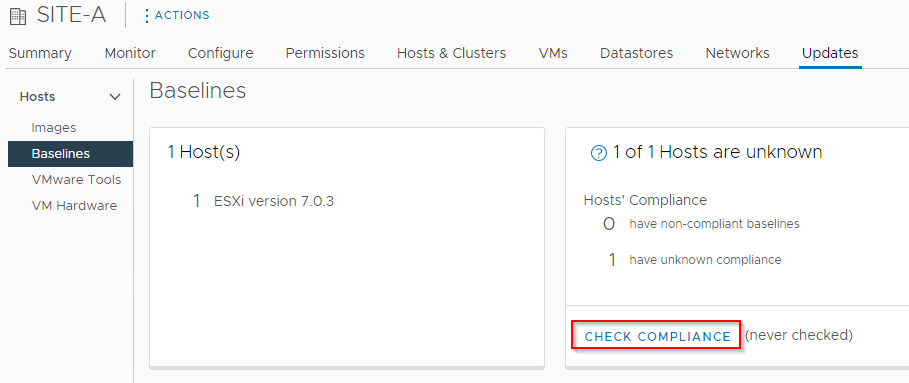
From the Inventory > Datacenter > Updates > Baselines view, select Check Compliance:
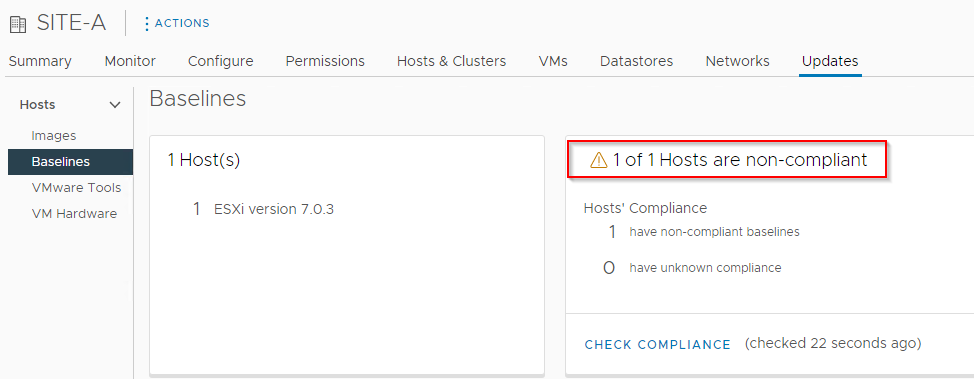
Once the compliance check has completed, you will see that your hosts will be flagged as “Non-compliant”:
Scroll down and select Pre-check Remediation:
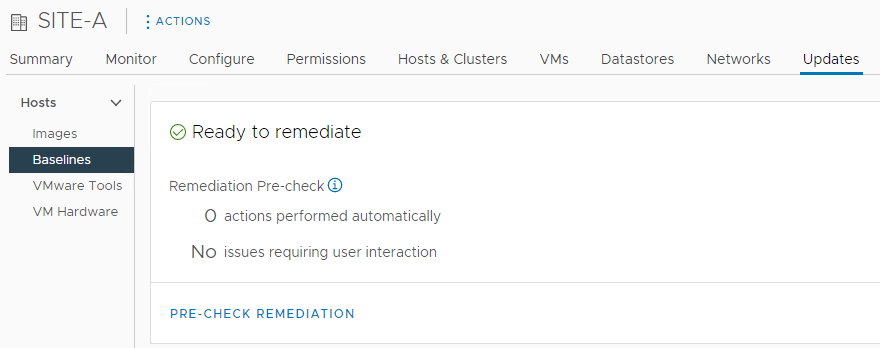
Confirm that there are no issues flagged that may prevent the completion of remediation:
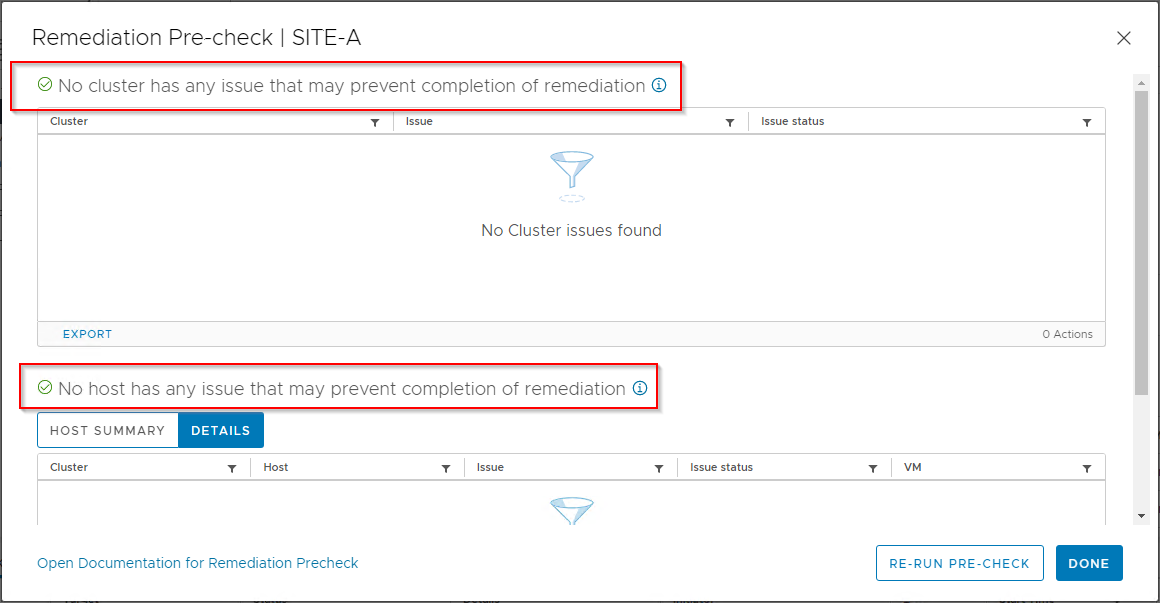
Click Done.
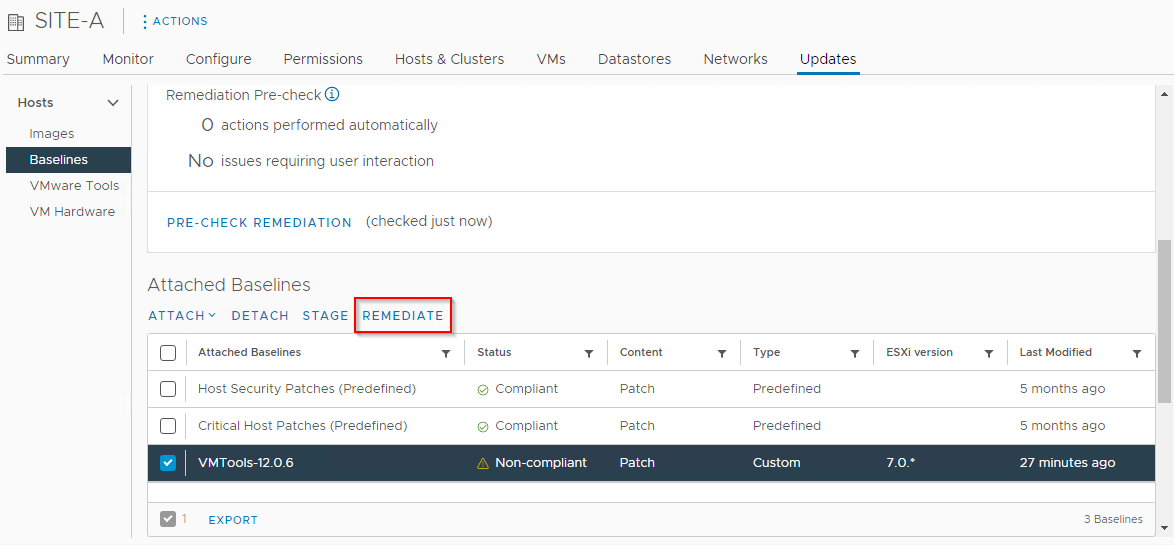
Scroll down further, select the VMTools package attached earlier and finally select Remediate:
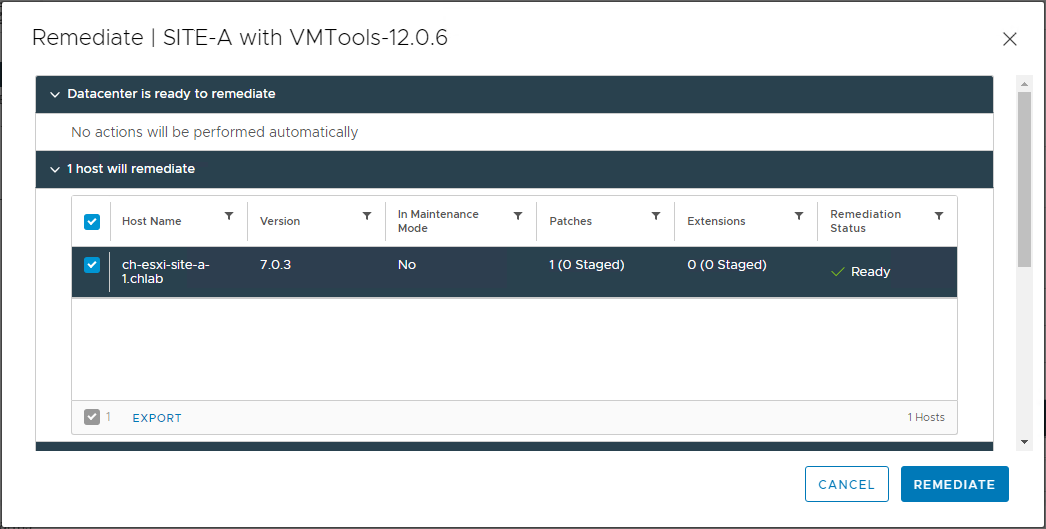
Again, confirm all looks goo and click Remediate again:
Monitor the installation via Recent Tasks:

Job Done:

Giving ESXi ten minutes to catch up, yep our Windows VMs need updating:
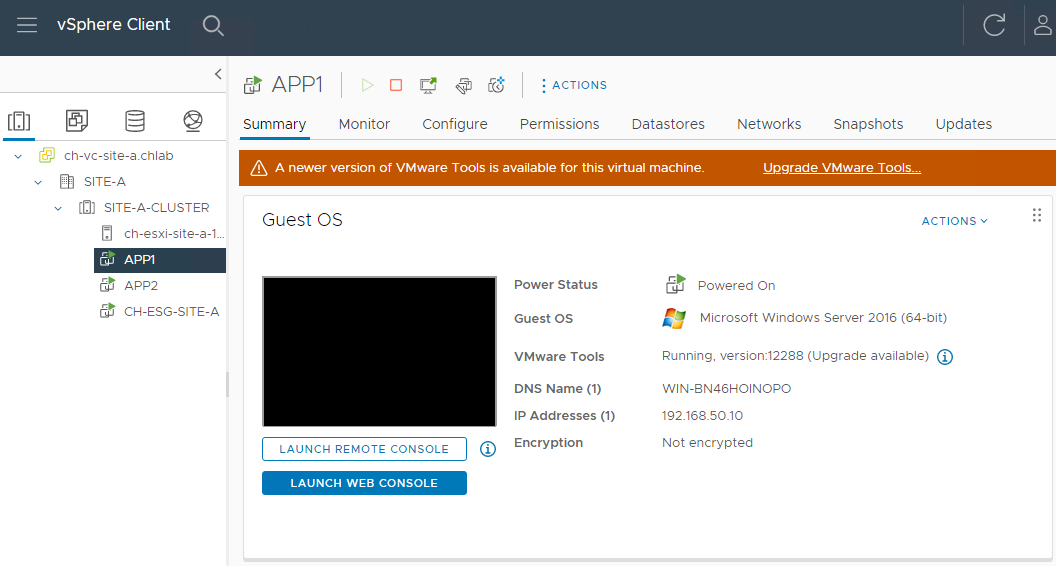
Don’t worry, I have a lazy way to handle those too. ![]()
Stand-alone ESXi (Without vCenter) Method
This method is a little simpler.
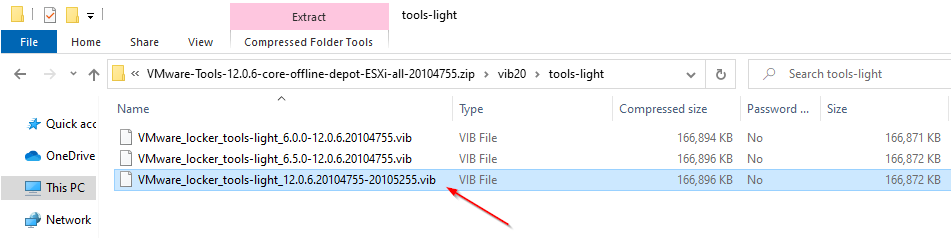
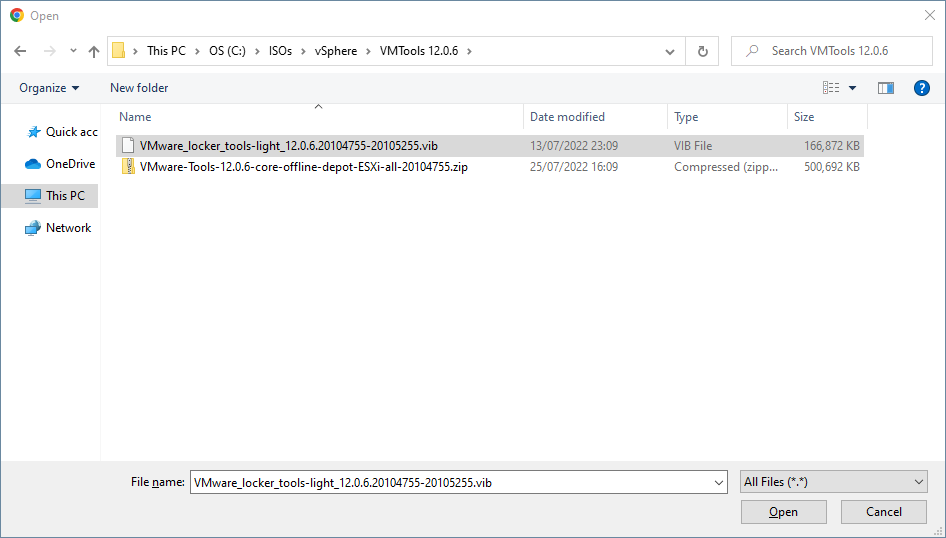
First off, we need to open our downloaded VMTools zip file and extract a VIB. Opening the zip and navigating into the vib20\tools-light folder, lets extract our VIB:
Log onto the ESXi management interface (https://esxi.fqdn/ui/), select Storage and a Datastore. In my case I selected “LOCAL1”:
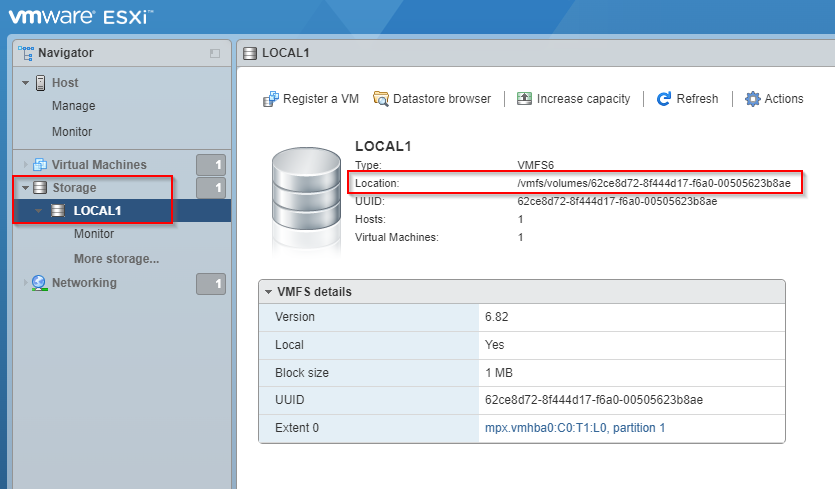
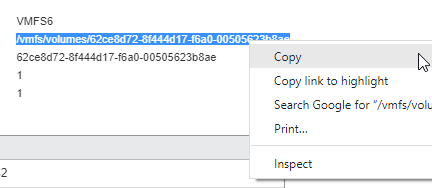
Make a note of the location. This should be easily copied:
Select Datastore browser and Upload. Select the VIB extracted earlier and click Open:
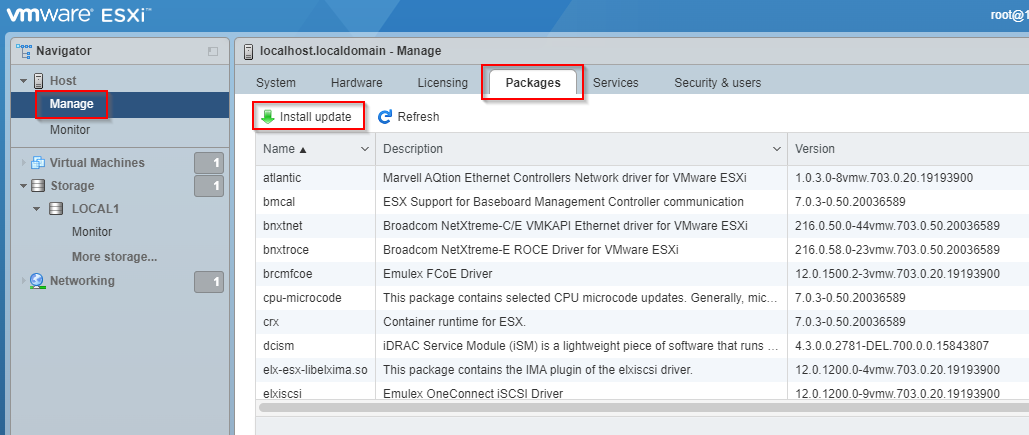
Once the upload has completed, select Manage > Packages > Install Update:
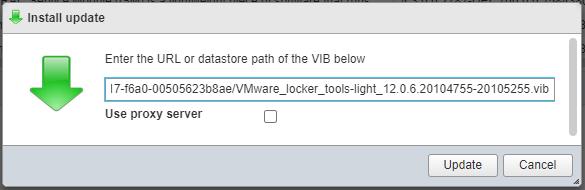
Using the location noted earlier, add the name of the VIB file, paste into the install update dialogue and select Update:
Click Continue:

Monitor and confirm successful completion:

Finally, refresh the packages page, search for “tools-light” and confirm the updated version is listed:

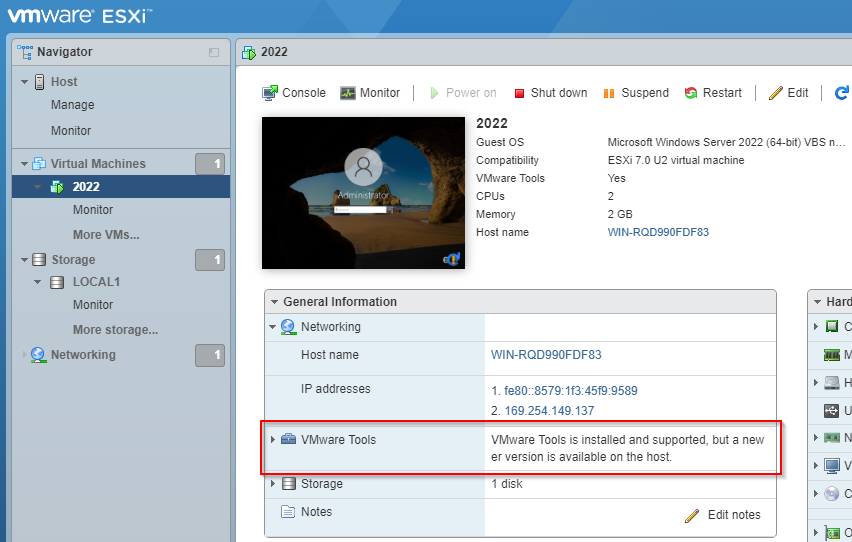
Again, giving ESXi ten minutes to catch up, yep our Windows VMs need updating:
Installing VMTools in VMs
The simplest way to handle updating of VMTools in VMs is two-fold:
Linux and FreeBSD VMs
Use Open VM Tools for Linux and FreeBSD VMs rather than the VMware supplied VMTools. Open VM Tools are bundled with Linux and FreedBSD and are updated via distribution updates, therefore do not need updating separately. See Open VM Tools for details.
Windows VMs
Use automation. Lets look at that next.
Automating VMTools Updates (GUI Method - With vCenter)
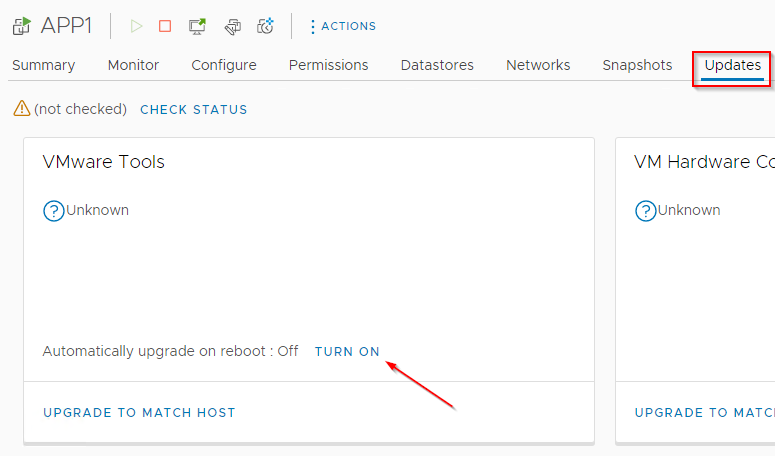
If we dig into our Windows VMs and take a look at the Updates tab, we can see the following option to update VMtools automatically when a VM is rebooted:
Since we are talking Windows based VMs here, we know that through normal maintenance patching, our VMs are rebooted at least once a month.
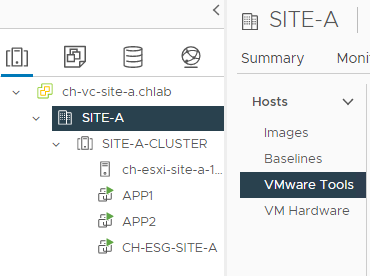
Lets configure auto VMTools auto update then. Select Site > VMware Tools:
After selecting the Cluster and our Windows VMs, we can set auto update to On:
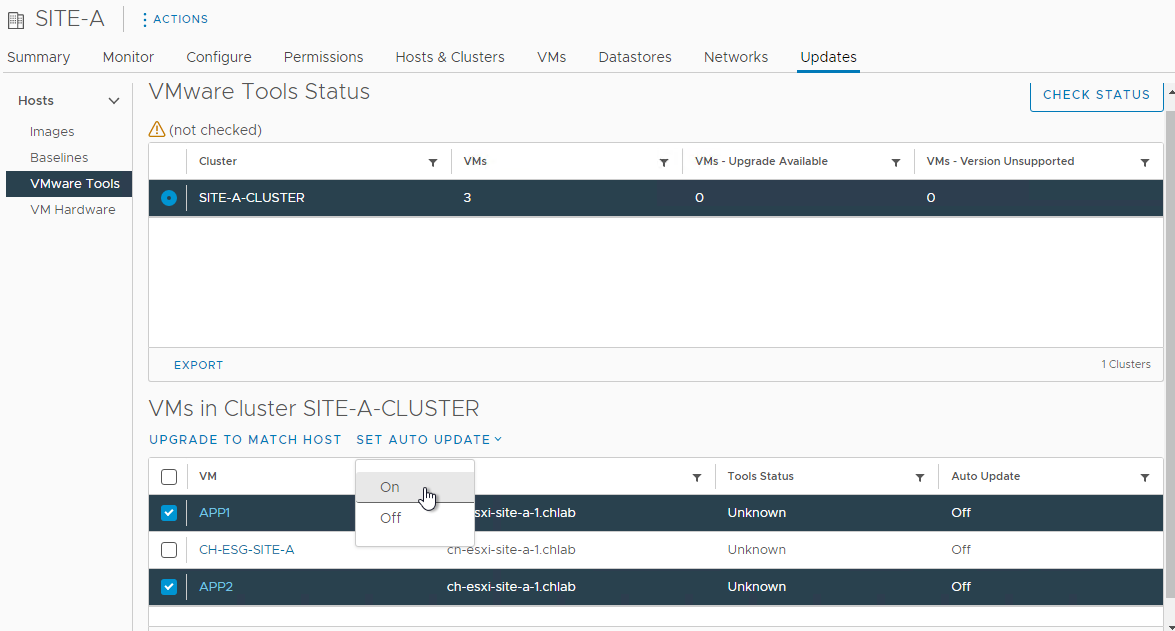
Job done.
Automating VMTools Updates (GUI Method - Without vCenter)
Log into ESXi web client, select a Windows VM, Edit > VM Options, expand VMware Tools and enable Check and upgrade VMware Tools before each power on:
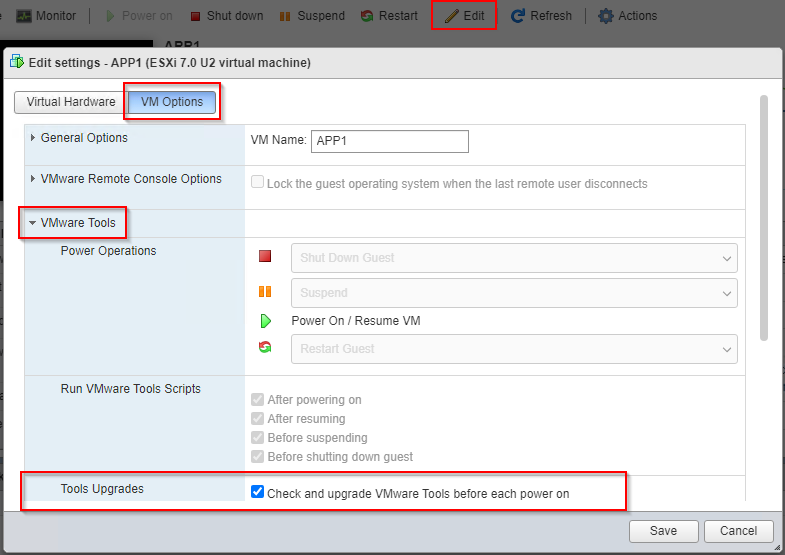
Save and repeat for remaining Windows VMs.
Automating VMTools Updates (Script Method - Both With and Without vCenter)
The above methods VMTools Update methods are acceptable small scale, but what happens if we have hundreds of VMs to deal with?
Let’s use PowerShell! ![]()
First let’s create a report of all Windows VMs that are not currently set to auto update VMTools:
1
2
3
4
5
6
7
8
9
10
11
12
13
14
15
16
17
18

$VC = @("vcenter.local")
$StoredCred = "vSphere-Admin"
$Report = "C:\Scripts\VM-Tools\V2\Enable-VMToolsAutoUpgrade-Report.csv"
$Credentials = Get-StoredCredential -Target $StoredCred
Connect-VIServer -Server $VC -Credential $Credentials
$UPGNeeded = Get-VM | Where {$_.ExtensionData.Config.Tools.ToolsInstallType -eq "guestToolsTypeMSI" -and `
                             $_.ExtensionData.Config.Tools.ToolsUpgradePolicy -like "manual" -and `
                             $_.ExtensionData.Config.ManagedBy.type -ne "placeholderVm" -and `
                             $_.Name -notlike "*FRED*"}
$UPGNeeded | Select-Object `
             Name,`
             PowerState,`
             @{label='Current Tools Version'; expression={($_.ExtensionData.Guest.ToolsVersion)}}, `
             @{label='Operating System'; expression={($_.Guest.OSFullName)}}, `
             @{label='VM Notes'; expression={($_.Notes[0..51] -join "")}} `
             | Export-Csv -Path "$Report" -NoTypeInformation
Write-Host "`n Report saved to $Report"
Disconnect-VIServer -Server * -Confirm:$false
Breaking the report script down:
- Lines 1 to 5: Configure and connect to vCenter / ESXi using Credential Manager as discussed in PowerShell Credential Handling post.
- Lines 6 to 9: Select VMs where VMTools install like “guestToolsTypeMSI” (IE Windows VMs), where upgrade policy is like “manual”, where VM is not a SRM place holder VM and finally with a VM name not like “FRED”.
- Lines 10 to 16: From the VMs selected, export name, power state, current tools version, guest operating system and VM notes (truncated to 50 characters).
- Line 17: Export .csv report
- Line 18: Disconnect from vCenter / ESXi
The above will create a .csv spreadsheet containing following information:
| Name | PowerState | Current Tools Version | Operating System | VM Notes |
|---|---|---|---|---|
| APP1 | PoweredOn | 11334 | Microsoft Windows Server 2016 (64-bit) | Test Server APP1 |
| APP2 | PoweredOn | 11334 | Microsoft Windows Server 2016 (64-bit) | Test Server APP2 |
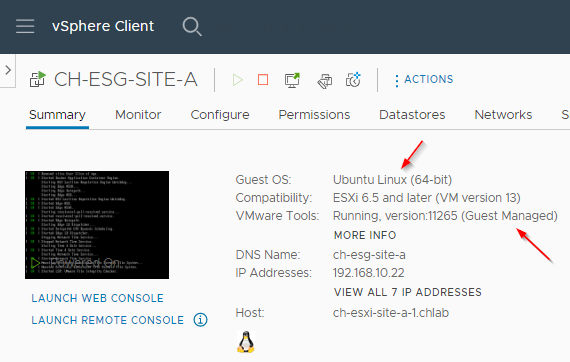
Notice that the VM-CH-ESG-SITE-A is not listed in the report?
That’s because it’s a Linux VM running with Guest Managed VM tools:
After confirming the .csv spreadsheet contains the correct data, the next step is to enable VM tools on the applicable VMs. Again, we will use a script for this:
1
2
3
4
5
6
7
8
9
10
11
12
13
14

$VC = @("vcenter.local")
$StoredCred = "vSphere-Admin"
$Report = "C:\Scripts\VM-Tools\V2\Enable-VMToolsAutoUpgrade-Report.csv"
$Credentials = Get-StoredCredential -Target $StoredCred
Connect-VIServer -Server $VC -Credential $Credentials
$VMs = Import-CSV "$Report"
$vmConfigSpec = New-Object VMware.Vim.VirtualMachineConfigSpec
$vmConfigSpec.Tools = New-Object VMware.Vim.ToolsConfigInfo
$vmConfigSpec.Tools.ToolsUpgradePolicy = "UpgradeAtPowerCycle"
ForEach($VM in $VMs){
    Get-VM -Name $($VM.Name) | ForEach {$_.ExtensionData.ReconfigVM_task($vmConfigSpec) > $null}
    Write-Host "Reconfigured $($VM.Name)"
}
Disconnect-VIServer -Server * -Confirm:$false
Breaking the enable script down :
- Lines 1 to 5: Configure and connect to vCenter / ESXi using Credential Manager as discussed in PowerShell Credential Handling post.
- Line 6: Import the report .csv
- Lines 7 to 9: Create the VM configuration specification
- Line 10 to 13: Loop through the .csv report and apply the configuration specification to each VM listed and feedback
- Line 14: Disconnect from vCenter / ESXi
Let’s run the script:
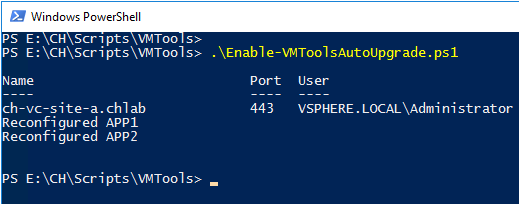
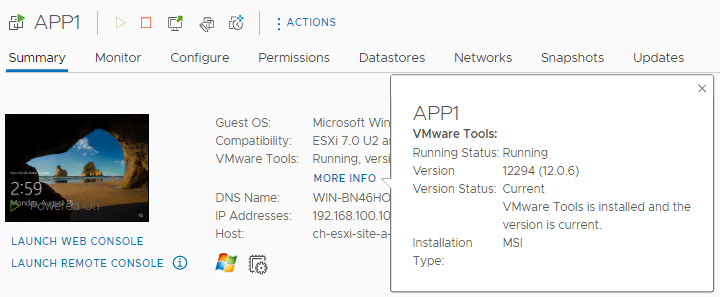
Looks good. Checking one of the VMs reconfigured:

Boom!
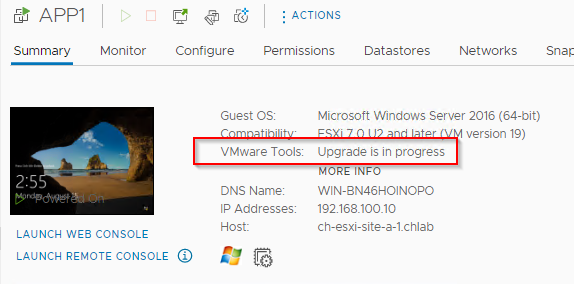
After a reboot of the VM:
Something to be aware of, sometimes VMs require a reboot to fully install VMTools:
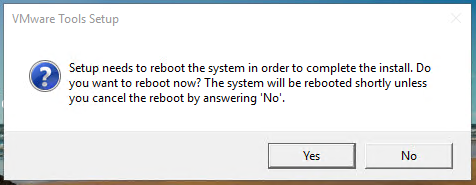
If you are rebooting your VMs in a maintenance window, what difference does second reboot make anyway?
And we are done!
Conclusion and Wrap Up
So there we have it. A simple way to update VMTools using Baselines and Lifecycle Manager in vCenter if you have it, or via ESXi host VIB update if not.
We then looked at using the Open-VM-Tools package for Linux and FreeBSD based VMs.
Finally we looked at manual and scripted methods to configure VMs to auto update their VMTools installations when they are rebooted - say during a maintenance window.
All with ease. Happy belated Lazy Day 2022!
-Chris