


 Photo: Tudor Panait
Prioritising certain types of internet traffic over others.
Overview
Traffic Shaping Primer and My Objective
Traffic shaping / quality of service (QoS) is an expansive subject with many, many, many ways to achieve the same outcome; namely to prioritise certain types of network traffic over types of network traffic as and when required.
Typically, configuring and managing traffic shaping was seen as a non-trivial task.
Frequently this meant understanding traffic flows; getting a handle on traffic sources, traffic destinations and TCP/IP ports used by most / all of the traffic on the network. From there one could prioritise traffic based on the knowledge gained. Adjust traffic control policies, test, adjust traffic control policies again, test, repeat… Lots of adjusting and testing.
Luckily for us, pfSense has a traffic shaping capability built in that has been written for those of us who simply do not want to investigate flows, ports, adjust, test, repeat etc. This means that anyone can implement traffic shaping on their own network in double quick time. Yes, you can still adjust traffic shaping polices as desired, but most of the time the shaping basics implemented by pfSense are more than enough for a normal home network set up.
So lets get going then. In this scenario, I have my pfSense router configured as my gateway for my home network. All internet traffic must pass though my pfSense router. If you need help in setting up your own pfSense router, have a read of Netgate’s excellent pfSense installation guide.
My objective: prioritise internet streaming services such as Netflix, Amazon Prime, YouTube, etc over other types of traffic. Whilst I’m not seeing any issues at present, there is noting more annoying than video buffering!
Your objective may/will be different. You can certainly use pfSense to achieve your objective. Same process as below.
How to Shape with pfSense
Log onto your pfSense server and select Firewall - Traffic Shaper - Wizards:

If you have multiple WAN connections you should select traffic_shaper_wizard_multi_all.xml If you have a single WAN connection you should select traffic_shaper_wizard_dedicated.xml - nine times out of ten traffic_shaper_wizard_dedicated.xml is the wizard you need to select. For the purposes of this walk-through, I’ll be selecting the dedicated option.
At the next screen enter the number of WAN connections you have. I have one WAN connection, so I’ll leave this as is and click Next

At the Step 1 of 8 screen, I’ll select my local interface as LAN1, my WAN Interface as WAN and I’ll leave both set to PRIQ for simplicity (To learn more about PRIQ and the other scheduler types, see ALTQ Scheduler Types in the pfSense documentation)
For upload and download figures, you can either discover these numbers from your broadband router or via a line speed test such as Speedtest.net. Whatever numbers you enter here, I highly recommended that you enter around 5% less than the numbers you discover for your line. This is so that you hit your pfSense limiter before you hit the limit of your line.
For example, today my fibre modem is showing:
- Upload = 14.8 Mbit/s
- Download = 68.1 Mbit/s
Taking 5% away from both these numbers gives me:
- Upload = 14.06 Mbit/s - I’ll round this down to 14 Mbit/s
- Download = 64.6 Mbit/s - I’ll round this down to 64 Mbit/s
Your numbers will almost certainly be different. Completing the page then:
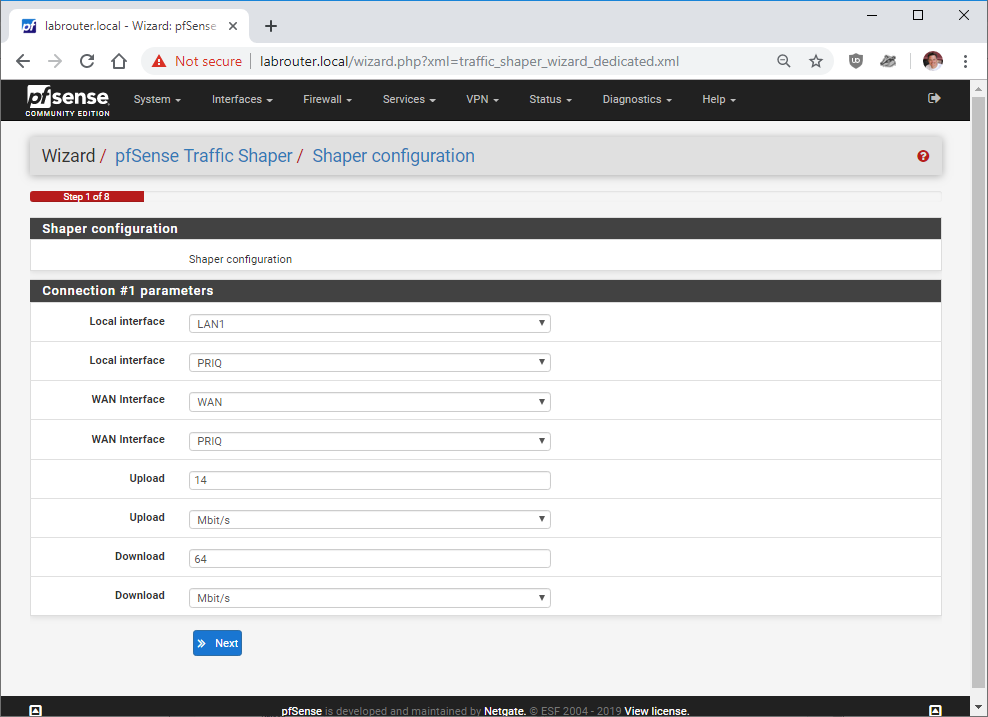 Click Next when done.
Step 2 of 8 deals with prioritising Voice Over IP traffic. If you use VOIP, configure your parameters here:
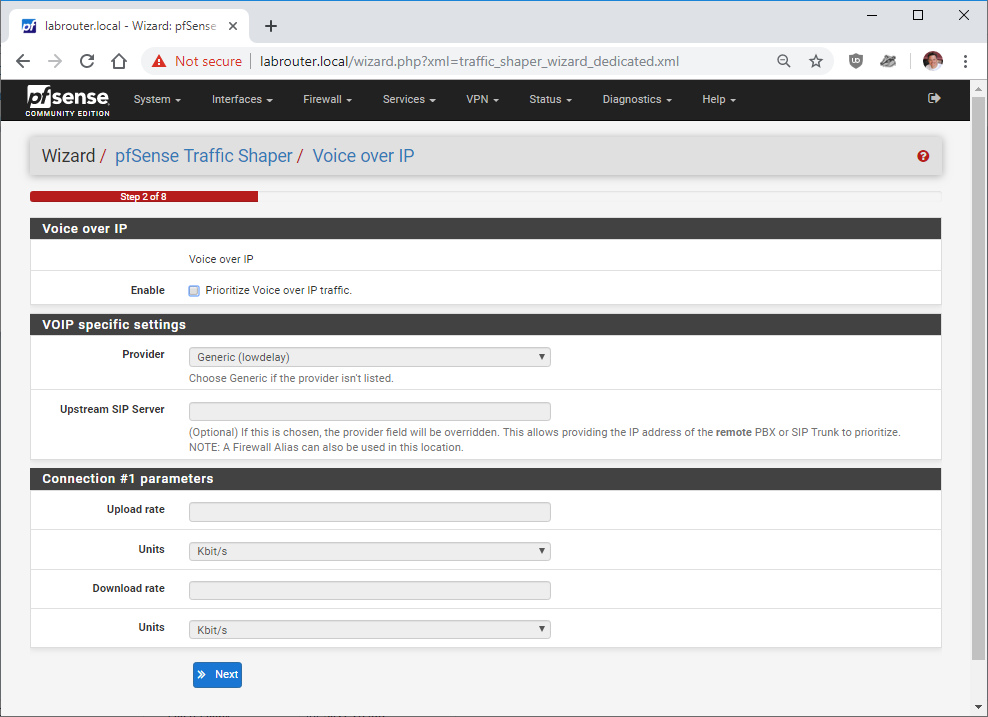 Nowadays, I don’t use VOIP so I’m going to simply click Next here.
Step 3 of 8 deals with bandwidth “hogs”. If you have that one particular user on your network that likes to hog your internet bandwidth, you can enter their details here. For the demo, I’m going to limit the machine with the IP address 192.168.99.100 to 15% bandwidth. pfSense accepts a range of 2% to 15% in this step:
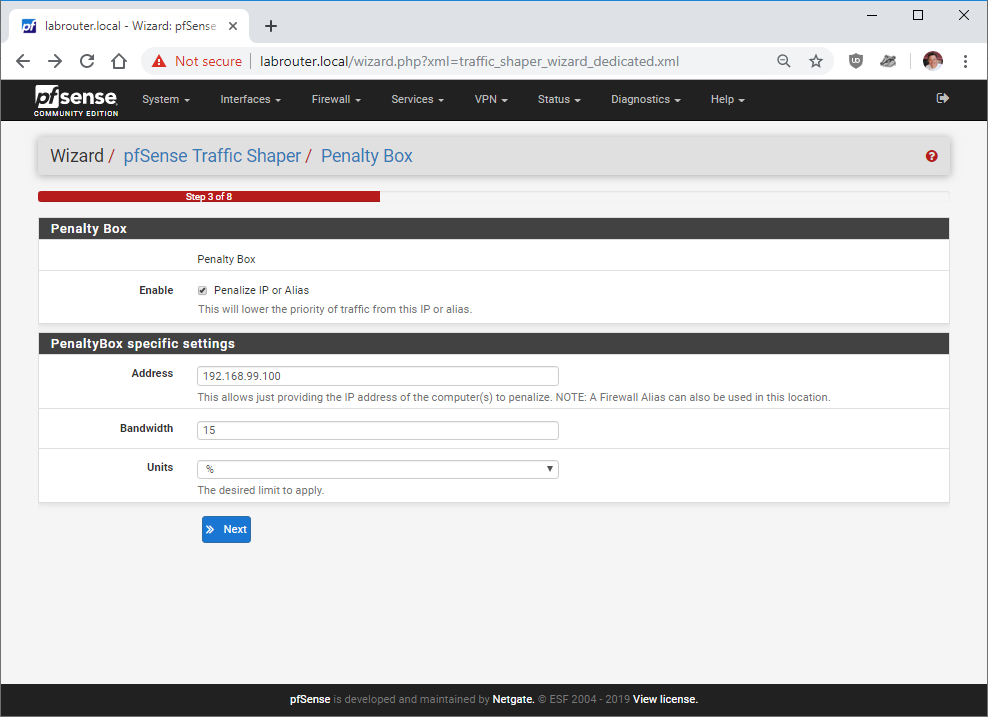 Click Next when done.
Step 4 of 8 deals with peer-to-peer traffic. Yes I want to limit P2P traffic, so I’m enabling the option and I’m selecting BitTorrent. As you can see, there are plenty of P2P protocols to limit supported out of the box:
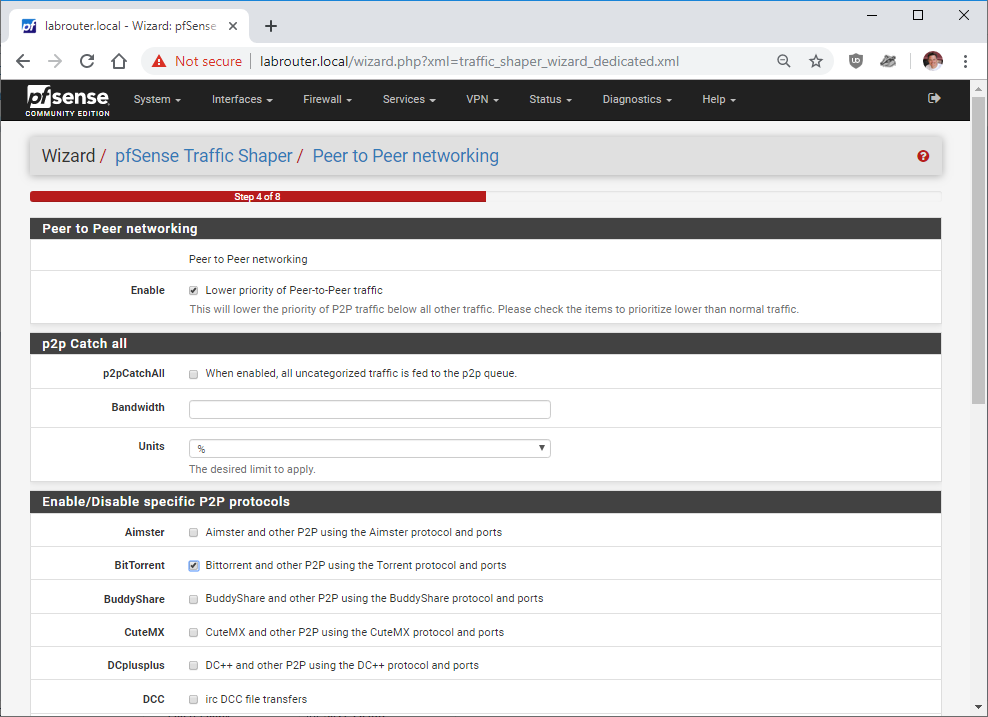 Click Next when done.
Step 5 of 8 deals with prioritising internet game traffic:
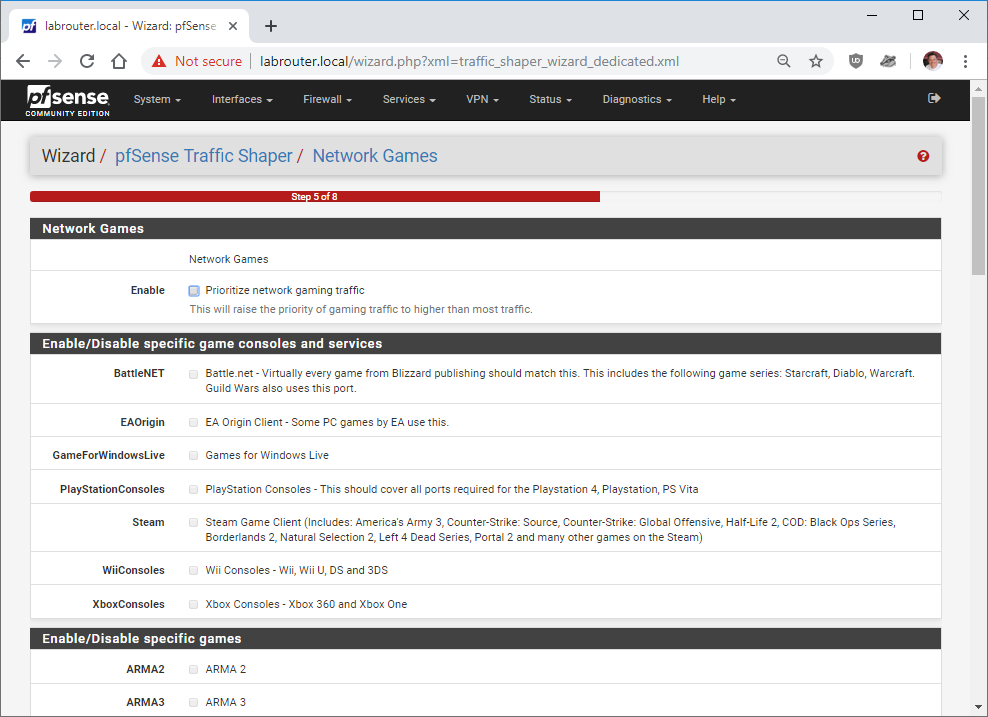 Again, I don’t play games online so I’m going to leave this unset and click Next.
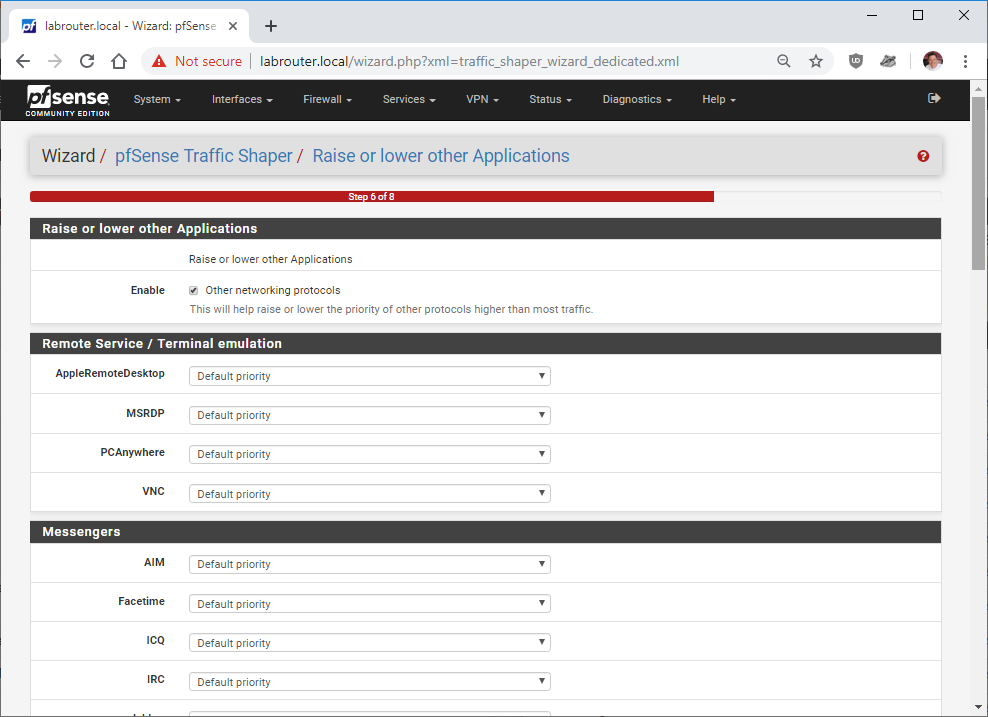
Step 6 of 8 deals with raising or lowering the priority of other application traffic: OK, so here I’m going set the following to “Higher Priority” along with the reasoning to do so:
-
IPSEC - IP Security (VPN section) - For connecting to other networks
-
RTSP - Real Time Streaming Protocol (Multimedia/Streaming section) - As used by Netflix, Amazon prime etc. What we came here for, objective met!
-
RTMP - Real-Time Messaging Protocol (Multimedia/Streaming section) - As used by Netflix, Amazon prime etc. What we came here for, objective met!
-
HTTP (Web section) - Standard Web browsing
 Click Next when done.
Step 7 of 8 Almost there:
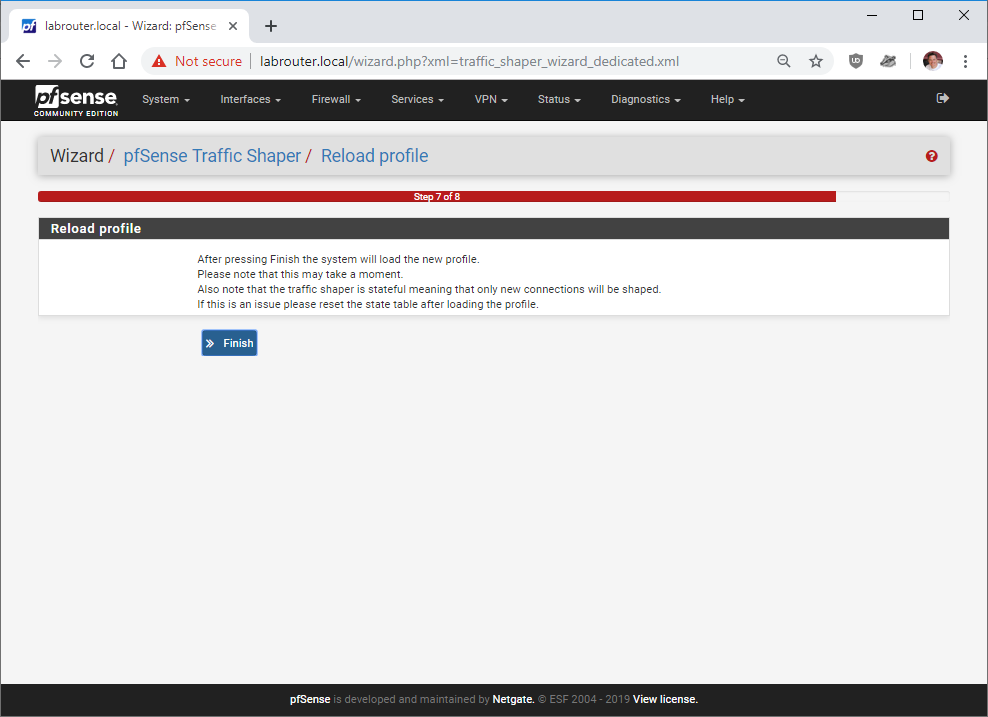 Click Finish to load the new profile.
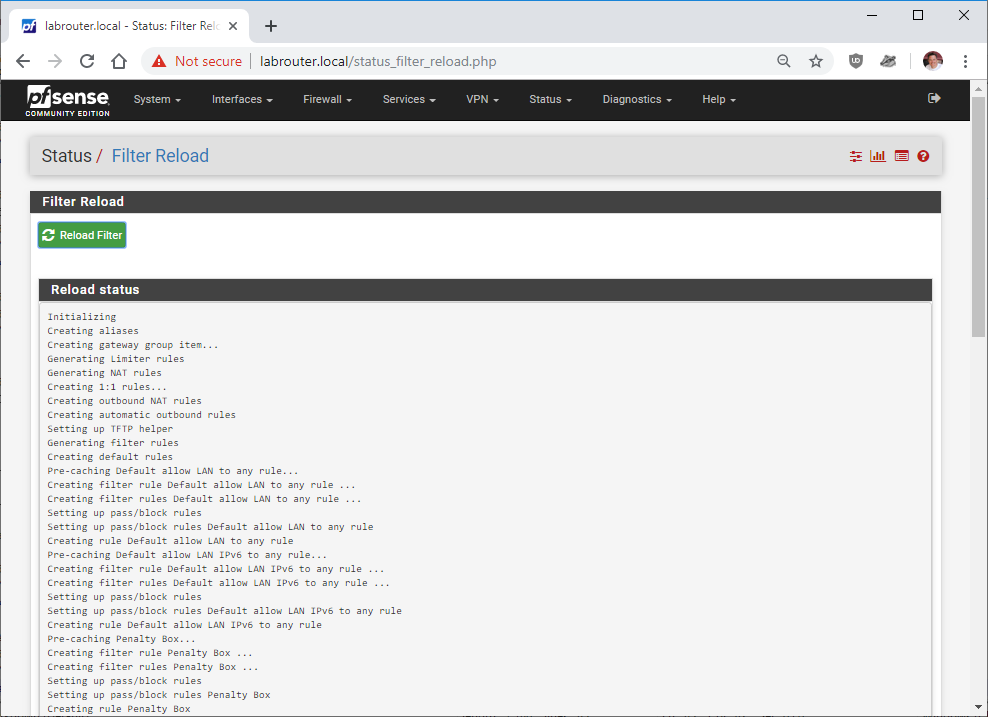
Step 8 of 8 Done!
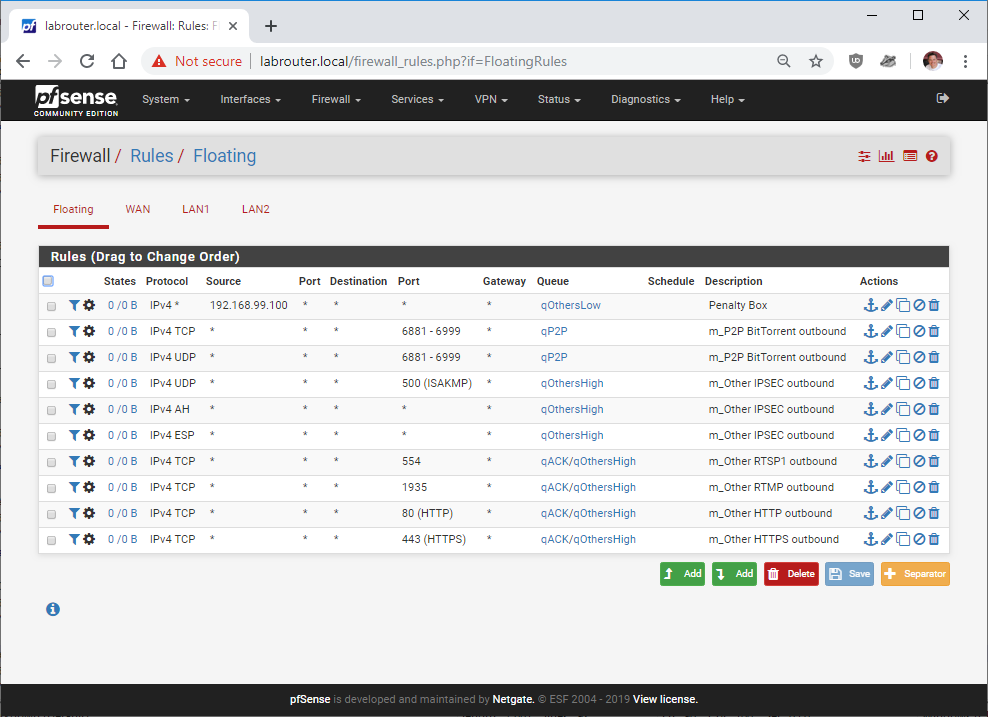
Right. Lets take a look at the rules created. Click Firewall - Rules - Floating.
Here they are:
Monitoring Traffic Shaping Queues
To see in real-time how the traffic shaper is performing, head over to Status - Queues. From there you can see the following:
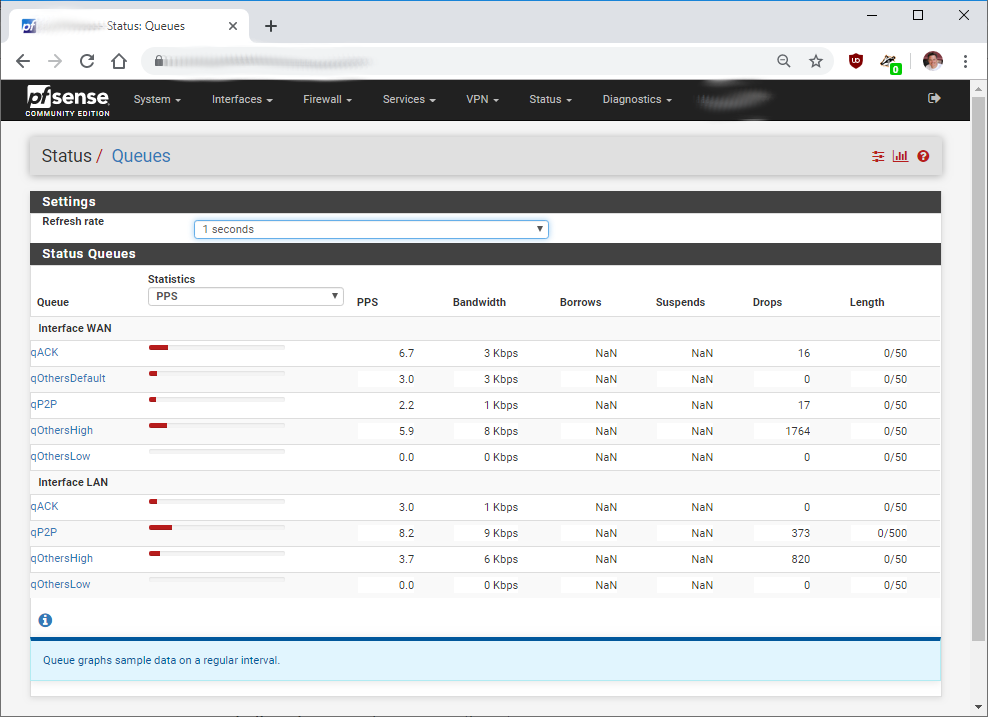
Think of the graphics on this page as “buckets”, the red line shows how full each “bucket” is. The fuller the “bucket”, the more traffic waiting for bandwidth to traverse the network. Further information on queues can be found in the monitoring the queues section of the pfSense documentation.
Further Traffic Shaping Customisation
From the floating firewall rules we can create other rules based on those created by the wizard, make adjustments to the rules created by the wizard, delete rules, whatever! We can either achieve this by running the wizard again or editing the rules created by the wizard directly at the firewall in the floating rule interface.
For further traffic shaping customisation over and above what is covered here, have a look at the traffic shaper advanced customization section of the pfSense documentation.
Conclusion
In this post we implemented traffic shaping / quality of service using the wizard that ships with pfSense. After implementing this on my own home network, I’m more than happy with the results. No more interruptions to streaming services.
Happy streaming! ![]()
-Chris