


 Just over 12 months ago, I sparked a flurry of interest in the community with my initial exploration of modifying Nutanix Community Edition (CE) to enable storage controller aka Host Bus Adaptor (HBA) PCI passthrough thus putting CE’s performance on par with it’s enterprise sibling.
You can read all about that adventure at Nutanix Community Edition HBA Passthrough.
Overview
TL;DR?
So what is this post about? Well, new (ok, 6 month old - I’ve been busy! ![]() ) Community Edition v2.1, new passthrough method, hence new post. The good news is that I’ve been running my CE v2.1 install like this for 5+ months and I haven’t looked back.
) Community Edition v2.1, new passthrough method, hence new post. The good news is that I’ve been running my CE v2.1 install like this for 5+ months and I haven’t looked back.
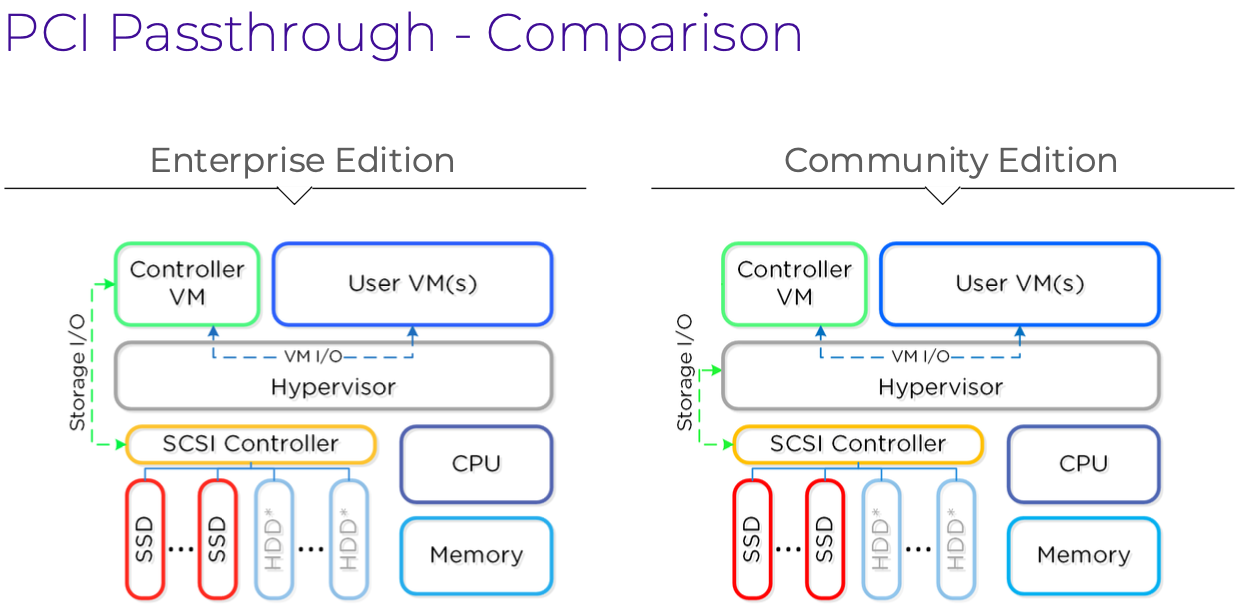
As you can see from the diagram above, with Nutanix Enterprise, user (or guest) VM storage I/O passes via the Controller VM (CVM) and then directly to the SCSI storage controller, bypassing the hypervisor layer in the middle of the diagram. However, with Nutanix Community Edition, user VM I/O passes through the Controller VM and then through the hypervisor level on it’s way to the SCSI storage controller.
Understandably given that the Hypervisor is also juggling running VMs, it is possible that the hypervisor might become a bottleneck and potentially hold up user VM storage I/O. Remember Nutanix Enterprise offloads I/O directly to the storage controller thus eliminating any potential bottleneck.
So, why is CE architected like this? Compatibility. Passing VM I/O back through the hypervisor ensures wider hardware support, at the potential cost of performance.
Let’s Do This Again!
As discussed in Nutanix KB-7154:
Starting with AHV 20230302.100173, [the] CVM is automatically recreated on every host reboot using configuration from the /etc/nutanix/config/cvm_config.json file. Updating CVM XML on AHV won’t guarantee changes will persist across host reboot or upgrade. Instead, /etc/nutanix/config/cvm_config.json must be updated.
Ah, so our “update” from last time won’t work. We need to update /etc/nutanix/config/cvm_config.json. Got it.
Installation
Booting CE v2.1 on our test hardware, we can see the following:
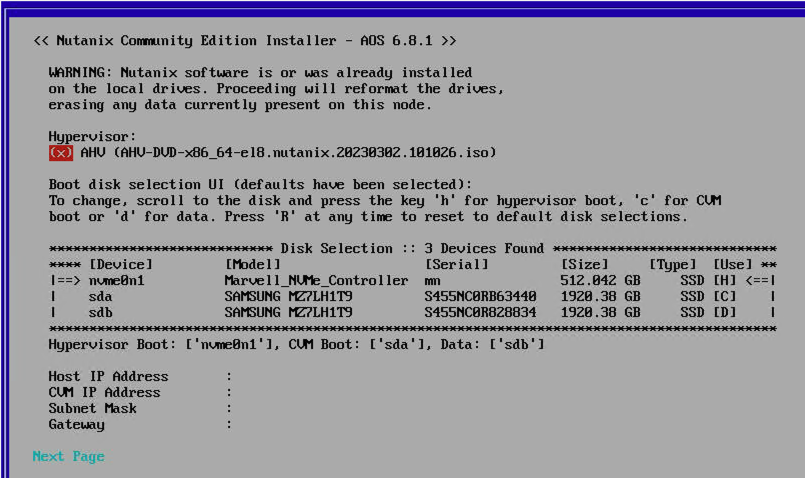
Of note from the screenshot above:
- Our AOS version will be 6.8.1
- Our AHV version will be 20230302.101026 (later version than AHV previously identified 20230302.100173)
- The 512GB disk identified as nvme0n1 attached to the Marvell_NVMe_Controller will be used for hypervisor boot [H]. It is imperative that the hypervisor (AHV) is using a different storage controller to the controller to be passed through to the CVM. Passing AHV’s boot drive through to the CVM would effectively remove AHV’s access to it’s boot drive and that would be bad
- We could use a USB device for AHV boot if we wanted; as long as it is managed by a different controller
- sda and sdb (the Samsung devices) are attached to the controller that we wish to passthrough
For now, let’s get CE installed and booted. At this point I won’t create a cluster, I’ll just boot AHV and the CVM and allow them circa 20 minutes to complete any post creation first boot tasks and get settled.
That way, I’m not risking any VMs, VM data, the keys to the castle, etc, etc. All I’ll loose is a CE v2.1 install; something that I can reinstall with zero effort and data loss. If you are going to attempt this, I recommend you follow this guide on a fresh CE v2.1 install too. If you want to risk your data, then you are on your own.
Investigation
With that out of the way, let’s investigate our storage controllers further after logging into AHV and running lspci:

OK, we have the following hardware storage controllers available:
31:00.0 NonVolatile memory controller: Marvell Technology Group Ltd 88NR2241 Non-Volatile memory controller (rev 20)
32:00.0 Serial Attached SCSI controller: Broadcom / LSI Fusion-MPT 12GSAS/PCIe Secure SAS38xx
Looking closer at the Broadcom controller using the command lspci -s 32:00.0 -v:
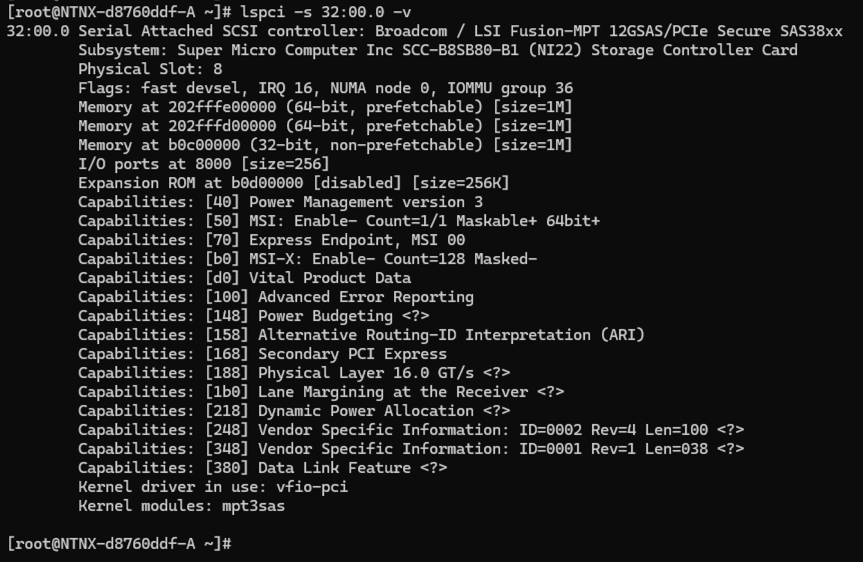
Yep, that looks like a controller we can passthrough to our CVM. Keep this information, we’ll need it later. Next, let’ run virsh nodedev-list --tree and look for our PCI number 32:00.0. Found it:
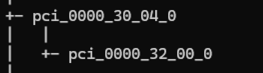
OK so we know that virsh (the tool used to manage Linux virtualisation) identifies our Broadcom controller as pci_0000_32_00_0. Let’s keep this information for later too.
Logging on to our CVM for a moment, we can see that it has the following hardware present:
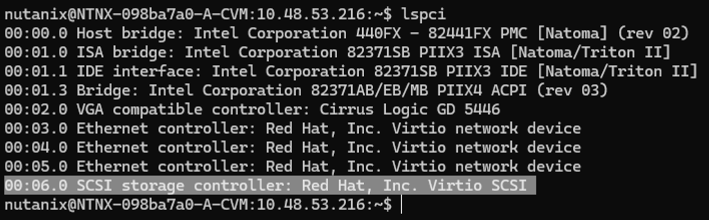
Most noticeably, it is using the following storage controller:
00:06.0 SCSI storage controller: Red Hat, Inc. Virtio SCSI Looking closer at the Virtio controller using the command lspci -s 00:06.0 -v:
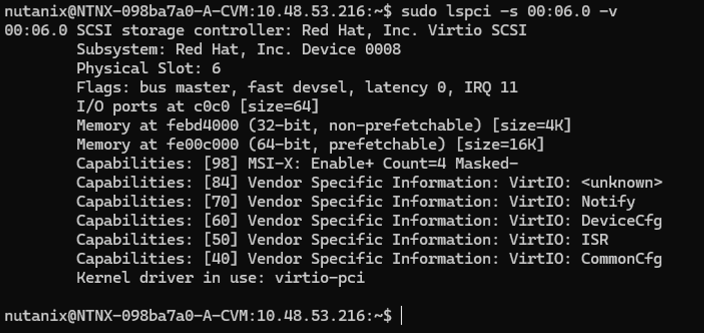
Yep, currently our CVM is using a virtual SCSI controller that is presented to it via the AHV hypervisor layer, consistent with a standard CE v2.1 installation.
Modification 1: Detach Controller from AHV
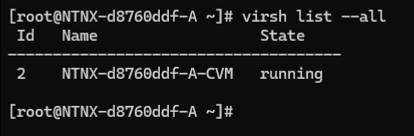
OK, so without fear of data loss (you read the last two paragraphs of the Installation section above didn’t you?), lets get the details of our CVM.
For that we can use the virsh list --all command. This will list all VMs defined in AHV:
Next, lets shutdown our CVM: virsh shutdown <CVM_Name>:

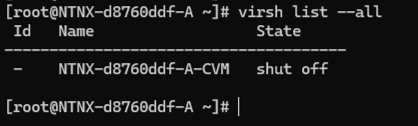
Checking that our CVM has indeed been shutdown virsh list --all:
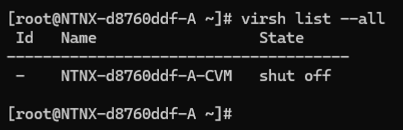
Yep, CVM shut off.
Lets issue the command to detach our Broadcom / LSI Fusion-MPT 12GSAS/PCIe Secure SAS38xx controller from AHV ready for passing through to our CVM.
Using the virsh information we saved earlier; virsh nodedev-detach pci_0000_32_00_0:

Done. Our Broadcom storage controller is now detached from the AHV hypervisor, ready for attaching to our CVM.
Modification 2: Attach Controller to CVM
OK, so using the knowledge from the section Let’s Do This Again above and the KB article linked, we know that we need to modify the file /etc/nutanix/config/cvm_config.json to update our CVM configuration.
First, we’ll backup the cvm config file just in case we need it later:
cp /etc/nutanix/config/cvm_config.json /etc/nutanix/config/cvm_config.json.backupNext, lets open the file with vi: vi /etc/nutanix/config/cvm_config.json. Scrolling down the the devices disks section we can see our two Samsung SSD’s defined; the same two we saw at the very beginning of the CE v2.1 installer:
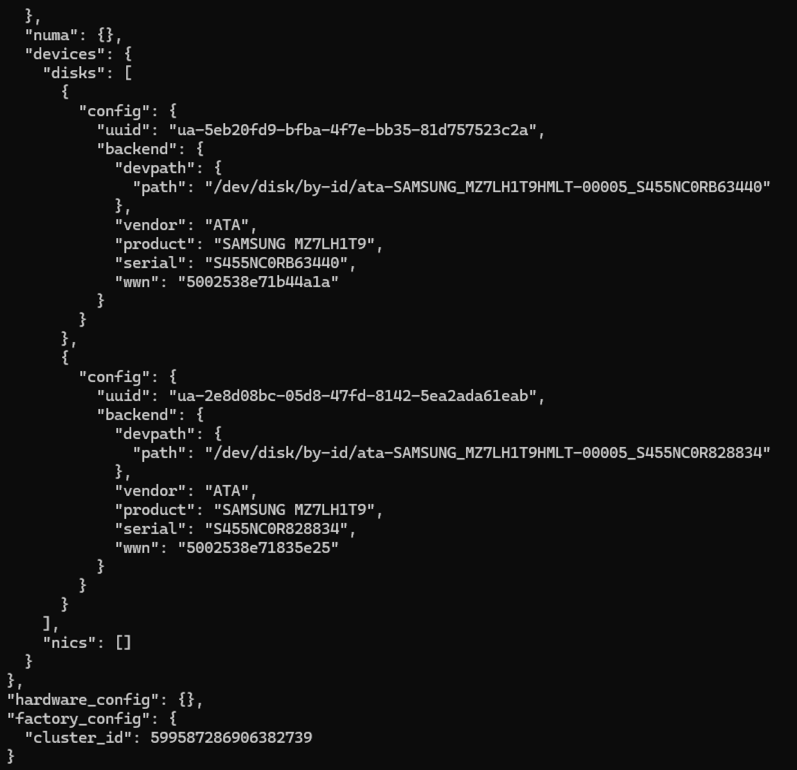
To update, we need to:
- Remove all references to the disks, themselves from the first
"backend":definition down to the close square bracket/brace, so that we have just one disks"backend":definition - Keeping the correct indentation, add a new line with
"address: {under"backend": - Again keeping the correct indentation, add a new line
"pci"; "0000:32:00.0"(this is thelspciinfo we kept earlier) - Finally, add a close curly bracket/brace on another new line
} - As a check, there should be four open
{and close}brackets/braces in the"disks": ["section of the config
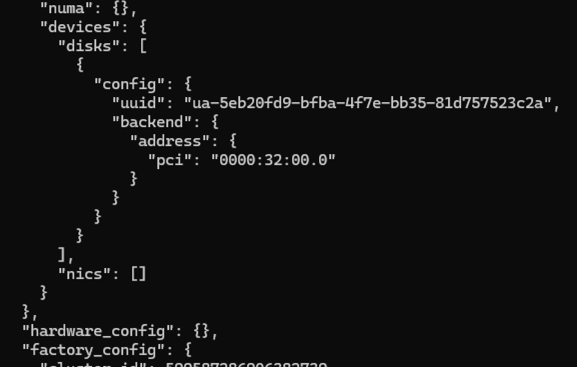
Our complete disks section of /etc/nutanix/config/cvm_config.json, opening square bracket/brace to closing square bracket/brace, should resemble this:
      "disks": [
        {
          "config": {
            "uuid": "(keep original uuid)",
            "backend": {
              "address": {
                "pci": "lspci id"
              }
            }
          }
        }
      ],
So my completed section looks like this:
Save and exit vi when done.
Modification 3: Recreate CVM
With the CVM definition updated, all that is left to do is to recreate our CVM with it’s new PCI device.
First, lets double check our CVM is still powered off virsh list --all:
Next, lets remove our original CVM: virsh undefine <CVM_NAME>:

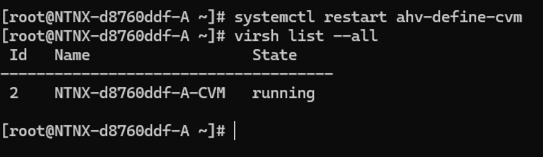
Finally, let’s use AHV’s built in service to recreate the CVM using our updated template: systemctl restart ahv-define-cvm
If all good, the CVM will be created and started. Use virsh list --all to check:
And that’s it, job done!
Confirmation
Lets see if our CVM’s Red Hat, Inc. Virtio SCSI storage controller has been replaced by the Broadcom / LSI Fusion-MPT 12GSAS/PCIe storage controller via PCI passthrough using lspci:
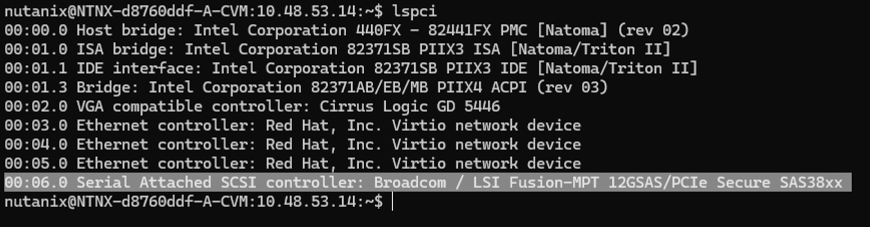
Looking deeper sudo lspci -s 00:06.0 -v:
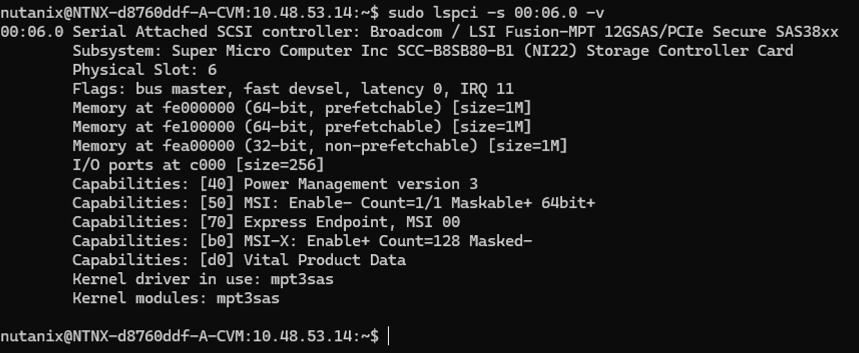
Nice! Happy days!
With that all done, we can create our cluster:
cluster -s 10.48.53.14 \
--dns_servers=8.8.8.8,1.1.1.1 \
--ntp_servers=pool.ntp.org \
--cluster_name=GSO-EVERGLADE02-1 \
--cluster_external_ip=10.48.53.18 \
create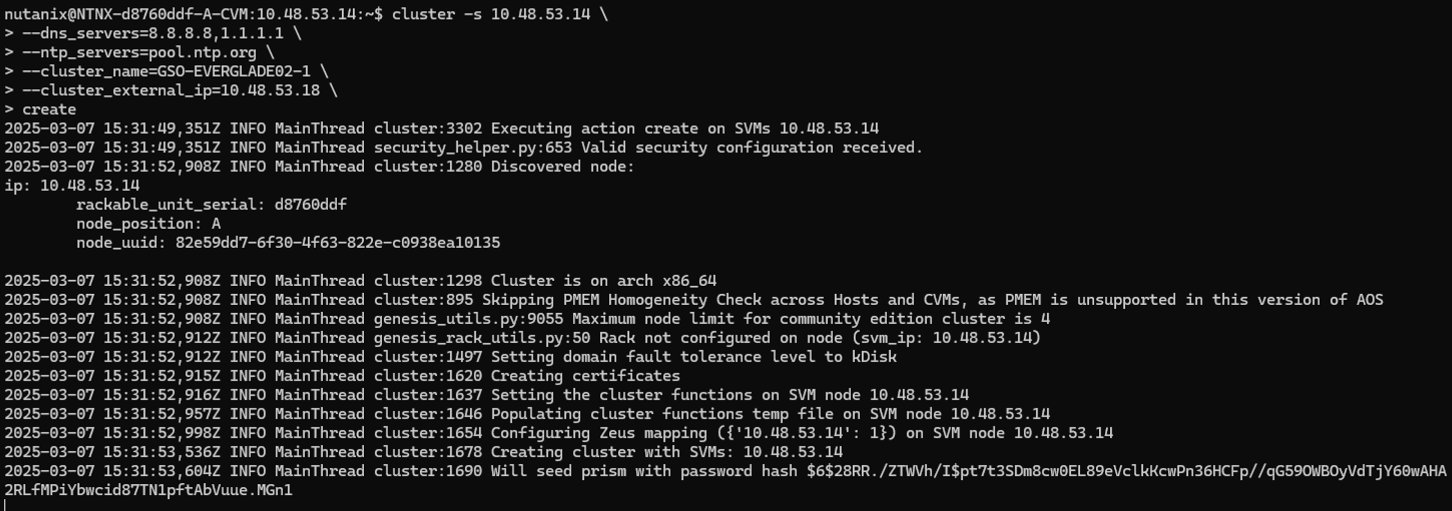
And done:
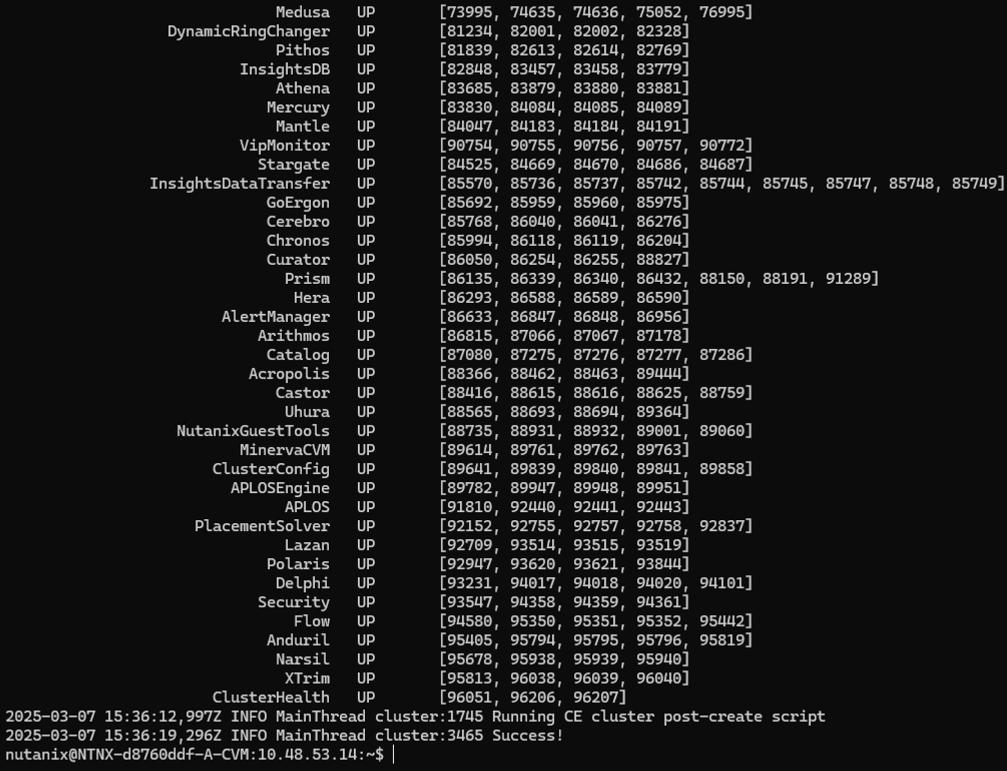
Conclusion and Wrap Up
In this post, we explored how to enable storage controller PCI passthrough in Nutanix Community Edition (CE) v2.1. This feature allows the Controller VM (CVM) to directly access the physical storage controller Host Bus Adapter, resulting in improved performance for workloads.
To achieve this, we followed a series of steps that included detaching the HBA from AHV using a specific command, reconfiguring our CVM creation template, and recreating our CVM. With these changes complete, our CE v2.1 environment is now capable of supporting storage controller passthrough for improved performance.
In conclusion, enabling storage controller PCI passthrough in Nutanix Community Edition (CE) v2.1 is a simple way to unlock improved performance for workloads.
-Chris