


 As organisations continue to evolve their IT infrastructure, the need for seamless migration and management of virtual machines (VMs) across different cloud environments has become increasingly important. In this blog post, we’ll be exploring the process of migrating Azure VMs to Nutanix, a leading hyperconverged infrastructure (HCI) solution that enables you to run any workload on any public cloud or on-premises environment with ease.
Migrating Azure VMs to Nutanix can seem daunting at first, but with the right tools and knowledge, it’s a straightforward process. In this post, we’ll walk through the steps involved in migrating Azure VMs to Nutanix, including choosing the VMs you want to migrate, selecting the target container, and understanding the migration considerations that come into play.
Whether you’re looking to reduce costs by moving workloads from public cloud providers like Microsoft Azure to on-premises infrastructure or wanting to take advantage of the scalability and flexibility offered by Nutanix’s Cloud-First Disaster Recovery solution, this post will provide a comprehensive overview of the process involved in migrating Azure VMs to Nutanix. So let’s dive in!
Overview
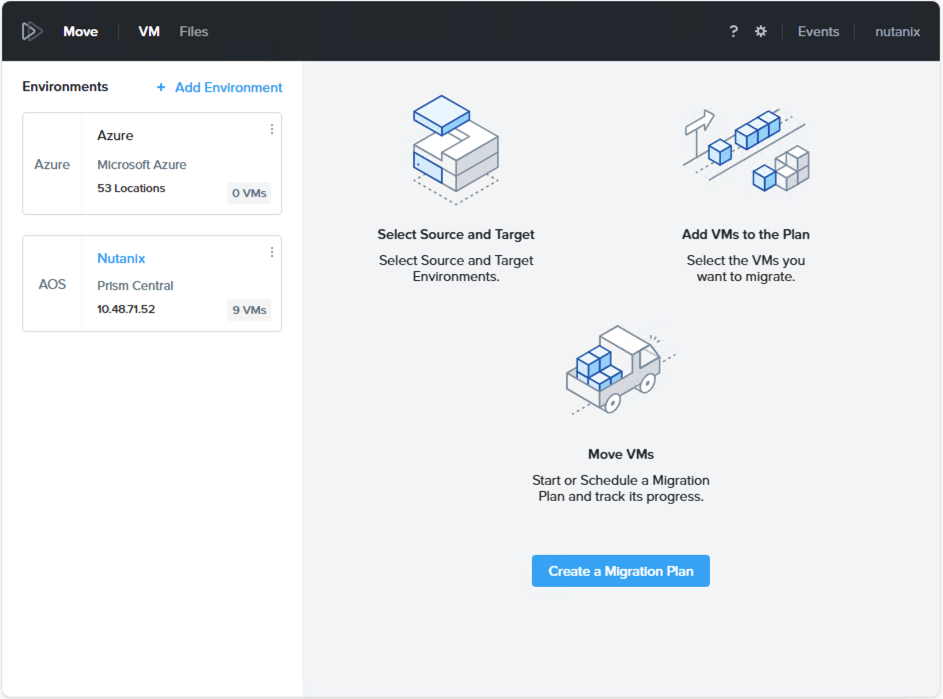
Introducing Nutanix Move
Nutanix Move is a powerful migration tool that enables you to seamlessly move VMs between different environments, including on-premises infrastructure and public cloud providers like Microsoft Azure:
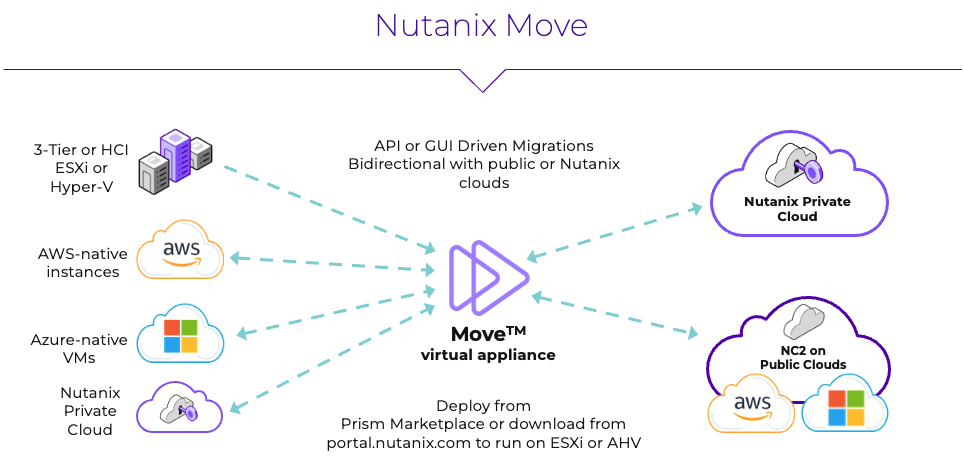
As discussed, in this post we will migrate an Azure-native VM to a Nutanix private cloud.
Move Deployment
For the purpose of this post, we will be focusing on the migration process itself. Information regarding the deployment of Nutanix Move can be found at:
-
My PolarClouds post Quickly Migrate from Free ESXi to Nutanix Community Edition, specifically the section Installing and Configuring Move
-
Nutanix Move User Guide, specifically the section Deploying Move
Following best practice, we will deploy the Move appliance onto our target environment, in this case our Nutanix infrastructure.
Registering Move App in Azure and Applying Privileges
To be able to export VMs from Azure, we need to grant Move access to our source Azure environment. This can be completed following the steps outlined in the documentation, specifically the section Azure to AHV. Also documented there are migration considerations, requirements and limitations.
For the purposes of this post, we will use the Move appliance command line (CLI) method to register the Move application in Azure and apply the required privileges.
From an SSH session to our newly deployed Move appliance, Switch to the root user and launch create-azure-app:
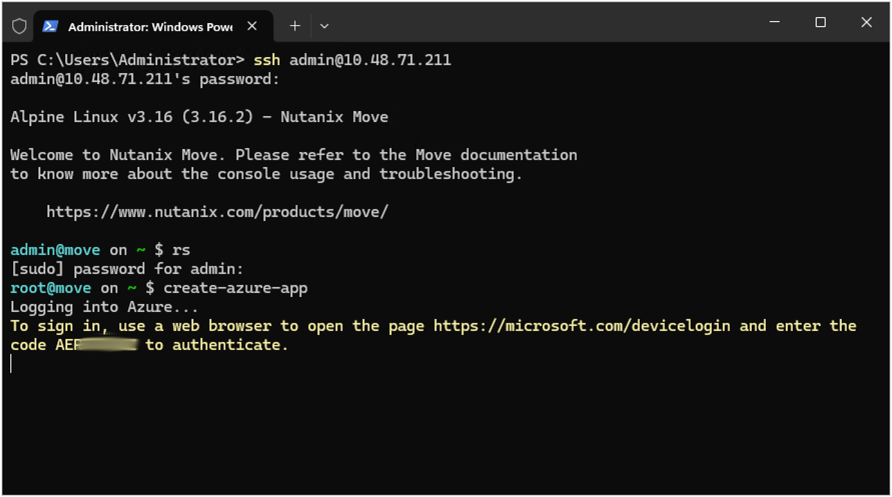
After logging in and selecting my Azure subscription, the CLI prompts and my responses are as follows:
Please enter a name to be used with the app. Press 'Enter' for default (Default: NutanixMoveApp): NutanixMoveApp
Please enter a name for the custom role. Press 'Enter' for default (Default: Nutanix Move Operator): Nutanix Move Operator
Please enter the type of role to be assigned to the app. Options are (Source,Target,Both). Press 'Enter' for default (Default: Both): Both
Do you want to add public IP permissions to create and assign Public IP address to VMs on Azure target? (y/n). Press 'Enter' for default (Default: n): y
After which the Nutanix Move Azure app is created and assigned with the custom role.
Finally, the CLI provides the following information which can be used in the Move GUI to register the Azure source environment:
- Subscription ID
- Tenant ID
- Client ID
- Client Secret
Unfortunately, using Move 5.5.2 and Azure in mid February 2025, the following error can be observed when combing through the create-azure-app console output:
Adding the custom role 'Nutanix Move Operator' to the app...
ERROR: the following arguments are required: --scope
Examples from AI knowledge base:
az role assignment create --assignee sp_name --role a_role
Create role assignment for an assignee.
Subsequently trying to add the Azure Environment to Move
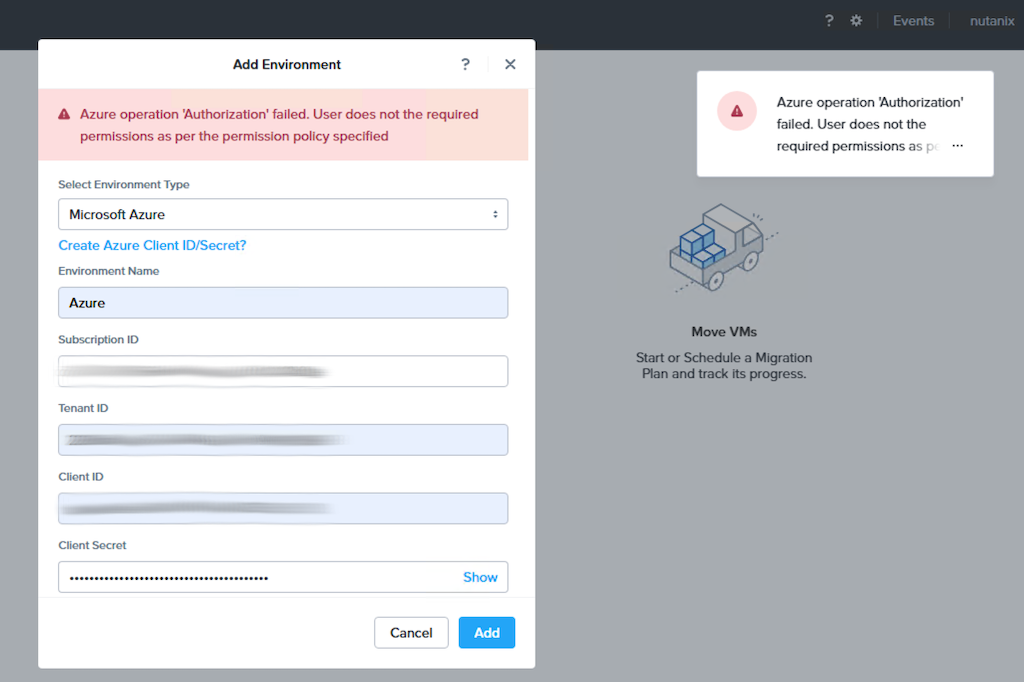
Azure operation ‘Authorization’ failed. User does not have the required permissions as per the permission policy specified:
Yep, Microsoft have changed the requirements of the az role assignment command… ![]()
Nutanix Engineering are aware of the issue and this will be fixed in upcoming versions (v5.5.3+).
Add Role Assignment
Luckily resolving this is simple enough.
Log into the Azure Portal, select Subscriptions > Your Subscription > Access control (IAM) > Add role assignment.
Select Nutanix Move Operator role, click Members > +Select Members, search for and select NutanixMoveApp
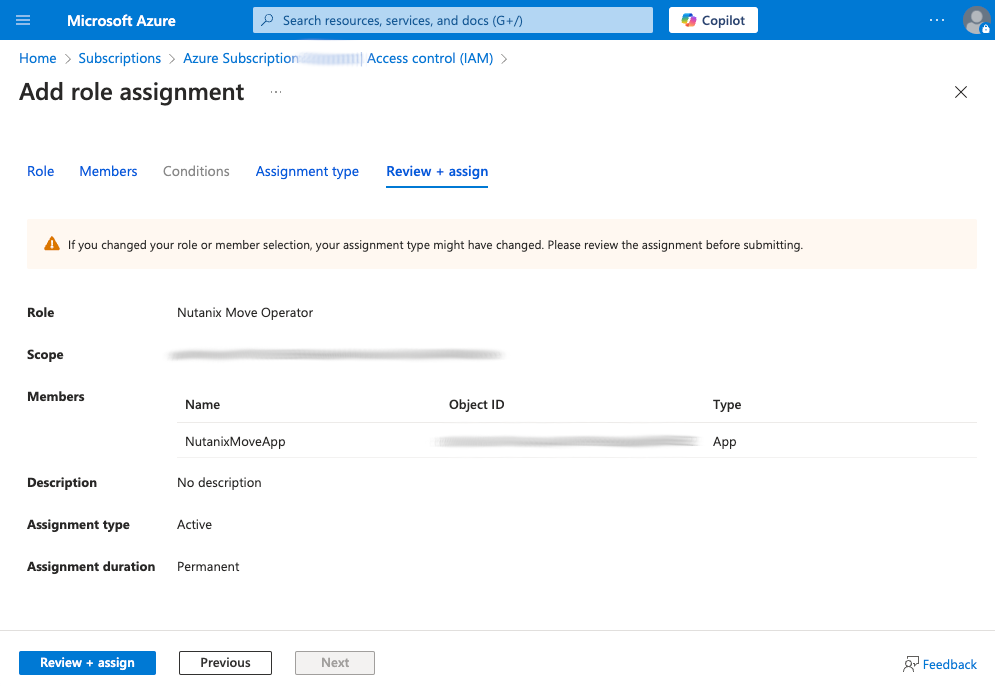
Finally, click Review + assign at the bottom of the wizard.
After retrying the registration in the Move GUI, Azure registration completed without issue:
Azure to Nutanix: Migration Configuration
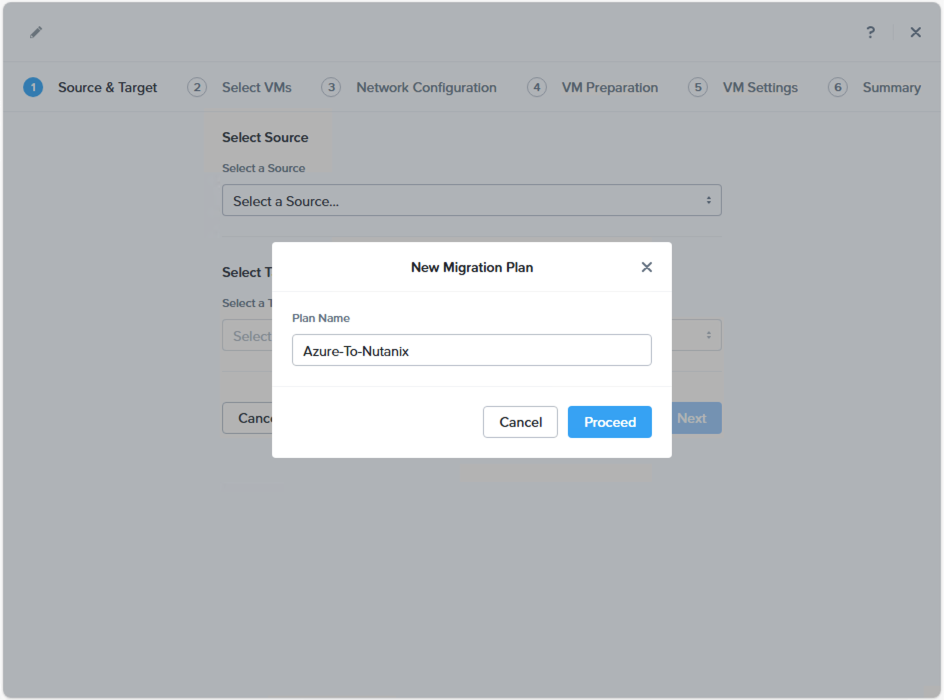
So let’s do this. I’ll create a new Migration Plan:
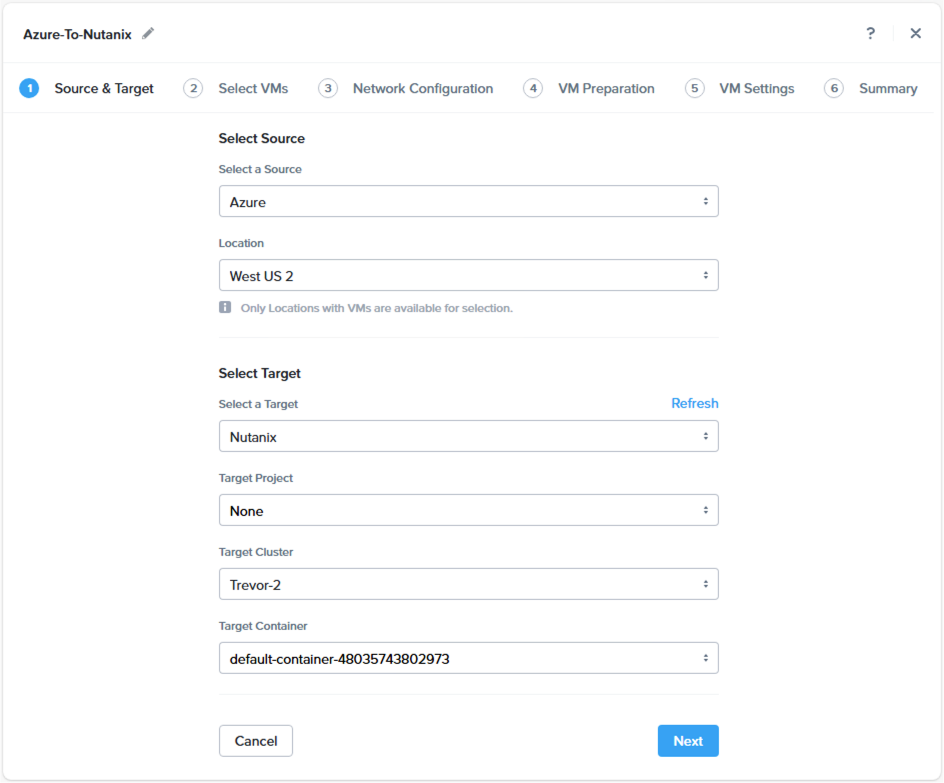
I’ll select my source and target environments:
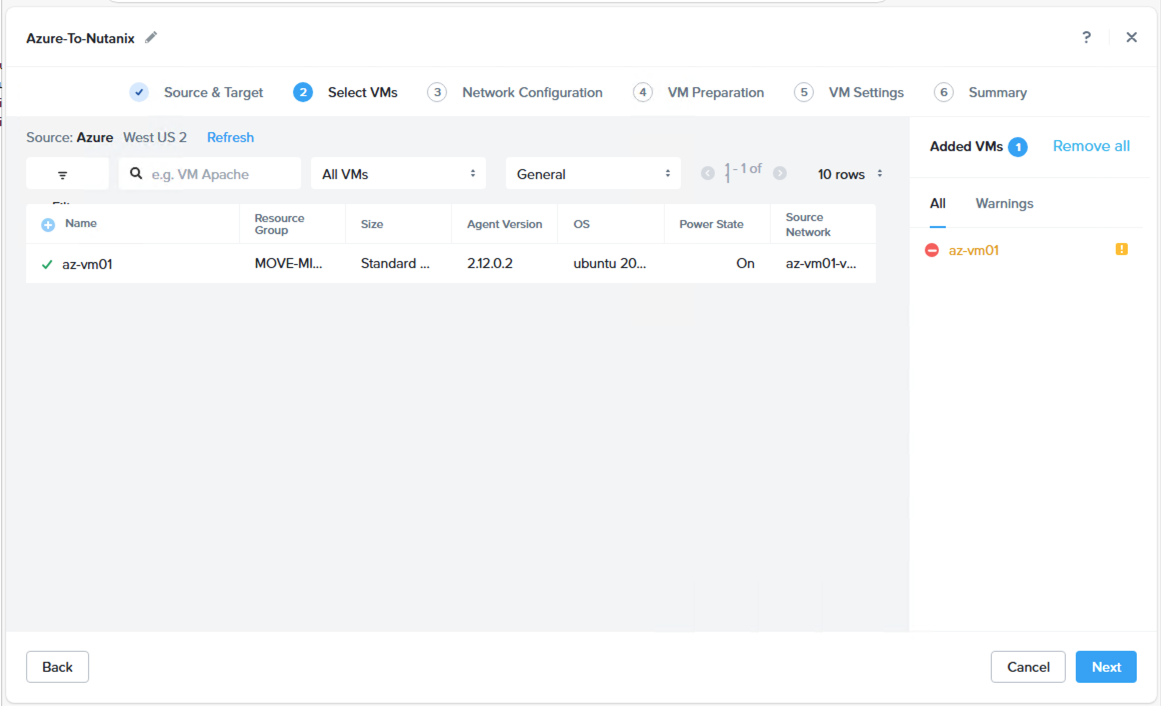
I’ll select my source VM:
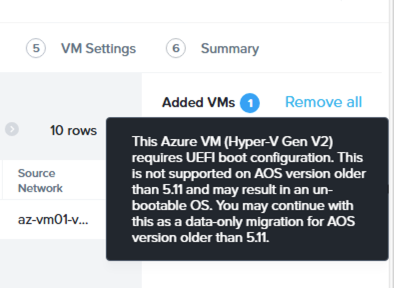
Quick look at the warning (!), yep that’s no problem, I’m running AOS v7.0 on my target cluster:
I’ll select my target and optional test networks:

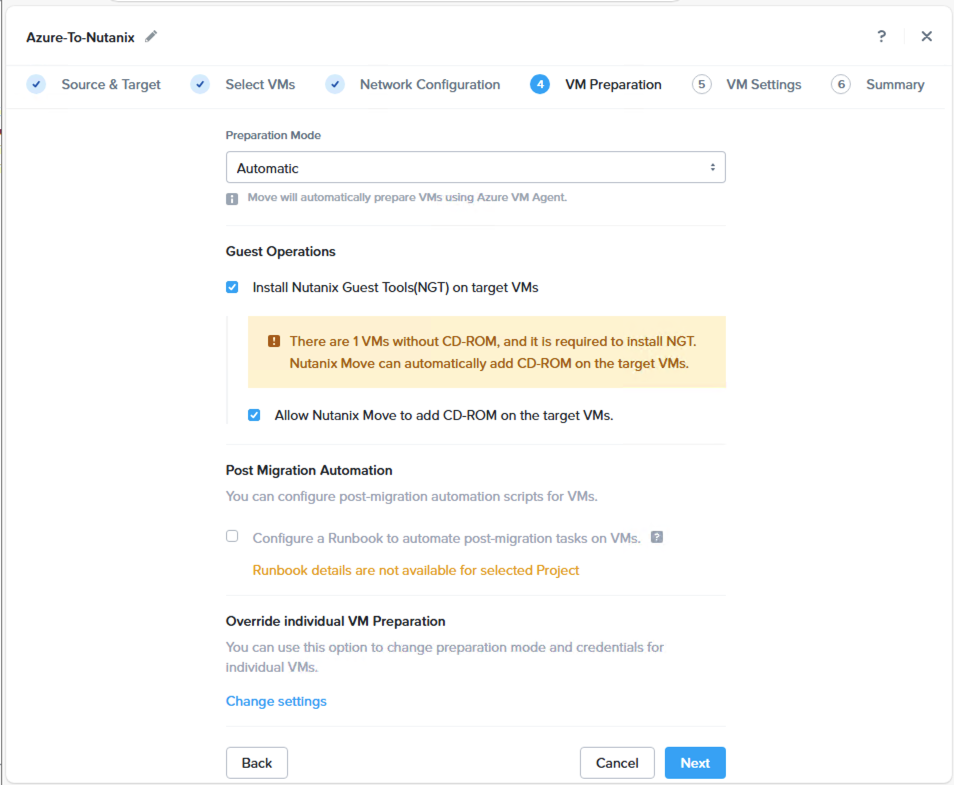
I’ll tick Allow Nutanix Move to add CD-ROM on the target VMs and accept all other defaults:
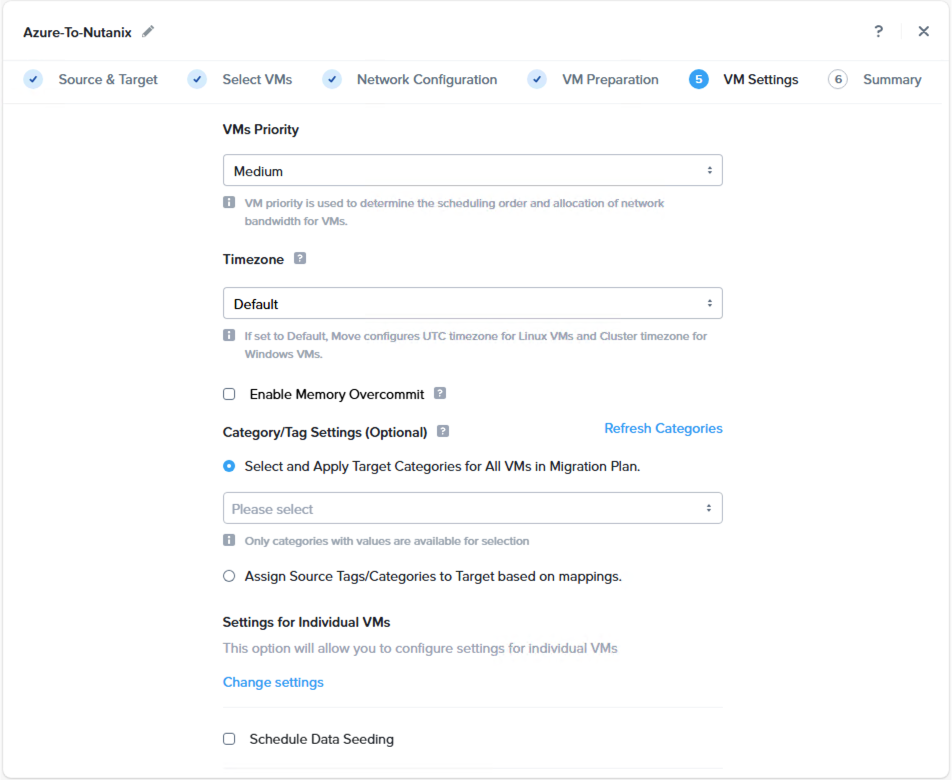
I’ll accept the default VM Settings:
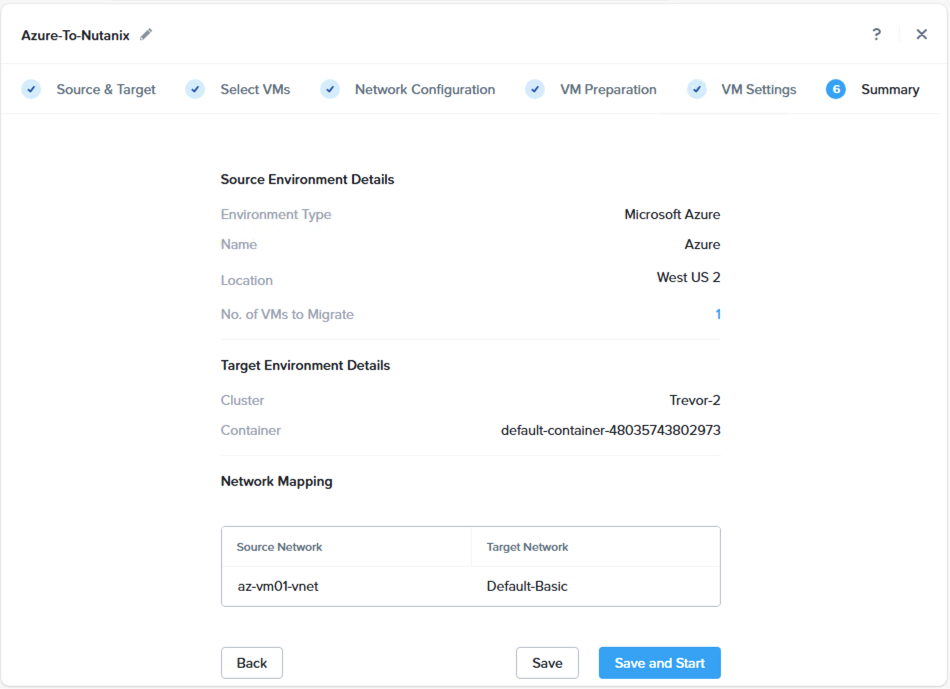
The summary of my Azure to Nutanix VM migration looks like this:
Azure to Nutanix: The Migration
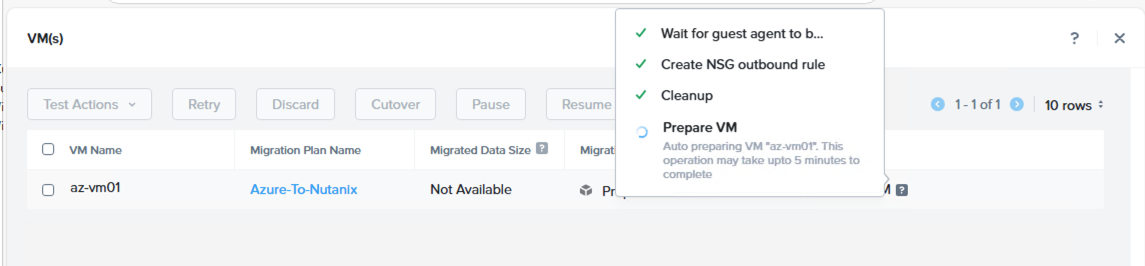
After clicking Save and Start, Move will begin the migration. During this time my Azure VM remains online and available to production workloads:
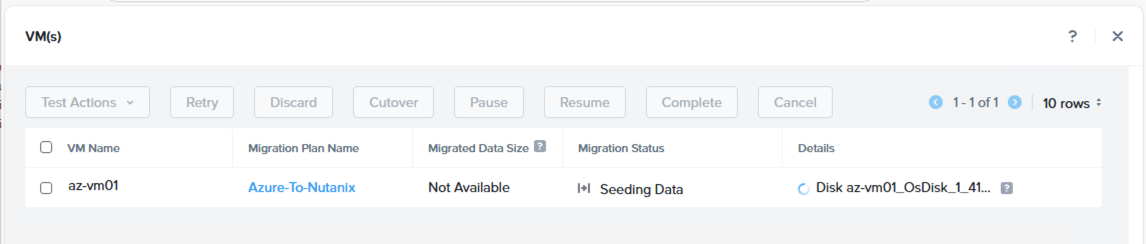
Next, Move will seed my Azure VM data into my Nutanix environment. Again, my Azure VM is online throughout:
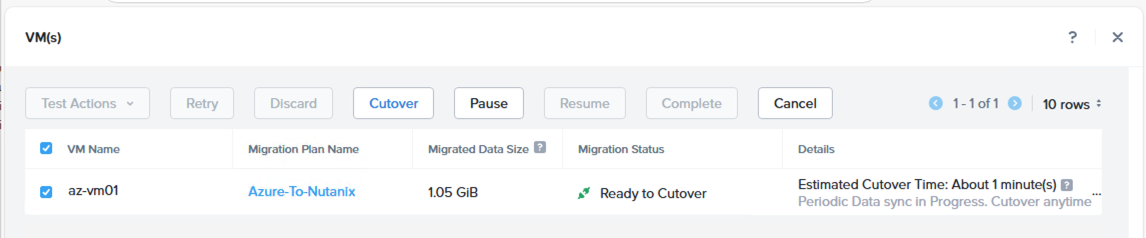
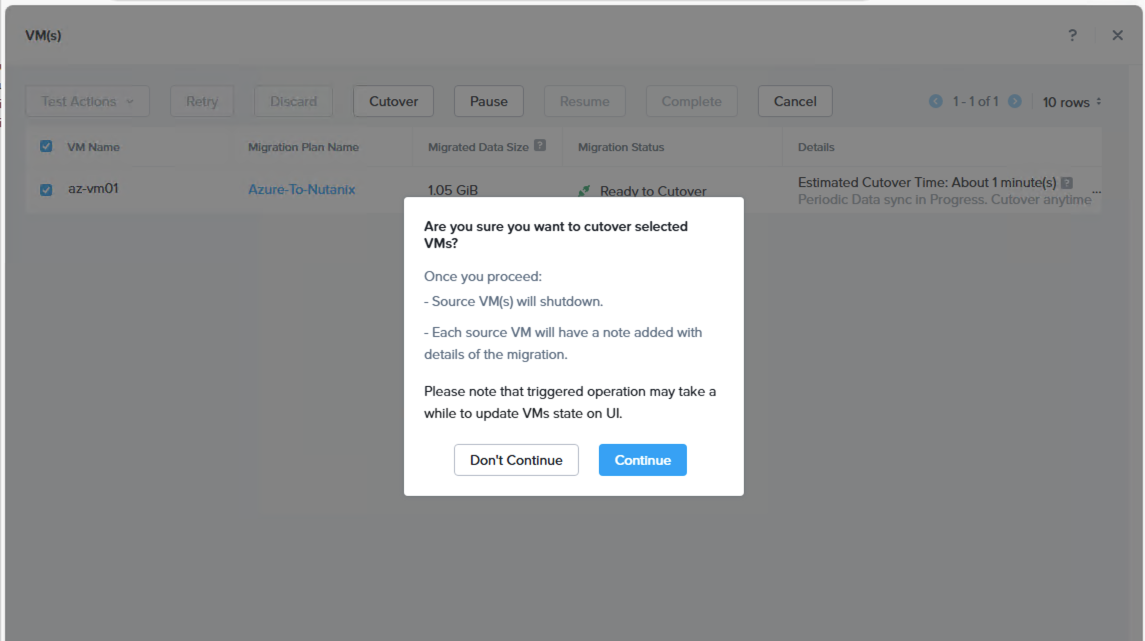
With seeding complete, I’m ready to cutover my Azure VM to Nutanix. Let’s click the Cutover button:
As per the warning, after proceeding with the cutover, my Azure VM will be shutdown and final changes will be replicated to my Nutanix environment:
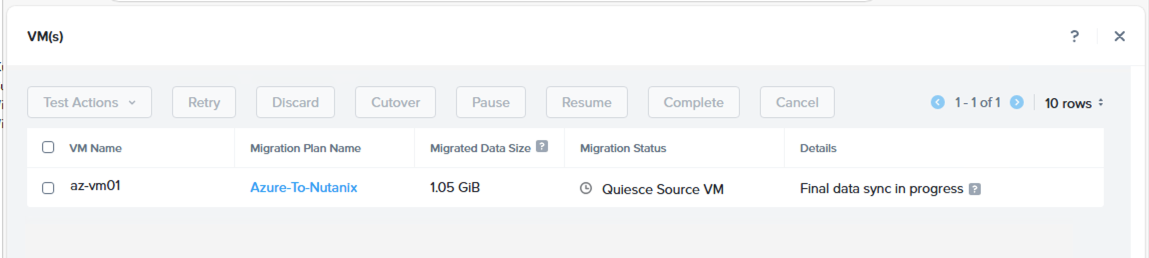
Final data synchronisation in progress:
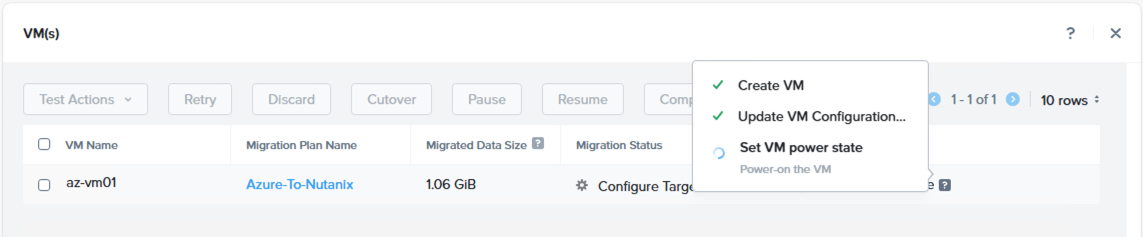
With the synchronisation complete, a Nutanix VM is created, assigned the replicated data and powered on:
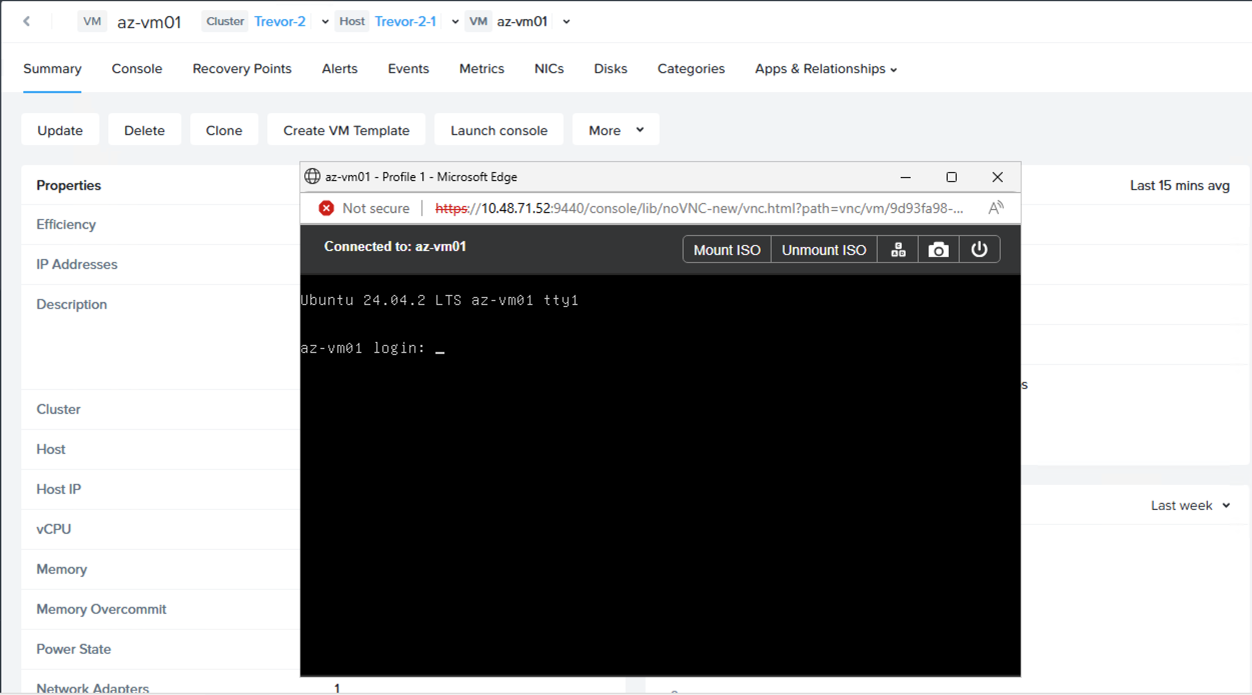
Success! My Azure VM is now running on my Nutanix environment:
After verifying that my applications are functioning as expected and services have been resumed, I can safely delete the shutdown Azure VM. Note that Move leaves the source Azure VM in a shut down state after migration.
Alternatively, if I discover issues related to the migration or I simply want to back out the migration for whatever reason, I can shutdown my Nutanix VM and power my source Azure VM back on.
Conclusion and Wrap Up
In this post, I walked you through the process of migrating Azure VMs to Nutanix using Nutanix Move. From preparing your source and target environments to verifying application functionality after migration, we can ensure a smooth transition each and every time. By following these instructions, you’ll be able to elevate your cloud game by leveraging the benefits of hybrid cloud computing with Nutanix.
As seen in the graphic above in the section Introducing Nutanix Move, should you not want to run Nutanix on-prem, the same process can be used to migrate your Azure VMs to Nutanix Cloud Clusters (NC2) running on public cloud. Find out more about NC2 Azure at Microsoft Learn or more generally at Nutanix UK.
As organisations continue to evolve their IT infrastructure and adopt hybrid cloud strategies along with cost savings, migrations like this are becoming increasingly common. By leveraging tools like Move and understanding the technical nuances involved in migration, we can ensure successful transitions that minimise costs and downtime and maximise application availability.
-Chris