 I’m sure by now, everyone is familiar with cloud based messaging apps such as WhatsApp, Signal and Telegram.
As these services are cloud based, some have Application Programming Interfaces (APIs) that can easily leveraged by programming languages such as Microsoft PowerShell.
In this post we will use PowerShell to send Telegram messages.
I wont go through the process of installing Telegram on your mobile device and signing up / sign in. I’ll take it for granted that you have done this already. It’s simple enough to do using the app store of your choice.
Overview
Telegram Bots
In Telegram parlance, accounts operated by software are known as “bots”. So that we can receive messages sent by PowerShell, we need to setup a bot first.
Creating a Telegram Bot
Telegram bots are created via an automated account called BotFather.
Open the Telegram app, click the search button and search for BotFather.
Click BotFather to open a chat.
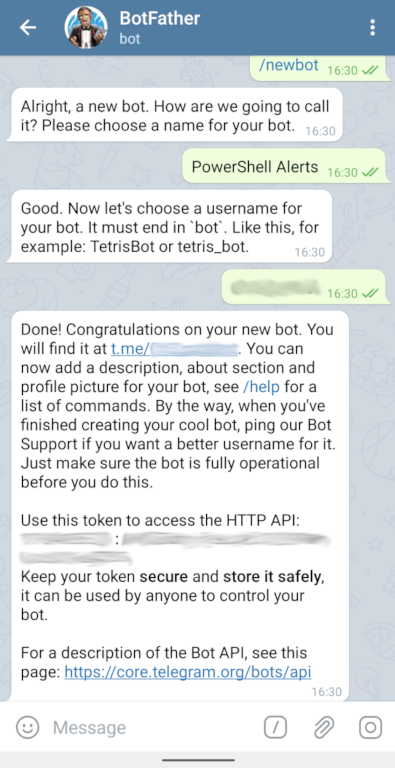
- Next enter the command /newbot
- When prompted, enter the friendly name of your bot. In the example below I setup a bot called PowerShell Alerts. You can call your bot whatever you like
- Enter a username for the bot
- Take note of the API token. We will need this later. Note: it is case sensitive
- Finally click the link to open a chat with the newly created bot
The full process can be seen in the screenshot below:

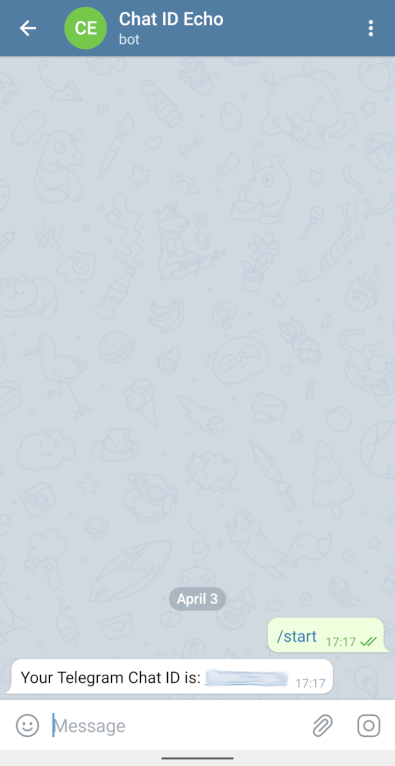
Next you need to find your Telegram Chat ID.
- From the Telegram home screen, search for chatid_echo_bot. Click Chat ID Echo to open a chat
- Enter /start to get the bot to send you your Telegram Chat ID
- Take note of the Telegram Chat ID returned
For example:

The PowerShell Script
The PowerShell script required to send a Telegram message is as follows:
Function Send-Telegram {
Param([Parameter(Mandatory=$true)][String]$Message)
$Telegramtoken = "Your_Telegram_Token"
$Telegramchatid = "Your_Telegram_Chat_ID"
[Net.ServicePointManager]::SecurityProtocol = [Net.SecurityProtocolType]::Tls12
$Response = Invoke-RestMethod -Uri "https://api.telegram.org/bot$($Telegramtoken)/sendMessage?chat_id=$($Telegramchatid)&text=$($Message)"}
After adding your token and ID, the above PowerShell function can either cut an pasted into your individual PowerShell scripts or saved in your PowerShell path to be called using the command Send-Telegram.
See PowerShell Functions for further info if needed.
Breaking the script down:
- Lines 1 + 2 : These identify the piece of code as a PowerShell function
- Lines 3 + 4 : Your individual Telegram token and ID. Update these with your info
- Line 5 : This configures PowerShell to use the security protocol to TLS 1.2 when running the next command
- Line 6 : The command doing “the heavy lifting” - Invoke-RestMethod sends an HTTPS request to Telegram. The request contains all of the elements gathered so far plus the message to be sent
Testing
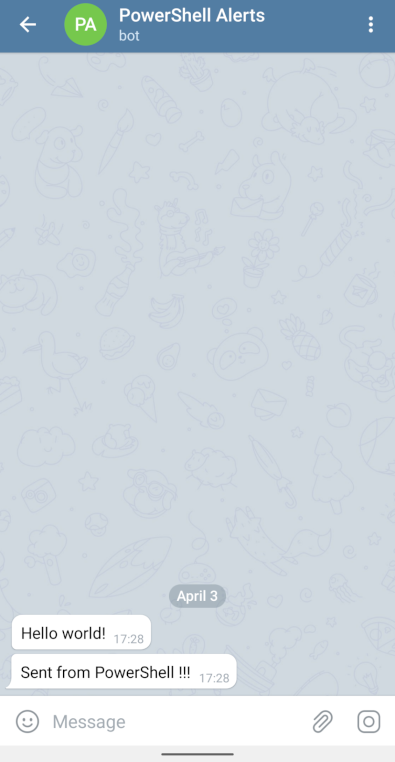
Running the function and sending some test messages:

Checking the Telegram chat:

![]() BOOOOM!!!
BOOOOM!!! ![]()
A Word About Security
Whilst the connection via PowerShell Invoke-RestMethod is encrypted using TLS 1.2, it is not possible to know what is done by the Telegram API when receiving the message and sending it on. With this in mind, I personally wouldn’t send sensitive data via a Telegram. As a work around, should I need to send sensitive data I store the data securely and send a link via Telegram to that securely stored data instead.
The hard part is over.
Now it’s time to start using Telegram in all sorts of PowerShell scripts! ![]()
-Chris


