


 Nutanix Flow Network Security is a software-defined microsegmentation solution integrated into Nutanix Acropolis Hypervisor (AHV). It allows granular control over network traffic between virtual machines (VMs) and applications, enhancing security posture by isolating workloads and reducing the attack surface. Flow Network Security uses policies based on VM categories, simplifying management and automation. It provides visibility into network traffic flows, enabling administrators to identify and mitigate security threats effectively.
The solution offers advantages over traditional firewalls, as it operates at the VM level, providing more granular control and flexibility. It integrates with other Nutanix services and third-party security solutions, providing a comprehensive security platform. Nutanix Flow Network Security simplifies security management, improves compliance, and reduces the risk of data breaches.
Overview
A Three Tier Application
Consider the following traditional three tier web, app and database application, with users accessing only the web tier:

Users access the web server VM via HTTPS, which enables secure communication between their devices and the 3-Tier application web front end. The web server VM then makes requests to an application server VM, retrieving data results over TCP port 8443. This data is subsequently pulled from a database server VM through queries sent to MySQL over TCP port 3306.
Also in consideration is that all three servers also require access to DNS in order to be able to resolve the hostnames and addresses of each other.
How can you secure this application using Nutanix Flow Network Security (FNS)?
Categories
As FNS secures entities such as VMs via categories, our first task is to determine our category model and then “slice and dice” our VMs into their appropriate categories.
Nutanix Categories consist of a key:value pair, allowing you to define custom keys and values. Therefore I’ll (imaginatively) name my category key after my application 3-Tier and I’ll create three tier values named after VM function: App for the application VM(s), DB for the database VM(s) and finally Web for the webserver VM(s):
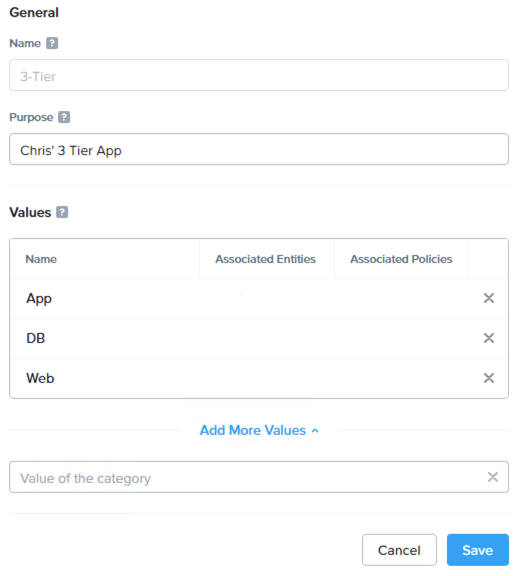
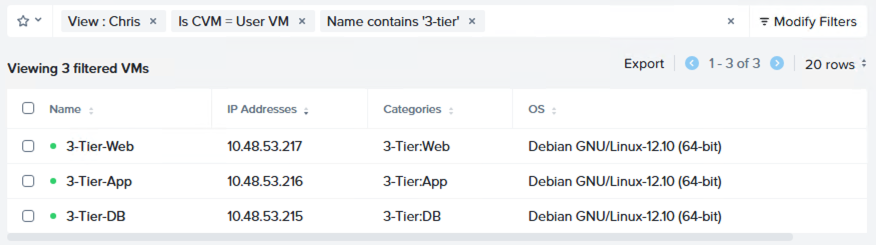
Once created, let’s assign our VMs to our categories:
Flow Policy Creation - Logical
As we are securing both incoming and outgoing traffic from our application tiers, we need to carefully plan our traffic flows.
To help with this, I like to think in terms of “traffic on the wire”, namely: What traffic are we expecting our VMs to receive over the network “wire” and what traffic are we expecting our VMs to transmit over the network “wire”?
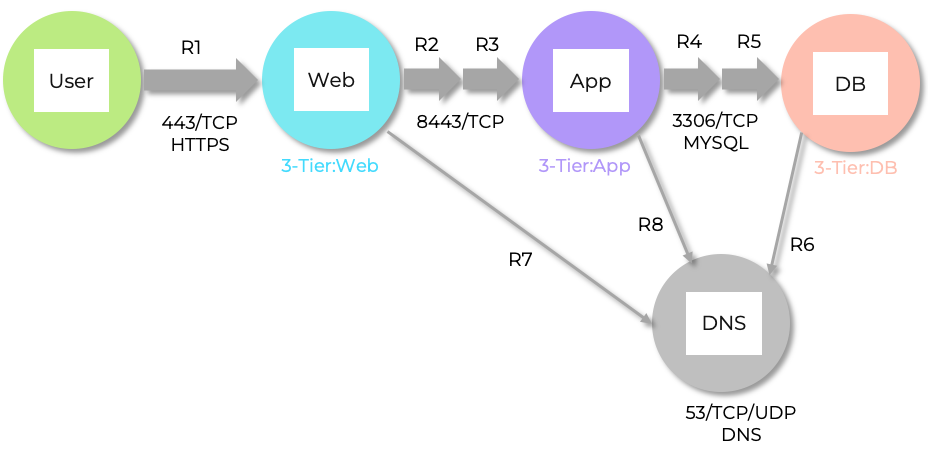
Using the above diagram as reference, we can build the following first pass rule base:
| Rule | Traffic “On The Wire” | Service | TCP/IP Port + Protocol |
|---|---|---|---|
| R1 | Web from Users | HTTPS | 443 TCP |
| R2 | Web to App | Custom | 8443 TCP |
| R3 | App from Web | Custom | 8443 TCP |
| R4 | App to DB | MySQL | 3306 TCP |
| R5 | DB from App | MySQL | 3306 TCP |
| R6 | DB to DNS | DNS | 53 TCP/UDP |
| R7 | Web to DNS | DNS | 53 TCP/UDP |
| R8 | App to DNS | DNS | 53 TCP/UDP |
Flow Policy Creation - Actual
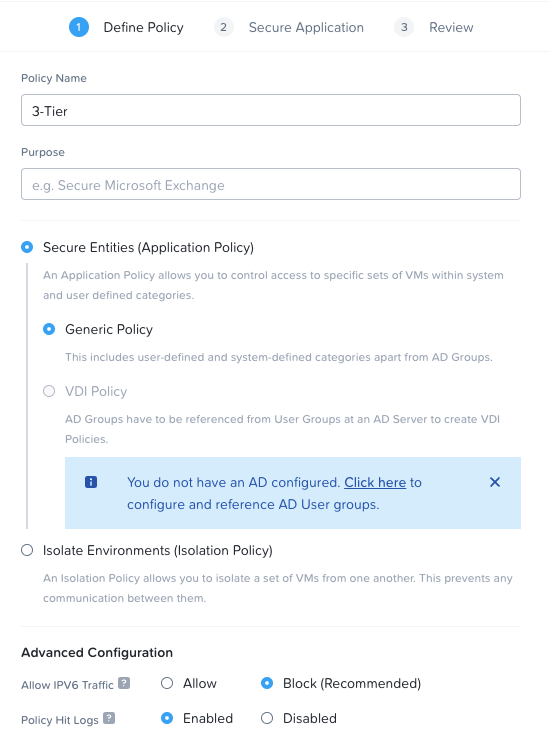
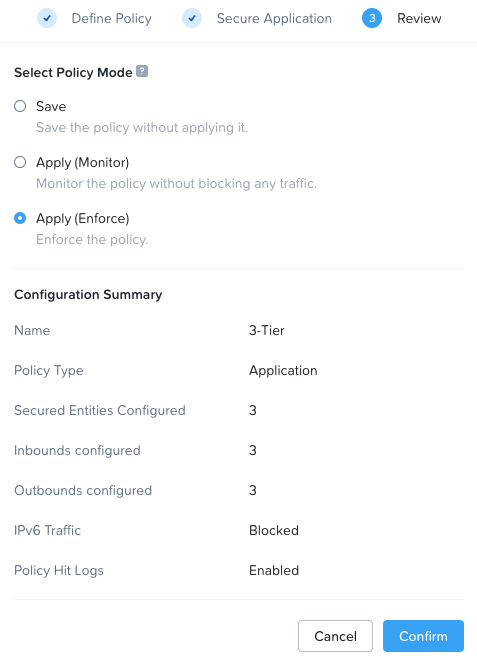
I’ll create a single security policy for my 3-Tier application. I’ll (imaginatively) name the policy 3-Tier and I’ll select to secure entities via an application generic policy as that fits our need here. I’ll block IPv6 traffic as I’m only using IPv4 and I’ll also enable policy hit logs to be sent to my Syslog server:
After building out our eight rules from the logical list above using the visual editor, the completed configuration resembles the following:
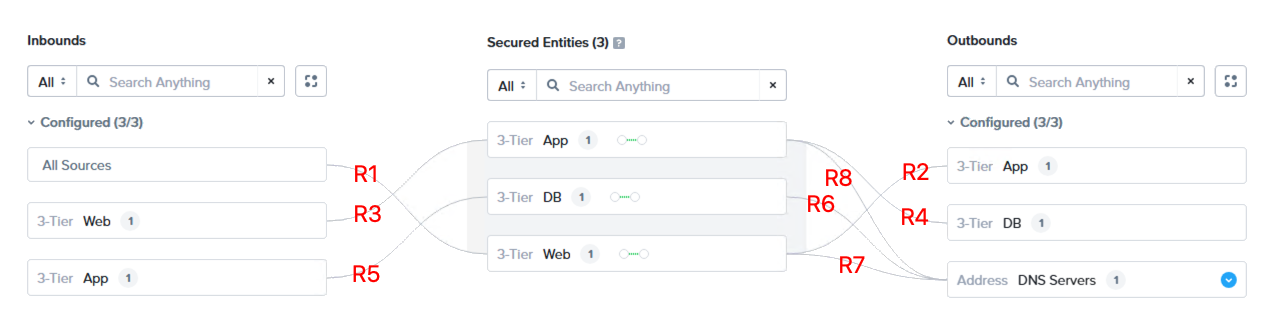
As you can see, I have the three categories configured in the centre as secured entities, with inbound traffic to each secured entity defined on the left and outbound traffic defined on the right. I’ve added the labels in red to help identify which connection represents which rule.
Swapping the FNS configuration view from the visual interface to the list interface, we can identify our eight rules.
Inbound Rules

Outbound Rules
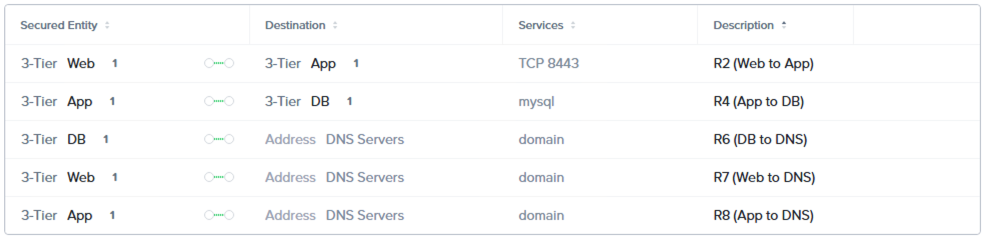
Rule descriptions can be anything you like, however I’ve used the numbering and descriptions from the logical rule base above to aid in tracking the individual rules.
Save the policy in enforce mode. All traffic not defined in our policy will be blocked:
Testing
After a hat tip to Doug Baer and his 3-Tier Demo App, lets test the application and our FNS rules:
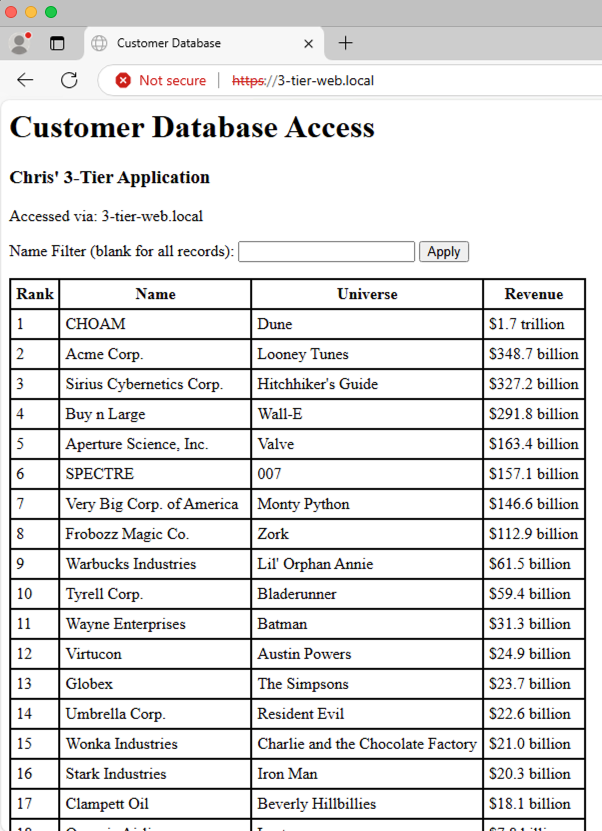
Looking good. Application running and I’m able to query the database via the application from the web using the name filter:
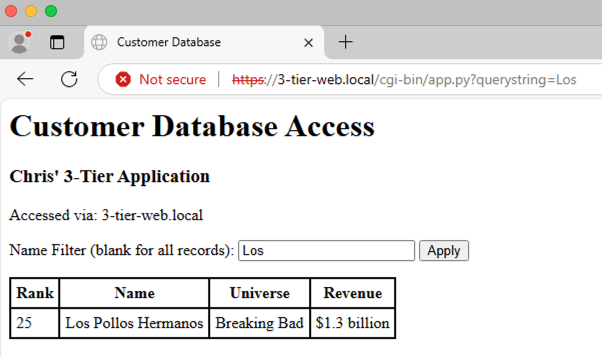
Yep, happy with that. Application and FNS rules working as expected.
Blocked Traffic
Now we know our known traffic is flowing as expected, what about unknown traffic? In other words, what have I forgotten to configure, or who’s unexpectedly trying to access our VMs when (perhaps) they should not?
Opening the 3-Tier policy again, using the list view with the Show Discovered Traffic option enabled, we can easily see blocked traffic over the previous 24 hour period. For incoming traffic to the VMs we can see the following:
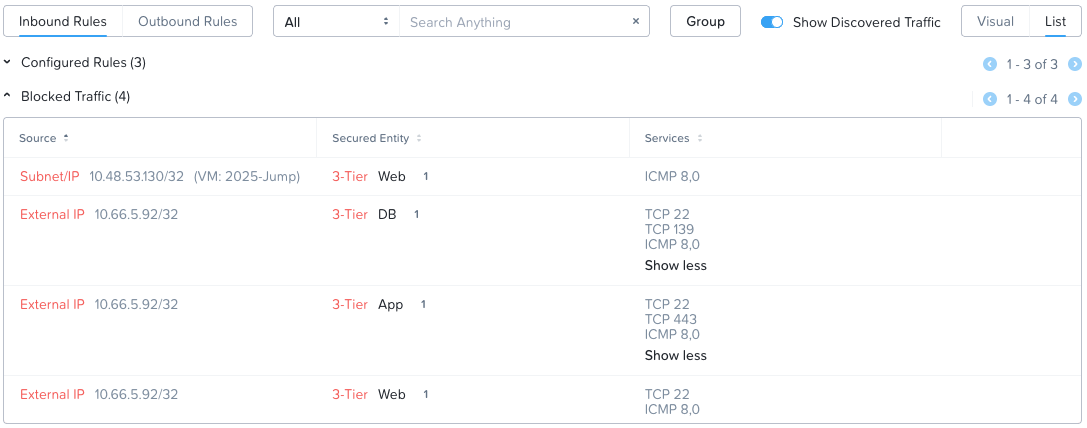
Interesting. Whilst the VM 2025-Jump is one of my VMs, another user of the lab is trying to access our VMs. Not a problem, their traffic was blocked.
Looking at where our VMs are trying to get to outside of just the allowed DNS connectivity (as configured in our rule base), that is unknown - or unthought about - outgoing traffic, lets see:
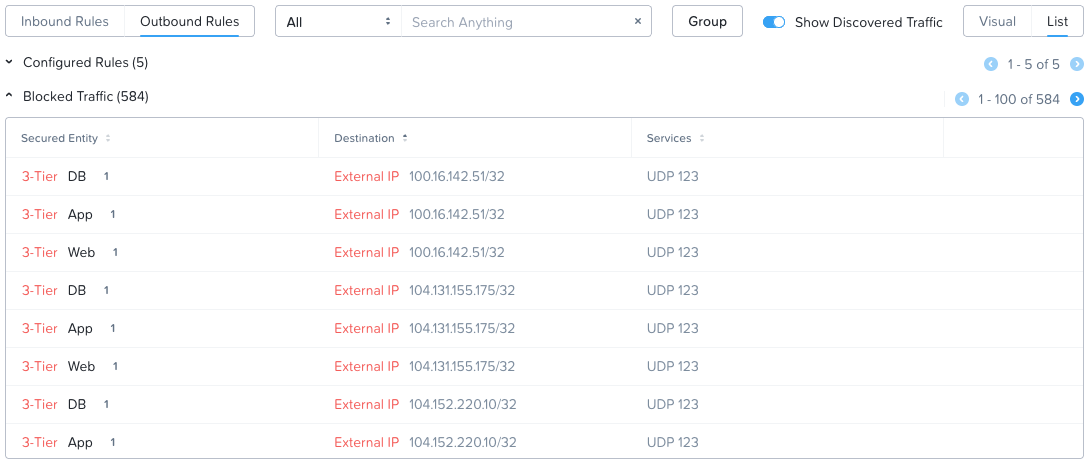
OK, lots of outgoing traffic to destinations via UDP port 123. Our VMs are trying to synchronise their time via Network Time Protocol (NTP). Yep, after checking the web, IP 100.16.142.51 is an NTP server belonging to pool.ntp.org.
External Monitoring
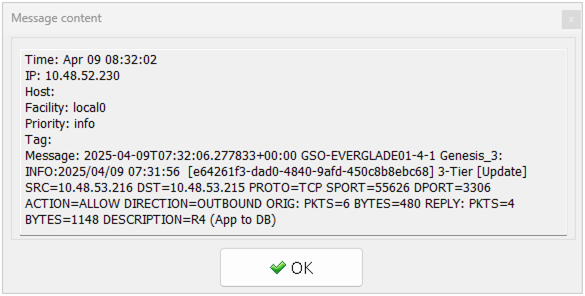
As we enabled policy hit logs above, interrogating our syslog server we can construct our traffic flows. This can also be used to look for traffic flows older than the previous 24 hours. For example the following hit log shows allowed MySQL traffic exiting the App VM outgoing to the DB VM, as per Rule 4:
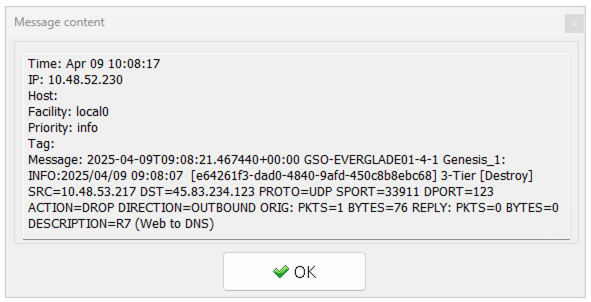
For completeness, in this syslog entry we can see our Web VM trying to get to an NTP server, this time at 45.83.234.123, with the traffic being blocked (ACTION=DROP):
Other options exist for external monitoring such as Nutanix Security Central. The plan is to look at this in a later post.
Conclusion and Wrap Up
There we have it. A primer on Nutanix Flow Network Security, demonstrating the microsegmentation of a three tier application consisting of three VMs each running their respective workloads.
Hopefully you found this post informative and it will help you build your own microsegmented environment on Nutanix with AHV.
-Chris