


 So you have a brand new Nutanix environment and you are looking to spin up a Windows VM for a deployment. Perhaps you are looking to do some testing with Windows Server 2025 with a view to upgrading to “the new Windows hotness” if such a thing exists…
Perhaps you are looking to create a Windows Server 2025 VM template.
Perhaps you are looking to do some side by side performance comparison with your old virtualisation environment.
Either way, you’ll be familiar with this screen, mid way through the Windows installation:
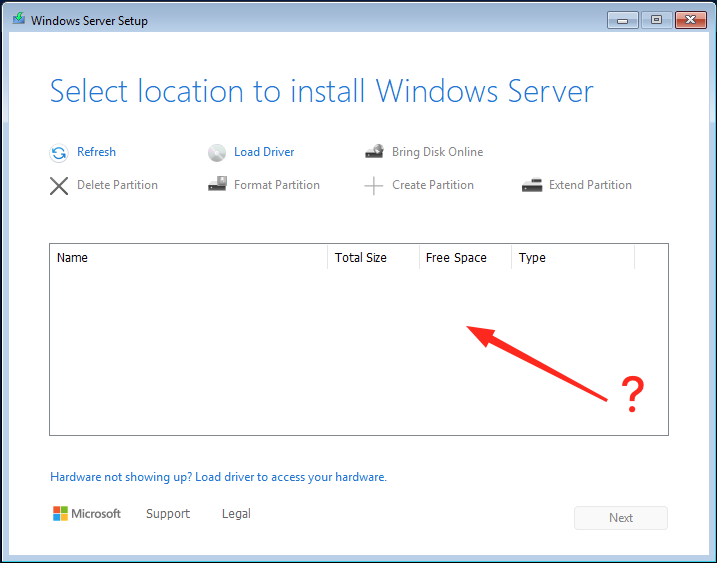
Wait… I added a disk to this VM didn’t I?

Fear not. It is because the required device drivers are not included in the Windows installer.
Why not? Well, as far as I can tell, it is an extended process to get drivers submitted, managed, published and ultimately included in the Windows installation media and we are not there just yet.
However, as per the release notes, Nutanix VirtIO version 1.2.4 is qualified for Windows Server 2025.
Therefore, to get Windows installed, we have three options: The Double Drive, The ISO image shuffle or Driver Injection. Lets cover the options.
Overview
The Double Drive Method
Essentially this method involves adding two CD-ROM drives to your VM; one for the Windows install ISO image and one for the additional VirtIO driver ISO image. Full details of the method can be found in the Nutanix documentation here: Creating a Windows VM on AHV with Nutanix VirtIO.
All well and good. However, if you want to remove the second CD-ROM drive from your VM (essentially leaving a normal setup with one CD-ROM drive per VM), you will need to power the VM down to do so. Removal of a CD-ROM drive from a powered on VM is not supported.
…and I always forget !
The ISO Image Shuffle Method
This method involves creating a VM with one CD-ROM drive, mounting the Windows install ISO image, getting the Windows installer to the “Select location to install” screen (as seen above), unmounting the Windows install ISO image, mounting the VirtIO driver ISO image, loading the drivers, unmounting, remounting the Windows install ISO image, clicking refresh (to wake the installer up to the fact that you have remounted the Windows installer ISO image) and finally clicking Next to carry on with the installation.
Phew…! OK for the odd VM now and again (for creating templates, clones etc) but long term?
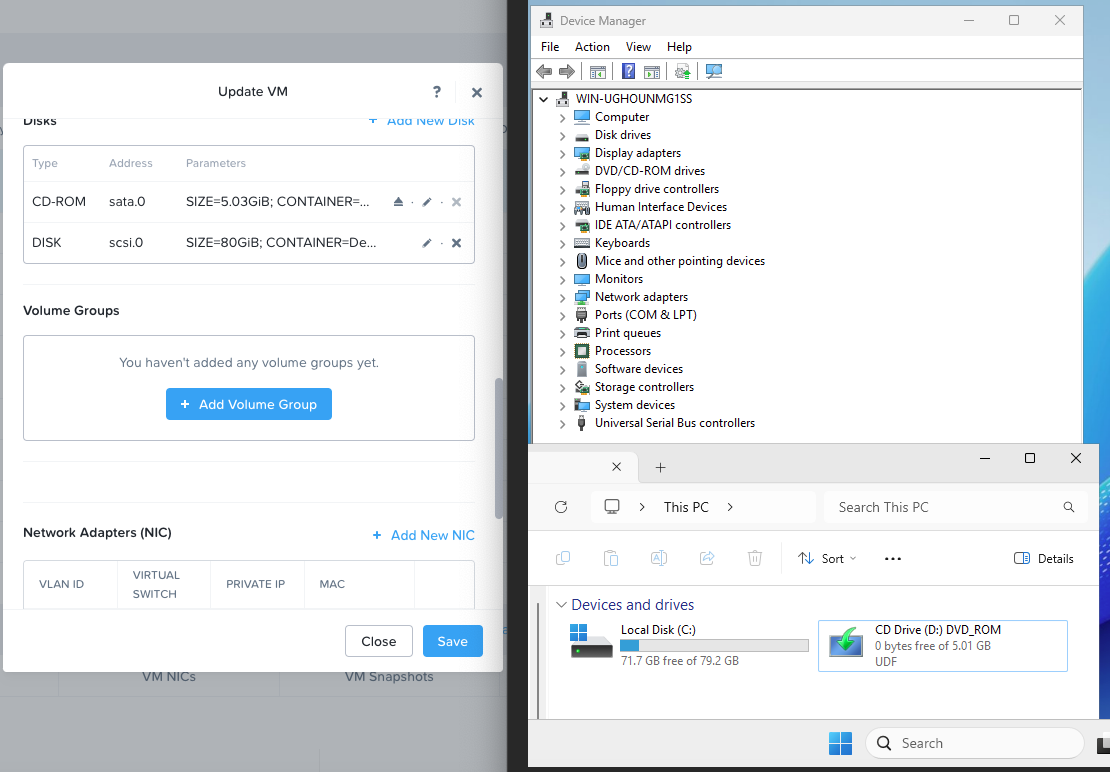
Also, due to a quirk with the Windows Server 2025 installer, it will only allow you to add ONE driver during installation. This means to load the other missing drivers (VirtIO Ethernet driver, Balloon driver, etc) you have to remount the VirtIO driver ISO after Windows has booted and install drivers via device manager as if it were 1995! FFS.
Driver Injection - The Setup
The meat and potatoes of this post:
Why not combine the two ISO images - inject the required drivers into the Windows install media?
Well, pfff that takes time and effort and for the longest time I was happy to ISO Image Shuffle my way forward.
That stops today. I’ve created a Windows Server 2025 install ISO image that contains all the required VirtIO drivers (VirtIO SCSI, Ethernet, QEMU Firmware Configuration and Balloon) that all install WITH Windows, not half during and half after the Windows installation itself.
Whats more, I’ve scripted the process so you can create your own custom ISO image too!
To create our custom installation media, we are going to require three things. I’ll link to them as we go.
1 - Windows Installation ISO Image
I’ve used Windows Server 2025 in my example above, however custom media creation should work with other installers for other Windows versions too, as you will see, we aren’t doing anything unsupported here. If required, you can download the evaluation version of Windows Server 2025 here:
- https://go.microsoft.com/fwlink/p/?LinkID=2268694&clcid=0x409&culture=en-us&country=US
(direct download from Microsoft)
2 - Nutanix VirtIO Driver ISO Image (v1.2.4)
At time of writing, this is the latest version available. This version includes signed drivers for Windows Server 2025:
- https://download.nutanix.com/virtIO/1.2.4/Nutanix-VirtIO-1.2.4.iso
(direct download from Nutanix)
3 - Oscdimg.exe from the Windows Assessment and Deployment Kit
This page hosts the latest version of the kit, where you will find the download:
- Download and install the Windows ADK
(learn.microsoft.com)
Upon launching the kit installer and after rejecting tracking agreements, accepting licence agreements etc, you will arrive at a feature selection page:
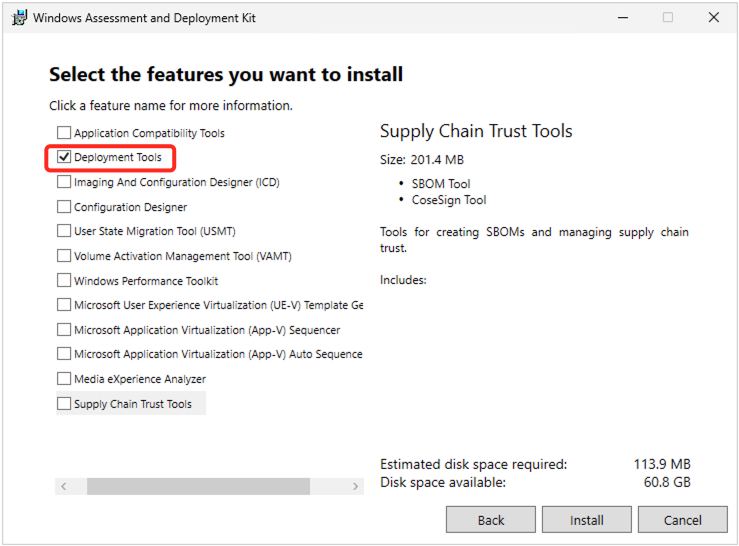
As highlighted, the only required feature are the deployment tools.
Driver Injection - This Won’t Hurt One Bit
Now we have our requirements met, lets set up for some injection. First, mount (double click in Windows) the Windows Installation ISO Image and copy all the files to C:\Windows-ISO. If using PowerShell and Windows ISO is mounted at E:\
Copy-Item "E:\*" -Destination "C:\Windows-ISO" -Recurse -Force
attrib -R "C:\Windows-ISO\*" /S
Unmount the image when done.
Next, mount the Nutanix VirtIO Driver ISO Image and copy the matching driver folder to C:\Drivers. If using PowerShell and copying the Windows Server 2025 drivers:
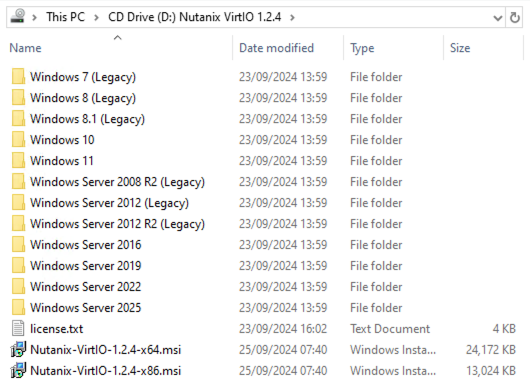
Copy-Item "E:\Windows Server 2025\*" -Destination "C:\Drivers" -Recurse -ForceNext, we will need to create an empty folder C:\Wim to temporarily mount the Windows Imaging Format (WIM) files for update:
New-Item -Path "C:\" -Name "Wim" -ItemType "directory" -ForceFinally, save and run the following script. For a line-by-line analysis of actions taken by the script see below.
1
2
3
4
5
6
7
8
9
10
11
12
13
14
15
16
17
18
19
20
$WinISOPath = "C:\Windows-ISO"
$DriverPath = "C:\Drivers\x64"
$WimMount = "C:\Wim"
$OscdimgPath = "C:\Program Files (x86)\Windows Kits\10\Assessment and Deployment Kit\Deployment Tools\amd64\Oscdimg"
$OutISOFull = "C:\Windows-Server-2025+VirtIO.iso"

ForEach ($Image in (Get-WindowsImage -ImagePath "$WinISOPath\sources\boot.wim")){
    Write-Host "Updating boot.wim: $($Image.ImageName)"
    Mount-WindowsImage -ImagePath "$WinISOPath\sources\boot.wim" -Path "$WimMount" -Index $Image.ImageIndex
    Add-WindowsDriver -Path "$WimMount" -Driver "$DriverPath" -Recurse
    Dismount-WindowsImage -Path "$WimMount" -Save
}
ForEach ($Image in (Get-WindowsImage -ImagePath "$WinISOPath\sources\install.wim")){
    Write-Host "Updating install.wim: $($Image.ImageName)"
    Mount-WindowsImage -ImagePath "$WinISOPath\sources\install.wim" -Path "$WimMount" -Index $Image.ImageIndex
    Add-WindowsDriver -Path "$WimMount" -Driver "$DriverPath" -Recurse
    Dismount-WindowsImage -Path "$WimMount" -Save
}
Start-Process -NoNewWindow -FilePath "$OscdimgPath\oscdimg.exe" -ArgumentList "-m -o -u2 -udfver102 -bootdata:2#p0,e,b$WinISOPath\boot\etfsboot.com#pEF,e,b$WinISOPath\efi\microsoft\boot\efisys.bin $WinISOPath $OutISOFull"
Write-Host "Done!"
Breaking the script down by line number:
- 1: Path to the files copied from the Windows Installation ISO Image
- 2: The path to drivers to be injected
- 3: Empty folder to temporarily mount WIM files for update
- 4: Location of oscdimg.exe (v2.56 or later)
- 5: Full path and filename of completed iso file
- 7: Find and loop around all boot images found in the Windows installer boot.wim file
- 8: Report the boot.wim image being updated
- 9: Mount the image to a temporary location for update
- 10: Inject the drivers into the mounted image
- 11: Unmount the mounted image and save
- 12: Loop back to line 7 for next image in boot.wim
- 13 to 18: Find, loop and inject drivers into Windows install images found in install.wim
- 19: Create a legacy/UEFI bootable x64 ISO image using oscdimg
- 20: Report done!
For details on the oscdimg switches used, see the Microsoft article Oscdimg Command-Line Options.
Testing
After creating and uploading my custom Windows install image to my Nutanix cluster: Drum roll, nothing up my sleeves, lets test!
Promising, VM disk seen by Windows installer with only my custom ISO mounted:
Job done - Windows installed, no missing drivers, no faffing about, all done with one image!
Happy driver injecting!
-Chris